

翻斗式雨量计
组件和用品
 |
| × | 1 | |||
| × | 1 | ||||
| × | 1 | ||||
| × | 1 | ||||
 |
| × | 1 | |||
 |
| × | 1 | |||
 |
| × | 2 | |||
 |
| × | 2 | |||
 |
| × | 1 | |||
 |
| × | 1 | |||
| × | 1 | ||||
 |
| × | 1 | |||
| × | 1 | ||||
| × | 1 |
必要的工具和机器
 |
| |||
 |
|
关于这个项目
这是一个翻斗式雨量计,基于专业气象学家使用的雨量计。该装置的工作原理是将雨水倒入一个类似于跷跷板的倾翻桶上,每端都有一个桶,可容纳约 2 毫升的雨水,当一侧装满时,桶尖和雨水开始收集到对面的桶中。每次铲斗倾斜时,都会临时打开一个簧片开关,向 Arduino 硬件中断发送信号。 Arduino 跟踪每个桶的“尖端”,并根据桶的体积和收集水库的表面积(16.605 平方英寸)将“尖端”转换为降雨量(英寸的降雨量)。
室内显示单元有一个菜单选择,可以显示“当前小时”、“前一小时”、“当前天”和“前一天”的总数。
对于每个桶尖,带有日期标记的事件都会写入 SD 卡文件。以后可以将此文件导入 Excel 进行分析和制图。
虽然我没有显示实际“桶尖”的视频,但该视频显示了仪表记录实际降雨事件。
第 1 步
打印列出的所有组件。我将 PETG 用于所有组件,因为它是一种非常适合户外使用的紫外线暴露和温度暴露的材料。对于顶部过滤器,请确保关闭所有水平外壳(顶部和底部)以创建多孔细节。

第 2 步
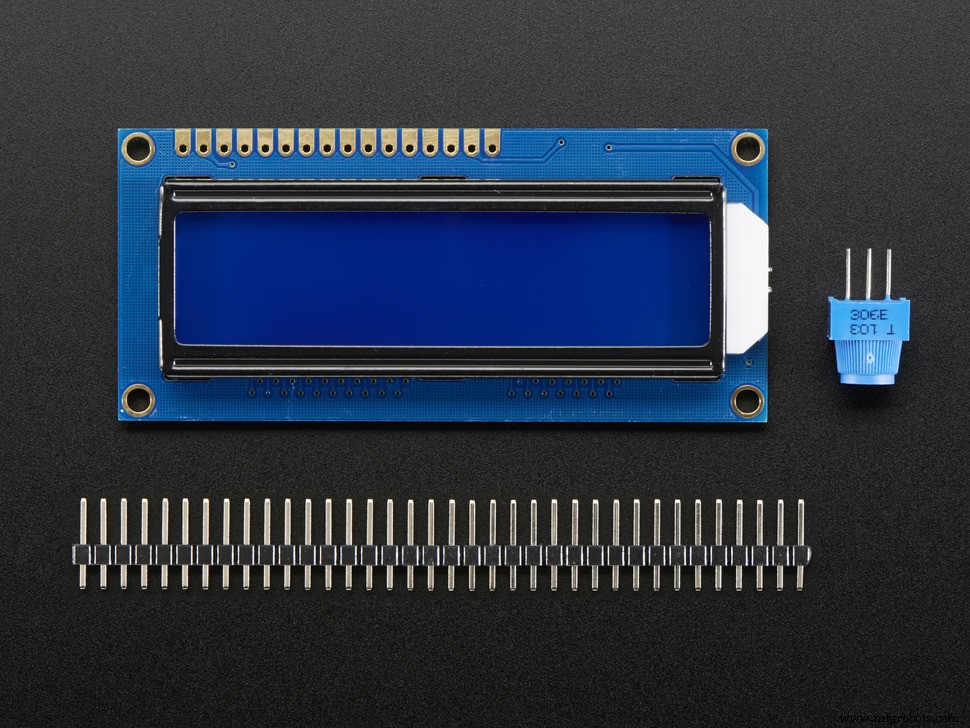
在开始组装前面板电路板之前,将 LCD 插入 PY-5*10CM 板上(无需焊接),LCD 的引脚 1 在板上的 C-1 孔位置。在四个 LCD 板安装孔的位置钻穿穿孔板。现在拆下 LCD 以便以后组装。
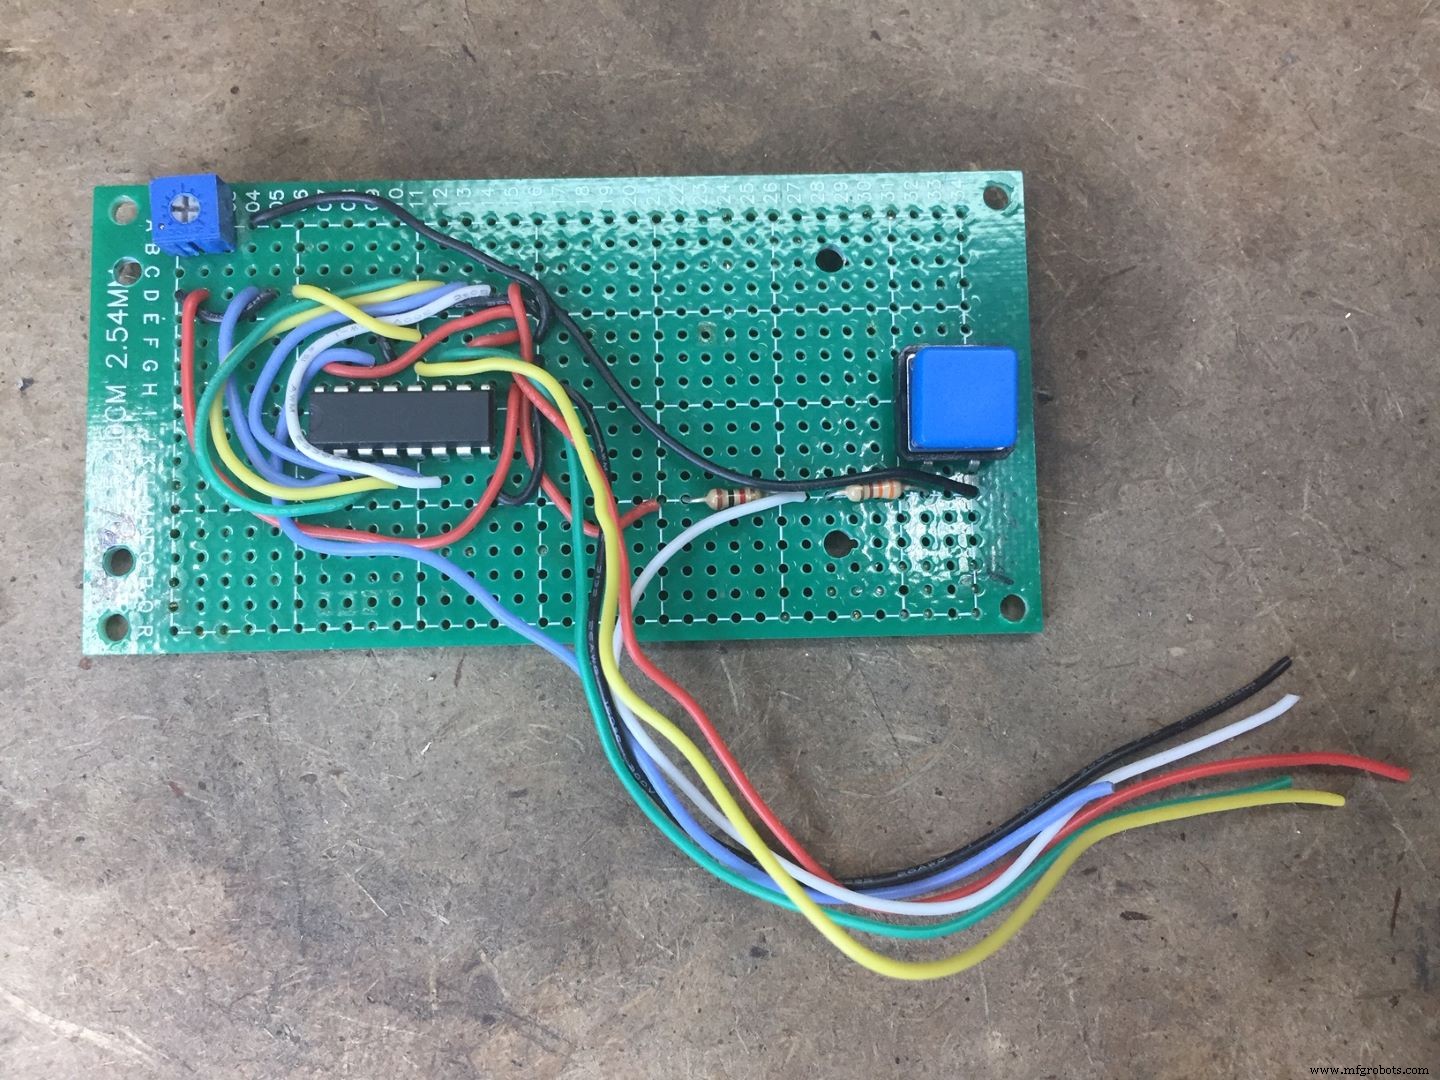
第 3 步
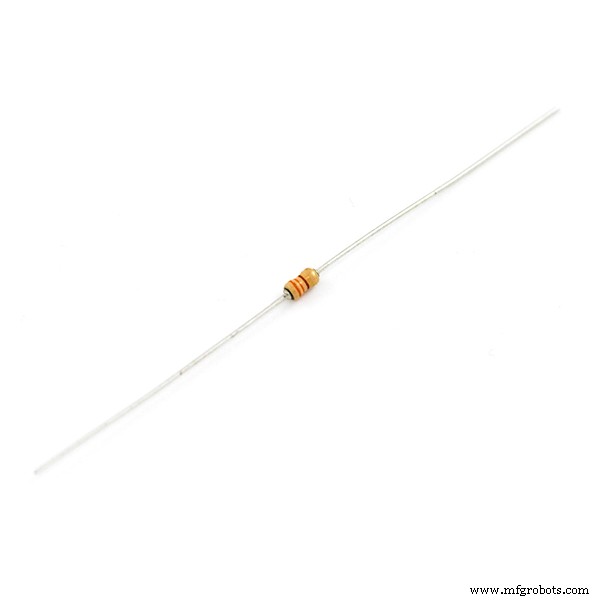
组装前面板电路板。如图所示放置 74HC595N 移位寄存器 IC、开关和电阻器。将所有必要的电线(请参阅接线图)布线到将连接到 LCD 显示器的位置点,以及 6" 长度将延伸到以后连接到第二块板。
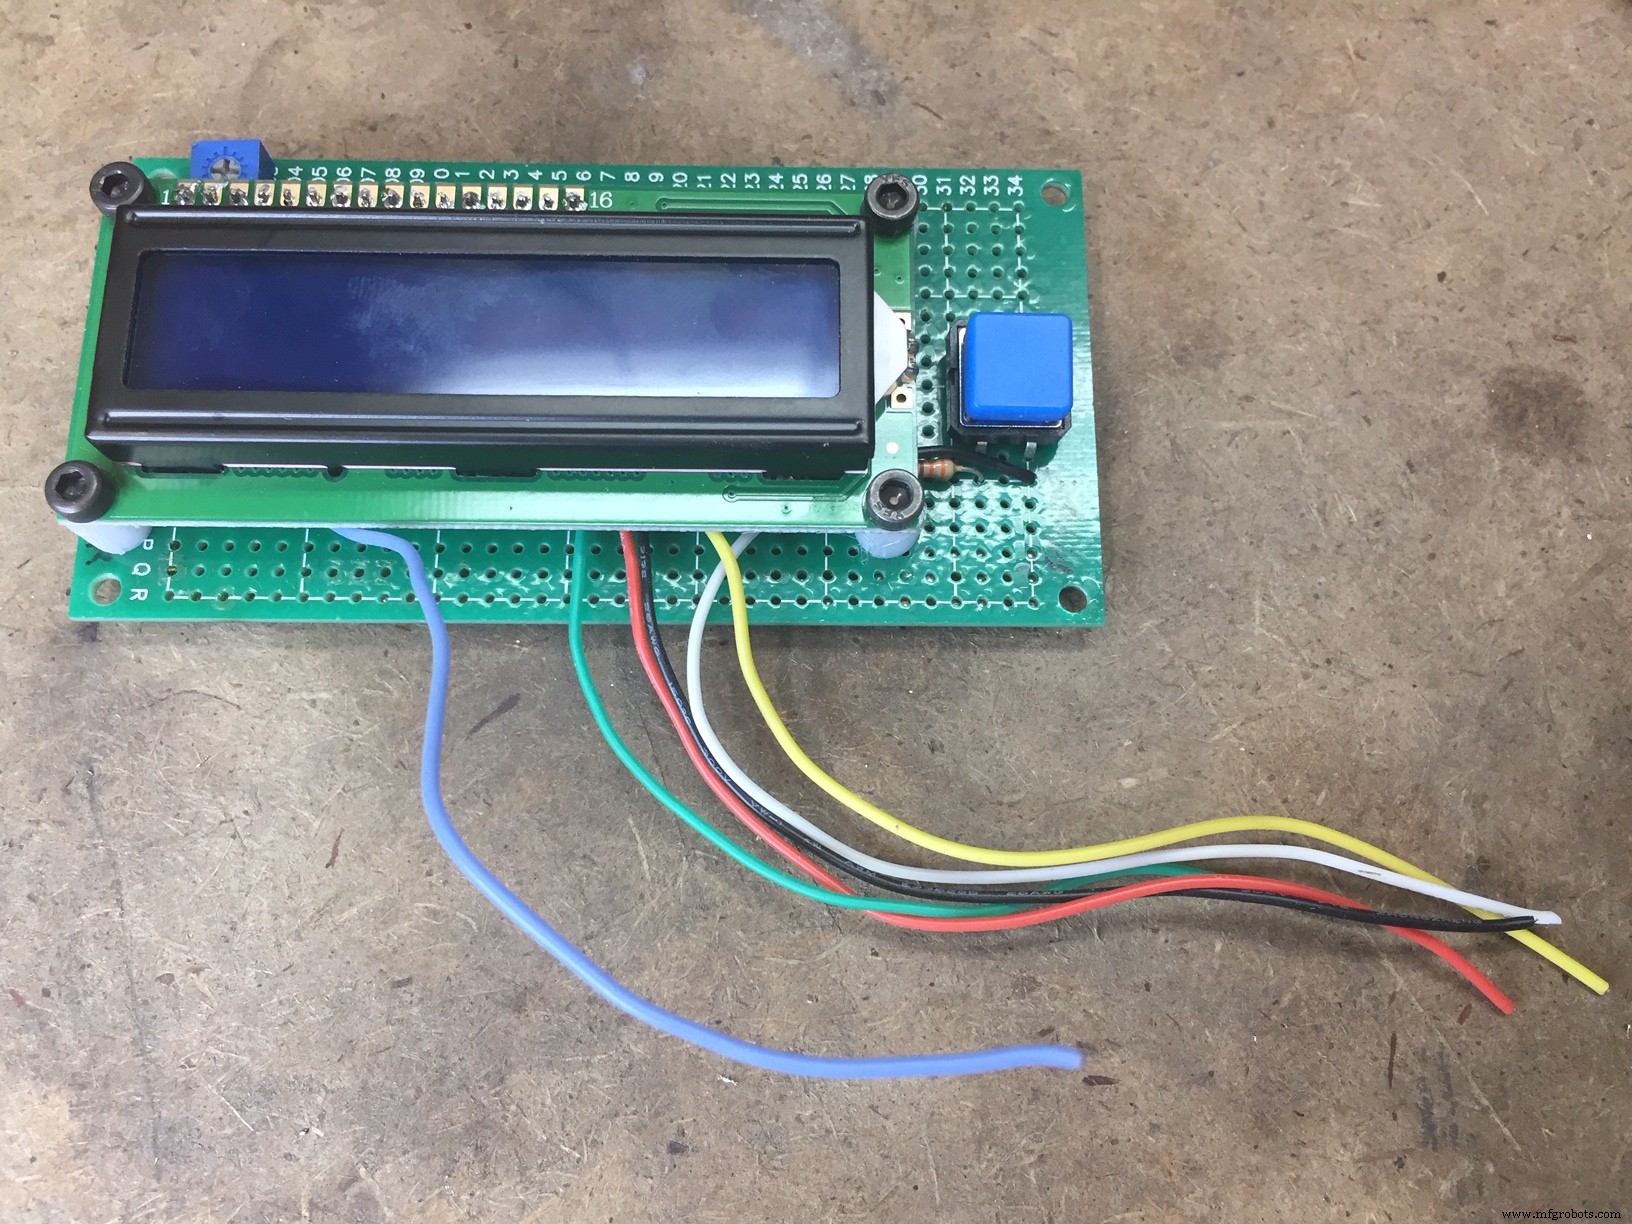
第 4 步
将 LCD 安装到前面板板上,使用印刷的垫片抬高 LCD 以清除 IC。使用 3mm x15mm 有头螺钉和螺母连接。 (所有紧固件均可通过 Fastenal 和/或 McMaster Carr 获得)
步骤 5
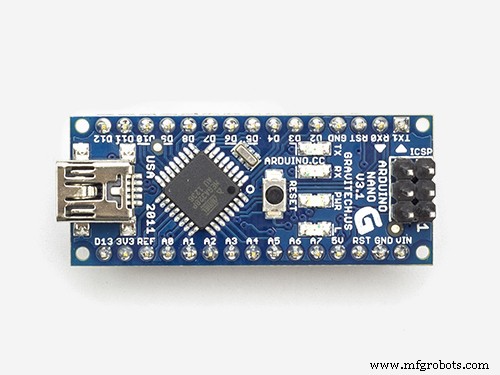
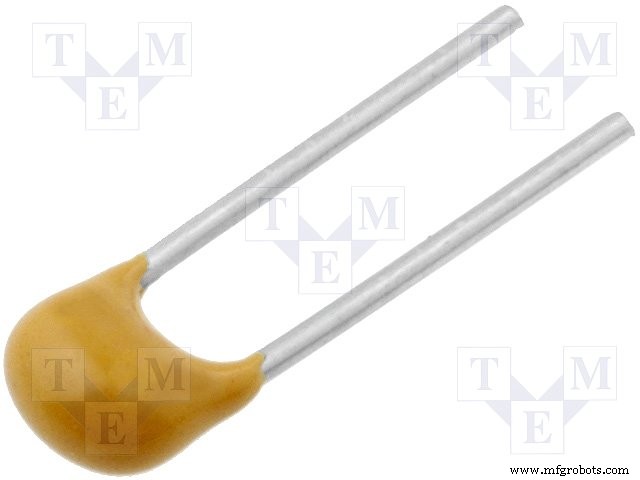
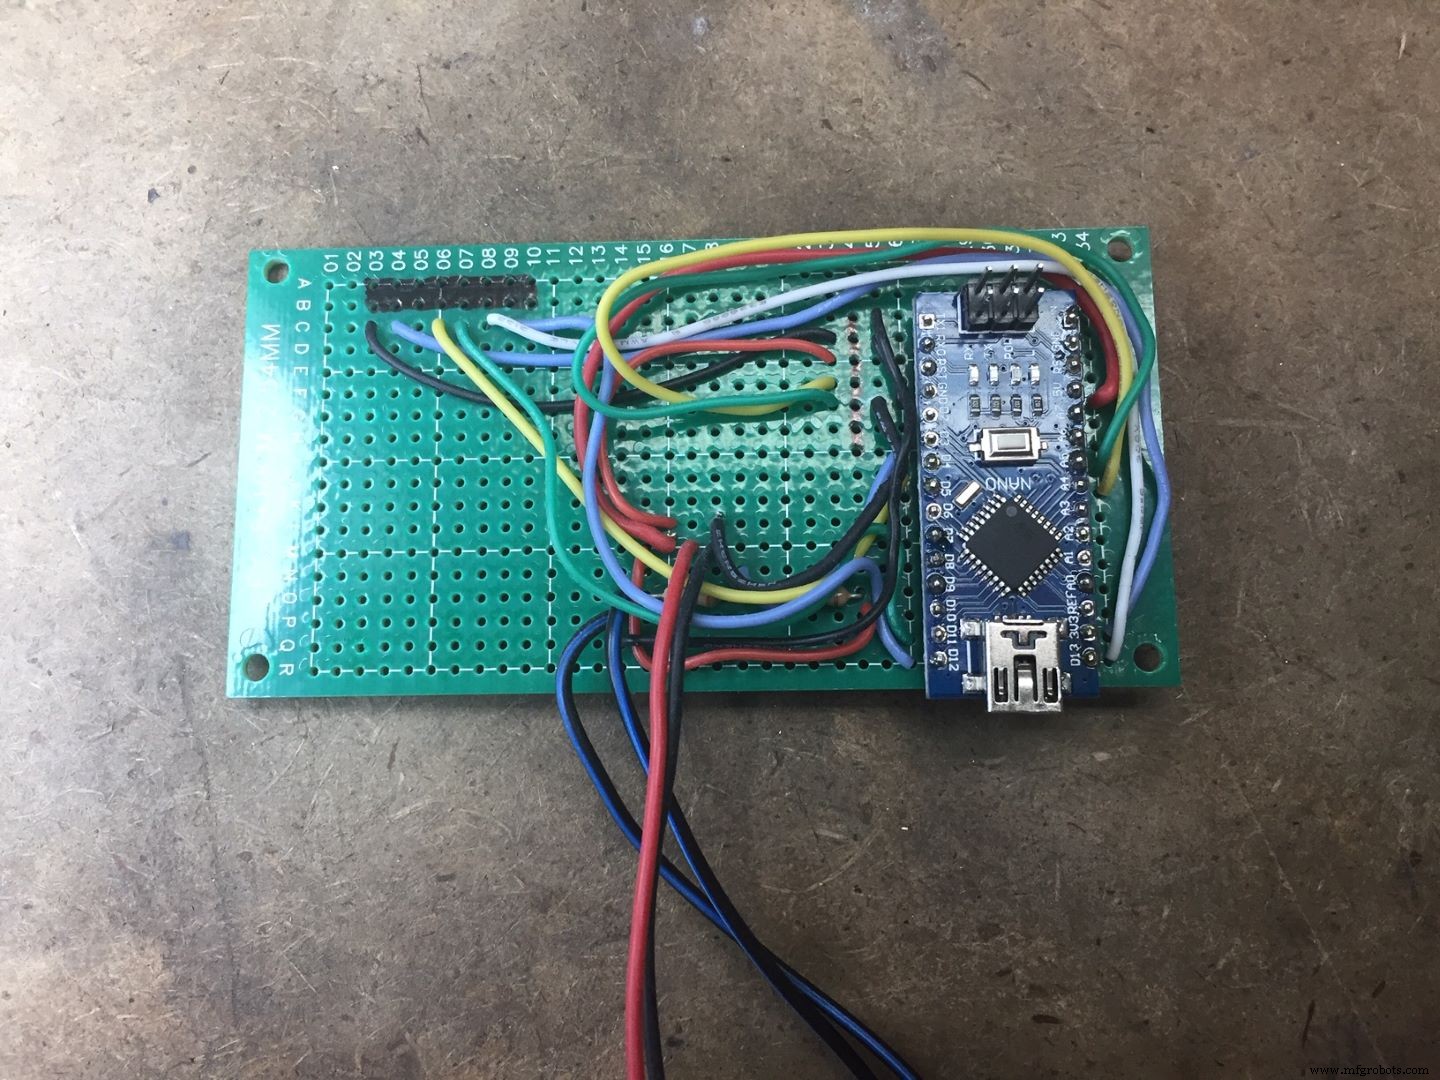
通过在电路板上的孔位置 R27 处插入带有引脚 D12 的 Arduino 来组装主电路板。添加电容器和电阻器,并在插入 SD 和 RTC 模块之前将所有接线布线到位置。所有细节的参考接线图。
第 6 步
在孔位置 A-3 到 B-10 处组装 SD 读取器。在孔位置 C-24 到 I-24 处组装 TinyRTC。焊接所有连接。

第 7 步
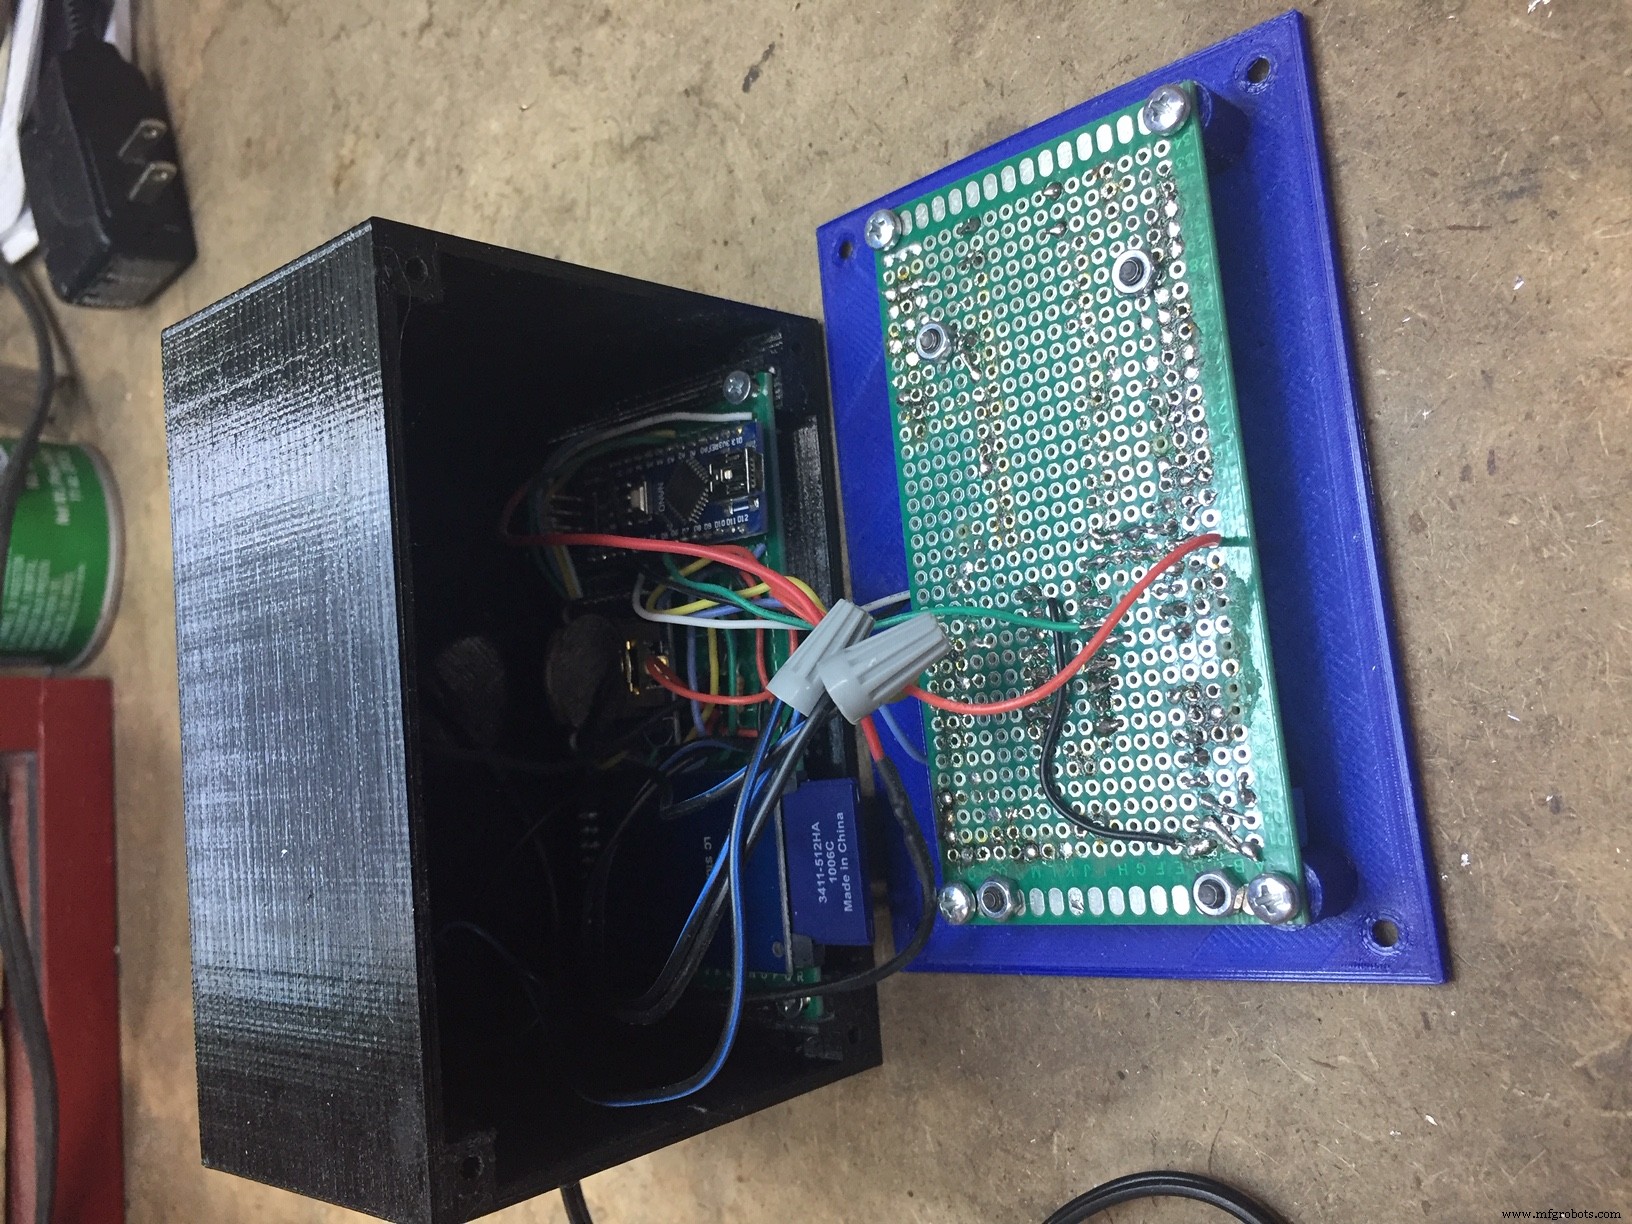
在室内机控制外壳上,在最能满足您需要的任何位置钻孔,用于连接到室外机的两根电线,以及来自外部电源或墙壁疣的电线的孔。将电线穿过外壳,并在适当的位置焊接。将主板滑入外壳并用两个 3mm x 6mm 长螺丝连接。将开关按钮插入前盖,然后用 3mm x 6mm 长的螺丝将前电路板连接到前面板。注意:我在开关按钮上使用了一个小的车削黄铜件而不是印刷部件,因为我更喜欢它的“感觉”。
步骤 8
使用 M3-0.5 x 10mm 长平头螺丝安装前盖
.
第 9 步
将USB插入PC并上传RTC程序以设置时间。时钟设置好后,上传主程序。插入 SD 卡。通过短接通往室外机簧片开关的引线来测试设备。每次短路(触点闭合)事件的降雨总量应增加。通过使用文本编辑器(如计算机上的记事本或写字板)读取来验证 SD 卡是否正在读取日期。应该有一个名为“Text.txt”的文件。文件将有每个“提示”事件的日期戳。
第 10 步
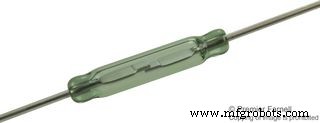
将簧片开关连接到底座上。使用扎带固定到位。将磁铁组装到降压器上,并用一小段 1/8" 直径的黄铜管(约 2" 长)安装桶。组装前请注意,在铲斗中的孔中钻一个 1/8" 的钻头进行清理。铲斗需要在没有摩擦的情况下轻松倾斜。如果需要,请在铲斗孔中使用一个小圆锉。在铲斗上添加一个 1/8" 小垫圈铲斗的最外侧以稍微缩小间距。确定您将如何安装室外机。我使用了 1" 铝角钢。使用从内向外安装的 1/4-20 六角螺栓将底座连接到角钢或支架上。使用 M3-0.5x 10mm 螺钉将子底座连接到外部单元底部。

第 11 步
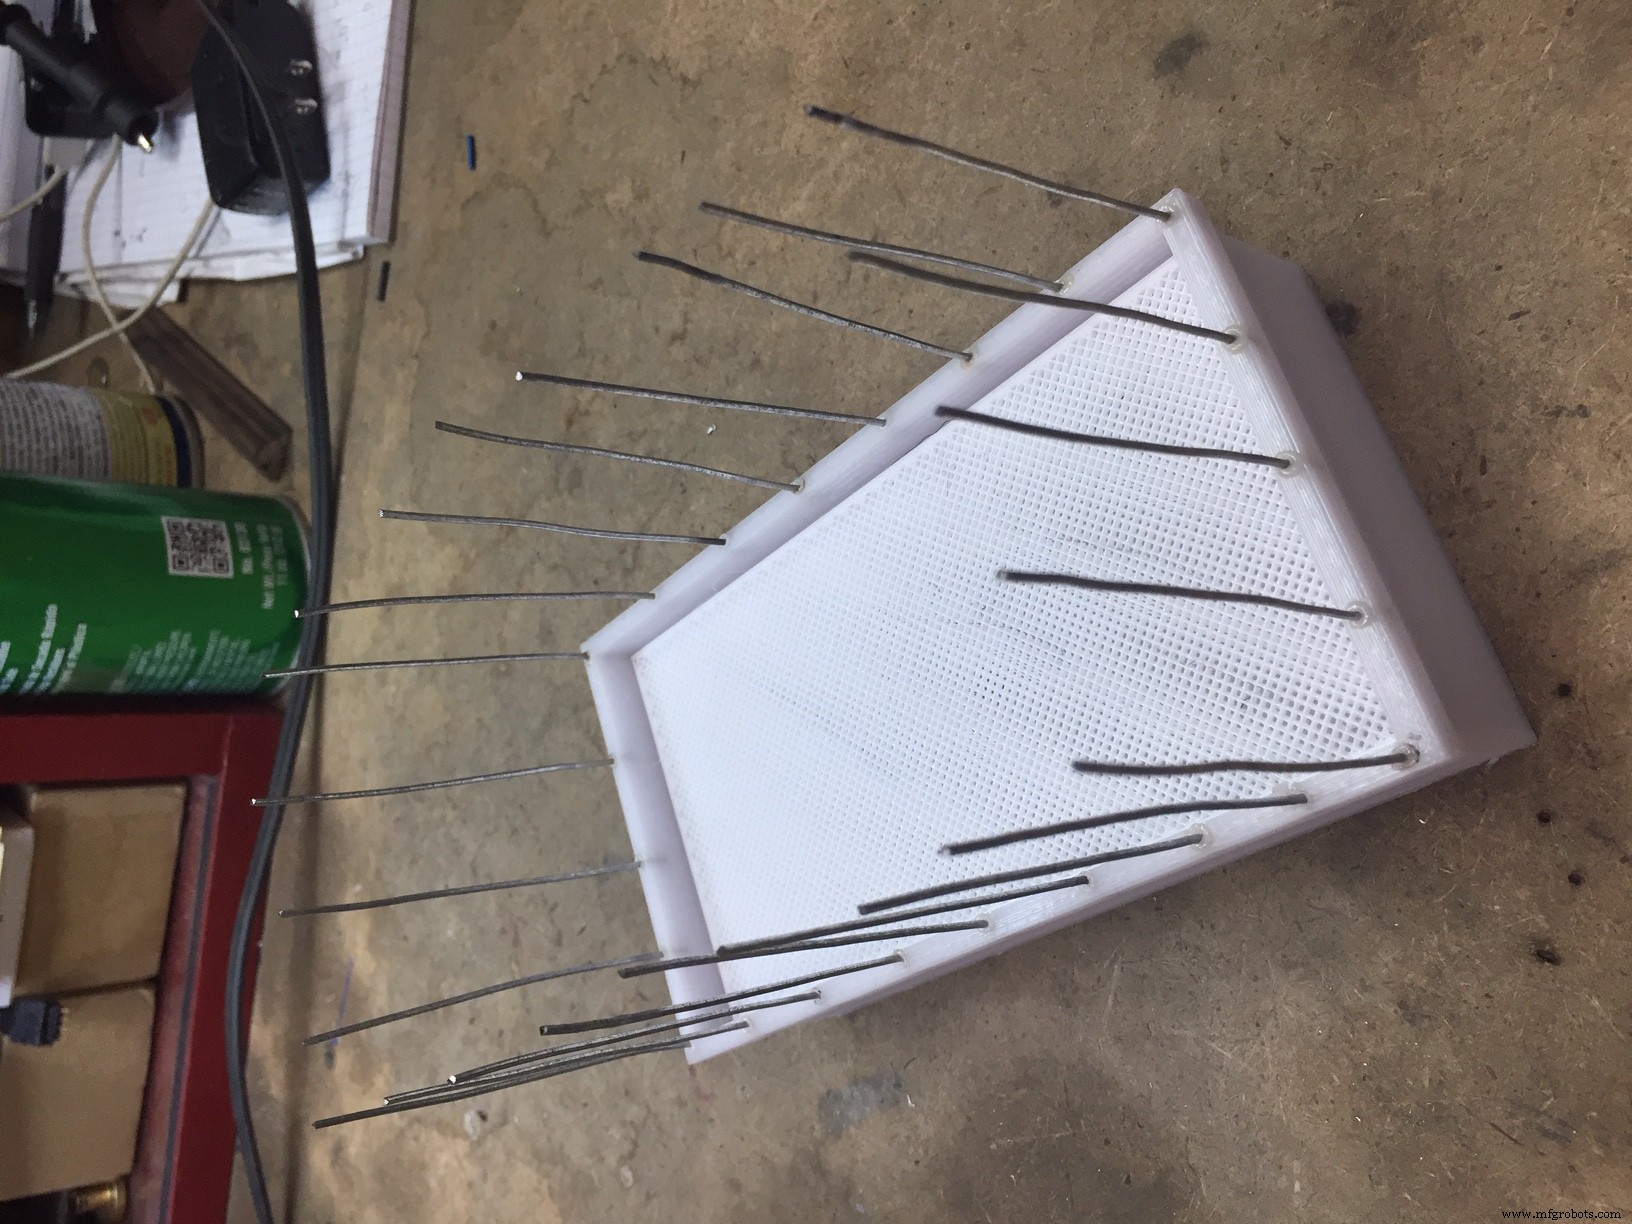
将漏斗插入顶部外壳。切约。 24 根 2" 长 18 号镀锌线。用钳子夹住一根线,用火炬或打火机加热,然后小心地压入塑料顶部。这些线将阻止鸟类栖息在设备上。您想测量雨量不是鸟粪。用 (4)M3-0.5x 6mm 螺丝将顶部连接到主外壳。将过滤器安装到漏斗顶部。此过滤器可以防止树叶进入并防止堵塞.. 记得偶尔检查并根据需要清洁。
第 12 步
安装室外机并将电线连接到室内机。确保室外机顶部在两个方向上都是水平的。
步骤 13
给机组通电并加水到室外机组以验证运行情况。
第 14 步(可选)
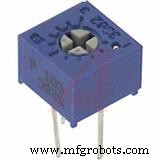
为了验证准确性,您可以非常缓慢地添加一杯水并检查单位是否测量了 0.87" 的降雨量。(一杯 =14,44 立方英寸。收集器面积为 16.605" [降雨量 =14.44 立方英寸。 /16.605"=0.87"]。如果您的单位与我的不同,您可以在主程序中调整修正系数。
恭喜!!享受能够跟踪您的降雨量。
代码
- 用于在 RTC 上设置时间的 Arduino 代码
- 雨量计的主程序Arduino代码
在 RTC 上设置时间的 Arduino 代码Arduino
首先加载此代码以在 RTC 上设置时间。在上传到 Arduino 之前用实际日期和时间编辑代码。#include "Wire.h"#define DS1307_I2C_ADDRESS 0x68 // Tiny RTCbyte 的 I2C 地址秒、分、小时、dayOfWeek、dayOfMonth、月、年;/ / 将普通十进制数转换为二进制编码的十进制数byte decToBcd(byte val){return ( (val/10*16) + (val%10) );}// 将二进制编码的十进制数转换为普通十进制数byte bcdToDec(byte val){return ( (val/16*10) + (val%16) );}// 设置当前时间的函数,将second&minute&hour改成正确的timevoid setDateDs1307(){second =00;minute =11;hour =12;dayOfWeek =5;dayOfMonth =24;month =7;year=20;Wire.beginTransmission(DS1307_I2C_ADDRESS);Wire.write(decToBcd(0));Wire.write(decToBcd(second)); // 0 到第 7 位开始clockWire.write(decToBcd(minute));Wire.write(decToBcd(hour)); // 如果你想要 12 小时 am/pm 你需要设置 // 位 6 (也需要改变 readDateDs1307)Wire.write(decToBcd(dayOfWeek));Wire.write(decToBcd(dayOfMonth));Wire.write(decToBcd) (month));Wire.write(decToBcd(year));Wire.endTransmission();}// 函数从 ds1307 获取日期和时间并打印 resultvoid getDateDs1307(){// 重置寄存器指针Wire.beginTransmission( DS1307_I2C_ADDRESS);Wire.write(decToBcd(0));Wire.endTransmission();Wire.requestFrom(DS1307_I2C_ADDRESS, 7);second =bcdToDec(Wire.read() &0x7f);minute =bcdToDec(Wire.read() );小时 =bcdToDec(Wire.read() &0x3f); // 如果 12 小时 am/pmdayOfWeek =bcdToDec(Wire.read());dayOfMonth =bcdToDec(Wire.read());month =bcdToDec(Wire.read());year =bcdToDec(Wire. read());Serial.print(hour, DEC);Serial.print(":");Serial.print(minute, DEC);Serial.print(":");Serial.print(second, DEC); Serial.print(" ");Serial.print(month, DEC);Serial.print("/");Serial.print(dayOfMonth, DEC);Serial.print("/");Serial.print(year, DEC);Serial.print(" ");Serial.println();//Serial.print("星期几:");}void setup() {Wire.begin();Serial.begin(19200); setDateDs1307(); //设置当前时间;}void loop(){delay(2000);getDateDs1307();//从微小的RTC中获取时间数据} 雨量计的主程序Arduino代码Arduino
雨量计的主要程序。确保在编译程序之前安装所有关联的库。参考网站 [ https://roboindia.com/tutorials/arduino-3-pin-serial-lcd/ ] 有关更新 LiquidCrystal 库的说明。/*Tipping Bucket Rain Gauge由 Bob Torrence 撰写*/#include#include #include #include "RTClib.h"#include // 包含 LiquidCrystal 库(特殊版本) ref https://roboindia.com/教程/arduino-3-pin-serial-lcd//定义LCD和用于接口的引脚。LiquidCrystal_SR lcd(6, 5, 9); // 引脚 6 - 数据使能/SER,引脚 5 - 时钟/SCL,引脚 9 -SCKRTC_DS3231 rtc;int 背光 =7; // LED 连接到引脚 7 (D7) 的引脚 // 常数不会改变。这里用来设置管脚号:const byte interruptPin_bucket =3;const byte interruptPin_menu =2;// 变量会改变:volatile int Bucket_Tip_Occurence;volatile int Menu_Select;float Bucket_tip_hour_total =0;float Bucket_tip_current_hour_total =0;float_float_pre_total =0;float_previous_total;float Bucket_tip_current_day_total =0;float Bucket_tip_previous_day_total =0;int current_minute;int loop_minute;int current_hour;int loop_hour;int current_day;int loop_day;int tip_counter;float conversion_factor =.00854; //每头雨量英寸 - 通过测量桶体积和收集器面积(16.605 平方英寸)计算 volatile unsigned long backgroundOfftime;volatile unsigned long backgroundOnDuration=30000; // 按下菜单选择按钮后背光保持的持续时间(毫秒)String print_time(DateTime timestamp) { char message[120]; int Year =timestamp.year(); int Month =timestamp.month(); int Day =timestamp.day(); int Hour =timestamp.hour(); int Minute =timestamp.minute(); int Second=timestamp.second(); sprintf(message, "%02d:%02d:%02d %02d/%02d", 时、分、秒、月、日);返回消息;}文件 myFile;void setup() { lcd.begin(16,2); // 初始化液晶屏的接口,并指定显示器的尺寸(宽和高)lcd.home(); // 在家里设置光标,即 0,0 rtc.begin(); //开始使用实时时钟变量 pinMode(10, OUTPUT); pinMode(背光,输出); // 将 LED 声明为输出 digitalWrite(backlight,HIGH); //打开液晶背光backlightOfftime =millis() +backlightOnDuration; //设置 LCD 背光的初始时间延迟为 On if (!SD.begin(4)) { lcd.print("insert SD Card");返回; } // 设置我们的数字引脚作为bucket pinMode(interruptPin_bucket, INPUT_PULLUP)的中断; attachInterrupt(digitalPinToInterrupt(interruptPin_bucket), count, FALLING); // 将我们的数字引脚设置为桶 pinMode(interruptPin_menu, INPUT_PULLUP) 的中断; attachInterrupt(digitalPinToInterrupt(interruptPin_menu), menu, RISING); myFile =SD.open("test.txt", FILE_WRITE); if (myFile) { myFile.println("Rain Gauge Ready - unit power up"); myFile.close();现在日期时间 =rtc.now(); current_minute =now.minute(); loop_minute =now.minute(); current_hour =now.hour(); loop_hour =now.hour(); lcd.setCursor (0,0); lcd.print(print_time(now)); // 在 LCD lcd.setCursor(1,1) 上打印“Arduino”; lcd.print("雨量计"); }void loop(){ DateTime now =rtc.now(); current_minute =now.minute(); loop_minute =now.minute(); current_hour =now.hour(); loop_hour =now.hour(); current_day =now.day(); loop_day =now.day(); //开始循环以确定当前天总数 while (loop_day - current_day ==0){ //开始循环以确定当前小时总数 while (loop_hour - current_hour ==0){ if (millis()> backlightOfftime) { digitalWrite (背光,低); } if (Bucket_Tip_Occurence ==1) { Bucket_Tip_Occurence =0;小费计数器 =小费计数器 + 1;现在日期时间 =rtc.now(); myFile =SD.open("test.txt", FILE_WRITE); myFile.print("事件"); myFile.print(now.year(), DEC); myFile.print('/'); myFile.print(now.month(), DEC); myFile.print('/'); myFile.print(now.day(), DEC); myFile.print(" "); myFile.print(now.hour(), DEC); myFile.print(':'); myFile.print(now.minute(), DEC); myFile.print(':'); myFile.print(now.second(), DEC); myFile.print(" "); myFile.print(conversion_factor,5); myFile.println(); myFile.close();延迟(200); } else { //检查当前小时状态 DateTime now =rtc.now(); loop_hour=now.hour();} switch (Menu_Select) { case 1:lcd.clear(); lcd.setCursor(0,0); lcd.print("当前时间"); lcd.setCursor(0,1); lcd.print(tip_counter * conversion_factor);延迟(500);休息;情况 2:lcd.clear(); lcd.setCursor(0,0); lcd.print("前一小时"); lcd.setCursor(0,1); lcd.print(Bucket_tip_previous_hour_total);延迟(500);休息;情况 3:lcd.clear(); lcd.setCursor(0,0); lcd.print("当前日期"); lcd.setCursor(0,1); lcd.print(Bucket_tip_current_day_total + tip_counter * conversion_factor);延迟(500);休息;情况 4:lcd.clear(); lcd.setCursor(0,0); lcd.print("前一天"); lcd.setCursor(0,1); lcd.print(Bucket_tip_previous_day_total); // lcd.print(print_time(now));延迟(500);休息;现在日期时间 =rtc.now(); // 重置下一小时循环的计数器 current_hour =now.hour(); loop_day =now.day(); loop_hour=now.hour(); //合计当前小时总Bucket_tip_previous_hour_total =tip_counter * conversion_factor; Bucket_tip_current_day_total =Bucket_tip_previous_hour_total + Bucket_tip_current_day_total;小费计数器 =0; /* 可选文件写入,仅每小时总计 myFile =SD.open("test.txt", FILE_WRITE); myFile.print("每小时总结"); myFile.print(Bucket_tip_previous_hour_total); myFile.print(now.year(), DEC); myFile.print('/'); myFile.print(now.month(), DEC); myFile.print('/'); myFile.print(now.day(), DEC); myFile.print(" "); myFile.print(now.hour(), DEC); myFile.print(':'); myFile.print(now.minute(), DEC); myFile.print(':'); myFile.print(now.second(), DEC); myFile.print(" "); myFile.print(Bucket_tip_previous_hour_total); myFile.println(); myFile.close();延迟(200); */ } //合计当前小时总Bucket_tip_previous_day_total =Bucket_tip_current_day_total; Bucket_tip_current_day_total =0; Bucket_tip_current_hour_total =0; tip_counter =0;/* 可选文件写入,仅前一天总计 myFile =SD.open("test.txt", FILE_WRITE); myFile.print("天总数"); myFile.print(Bucket_tip_previous_day_total); myFile.print(print_time(now)); myFile.close(); */ } //从桶簧开始中断 switchvoid count() { static unsigned long last_interrupt_time_bucket =0;无符号长interrupt_time_bucket =millis(); // 如果中断的速度超过 300 毫秒,假设它是一个反弹并忽略 if (interrupt_time_bucket - last_interrupt_time_bucket> 300) {Bucket_Tip_Occurence =1; } last_interrupt_time_bucket =interrupt_time_bucket;}//从菜单启动中断切换 switchvoid menu() { static unsigned long last_interrupt_time_menu =0;无符号长interrupt_time_menu =millis(); // 如果中断的速度超过 300 毫秒,假设它是一个反弹并忽略 if (interrupt_time_menu - last_interrupt_time_menu> 300) { if (digitalRead(backlight)==LOW) { digitalWrite(backlight,HIGH); //如果之前关闭则打开背光 } else Menu_Select =Menu_Select + 1; if(Menu_Select> 4){ Menu_Select =1; }backlightOfftime =millis() +backlightOnDuration;Menu_Select =Menu_Select; last_interrupt_time_menu =interrupt_time_menu; }}
定制零件和外壳
用于 3D 打印室外机底座的 STL。我使用 PETG 打印 30% infillSTL 文件,用于 3D 打印室外机盖。我使用 PETG 打印 30% infillSTL 文件,用于 3D 打印室外机漏斗。我使用 PETG 打印 30% infill.STL 文件,用于 3D 打印室外机过滤器。我使用 PETG 打印,填充率为 20%。这部分必须打印没有水平底层或顶层,创建一个“多孔”filter.STL 文件,用于 3D 打印铲斗通过枢轴杆连接到的底座。我使用 PETG 打印了 30% infill.STL 文件,用于 3D 打印桶。我使用 PETG 和 30% infill.STL 文件打印室内机外壳。我用 PETG 打印了 30% infill.STL 文件,用于 3D 打印室内机的前盖。我用 PETG 打印了 30% infill.STL 文件来打印垫片以保持 LCD 单元高于移位寄存器 IC。我使用 PETG 打印,填充率为 30%。Fusion 360 室外机模型 室外机rain_gauge_assembly___smaller_profile_v15_CFg0dGwM8s.f3d.STP文件 rain_gauge_assembly___smaller_profile_v15_jWCS0hjSDq.stepSTEP 室内机CAD模型 controller_box_v1_fwltgu6D0S.stepFusion 36 室外机CAD模型 用于 3D 打印开关按钮的 controller_box_v1_NxtSrPG4Vo.f3zSTL 文件示意图
项目接线示意图 rain_gauge_NtjqXF6QEw.fzz制造工艺