

使用 Raspberry Pi 2(Windows 10 IoT 核心版)的家庭自动化
组件和用品
 |
| × | 1 | |||
| × | 1 | ||||
| × | 1 | ||||
| × | 1 | ||||
| × | 1 | ||||
| × | 1 | ||||
| × | 1 | ||||
| × | 1 | ||||
 |
| × | 1 | |||
| × | 1 |
应用和在线服务
 |
| |||
|
关于这个项目
更新 2: 该项目仍在发展中,并且已经实现了许多新功能(例如 Twitter 客户端和 Telegram-Bots 的集成)。请查看 GitHub 存储库和发行说明以了解有关新功能的更多信息(或在 Twitter 上关注我)。我希望我能够尽快更新这个项目页面。
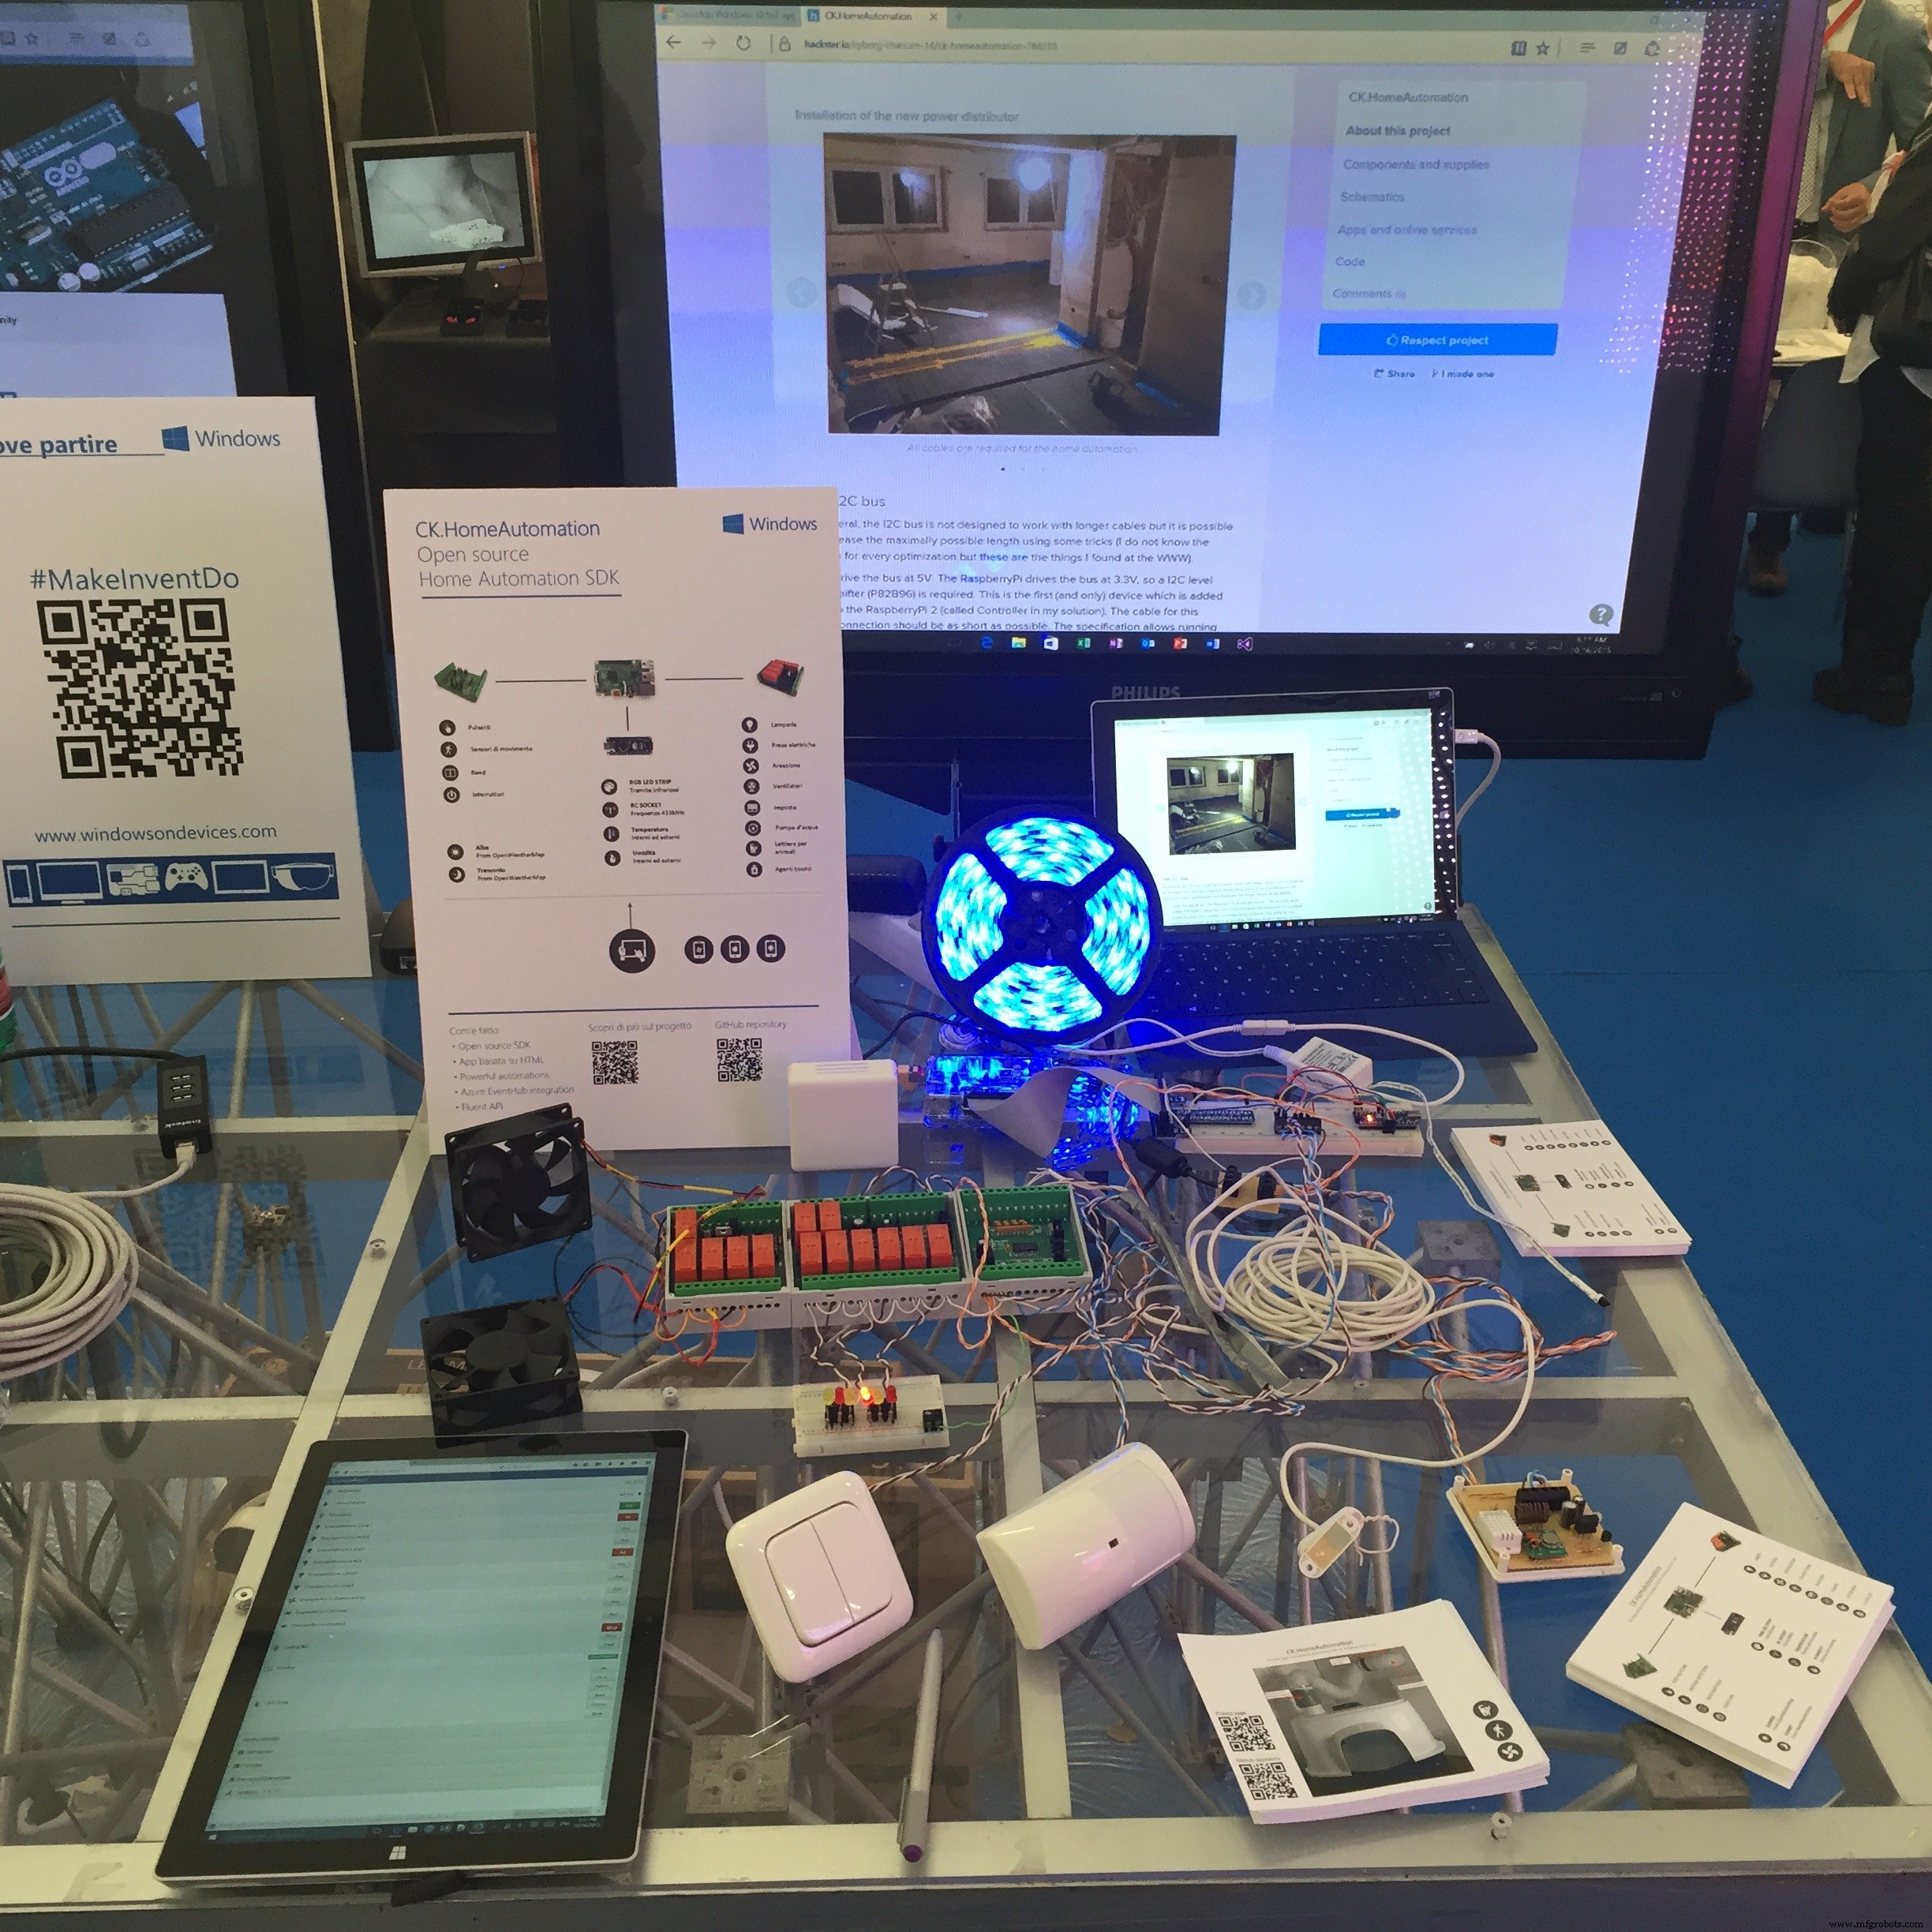
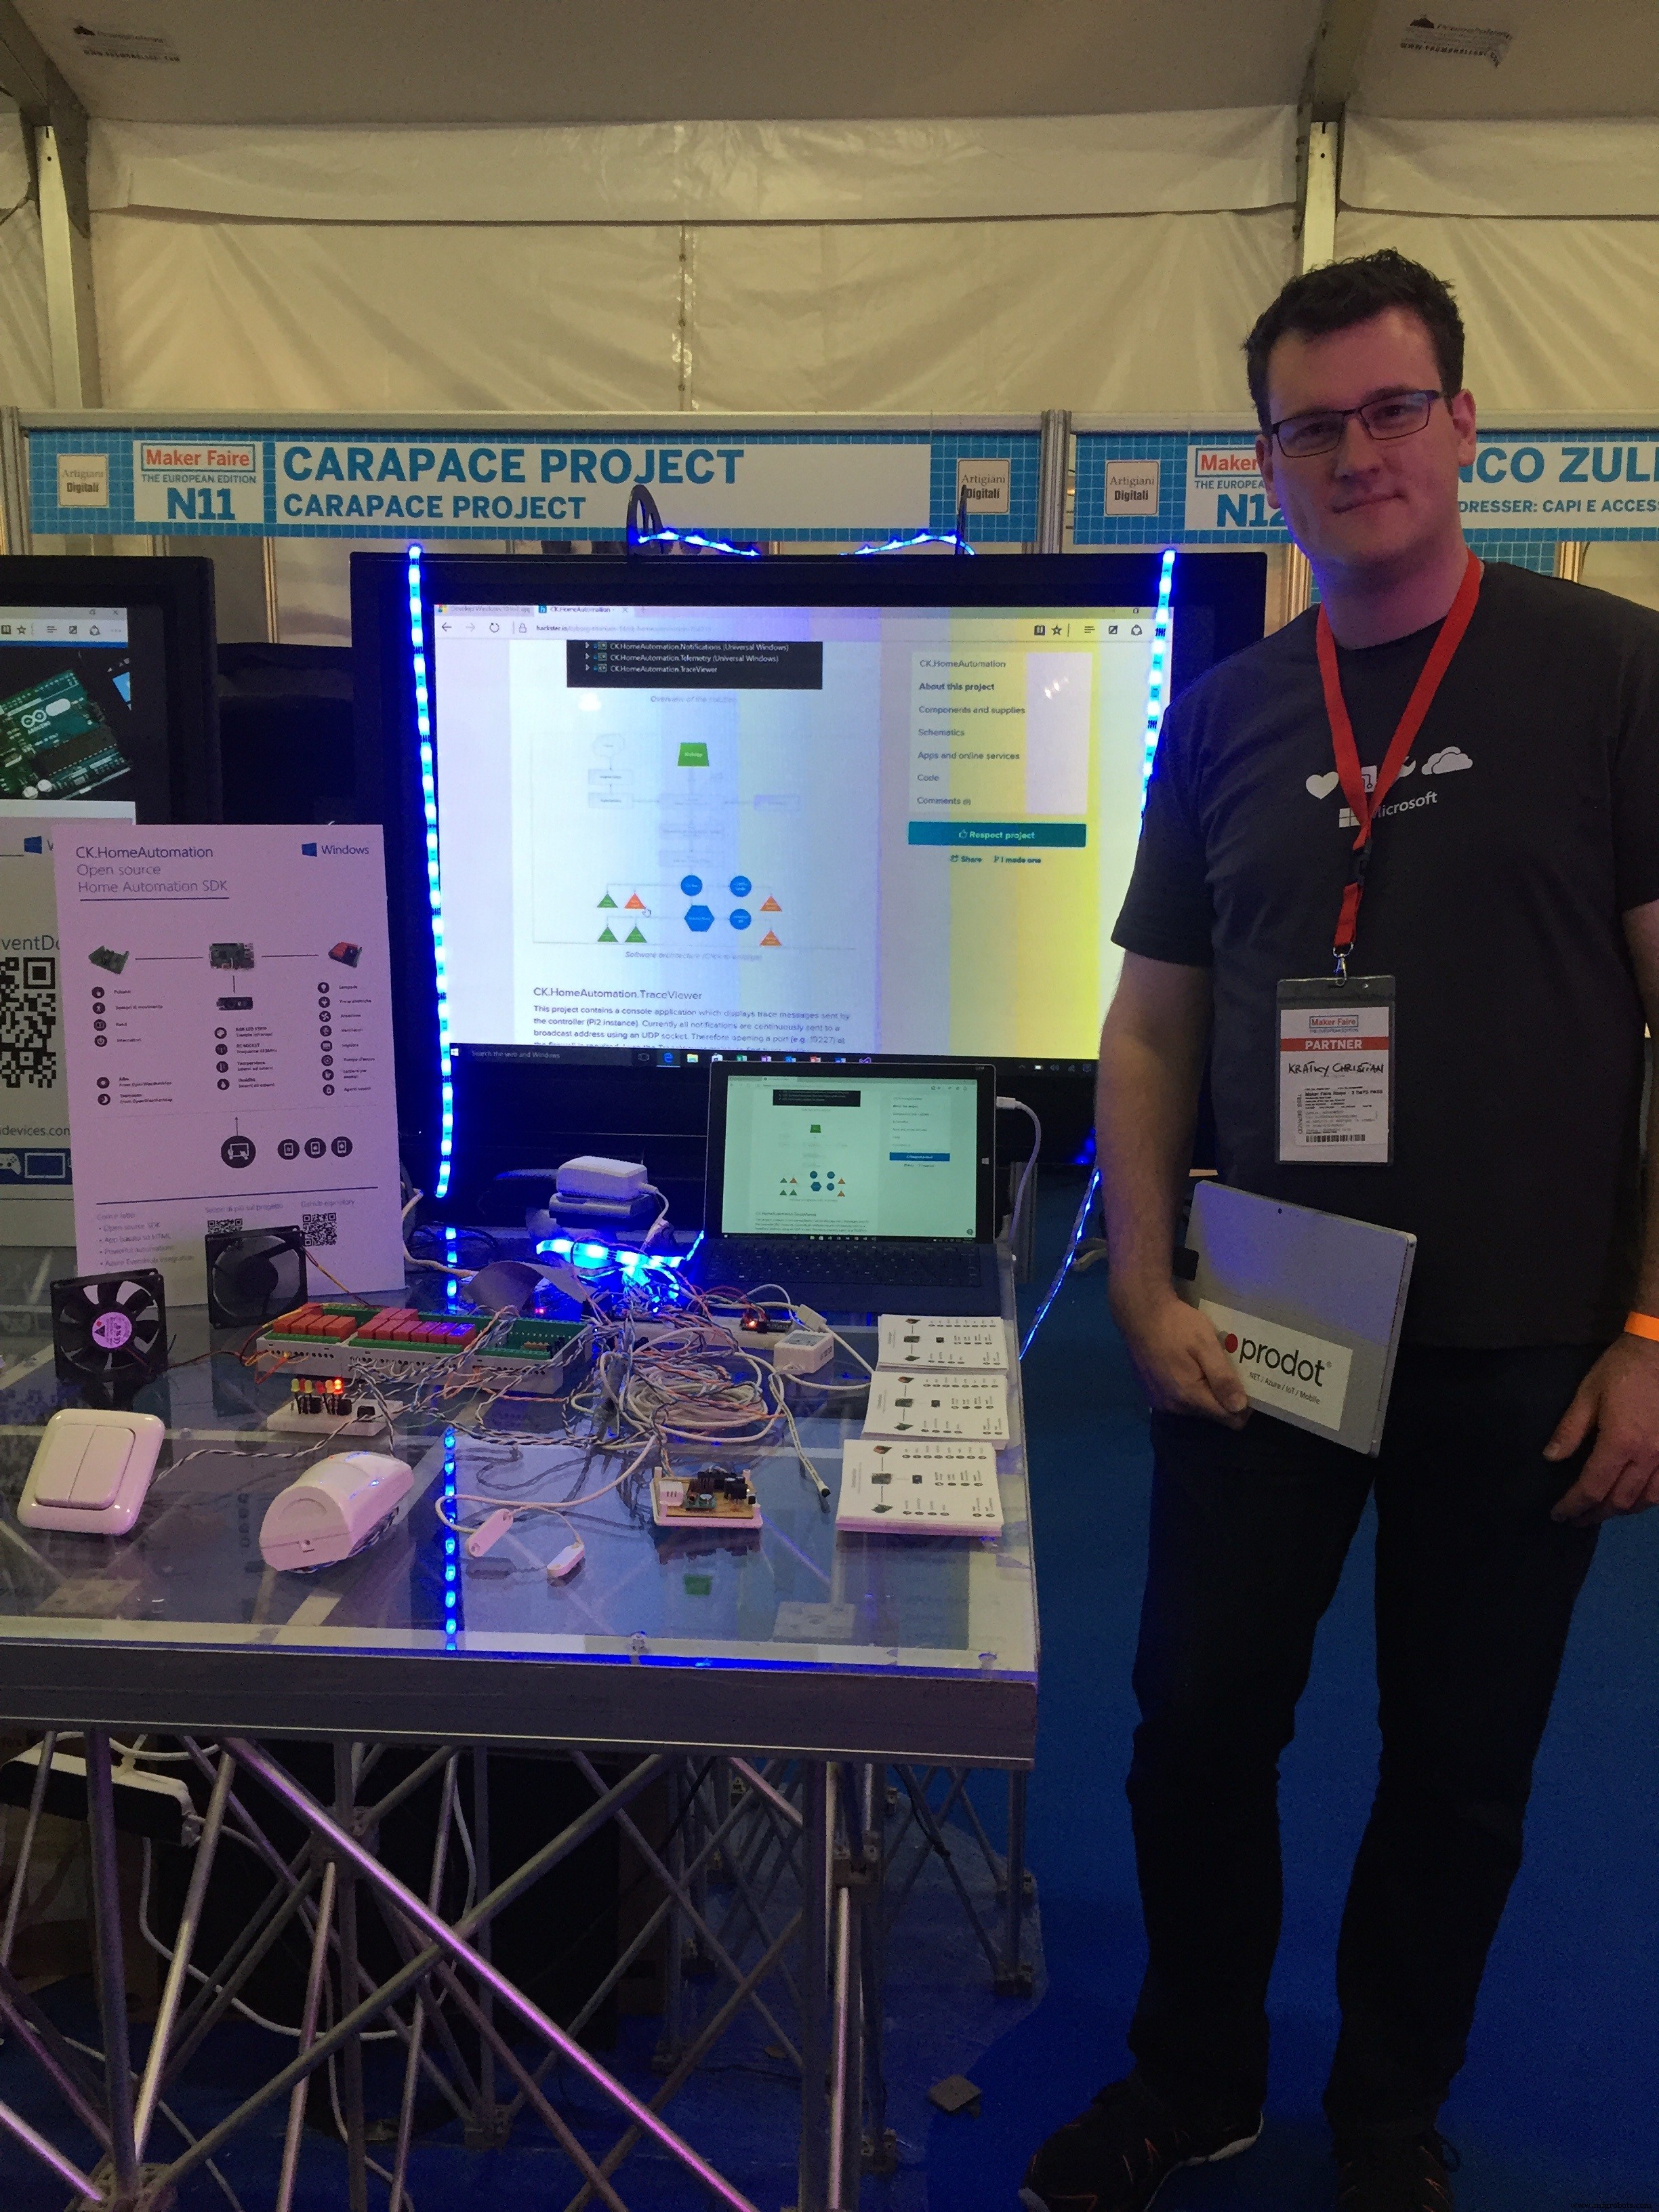
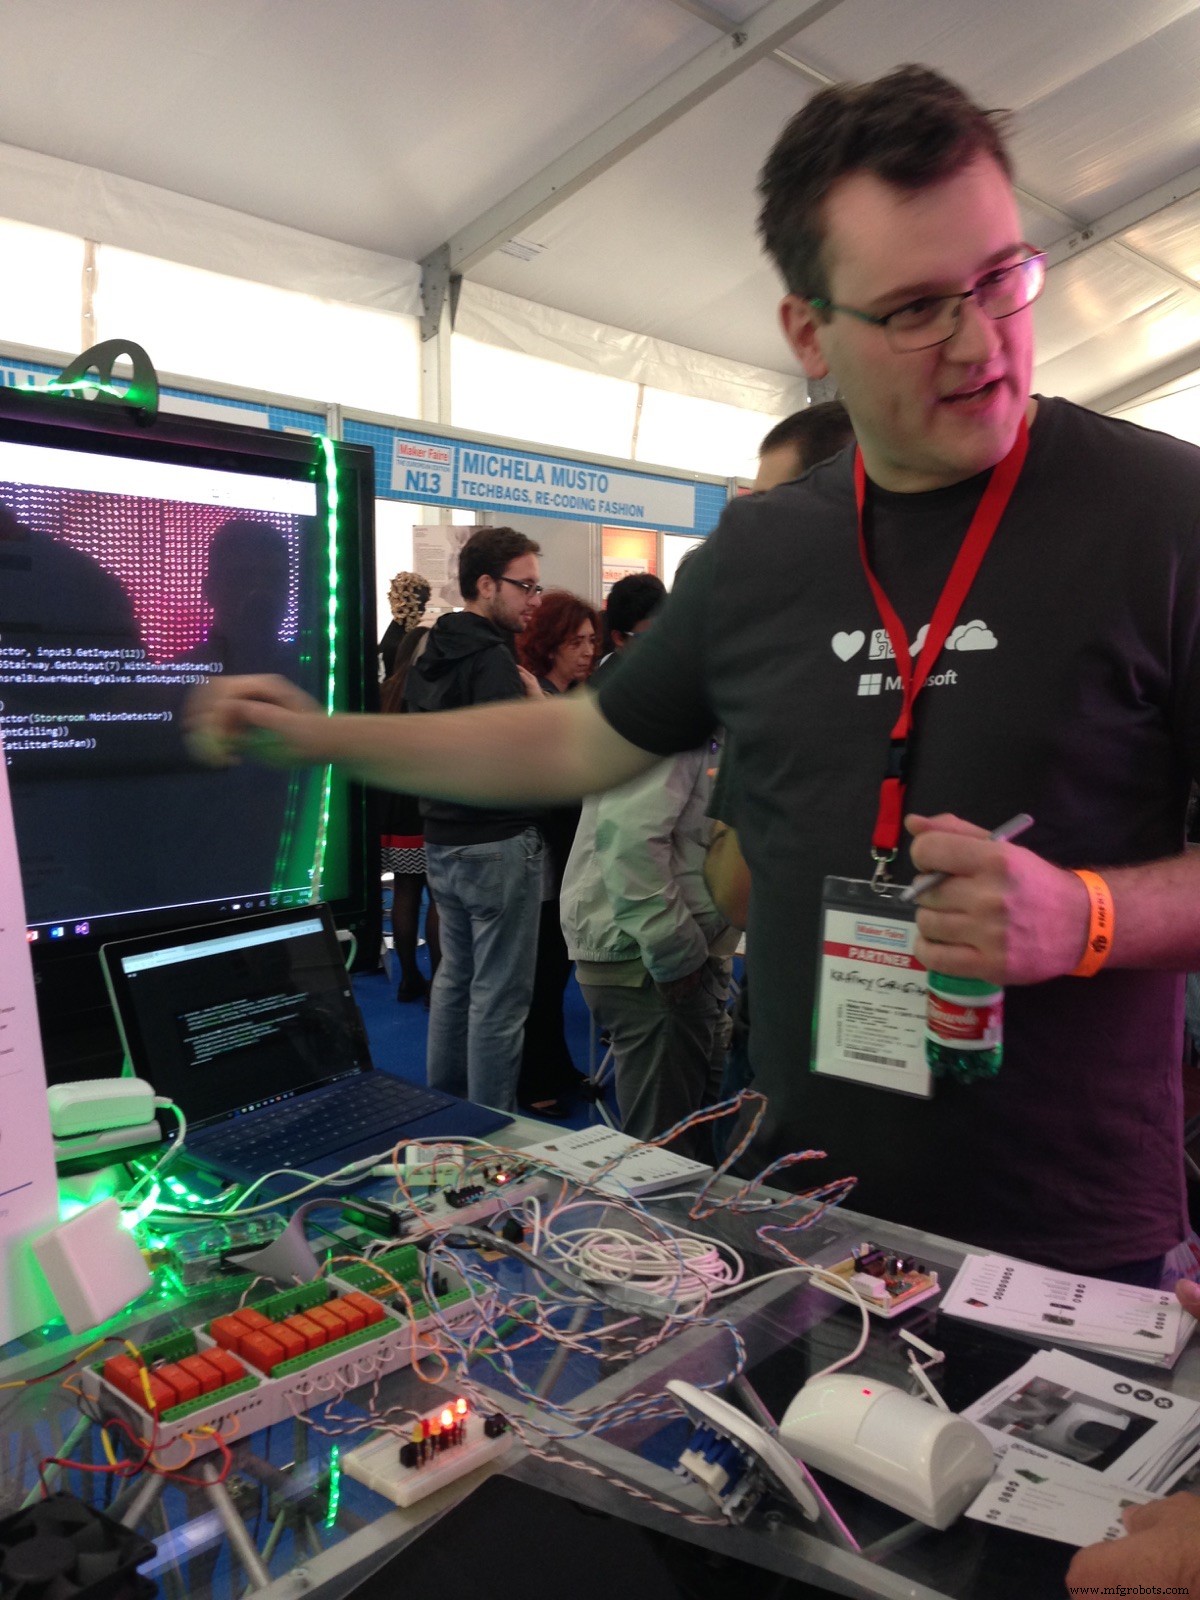
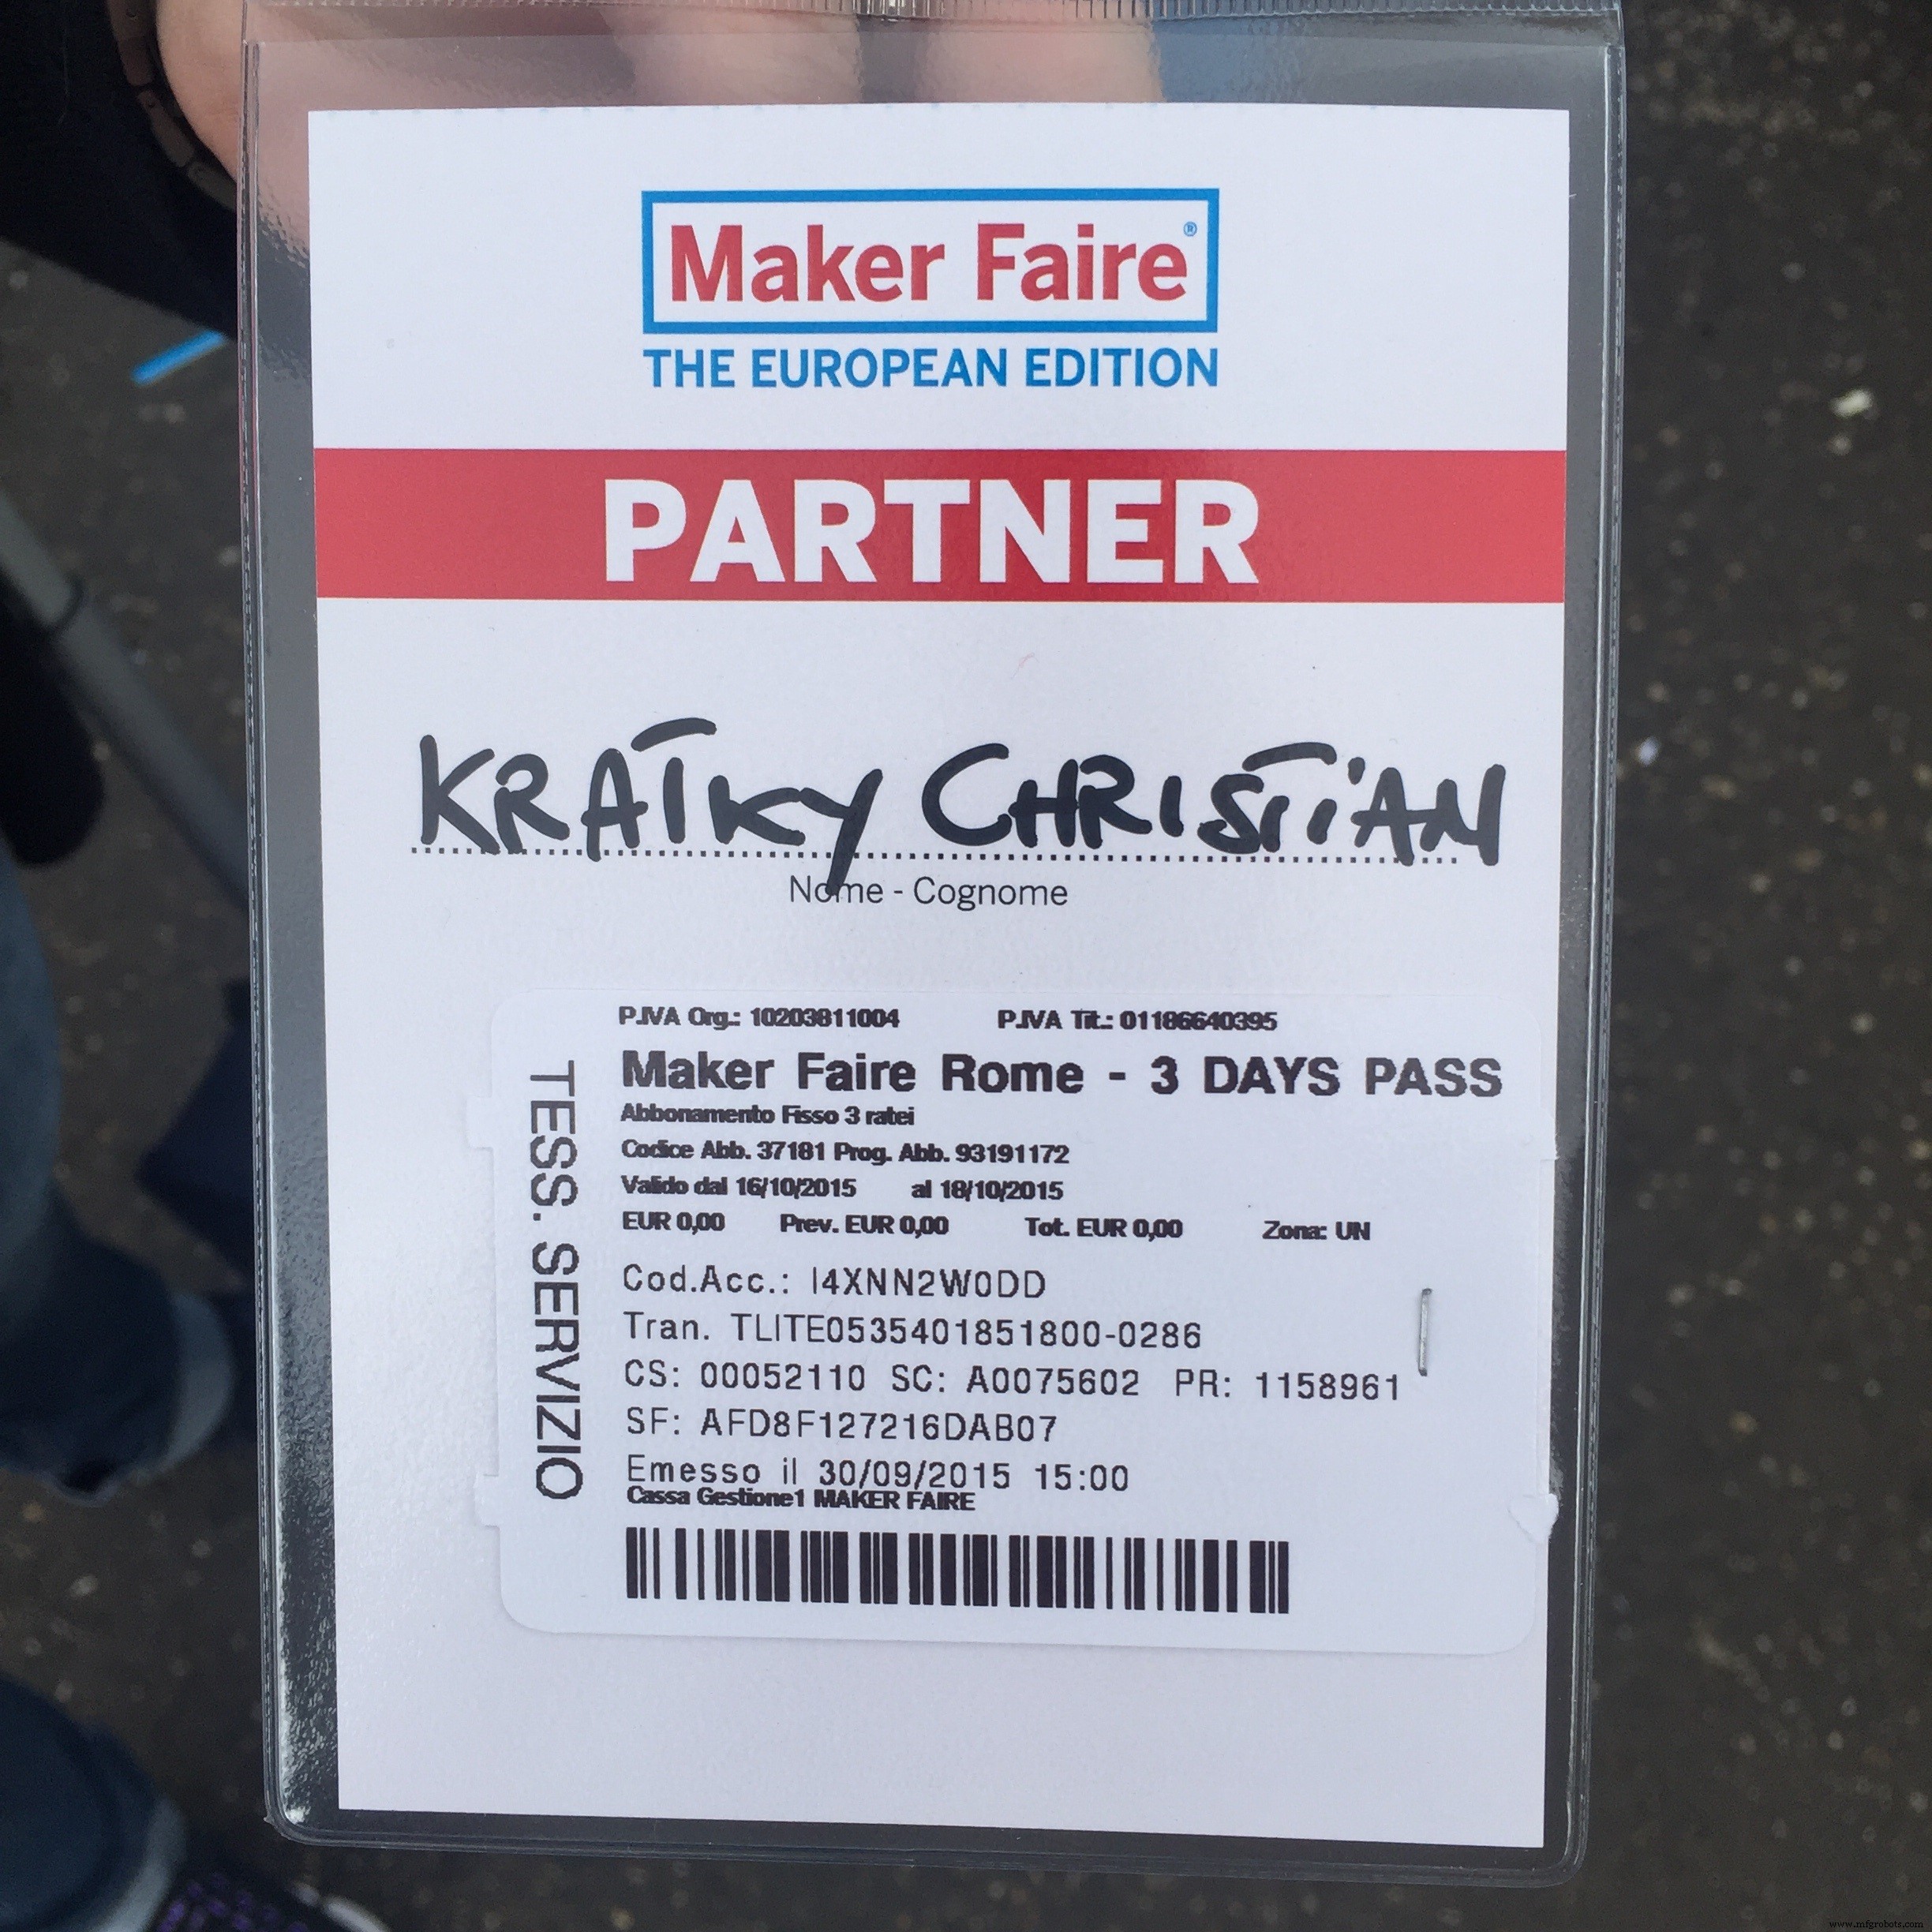
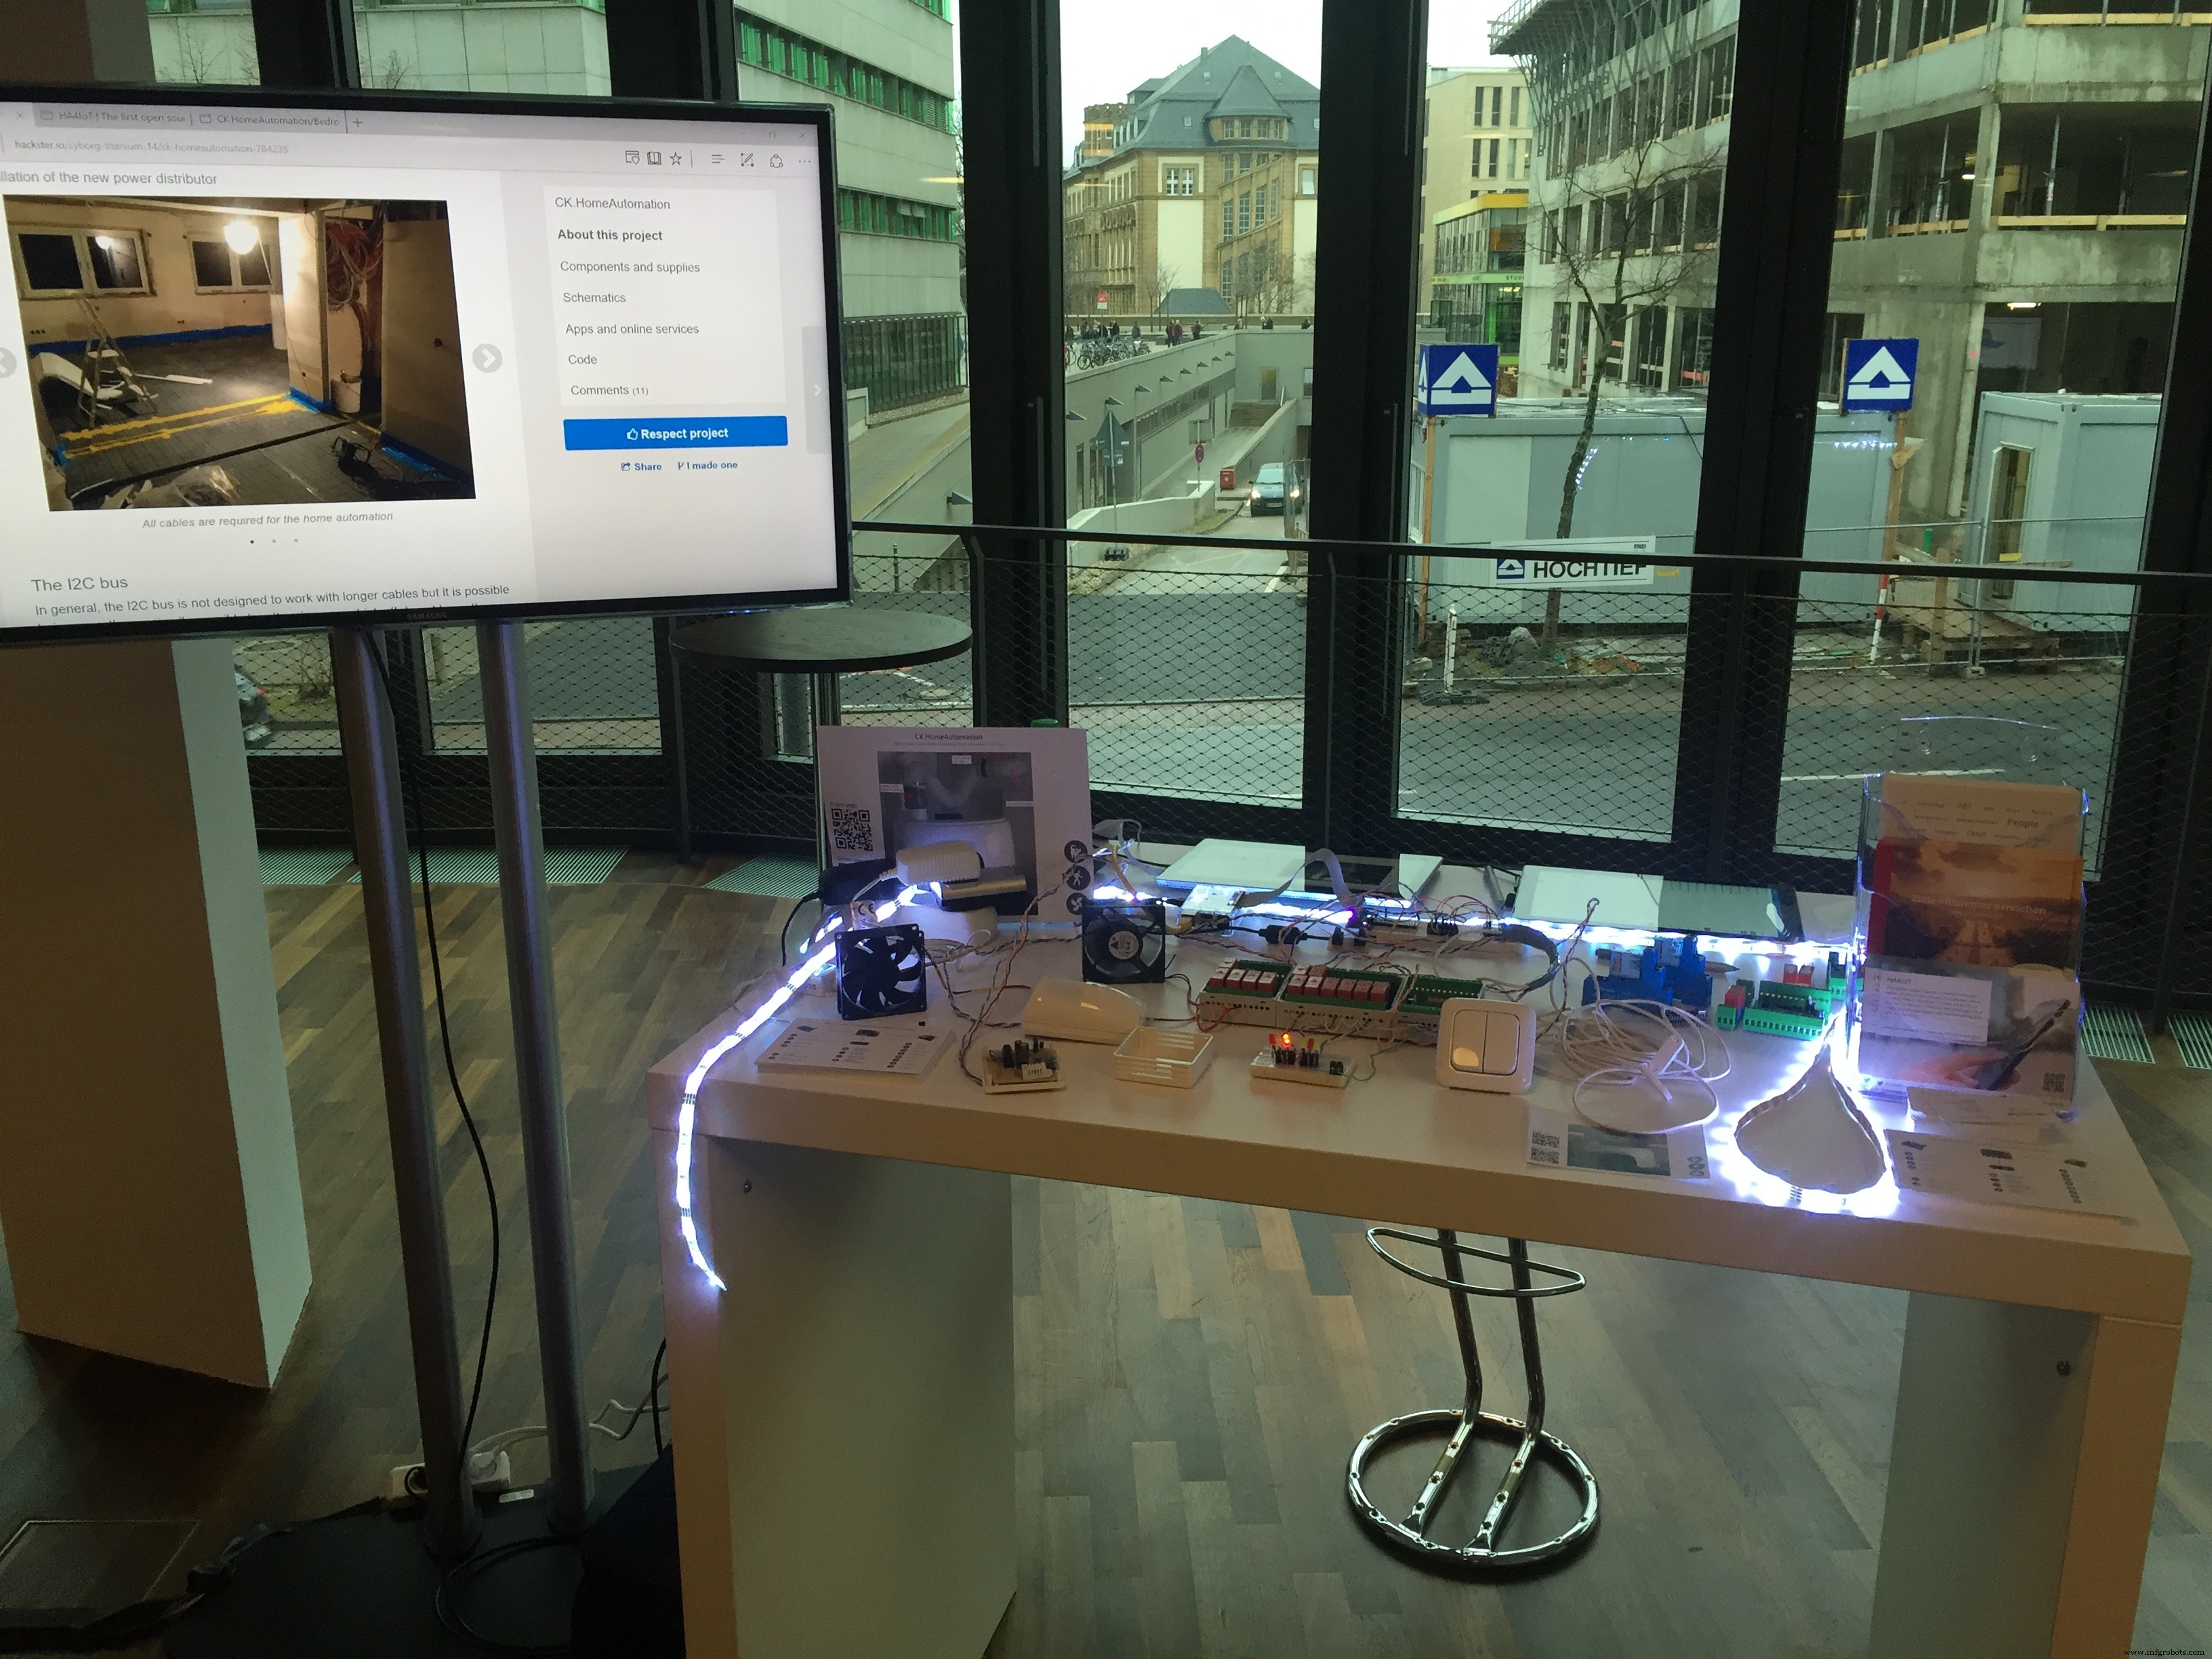
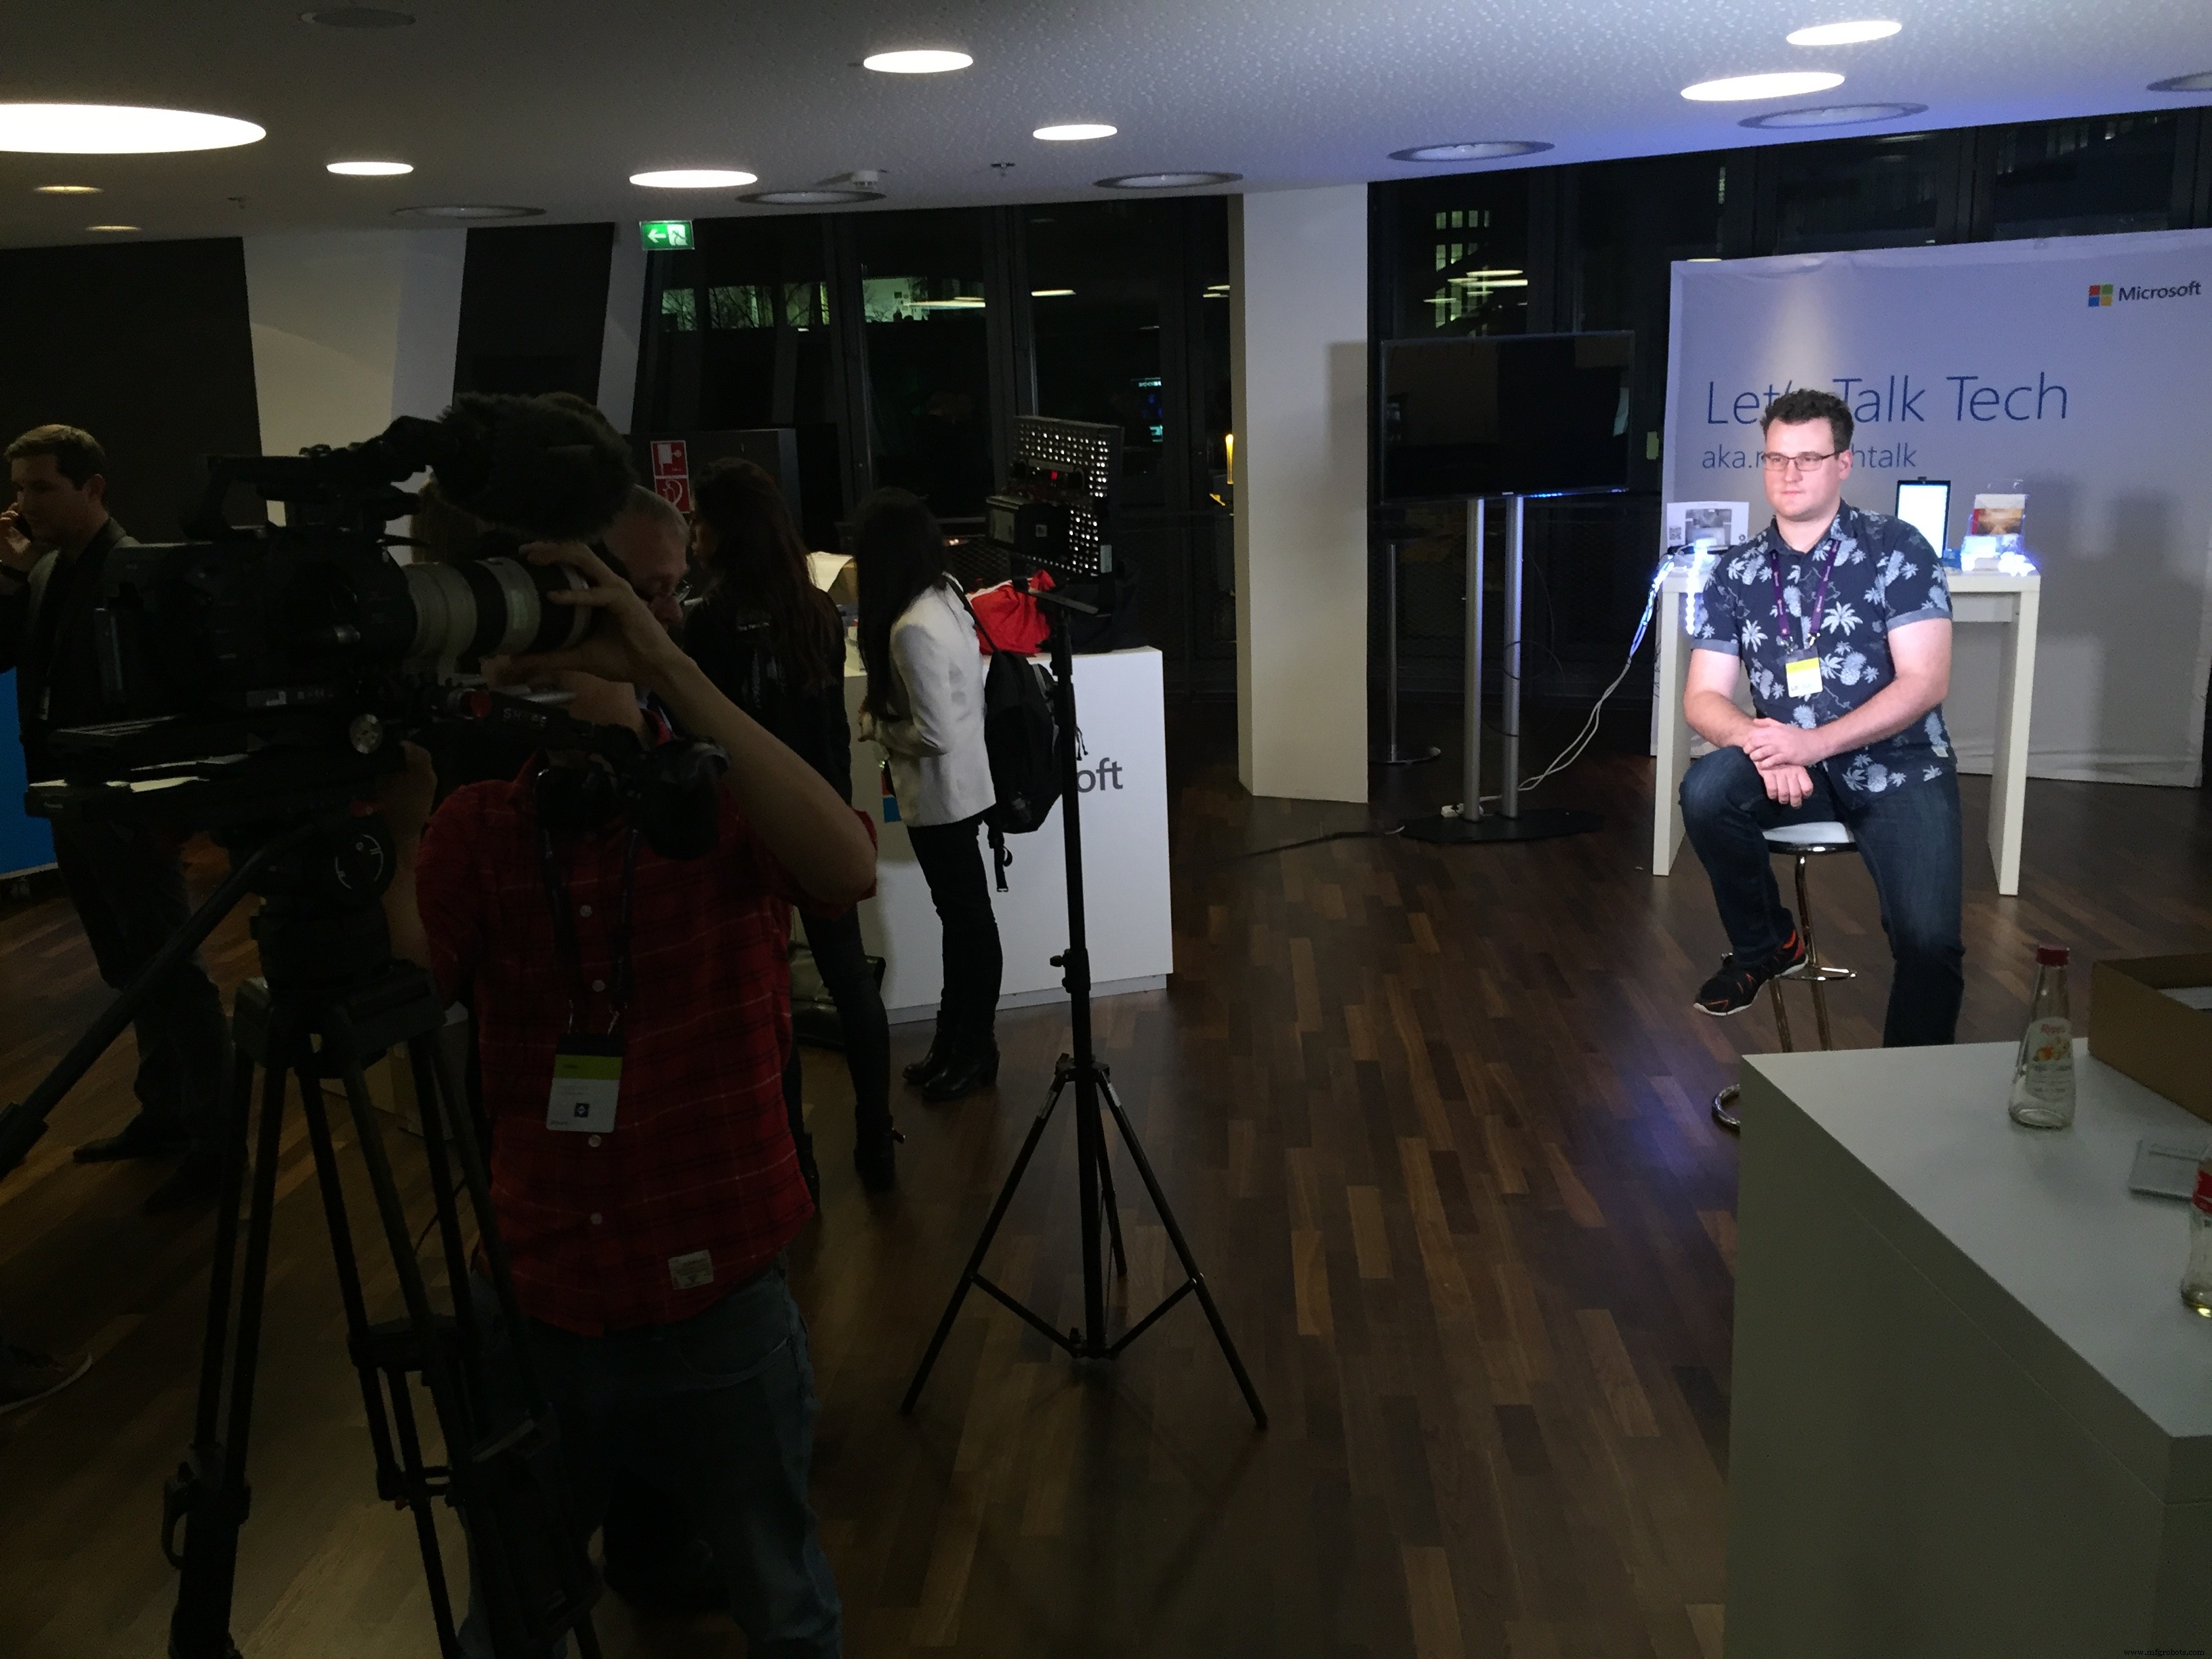
更新 1: 首先,我想对阅读此项目页面并给我反馈(私人或评论)的每个人说声“谢谢”。在 Maker Faire Rome 2015 和 Microsoft Technical Summit 2015 上展示这个项目非常有趣,未来的活动仍在等待中。我添加了一些活动图片。

我在过去 3 年里一直在开发家庭自动化解决方案。这包括硬件的物理安装和软件的开发。
特点
目前支持以下功能。
输入
- 按钮(BUSCH-JAEGER 2020US)
- 运动检测器(Abus 360° BW8085)
- 室温(我自己的基于 DHT22 的设备)
- 房间湿度(我自己的基于 DHT22 的设备)
- 窗口状态(使用 Honeywell Slimline 簧片触点打开或关闭)
- 日出、日落、温度和湿度(取自 OpenWeatherMap)
输出
- 灯(天花板)(由继电器驱动,不调光)
- 插座(由继电器驱动,无调光)
- 卷帘(窗)(由上下两个继电器驱动)
- 风扇(天花板)(每个档位由 3 个继电器驱动)
- 浴室风扇(每个档位由 2 个继电器驱动)
其他功能
- 该解决方案包含适用于 iOS、Android、Windows、Mac OSX 的网络应用程序,可用于控制虚拟执行器。网络应用的配置从控制器(Windows IoT 实例)加载。
- 输入和输出生成的所有事件都可以发布到 Microsoft Azure 事件中心和/或记录到 CSV 文件中。
- 控制器(Windows IoT 实例)提供基于 UDP 的跟踪,可使用控制台应用程序显示。跟踪非常详细,可用于查找错误或错误连接的执行器等。
- 可以添加自定义执行器以支持更多硬件。
- 物理输出可以组合为逻辑输出。
- 动画(逻辑输出中的物理输出可以动画)。
- 整个系统旨在尽可能地抵抗错误/硬件故障。即使多个核心组件断开/损坏,其余系统仍然按预期工作(例如,由于硬件故障,客厅中的某些板无法访问,但浴室仍按预期运行)
- 支持 433Mhz 远程中继。
概念
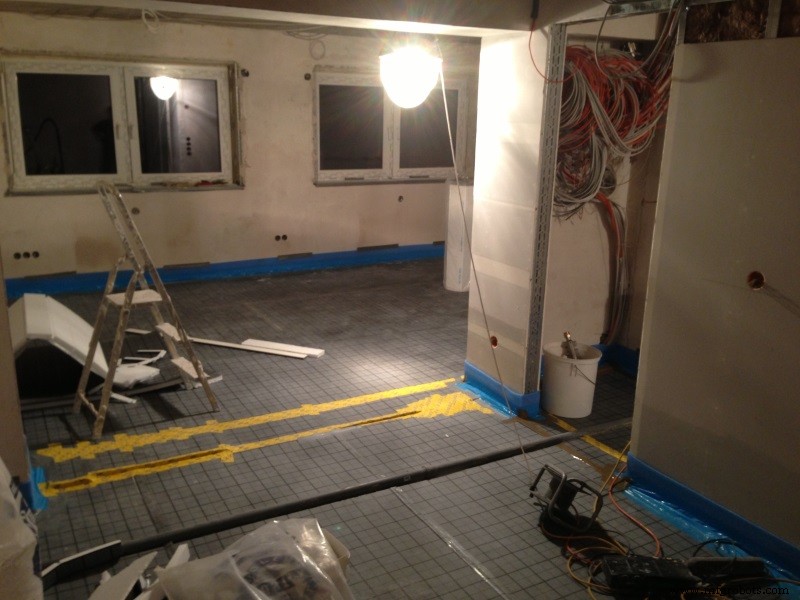
当我们 3 年前翻新我们的家时,我决定实施我自己的家庭自动化解决方案。实施背后的主要思想是使用继电器控制来自配电器的一切。由于这个决定,每个按钮、灯、插座、卷帘等都需要通过其自己的电缆通过执行器连接到电源分配器。不需要像 KNX 或 EIB 这样的总线。
注意 :由于我住在德国,所以每个组件都设计为使用 230V 电源。其他类型的电源可能需要进一步修改。 230V 电缆 (NYM)、新电源分配器等的安装由我的首选 完成 电工而不是我自己。
硬件
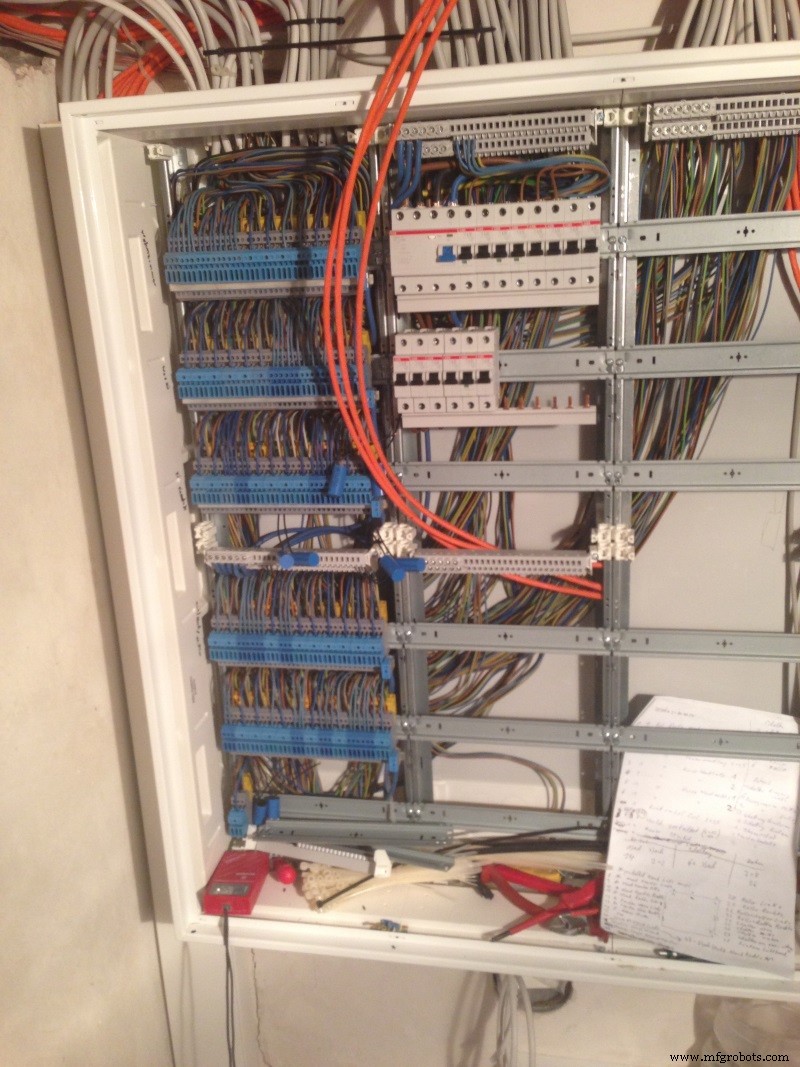
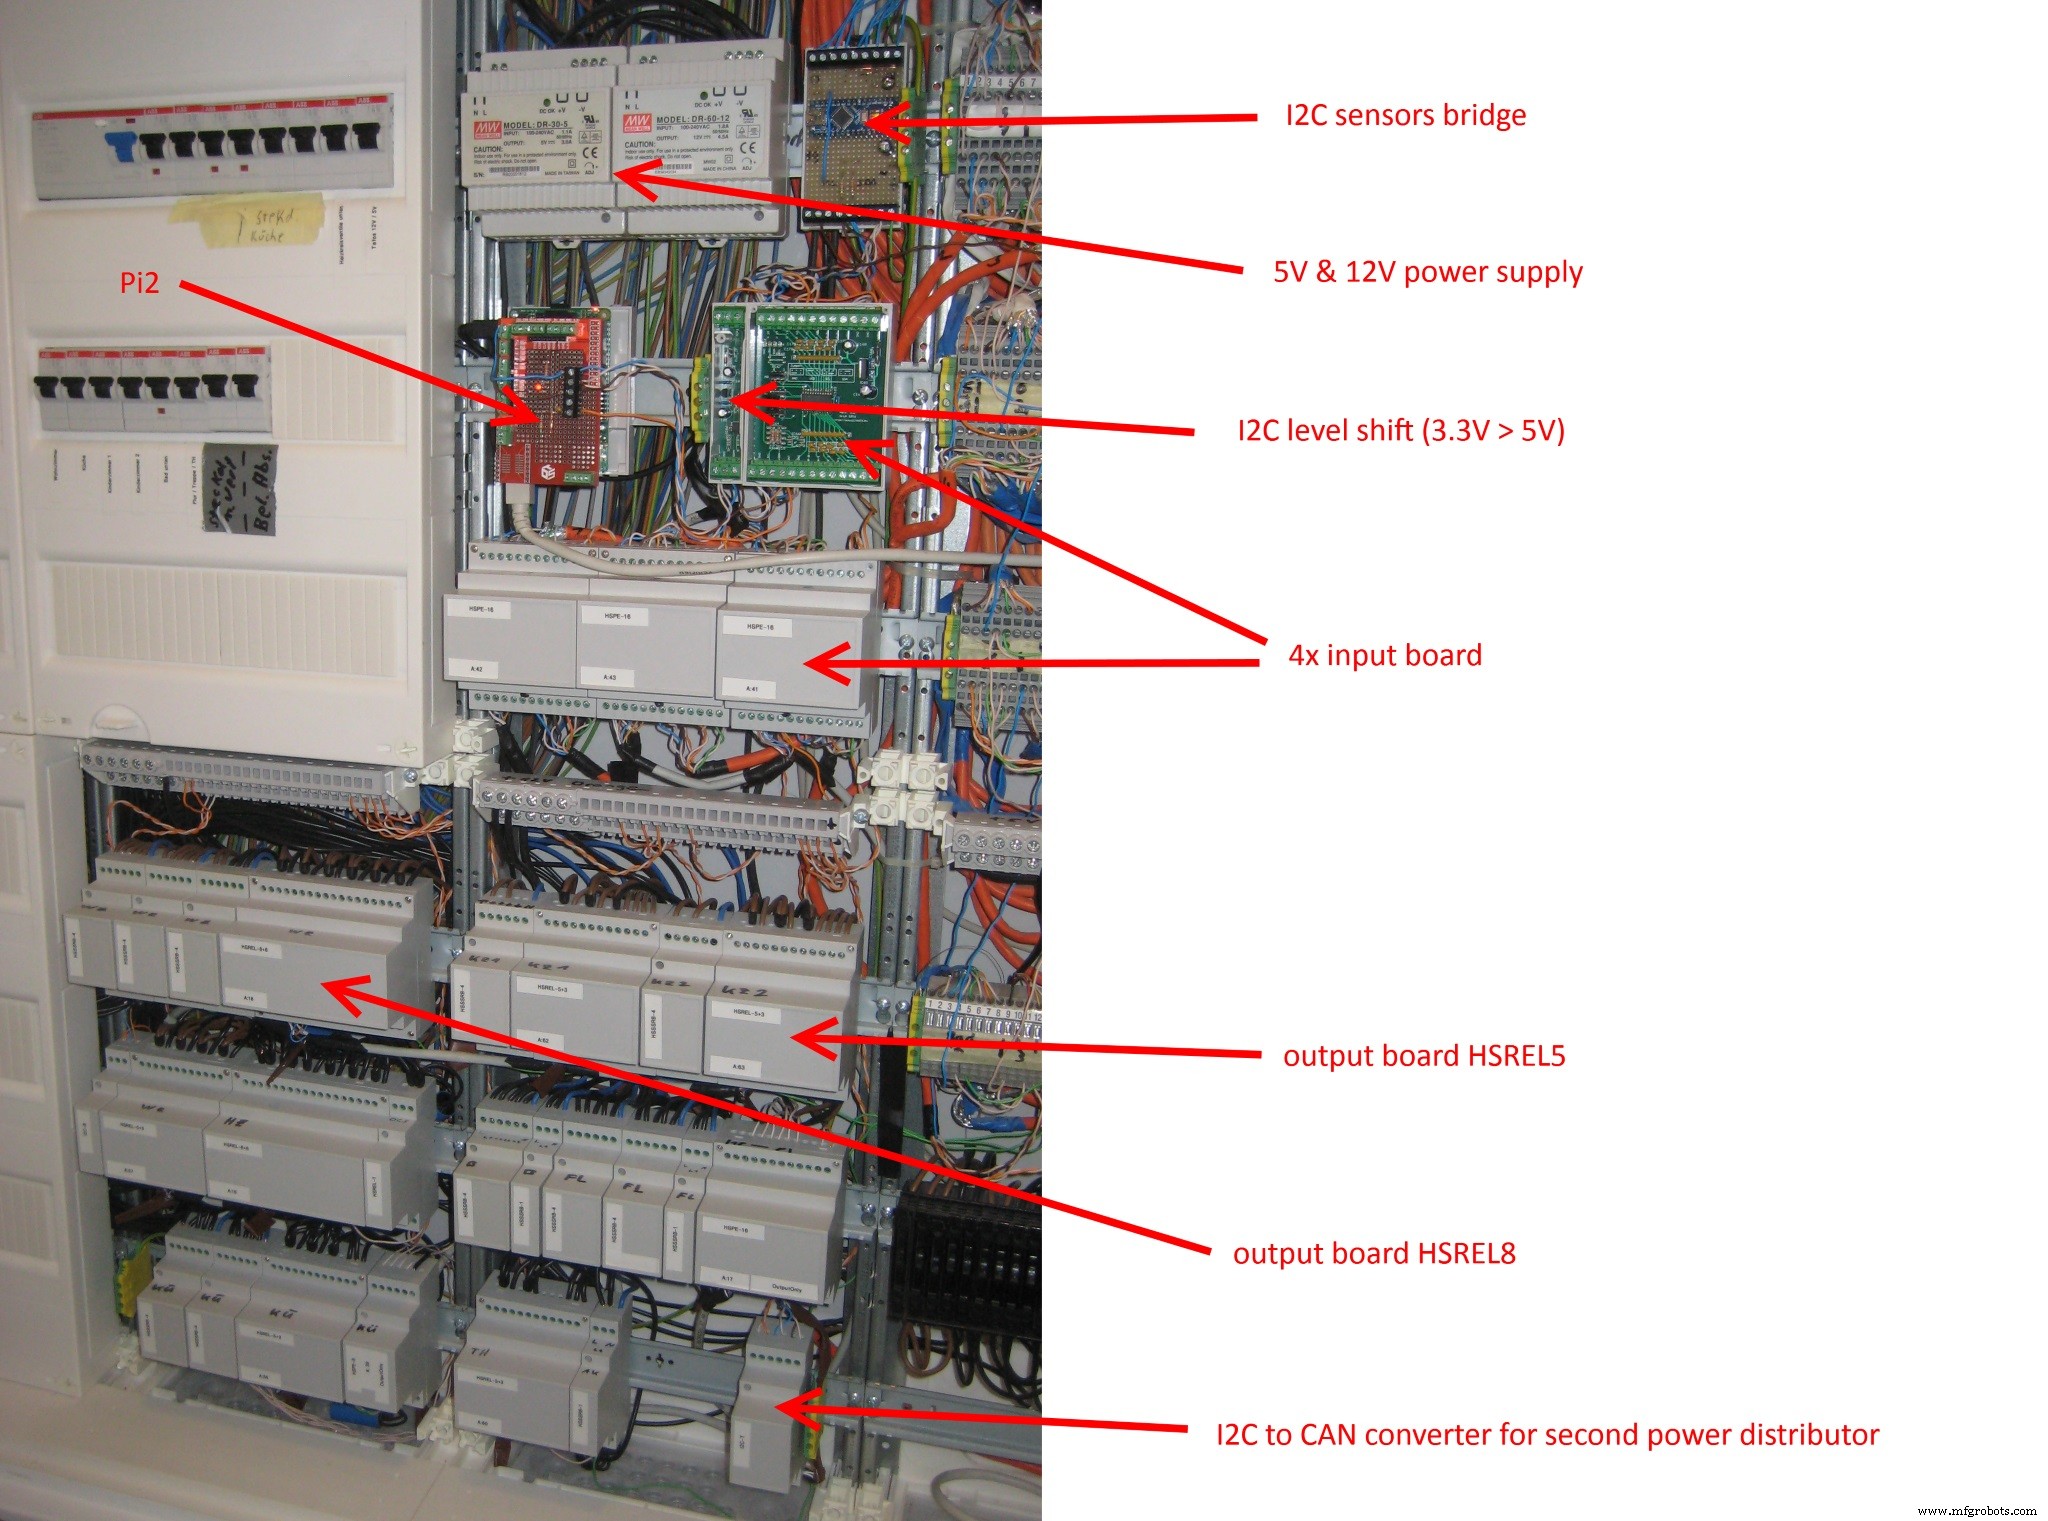
新的电源分配器
我们安装了一个新的配电器,负责我们家的两层楼。

I2C总线
一般来说,I2C 总线不是设计用于使用更长的电缆,但可以使用一些技巧来增加最大可能的长度(我不知道每次优化的原因,但这些是我在 WWW 上找到的东西)。
- 以 5V 驱动总线。 RaspberryPi 以 3.3V 驱动总线,因此需要 I2C 电平转换器 (P82B96)。这是第一个(也是唯一一个)添加到 RaspberryPi 2 的设备(在我的解决方案中称为控制器)。用于此连接的电缆应尽可能短。该规范允许以高达 15V 的电压运行总线,但像 PCF8574 这样的从设备仅支持最大 5V。
- 使用像 CAT7 这样的双绞线。将一对用于 SDA&GND,另一对用于 SCL&GND,这一点很重要。请勿将单根双绞线电缆用于 SDA&SCL。还要确保电缆的屏蔽层连接到 PE(在德国)。
- 首选绞合电缆。这使得连接所有东西变得更加复杂,但会增加电缆的长度。
- 在总线末端为 SDA 和 SCL 添加 10k 上拉电阻。
- 即使从站支持更快的速度,也将总线速度限制为 100kbits(标准模式)。
- 包括一个 I2C 缓冲器 (P82B96)。该 IC 可用作电平转换器或可用于分隔物理段中的总线。我在电源分配器中使用了这种缓冲器之一。缓冲区应放置在总线的中间。
这种优化的 I2C 总线用于连接电源分配器内的每个板。
继电器板(输出)
CCTools 来自德国的销售板带有可以连接到 I2C 总线的继电器。也可以将电路板作为单独的部件或仅作为电路板购买。这允许使用引脚兼容的替代品替换端口扩展器。前者是必需的,因为设备的可用地址是有限的。我为继电器和 IC 添加了支架,因此如果其中一个损坏,我可以更轻松地更换它们。另一点是我可以使用 PCA9555D 而不是 MAX7311 因为 PCA9555D 更便宜,更容易订购(在德国)。
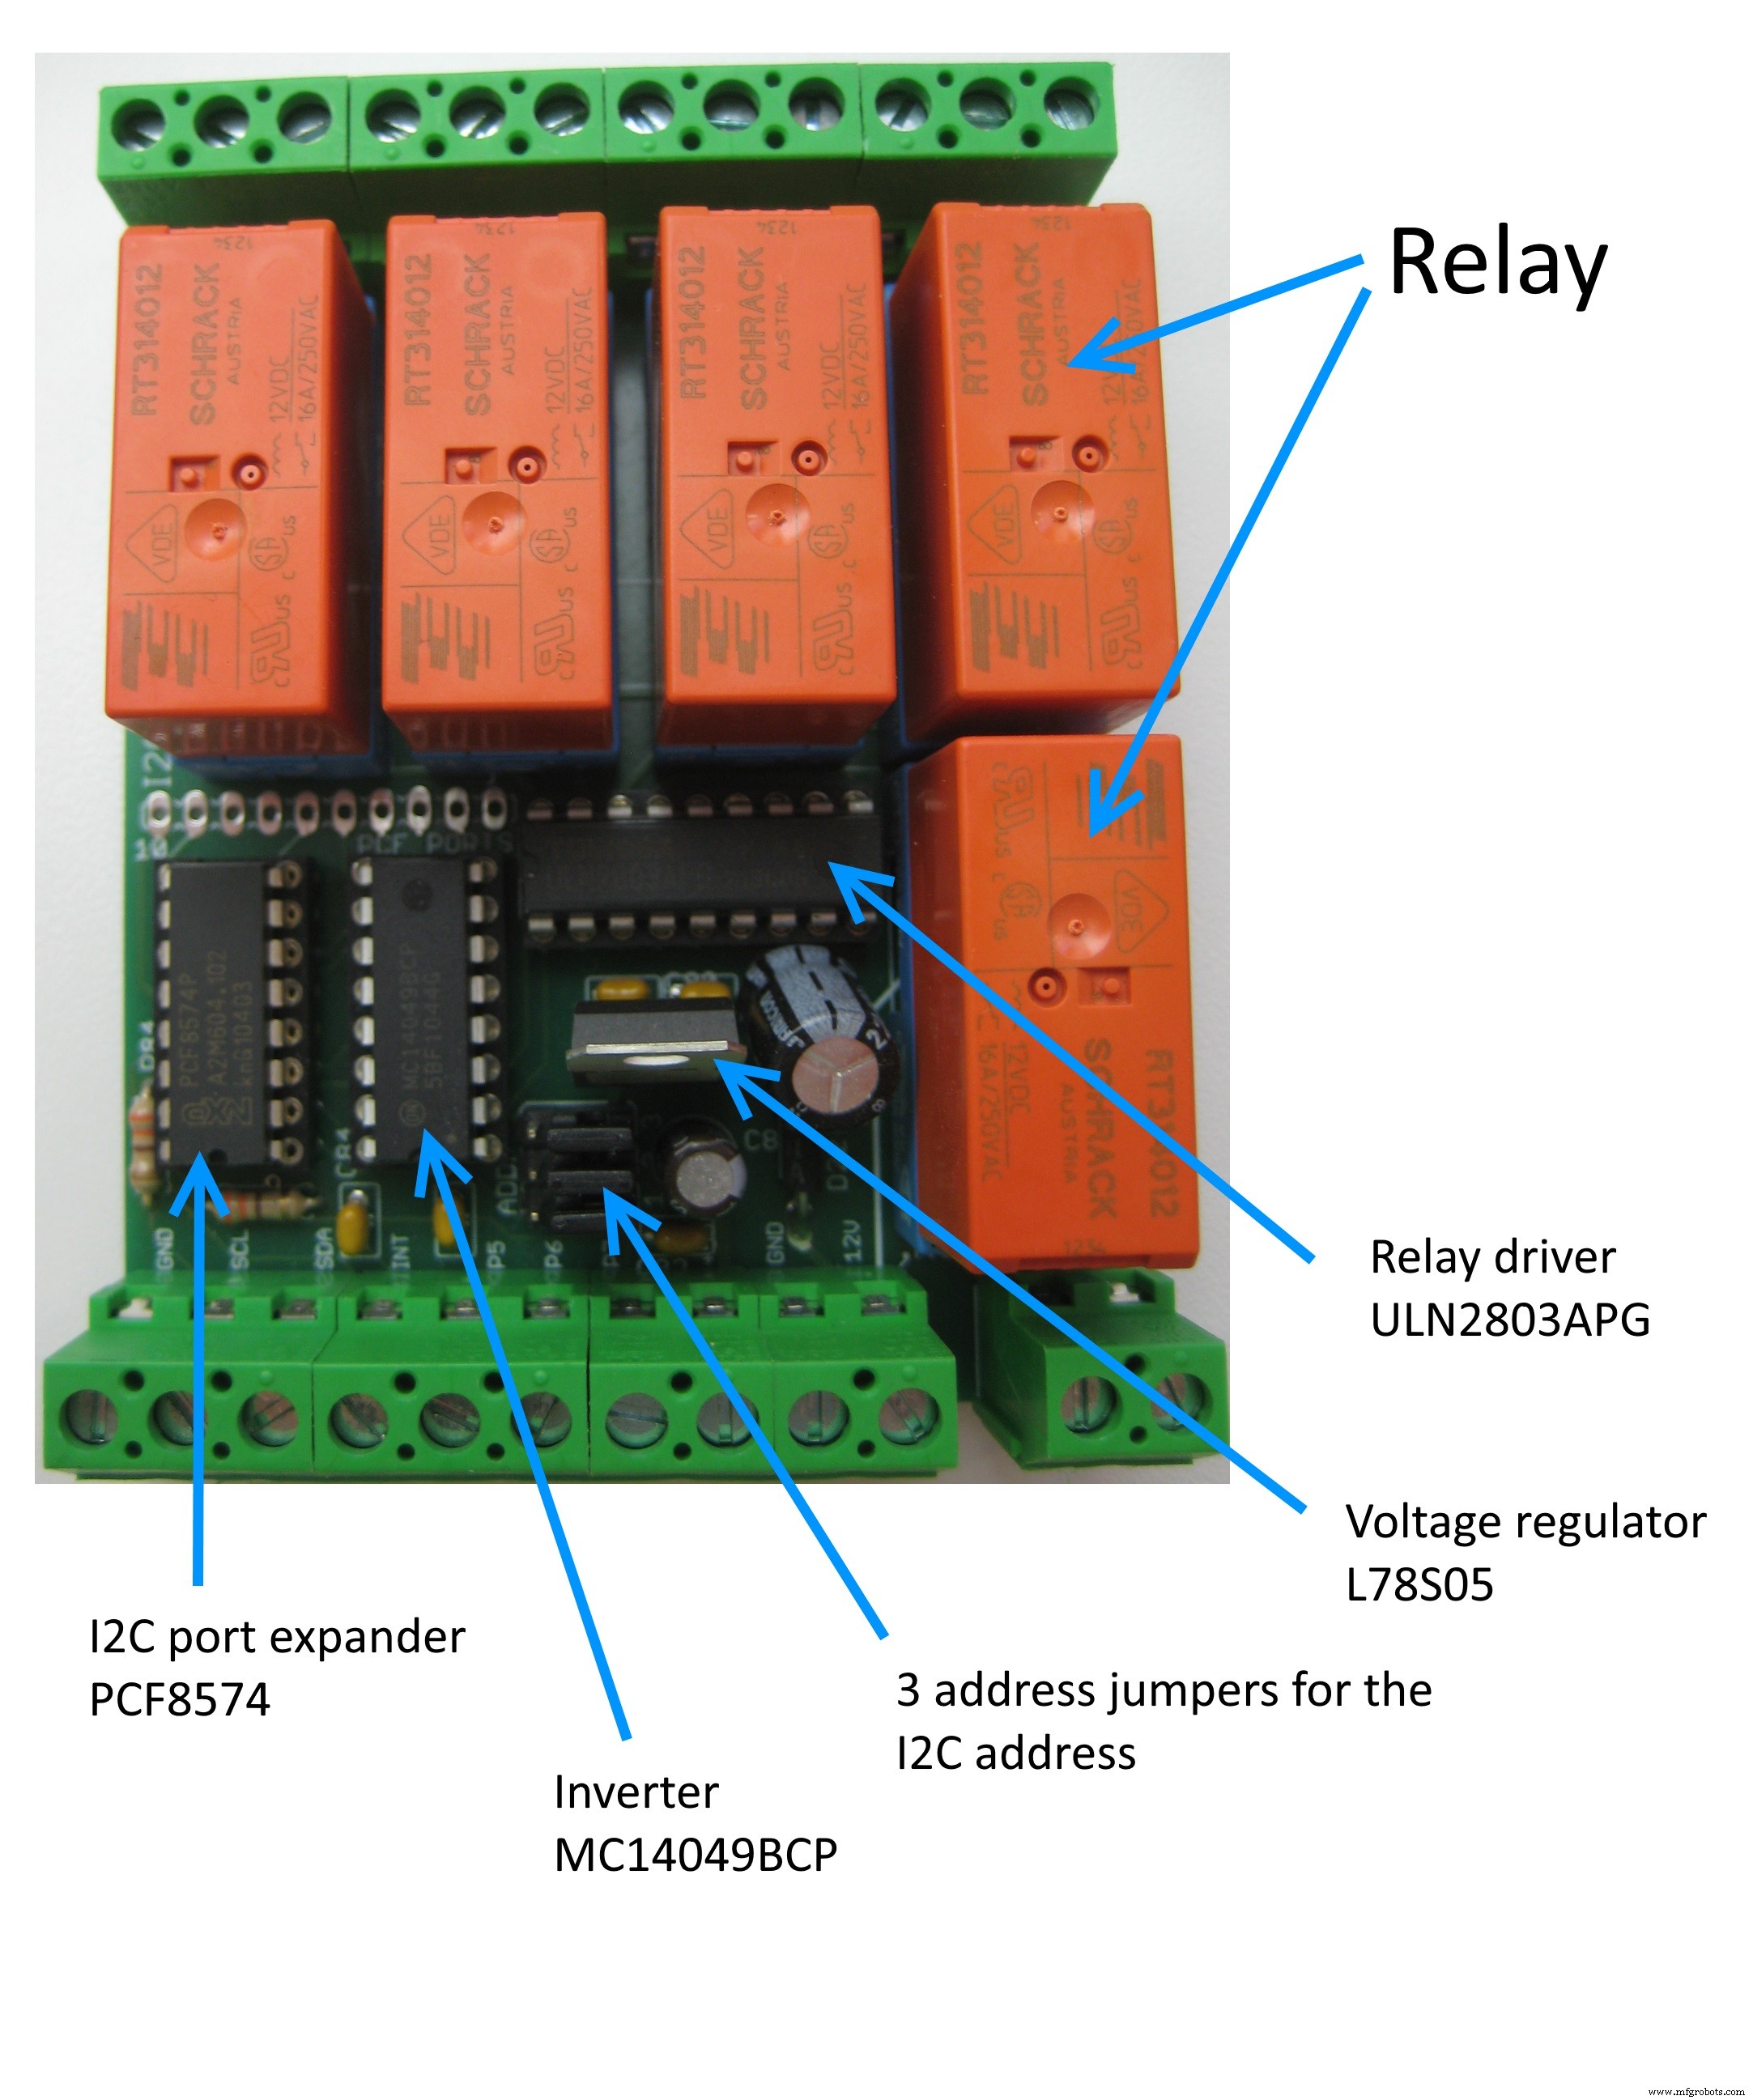
HSRel5 继电器板有 5 个继电器和 3 个 GPIO .所有必需的端口均取自内部 PCF8574 具有 8 个 GPIO 的 8 位端口扩展器 .前 5 个用于继电器,后 3 个可用于其他输出。继电器需要 12V 才能工作,而端口扩展器(只能驱动 LED)无法提供。因此,需要一个中继驱动程序。继电器与继电器驱动器相连,而继电器驱动器又与逆变器相连。这个逆变器是必需的,因为端口扩展器上的所有端口的状态都是HIGH IC通电后。这将关闭所有继电器,这是一种无意行为。
结论: 如果第一个中继应该关闭,则需要发送 00011110 (MSB) 到使用 I2C 总线的端口扩展器。这会将第一个端口设置为 LOW (其他端口也更新)。端口扩展器的第一个端口连接到逆变器的第一个输入端。逆变器的第一个输出连接到继电器驱动器 (ULN2803) 的第一个输入。作为链的最后一部分,继电器连接到继电器驱动器的第一个输出端。
CCTools 的另一个中继板 是 HSRel8(+8) 它使用 MAX7311 作为端口扩展器,包含 8 个继电器和 8 个 GPIO .该板不需要硬件逆变器。这意味着 HIGH HSRel5 的中继状态 意味着 OFF 和一个 HIGH 状态在 HSRel8(+8) 意味着ON。 这种不同的行为由这些设备的驱动程序处理,并且是软件的一部分。
每个灯、插座等都连接到这些继电器之一。在我家里,我目前使用 8 HSRel5 和 4 HSRel8 .我也使用带有固态继电器和其他类型继电器的电路板,但为了简短起见,我不会在这里详细介绍。 HSRel5 是最简单的中继板。但是PCF8574 只允许 8 个不同的地址。 PCF8574 A 是同一个端口扩展器,但有 8 个不同的地址。这意味着 16 HSRel5 可以连接到I2C 巴士。
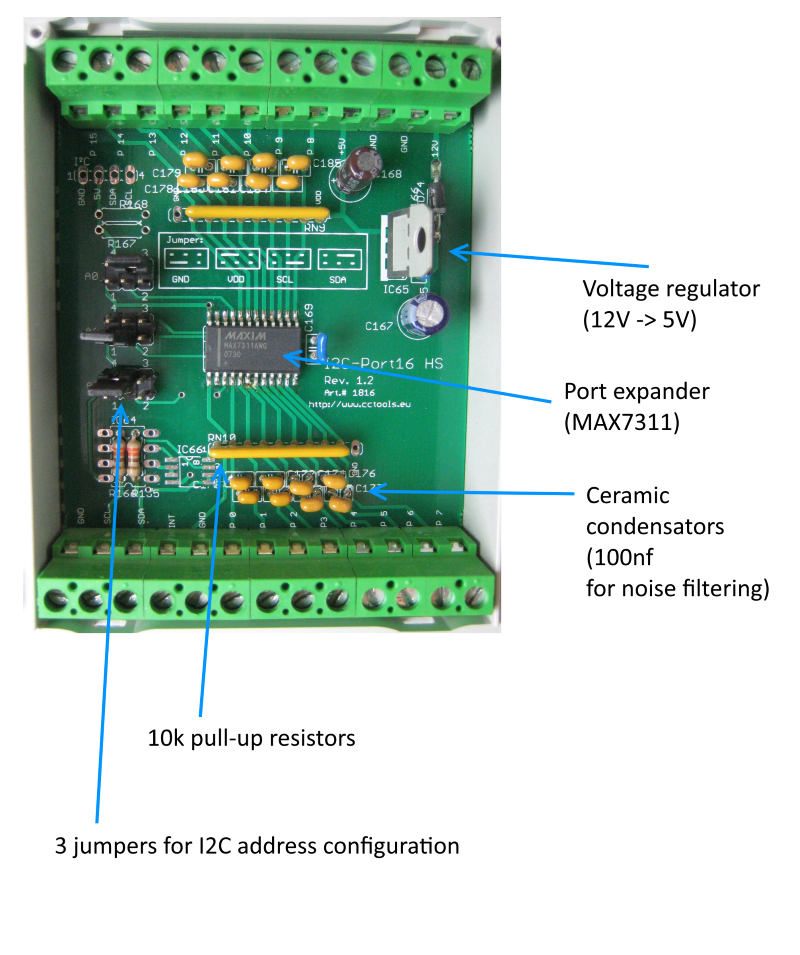
端口扩展器(输入)
按钮、运动探测器和簧片开关(用于窗户)连接到一个名为 I2C-Port16 HS 的电路板上 来自 CCTools .该板包含一个端口扩展器 (MAX7311 )、每个端口的上拉电阻器 (5V, 10K) 和陶瓷电容器 (100NF )。该板可使用 12V 或 5V 电源。陶瓷电容用于滤除噪声(glitch filter)。
每个输入设备(按钮、运动检测器、簧片开关)都有自己的电缆连接到电源分配器。 CAT7 电缆用于每个输入设备,因为它需要有屏蔽,与 PE(保护地)相连。具有多个按钮(如卷帘百叶窗按钮)的位置只需使用一个 CAT7 即可连接 电缆。
在电源分配器处,每个输入设备都连接到端口扩展器的一个端口和GND .由于上拉电阻,端口状态为 HIGH 默认情况下。按下按钮会将端口连接到 GND 这导致 LOW 港口的状态。运动检测器和簧片触点也以这种方式工作。
一个共享的中断 电缆连接到所有输入板。默认情况下,此电缆是上拉的。如果任何端口扩展器的状态发生变化,相应的端口扩展器将设置中断的状态 低。 此行为可防止使用 I2C 总线对所有端口扩展器进行连续轮询。 Pi2 上的软件仅轮询相应的GPIO。 如果中断 GPIO 处的状态已更改,则相应地轮询每个输入板的当前状态,并在需要时触发事件。
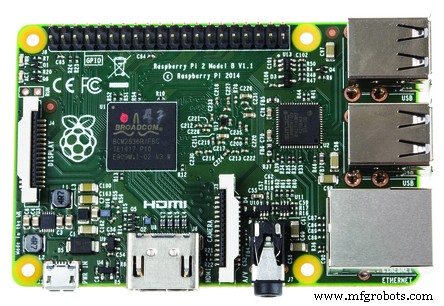
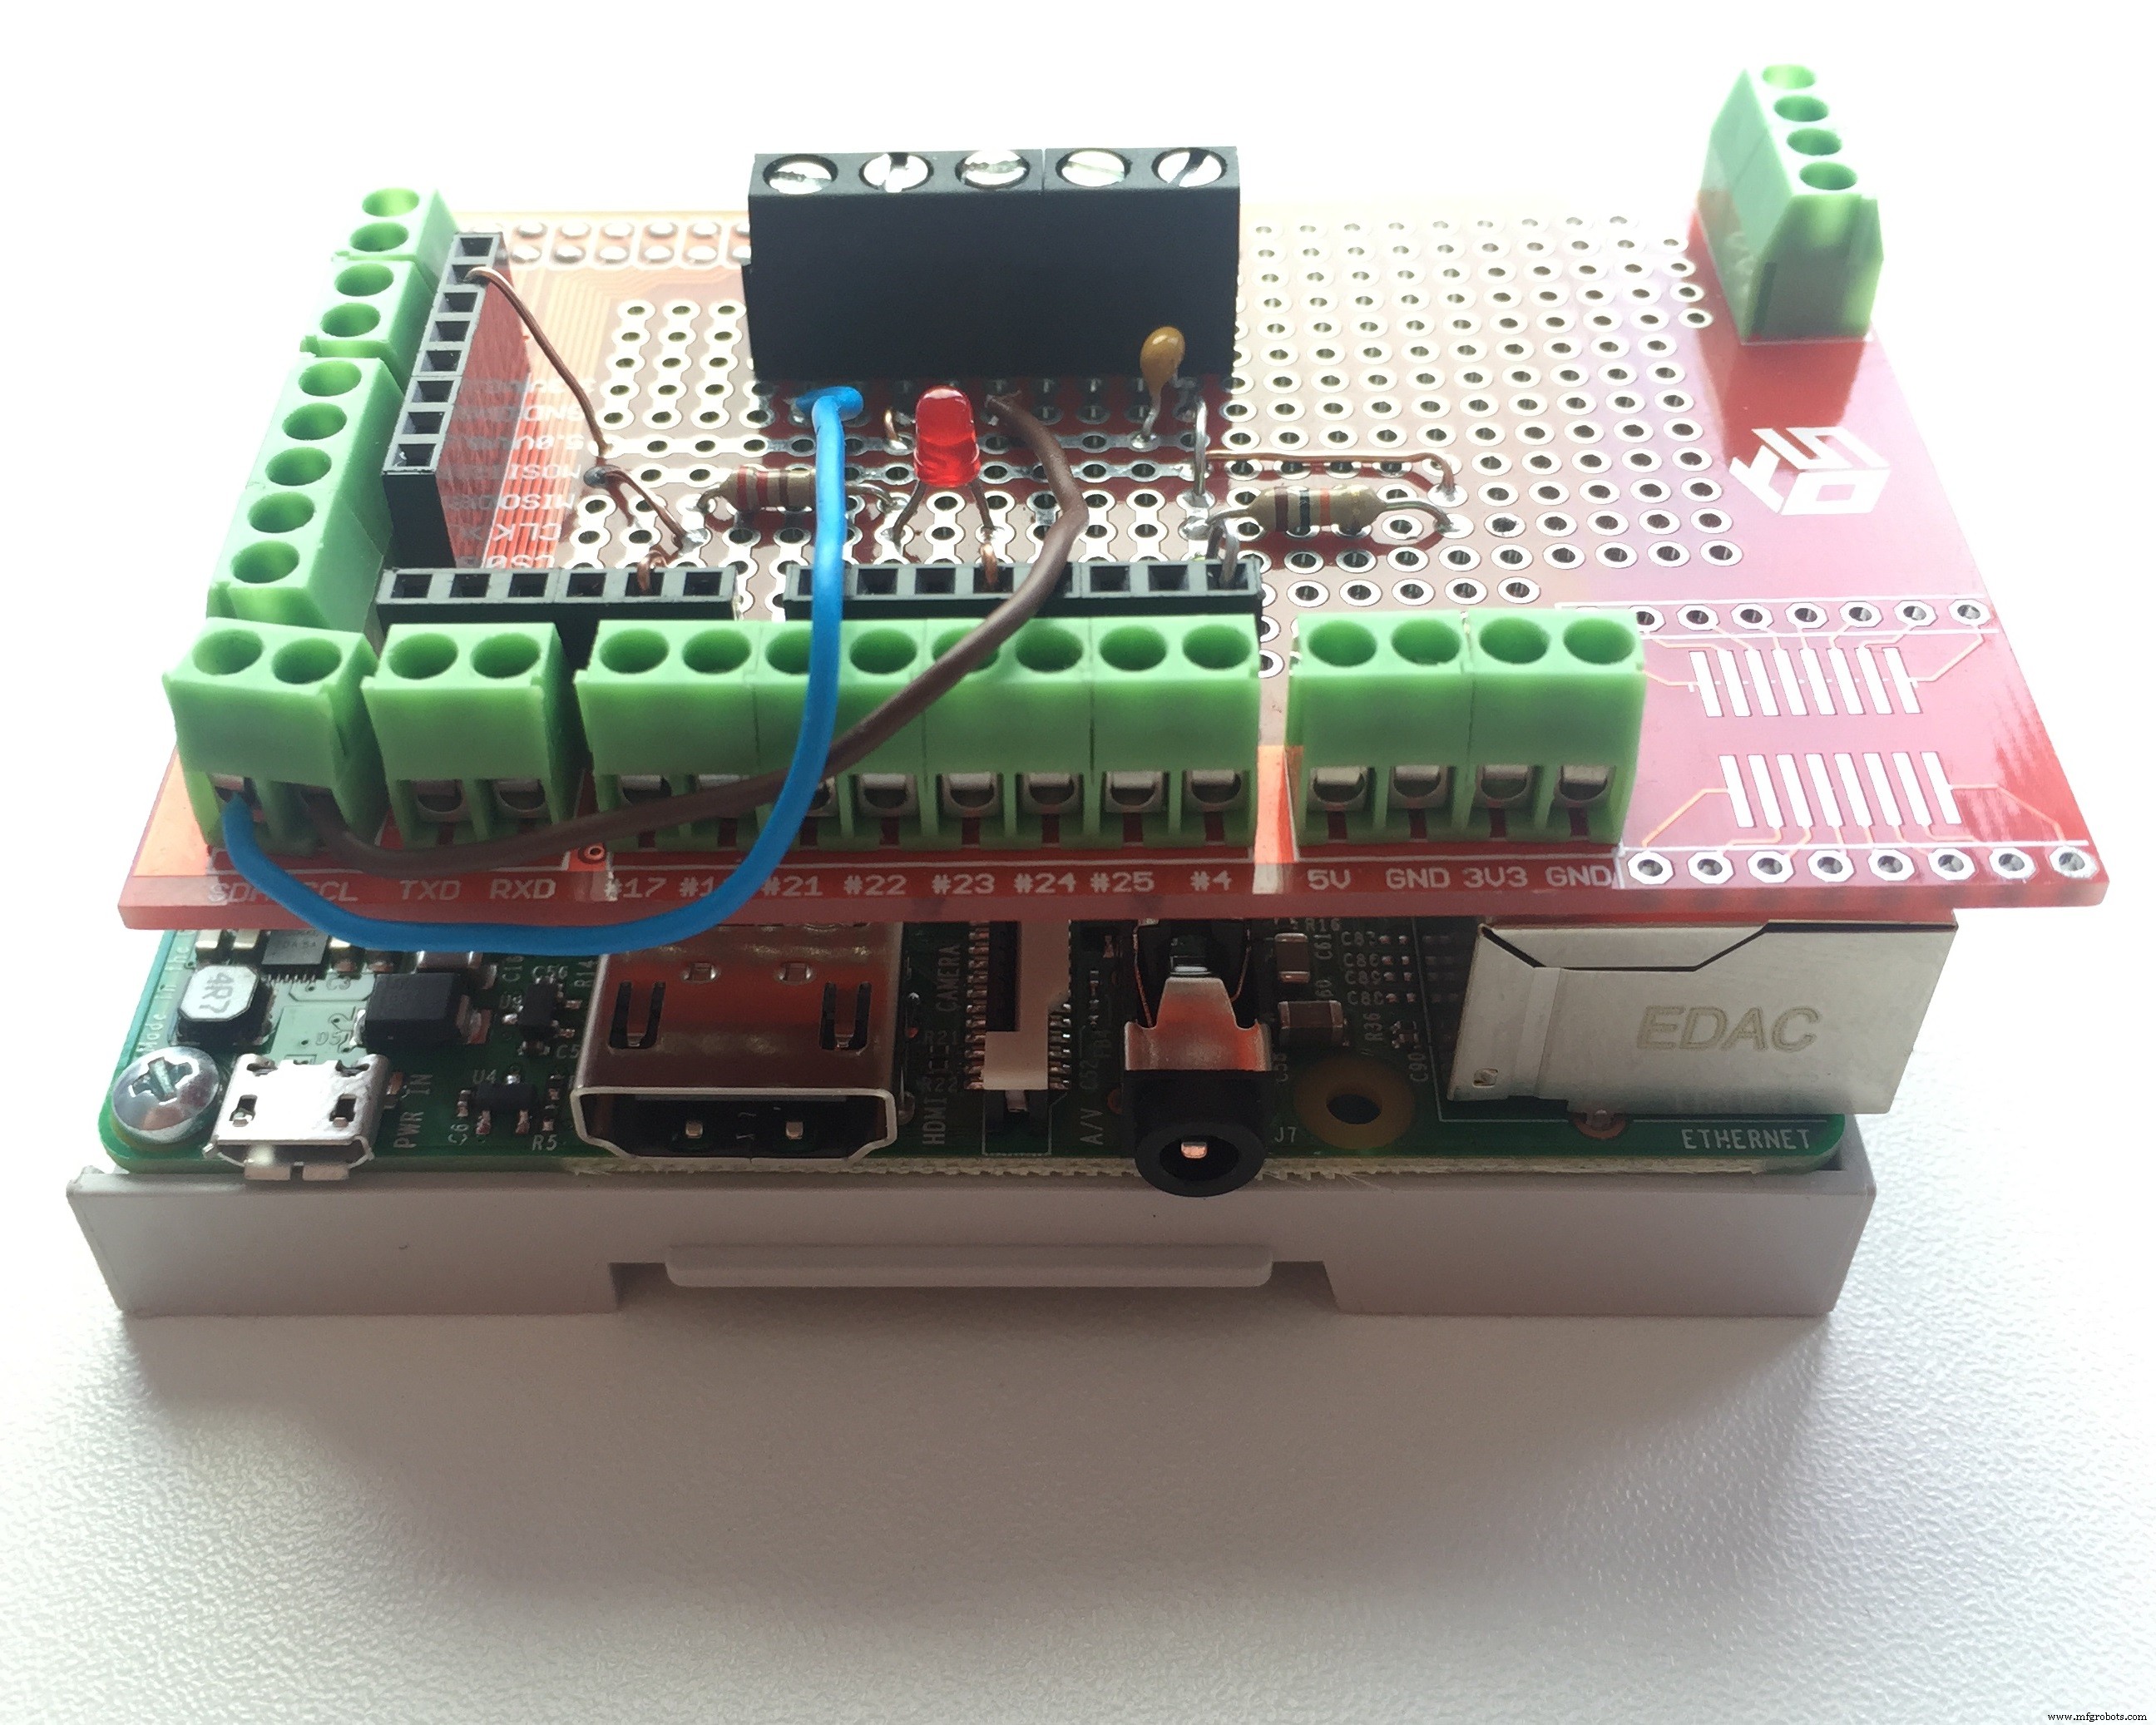
树莓派 2
Raspberry Pi 2 运行 Windows 10 IoT,并通过定制外壳安装到配电器上。它还有一个带有状态 LED 的原型保护罩,中断 带上拉电阻的端口 (10K ),一个保护电阻 (1K ) 和陶瓷电容器 (100NF ) 进行毛刺过滤。所有电缆都可以使用螺丝端子接线。

温湿度传感器
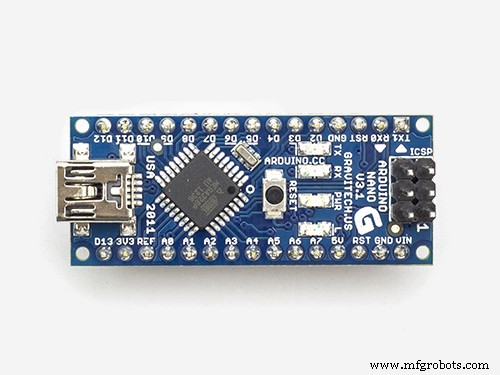
使用 DHT22 (AOSONG) 测量每个房间/地点(目前为 10 个)的当前温度和湿度。 该传感器使用不支持寻址的专有协议提供当前温度和湿度。这要求每个传感器都连接到微控制器。对于我的解决方案,我决定添加一个 Arduino Nano V3.0 作为I2C的奴隶 公共汽车。 Arduino Nano 每 2.5 秒从所有连接的传感器读取值并在本地缓存它们。这些值可以从Arduino Nano读取 发送端口 id (0-10) 后。使用 I2C 总线从寄存器读取数据时也是如此。
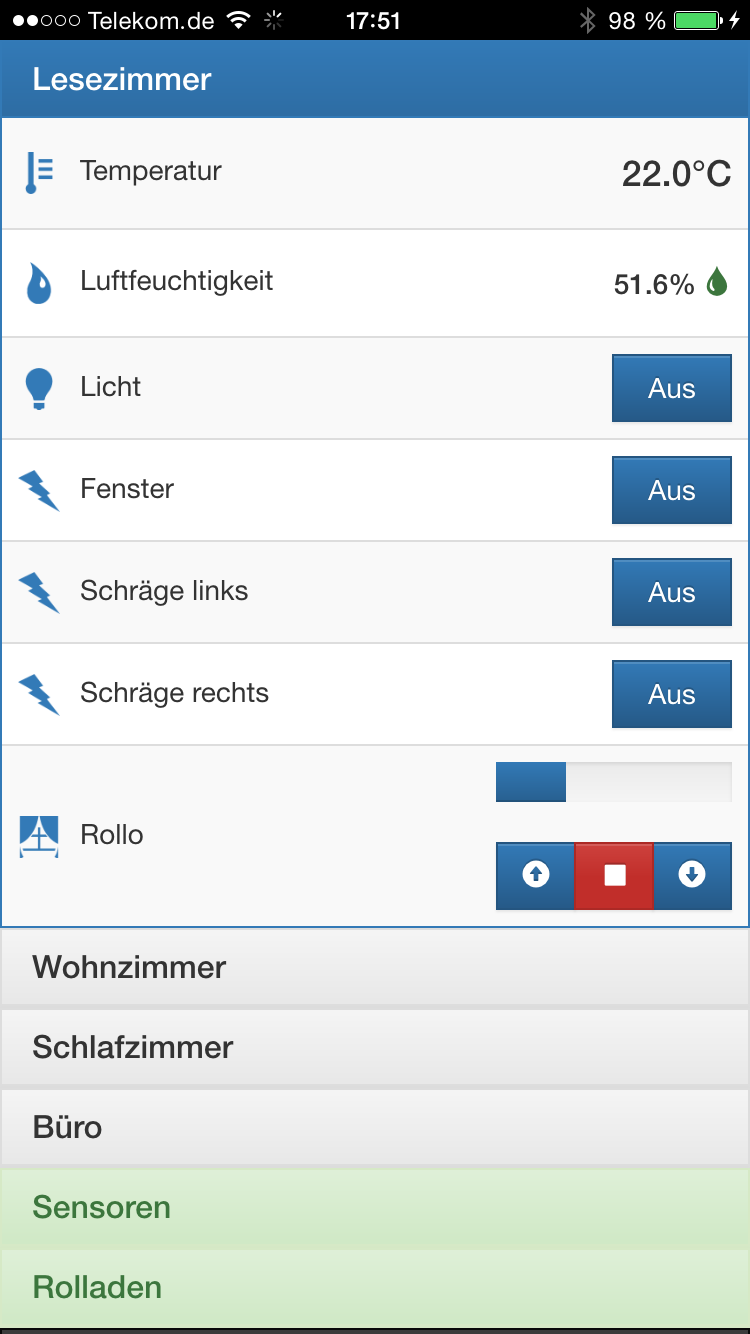
温度和湿度使用两种不同的视图在网络应用中显示。
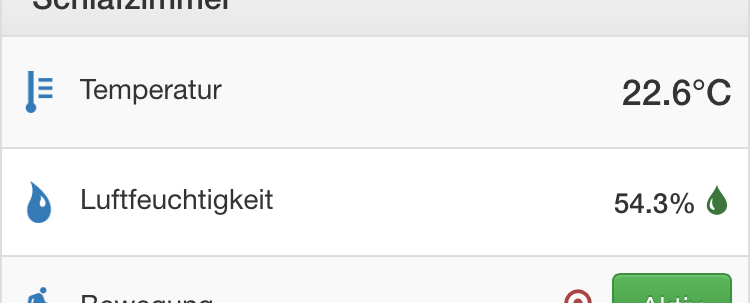
湿度右侧的图标 ("Luftfeuchtigkeit" ) 条目表明墙壁发霉的风险是否增加。小于 60% 的值是绿色 , 小于 70% 是黄色 并且超过 70% 是红色。
该网络应用还提供了所有传感器的概览。
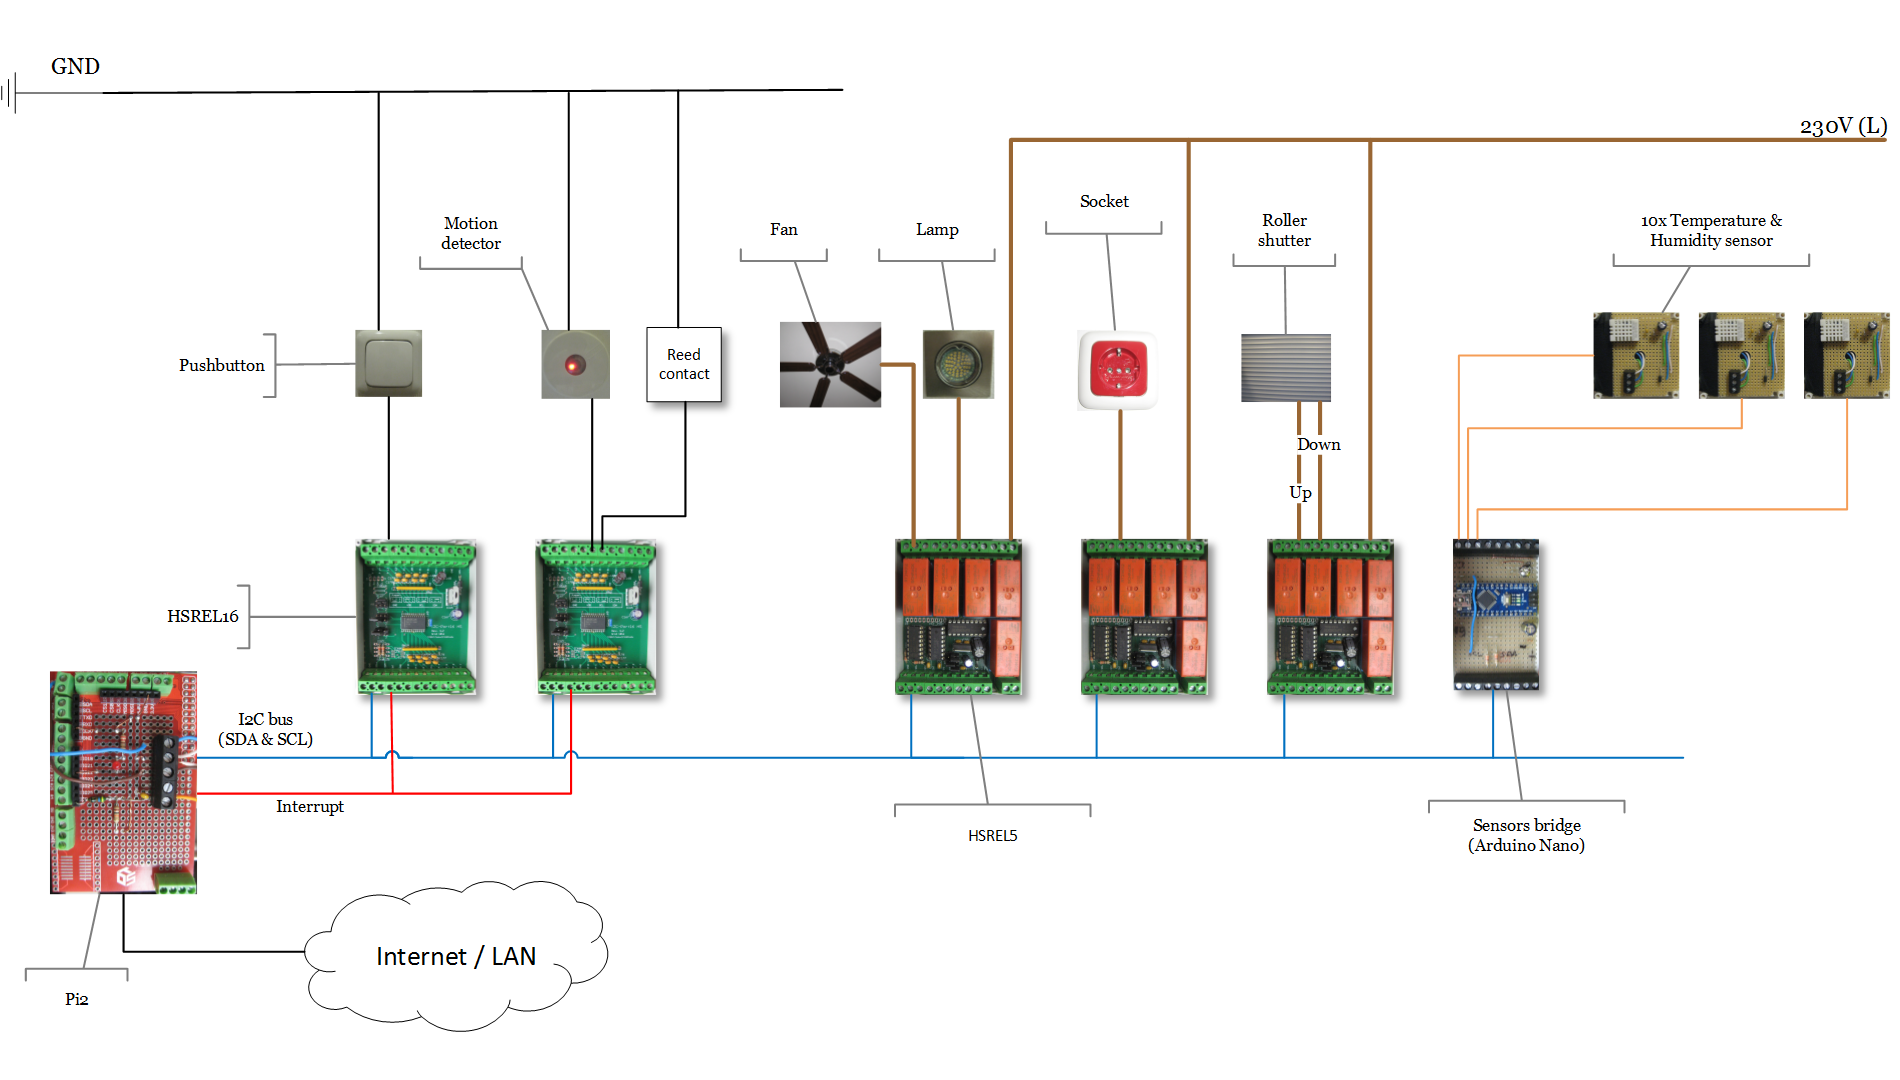
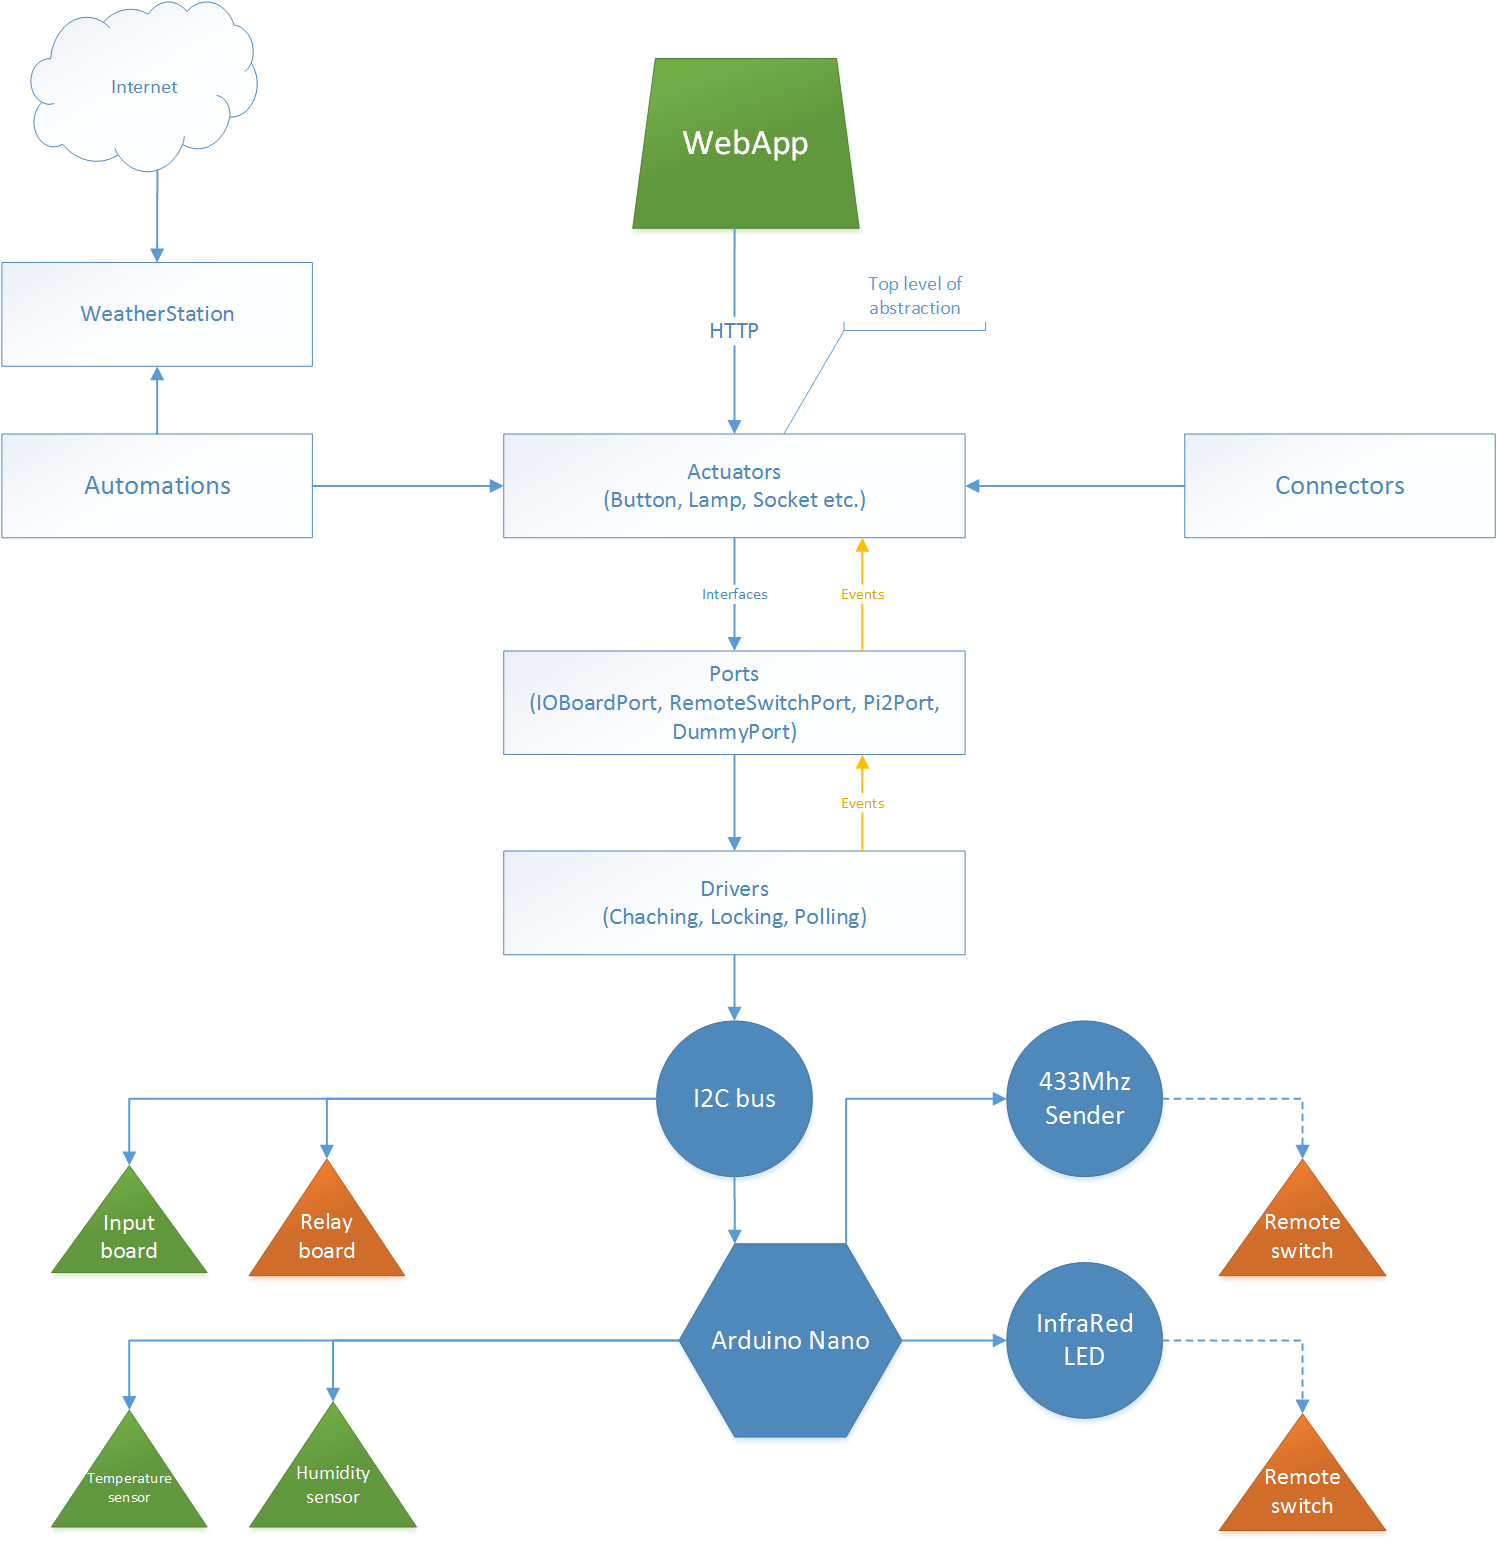
硬件设置
下图说明了使用输入和输出板的配电器上的硬件设置。未显示 12V/5V 电源和 N/PE 连接。
433Mhz远程中继
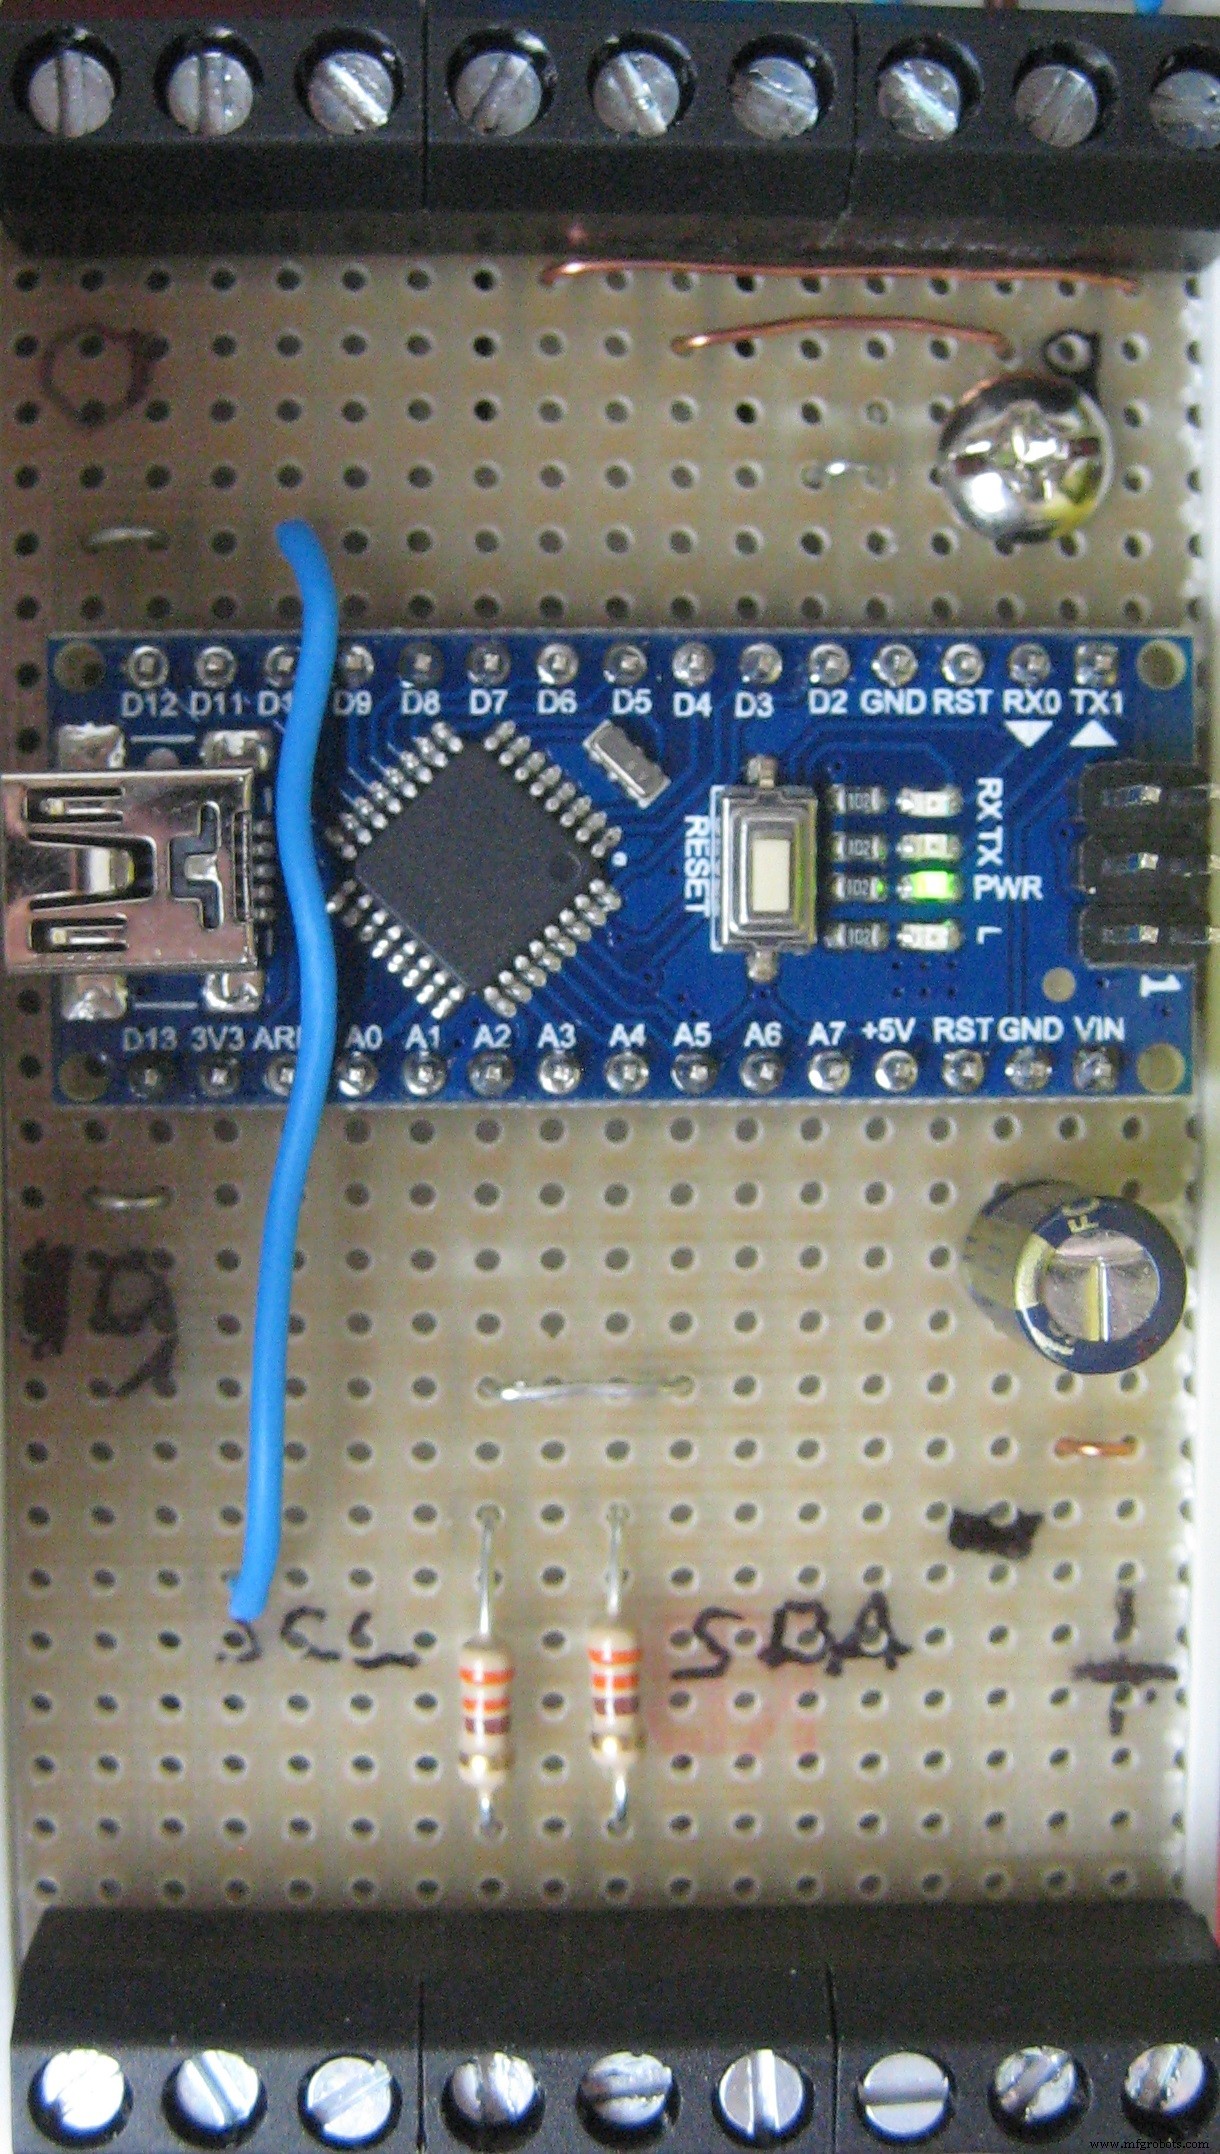
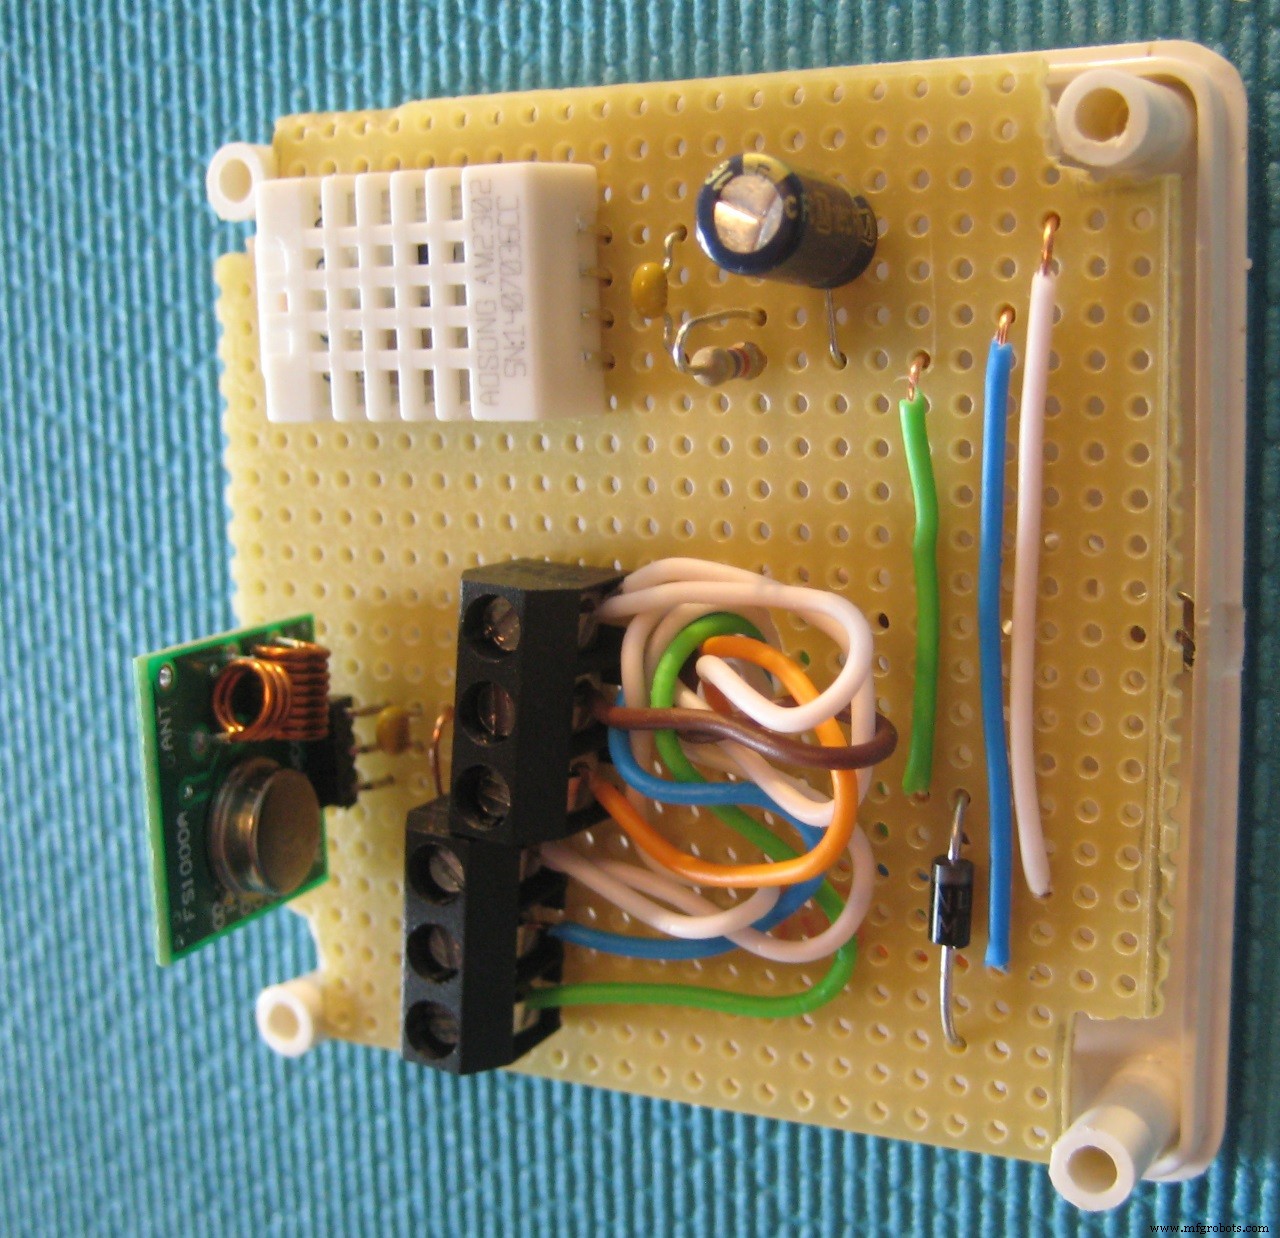
在此挑战过程中迁移和记录项目时,我还开发了 433Mhz 发送器单元,它与温度和湿度传感器一起方便地隐藏在一个普通的外壳内。
此功能使继电器板成为可选的。 Arduino Nano 负责DHT22 (温度和湿度)传感器也发送 433Mhz 信号。发件人 (FS1000A ) 与温度和湿度传感器一起安装在房屋中央房间的外壳内。为了进一步增加发射器的范围,它额外提供了 12V 供电(也可以使用 3.3 但范围较短)。
远程中继的主要问题之一是它们不发送任何状态信息。因此,用户绝对有可能通过使用原始遥控器将状态更改引入系统。为了强制同步,软件解决方案每 5 秒自动更新一次状态。这使 Web 应用程序上显示的状态尽可能可靠(但使原始遥控器的使用无用)。
远程继电器可用于每个自动化系统,并提供与继电器板继电器相同的功能。
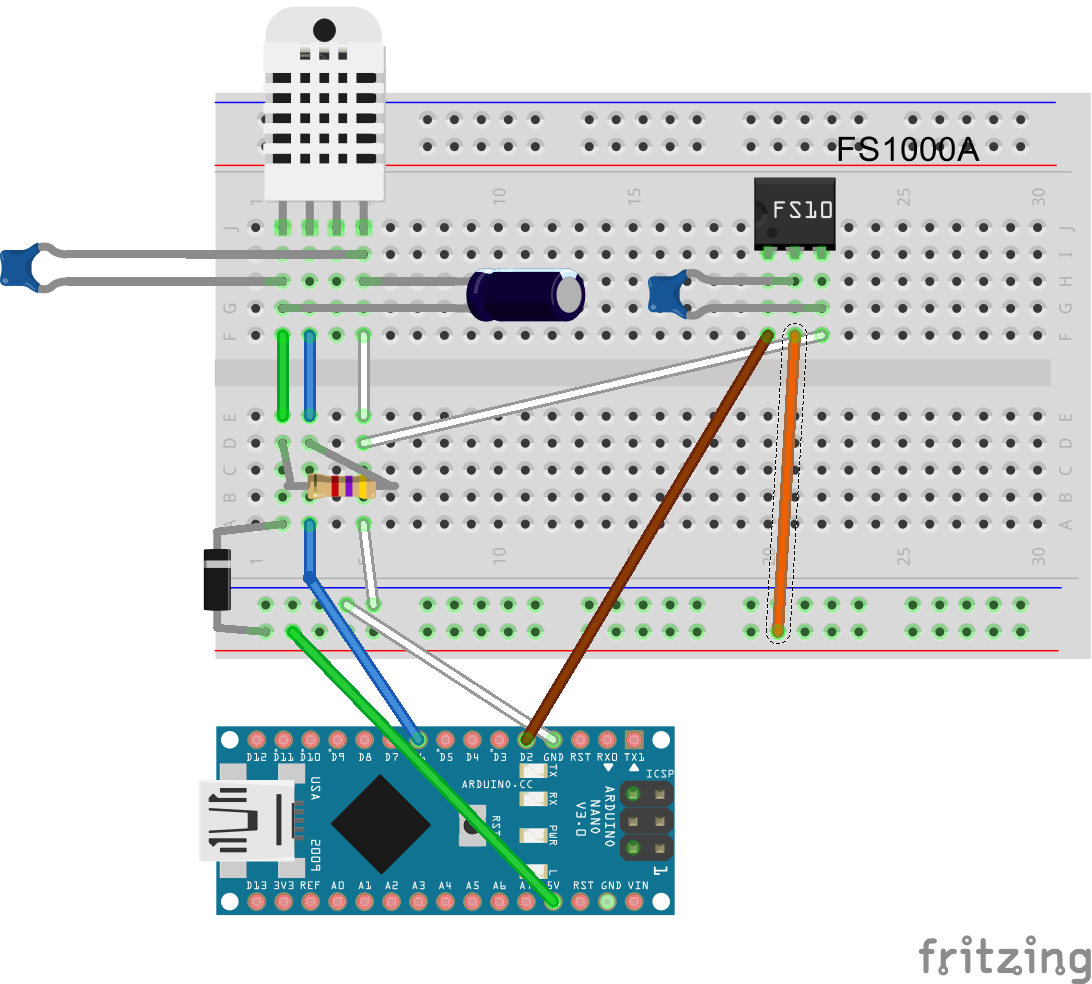
433Mhz 遥控器的代码目前只能通过原型板上的电路进行手动配置。然后将这些代码复制到配置中。 fritzing 下面参考了所需电路板的草图和 Arduino 草图位于存储库中的文件夹 CK.HomeAutomation.SensorsBridge\RemoteCodeFinder .
数字猫砂盒
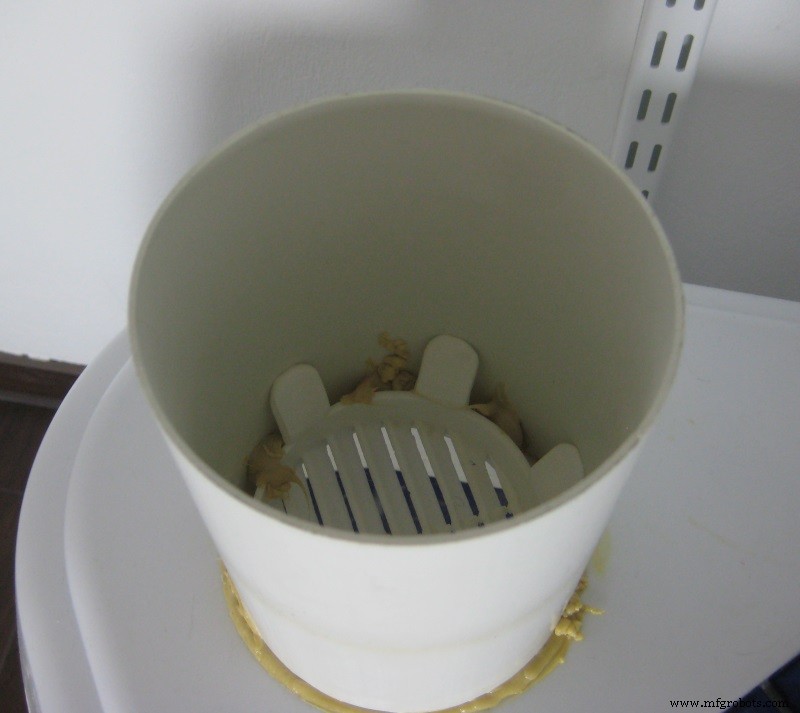
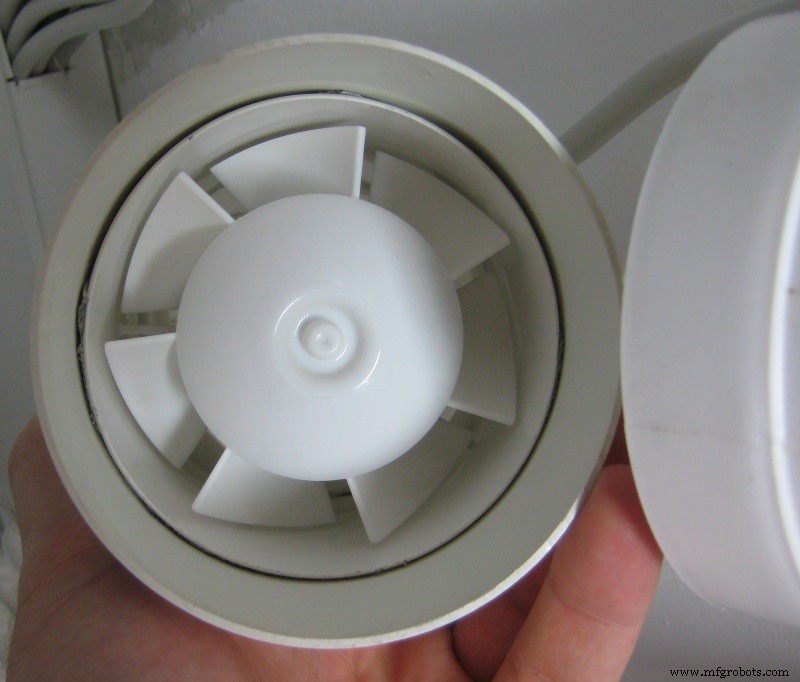
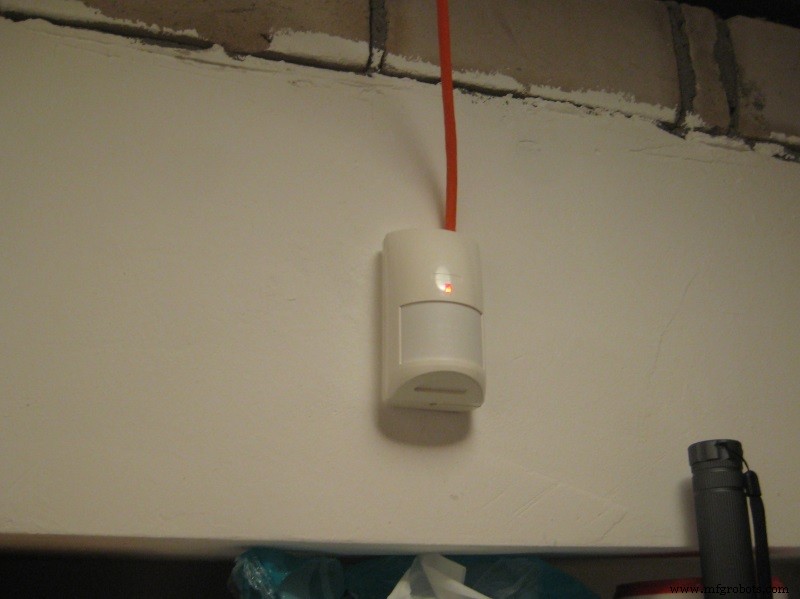
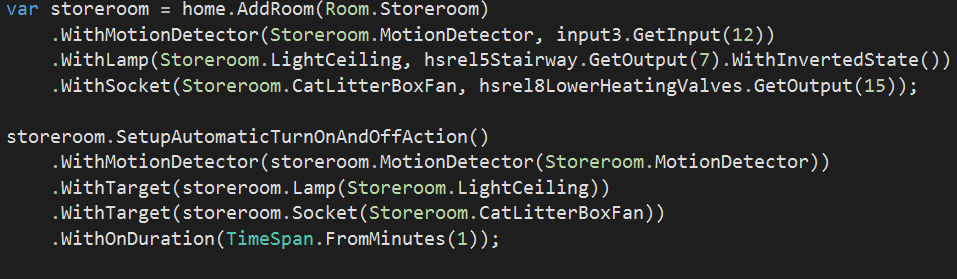
我们猫的猫砂盆放在储藏室,遗憾的是没有窗户让使用后的新鲜空气流通。由于这个问题,盒子连接到一个旧的未使用的 烟道。在连接到烟道的管子前面,有一个风扇连接到配电器的继电器。储藏室的运动探测器甚至可以检测到猫并启动风扇几分钟。
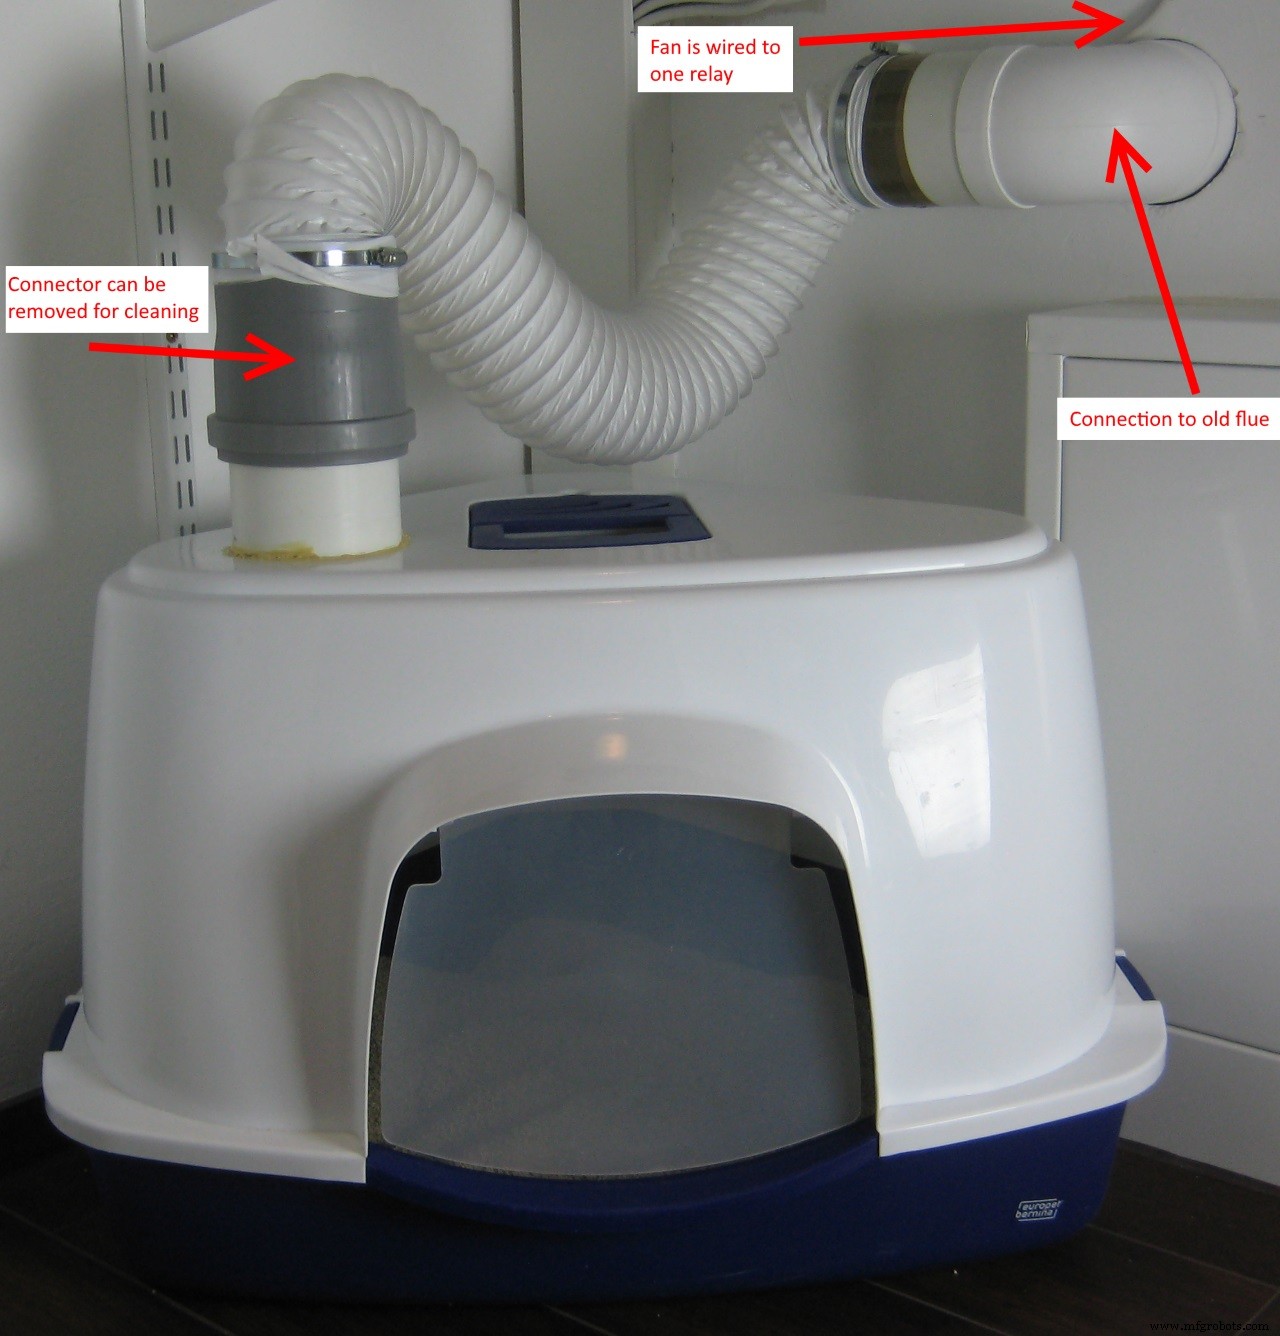
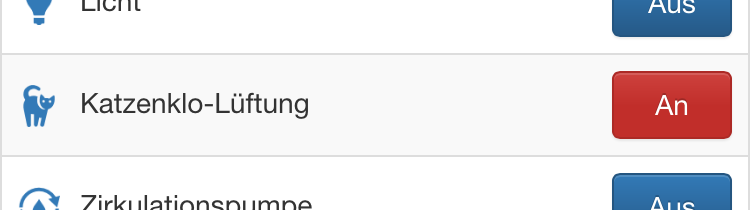
猫砂盆在网络应用程序上有自己的图标,可以远程控制风扇。
通过分析生成的日志并通过相应的执行器更改(Azure SQL DB 或 CSV 文件)进行过滤,我们可以跟踪猫的垃圾箱随时间的使用情况,从而改进所需的清洁间隔。
软件
在 Windows 10 IoT 发布之前,该软件在 G120 上运行 来自 GHI 电子 使用版本 4.3 中的 .NET Micro Framework。但主要是由于缺乏性能(120Mhz、16MB RAM 和解释器),并非所有计划的功能都按计划运行。
几周前,我开始迁移代码库以作为 Windows 10 IoT 后台任务运行,同时还添加了 Microsoft Azure 集成等功能。
下面引用的存储库包含 Visual Studio 2015 解决方案和所有相关项目。只需将 Raspberry Pi 2 用作家庭自动化控制器,同时通过为其他继电器板或传感器编写自定义驱动程序来进行扩展。
项目
软件解决方案的项目分为:
- 应用程序(包含网络应用程序)
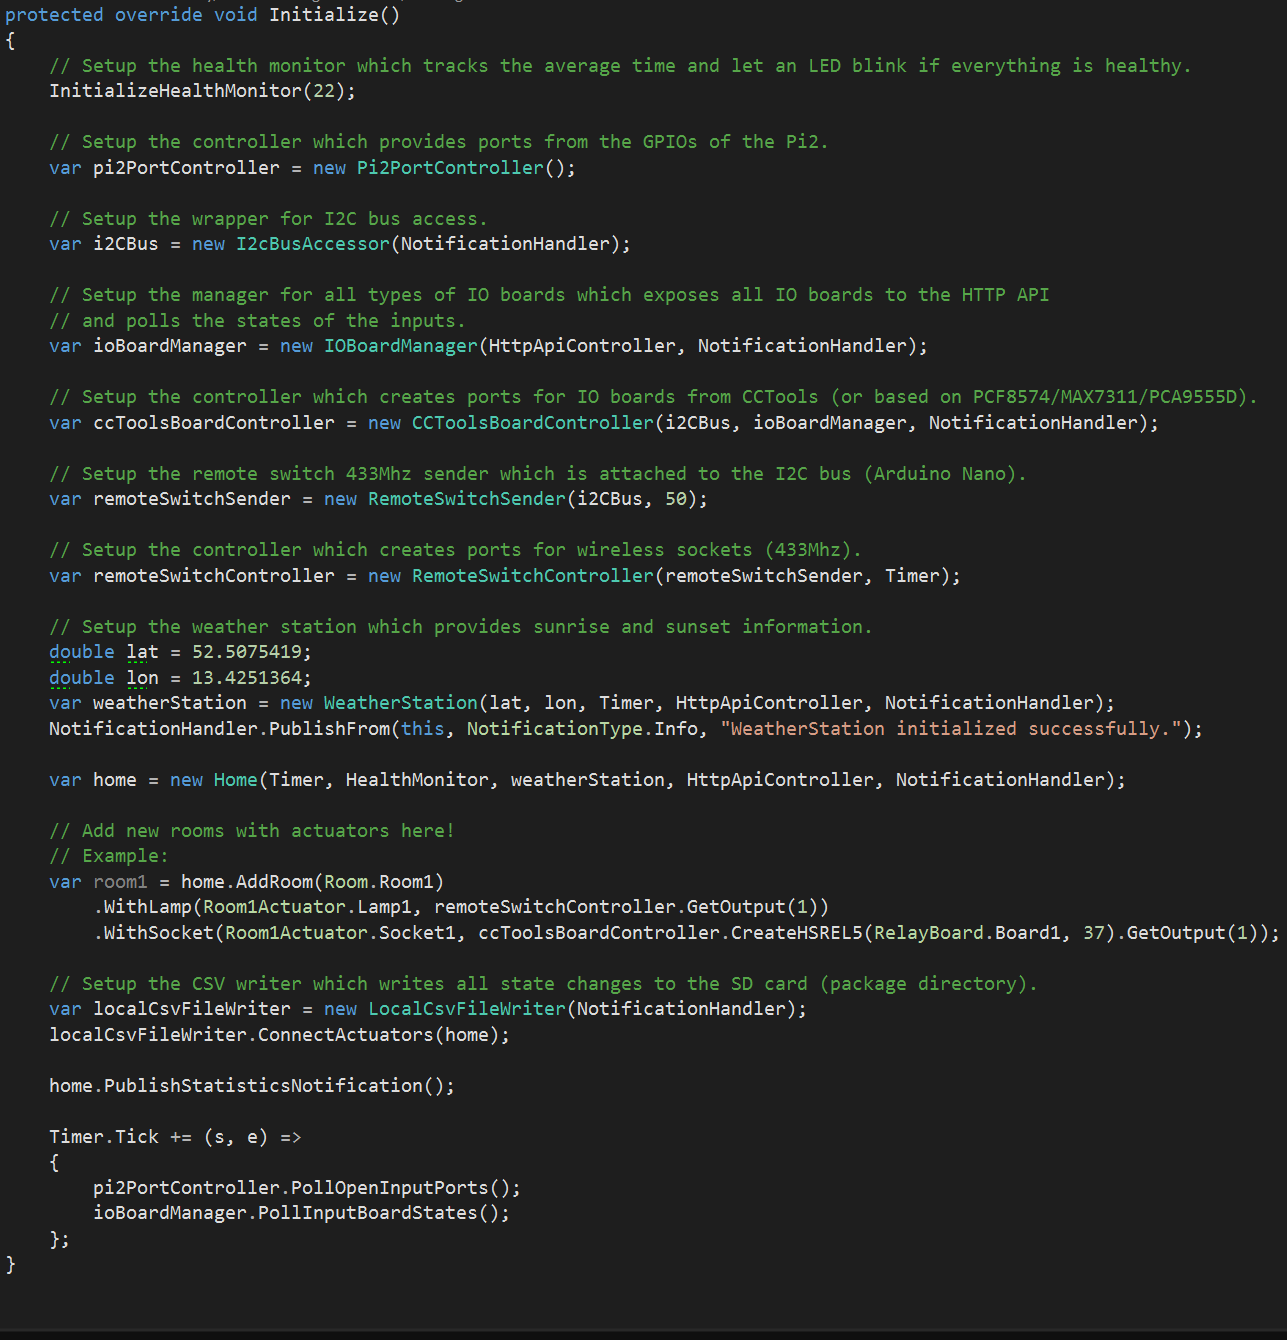
- 控制器(包含 Pi 的启动项目和家庭配置)
- SDK(包含所有共享项目)
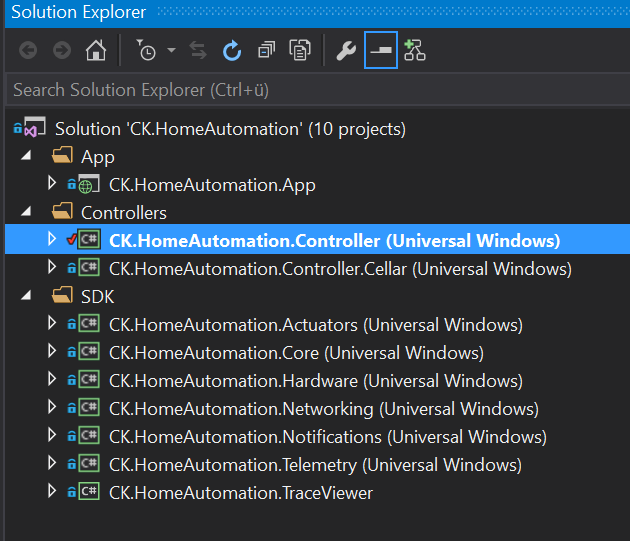
CK.HomeAutomation.TraceViewer
该项目包含一个控制台应用程序,用于显示控制器(Pi2 实例)发送的跟踪消息。当前,所有通知都使用 UDP 套接字连续发送到广播地址。因此需要在防火墙上打开一个端口(例如 19227)。我主要使用 TraceViewer 来查找错误和/或错误配置。

发送通知所需的所有类都位于项目 CK.HomeAutomation.Notifications .
CK.HomeAutomation.Networking
该项目包含基本 HTTP 服务器的实现。 Web 应用程序需要 HTTP 服务器,并以 JSON 格式提供状态信息并接受状态更改的请求。
HTTP 服务器还能够托管 Web 应用程序。由于包名称不同,必须使用管理 SMB 共享将 Web 应用程序的内容手动上传到目标文件夹。
目标文件夹:\\[IP]\c$\Users\DefaultAccount\AppData\Local\Packages\CK.HomeAutomation.Controller-uwp_p2wxv0ry6mv8g\LocalState\app
CK.HomeAutomation.Controller.*
Controllers 中的每个项目 文件夹是一个启动项目 实施一个物联网后台任务 .在提供详细文档之前,人们可以使用这些项目(目前在我家中使用)作为示例。
另外我提供项目 CK.HomeAutomation.Controller.Empty 作为尝试解决方案的起点。 注意 :名为 Cellar 的控制器 负责花园和停车场灯的设备不在本文档中。
在测试解决方案之前,您应该熟悉以下任务:
- 从头开始使用 Windows 10 IoT 设置 Raspberry Pi2 (https://ms-iot.github.io/content/en-US/win10/SetupRPI.htm)
- 使用 Microsoft PowerShell 远程会话连接 Raspberry Pi2 (https://ms-iot.github.io/content/en-US/win10/samples/PowerShell.htm)
- 将通用 Windows 应用部署到 Raspberry Pi2。
解决方案目录还包括一个小的 PowerShell 名为 SetupRaspberryPi.ps1 的脚本 执行常见的命令链来设置 Raspberry Pi2。建议但不要求您执行脚本(确保根据您自己的基础架构调整所有 IP 设置 ).
CK.HomeAutomation.Actuators
该项目提供了最高级别的抽象。本项目实现了家庭、房间末端的按钮、灯、插座等各个执行器,并根据各个执行器的特点提供了特殊的事件和方法。
可以使用 fluent API 创建房间,这使得配置易于阅读和理解。
MotionDetector - 执行器
该执行器用于检测房间内的人和运动。我使用 Abus 的运动检测器 BW8085 360° 安装在每个房间的天花板上。
运动检测器执行器的实现提供了两个事件。两者中的第一个是 MotionDetected 检测到运动时触发的事件。物理运动检测器将输出保持在 HIGH 直到没有检测到进一步的运动,此时第二个事件 DetectionCompleted 被解雇了。
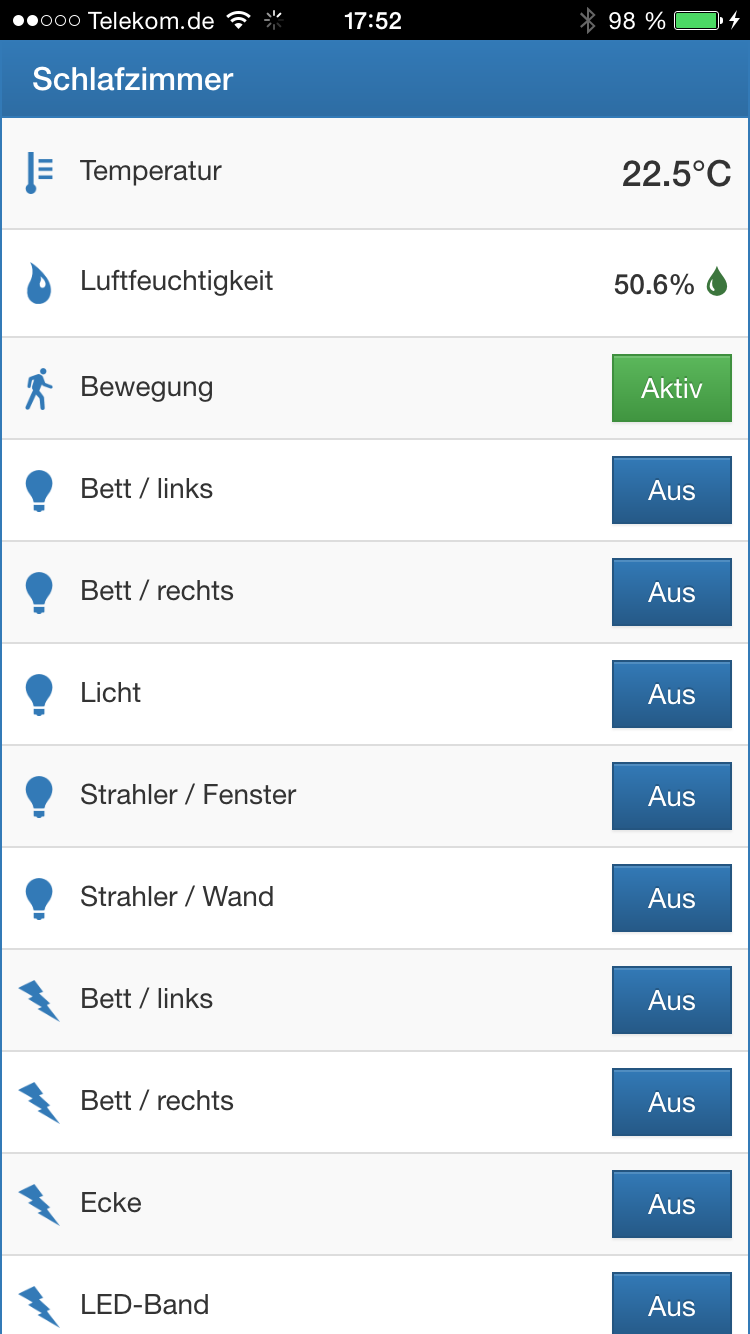
下图显示了 Web 应用程序中运动检测器的条目。每个运动检测器都可以使用 Web 应用程序停用(仅在软件中)。红点表示当前检测到运动。

按钮 - 执行器
这个执行器代表一个物理按钮。该按钮有两个事件,表明它被按下。事件 PressedShort 如果按钮按下时间很短(<1.5 秒),则触发,而事件 PressedLong 只有在长时间按下按钮(> 1.5 秒)时才会触发。如果超过持续时间(1.5 秒)并且没有释放按钮,第二个事件也会自动触发。这两个事件允许按钮具有多种功能。
示例:

该解决方案还包含一个 VirtualButton .这个按钮实现了相同的接口(IButton ) 并且只能使用网络应用程序“按下”。
插座、灯、BinaryStateOutput - 执行器
基类 BinaryStateOutput 用于支持二进制状态(ON 和关闭 ) 只要。这些执行器的示例是 Socket 和 灯 .基本实现提供了更新方法 (ON 和关闭 ) 或切换状态。 按钮 可以与实现 IBinaryStateOutputActuator 的对象交互 ,这允许添加多个自定义执行器。
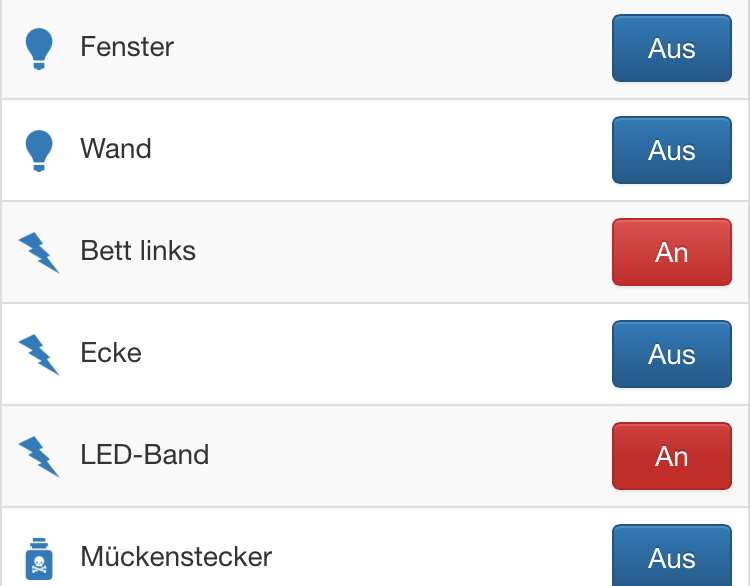
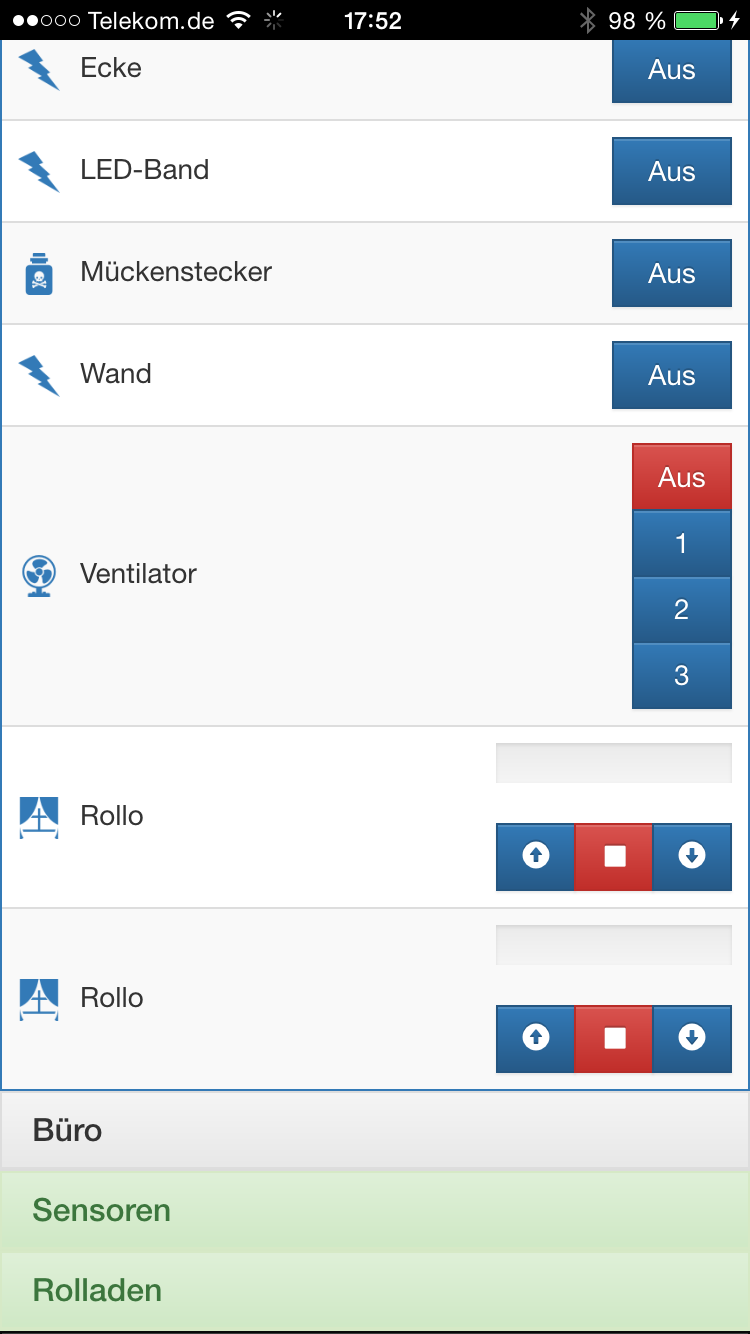
下图显示了每个二进制状态输出的模板。左侧的图标对于插座和灯是不同的。自定义图标,例如“Mückenstecker 中的毒瓶” " 条目可以使用配置文件 (Configuration.js ) 用于网络应用。
组合二进制状态执行器
BinaryStateOutput 类型的每个物理执行器 可用于创建逻辑二进制状态执行器。如果状态应该被切换,则必须将一个执行器设置为“主”,这是确定新状态所必需的。执行器有自己的ID,可以像任何其他二进制状态输出执行器一样使用(实现了所需的接口)。
这种实现的一个重要优点是处理状态更新的方式。通常一个二进制状态输出的新状态通过I2C总线直接一个一个地提交给每个设备。这种行为会在每次执行器状态更新之间产生短暂但可见的延迟。 CombinedBinaryStateActuator 使用内部更改跟踪来防止这种延迟。
示例:

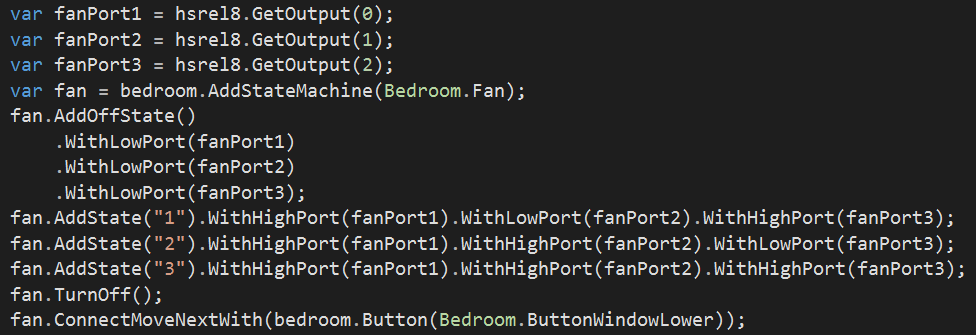
状态机 - 执行器
比 ON 更复杂的状态 和关闭 are possible to configure using the StateMachine . This actuator allows multiple states for ports (relays) or other binary output actuators.
Example with a fan:
The state machine provides methods to turn it off or moving to the next state. The state is reset to OFF if the last state of the state machine has been reached and the initial state should be applied next.
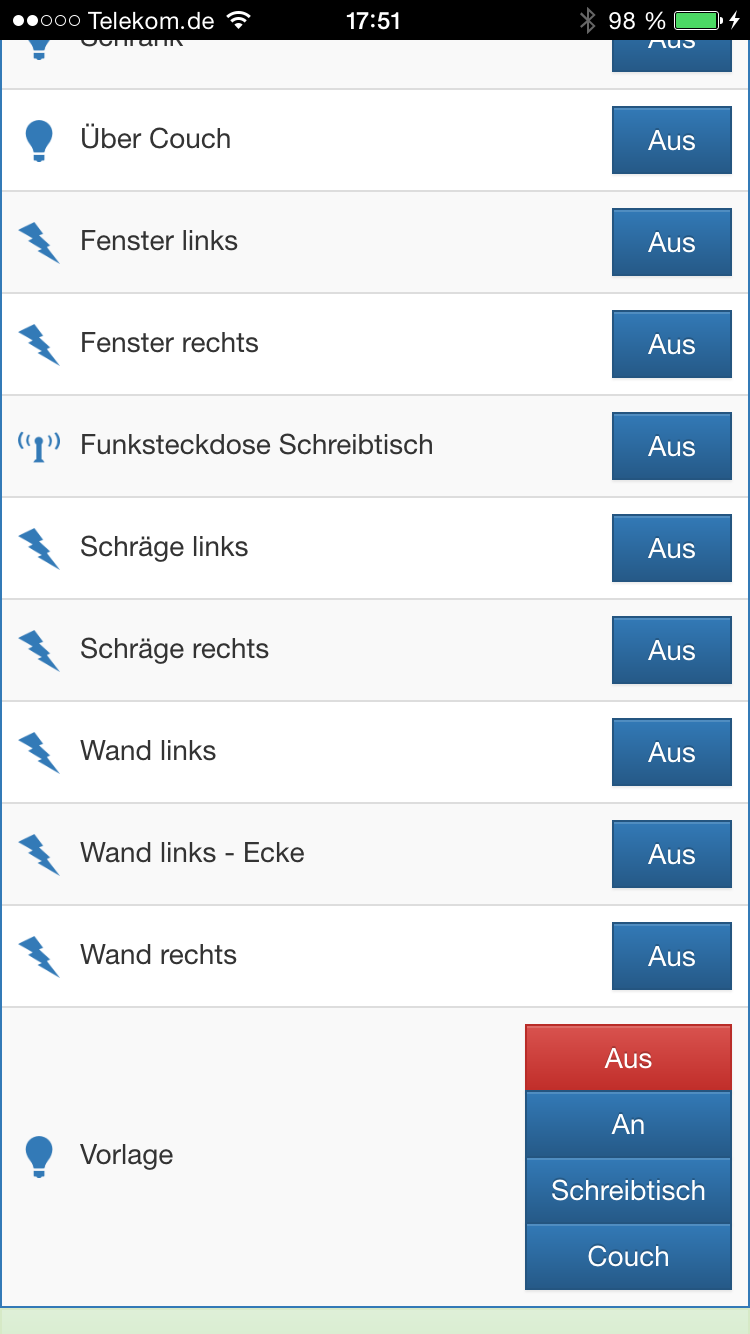
Another use case for the state machine is creating templates or "moods" for a couple of other actuators.
Example mood:
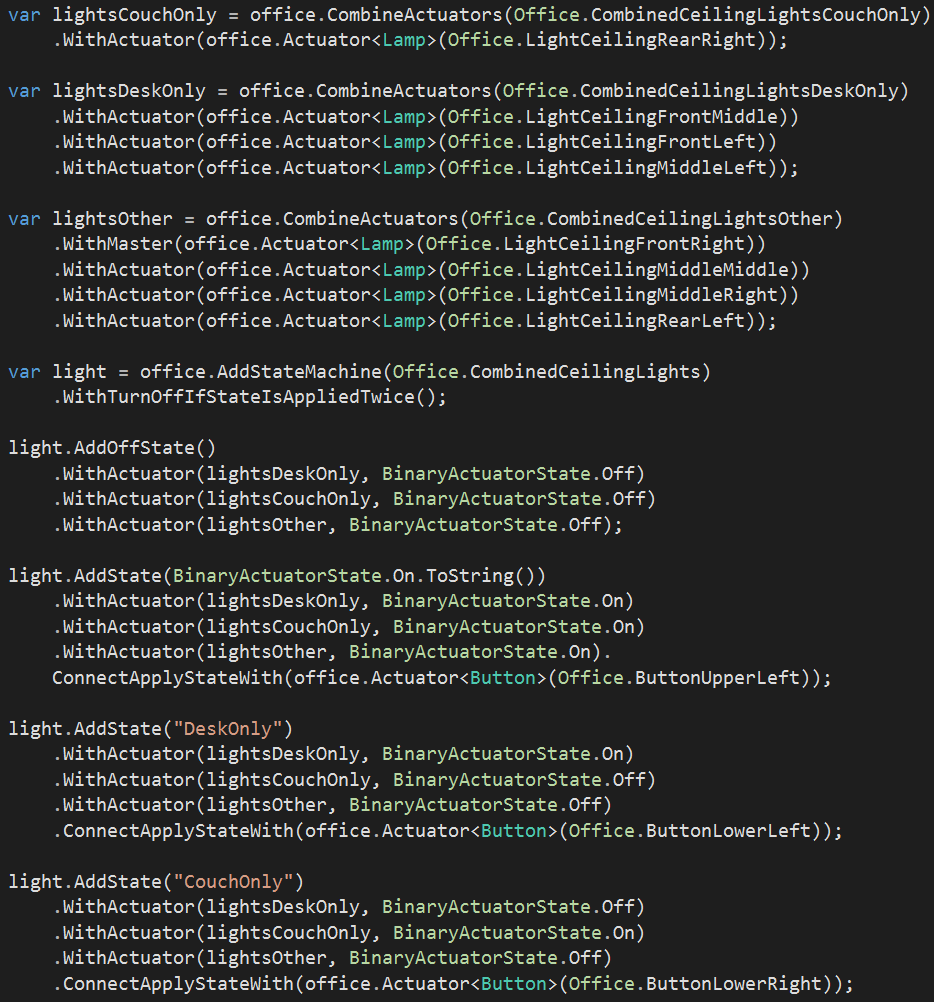
The method WithTurnOffIfStateIsAppliedTwice ensures that the state of the state machine will change to OFF if a particular trigger has been activated a second time as the configured state is still active (Example :Pressing the push button for "DeskOnly " will activate the "DeskOnly " mood. If the push button is pressed again while the "DeskOnly " mood is still active, the actuator applies the OFF 状态。 A dedicated push button for the OFF state is not needed.).
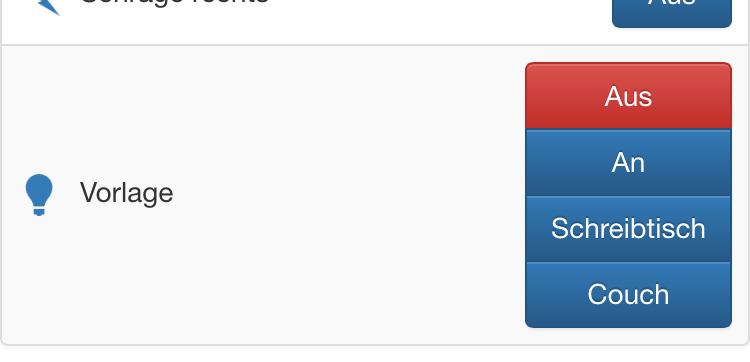
The following image shows the template for state machines. The caption and image of each state can be changed using the configuration file of the web app.
TemperatureSensor / HumiditySensor
The values for temperature and humidity are read using the I2C sensors bridge. Both values are read from a single physical device but separated into an actuator for temperature and an actuator for humidity. The values are automatically polled every 10 seconds.
Home Automation !=Home Control
As mentioned before the importing thing is automation. Without automations, the whole solution is only one big remote for the home. This solution provides several automations:
AutomaticTurnOnAndOffAutomation
This automation sets the connected binary state outputs to ON. A push button or motion detector can be used as the trigger. It is required to specify the desired duration of the ON 状态。 The state is set to OFF if that range exceeds. The state is automatically set to OFF if the specified range is exceeded. An optional time range can be provided in which the automation rule is enabled. Predefined ranges for "day only " or "night only " are available (requires a weather station object).
Example:

AutomaticRollerShutterAutomation
This automation is used to move several roller shutters automatically according to several conditions. One of these conditions is sunrise and sunset which means that the roller shutters are automatically moving up at sunrise and moving down at sunset (requires a weather station object). It is also possible to add a diff to sunrise and sunset. According to the sunrise and sunset feature, it is possible to specify a time for "do not open before" which will ensure that the roller shutter is never opened before that point in time has been reached. Another condition is the outside temperature (also requires a weather station object), which enables the roller shutters to be closed automatically if the outside temperature exceeds a certain value like for example 28°C. This feature is intended for roof windows.
The position of the roller shutter is also tracked via time measuring. The required duration between up and fully closed must be configured.
Example:

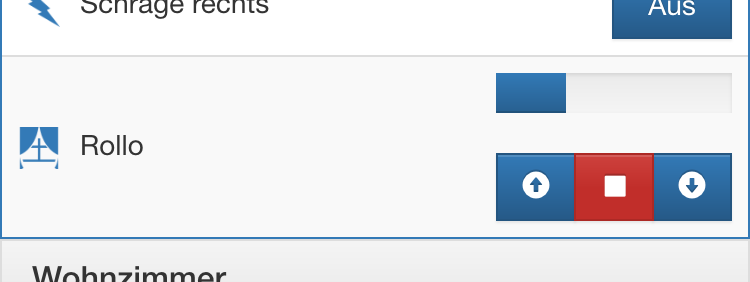
The following screenshot shows an entry for roller shutters at the web app. The progress bar over the buttons is showing the current position.
AutomaticConditionalOnAutomation
This automation is used to set the state of several binary state outputs to ON while conditions are matching. This automation is used for lamps in the garden which are only ON 在晚上。 It is possible to specify one time range for the ON state and multiple time ranges for the OFF 状态。 It is also possible to use sunrise and sunset for the ON state (requires a weather station object).
Example:
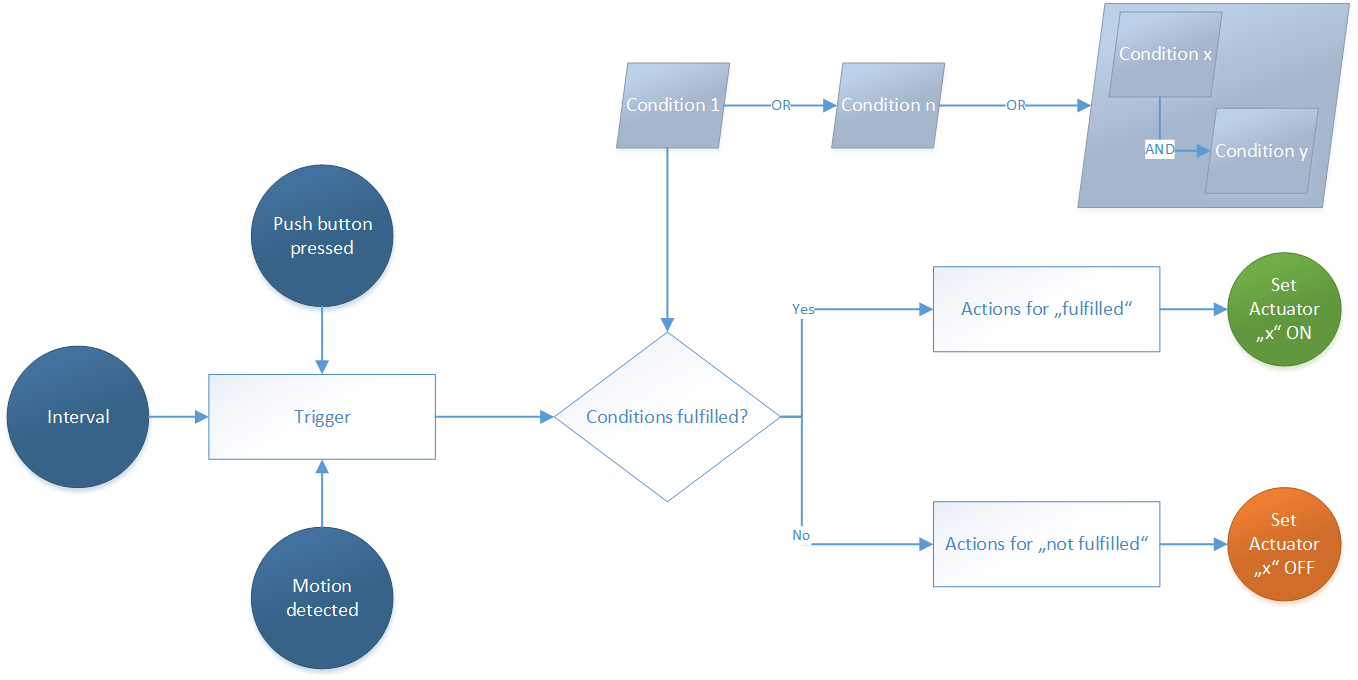
General automation and complex conditions
The latest feature of the new implementation is a generic automation and condition framework. The generic automations are designed to execute custom actions if the configured conditions are met. This is checked every time a trigger is invoked via a push button, motion detector, interval or any other code.

Weather station
Many of the automations and conditions are depend on environment conditions like the current weather, sunrise and sunset times, outside temperature or humidity. All of these information is currently provided every 60 seconds by a virtual weather station backed by WebApi of OpenWeatherMap. The virtual weather station is implemented using the interface IWeatherStation , this makes it easy to seamlessly integrate physical stations located in garden.
CK.HomeAutomation.Hardware
This project contains the drivers for all currently supported input and output devices. Specifically the relay boards, input boards from CCTools and 433Mhz remote switches. The driver and source code of the Arduino Nano (sensor bridge and 433Mhz sender) is included too. All higher level objects like actuators and automations are implemented against interfaces to add an abstraction layer to the concrete bare to the metal hardware classes. This makes it easy to later add further drivers for other boards and sensors.
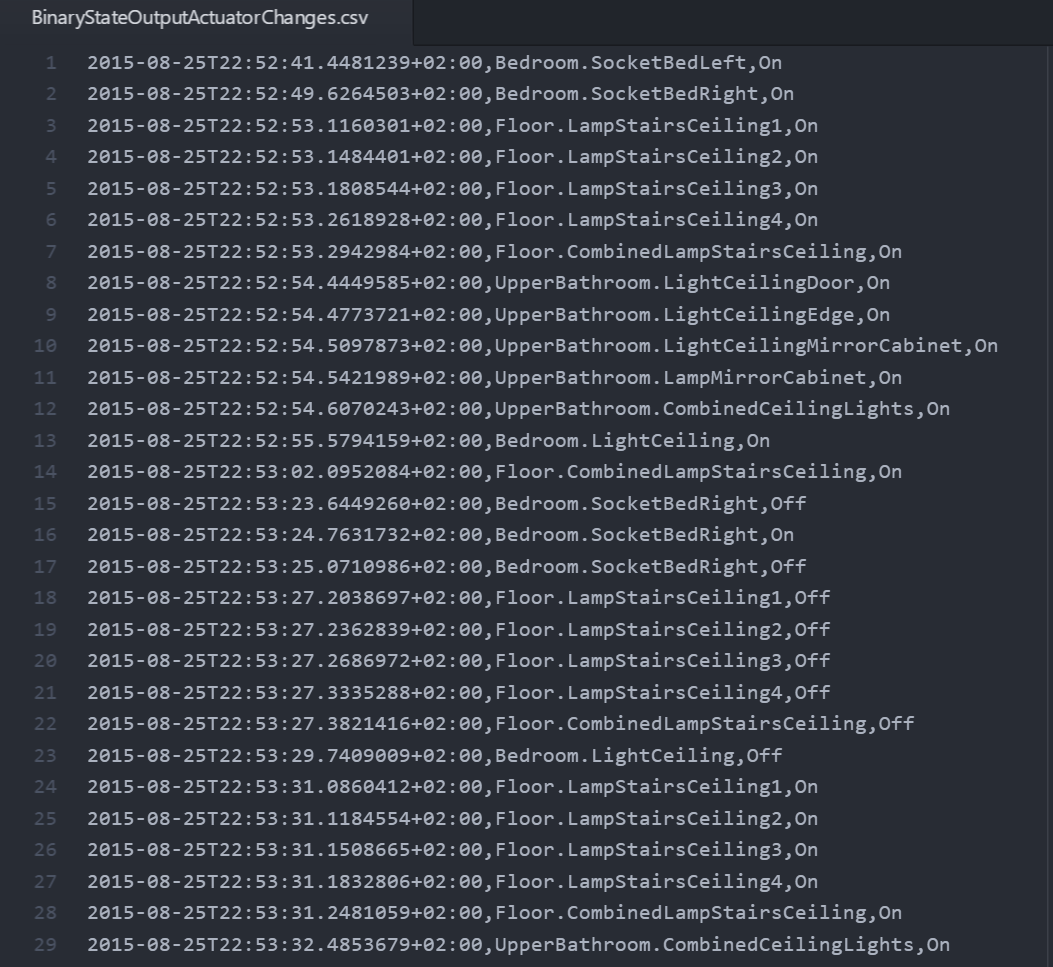
CK.HomeAutomation.Telemetry
This project contains two components. The first one is a CSV writer which writes every changed state to the "LocalState" directory of the package. This file can be downloaded from the Pi2 using the administrative SMB share: \\192.168.1.15\c$\Users\DefaultAccount\AppData\Local\Packages\CK.HomeAutomation.Controller-uwp_p2wxv0ry6mv8g\LocalState\BinaryStateOutputActuatorChanges.csv .
Example content of the the CSV file:
The second component is the AzureEventHubPublisher . This component sends events for any state has change and the values of any sensor change to an Microsoft Azure EventHub . Events are also generated if push buttons are pressed or motion is detected. The solution contains the SQL scripts for creating the required SQL database tables and the required query for a StreamAnalytics job (in folder #Azure).
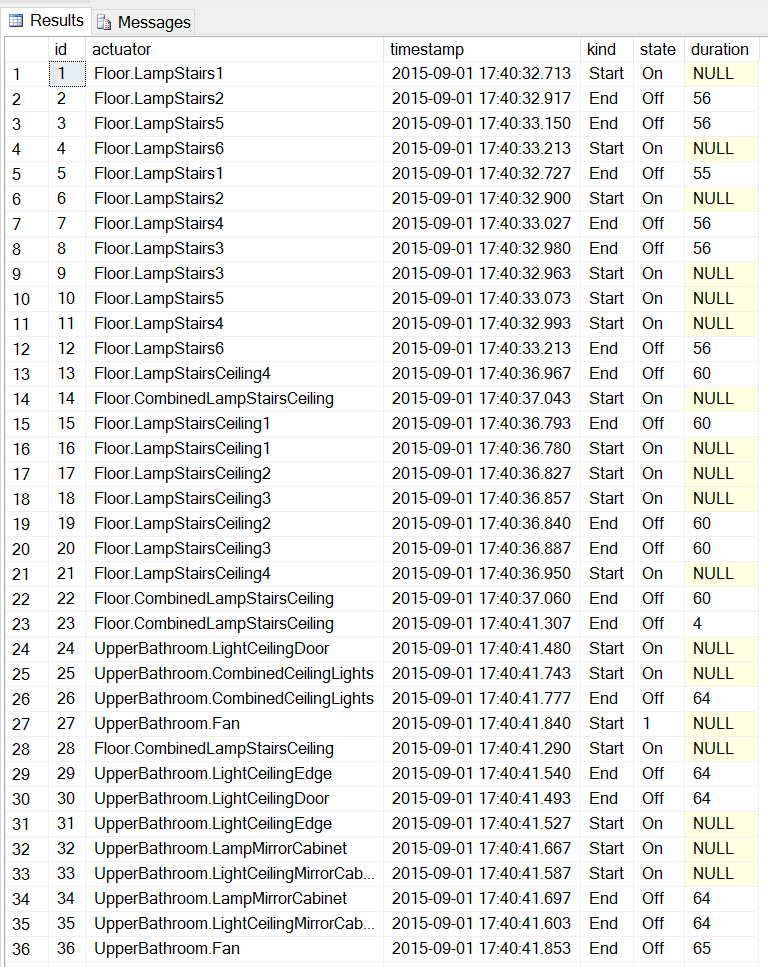
Every changed actuator state generates to entries at the Azure SQL 数据库。 The first entry contains the START event and the new state. The second entry contains the END event with the total duration of that state in seconds.
I already created some reports using a free Microsoft PowerBI 帐户。
WebApp
The software solution contains the project CK.HomeAutomation.App 。 This project is a web app building on top of AngularJS , jQuery and Bootstrap . The room configuration is read from the controller (Pi2) and the UI is generated according to the existing rooms.
The web app can be opened directly from the file system using the index.html file or uploaded to a web server. The file Configuration.js is used to configure and translate the web app. The IP address of the Controller (Pi2 instance) must be set in the configuration file.
The web app can be added to the home screen of iOS only if it is hosted at a web server (I am personally using a BananaPi with nginx). Adding a web app to the home screen is described here: http://www.tech-recipes.com/rx/44908/ios-add-website-shortcut-to-home-screen/
Hosting the web app at the Raspberry Pi2 is already in progress but currently not supported completely.
Terminal
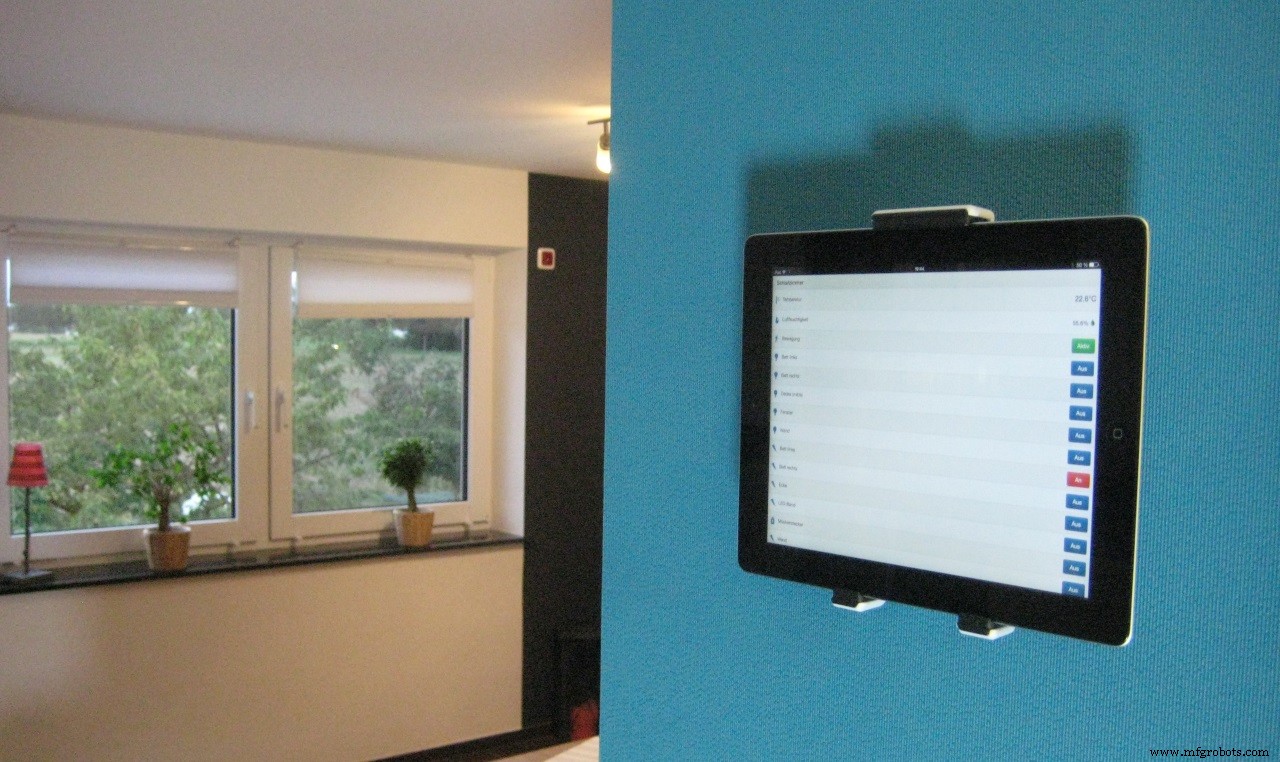
The web app also runs at the living room. An old iPad 3 is used as the terminal.
Future
The solution described above is still under development and will get more features in the future. Some of the planned are:
- Support for actuators based on infra red signals (like an RGB-LED-Strip).
- Support for XML based configuration files in addition to code based configuration.
- Implementation of a dedicated tablet web app with a different layout.
- Support for reed switches for windows which are showing the state at the web app.
- Libraries with drivers for devices from other manufacturers (like 433Mhz remote switches).
- Controlling of the valves of the heating system (outputs and temperature reading already implemented).
- Alarm system which sends notifications if motion is detected or windows are opened (requires implementation of point 4).
- A hardware weather station.
- Automatically closing roller shutters if the window is open and rain is detected (the currently used weather API already provides the required information).
- More Unit Tests.
- Detailed documentation at the GitHub wiki.
- Animations (this feature was already implemented using NETMF but I was not able to migrate it completely within the time range of the IoT contest)
If you are interested to contribute to this project (hardware, software, documentation or anything else), feel free to contact me.
代码
CK.HomeAutomation
This repository contains the complete solution including the SDK, WebApp and my personal configuration.https://github.com/chkr1011/CK.HomeAutomation.git示意图
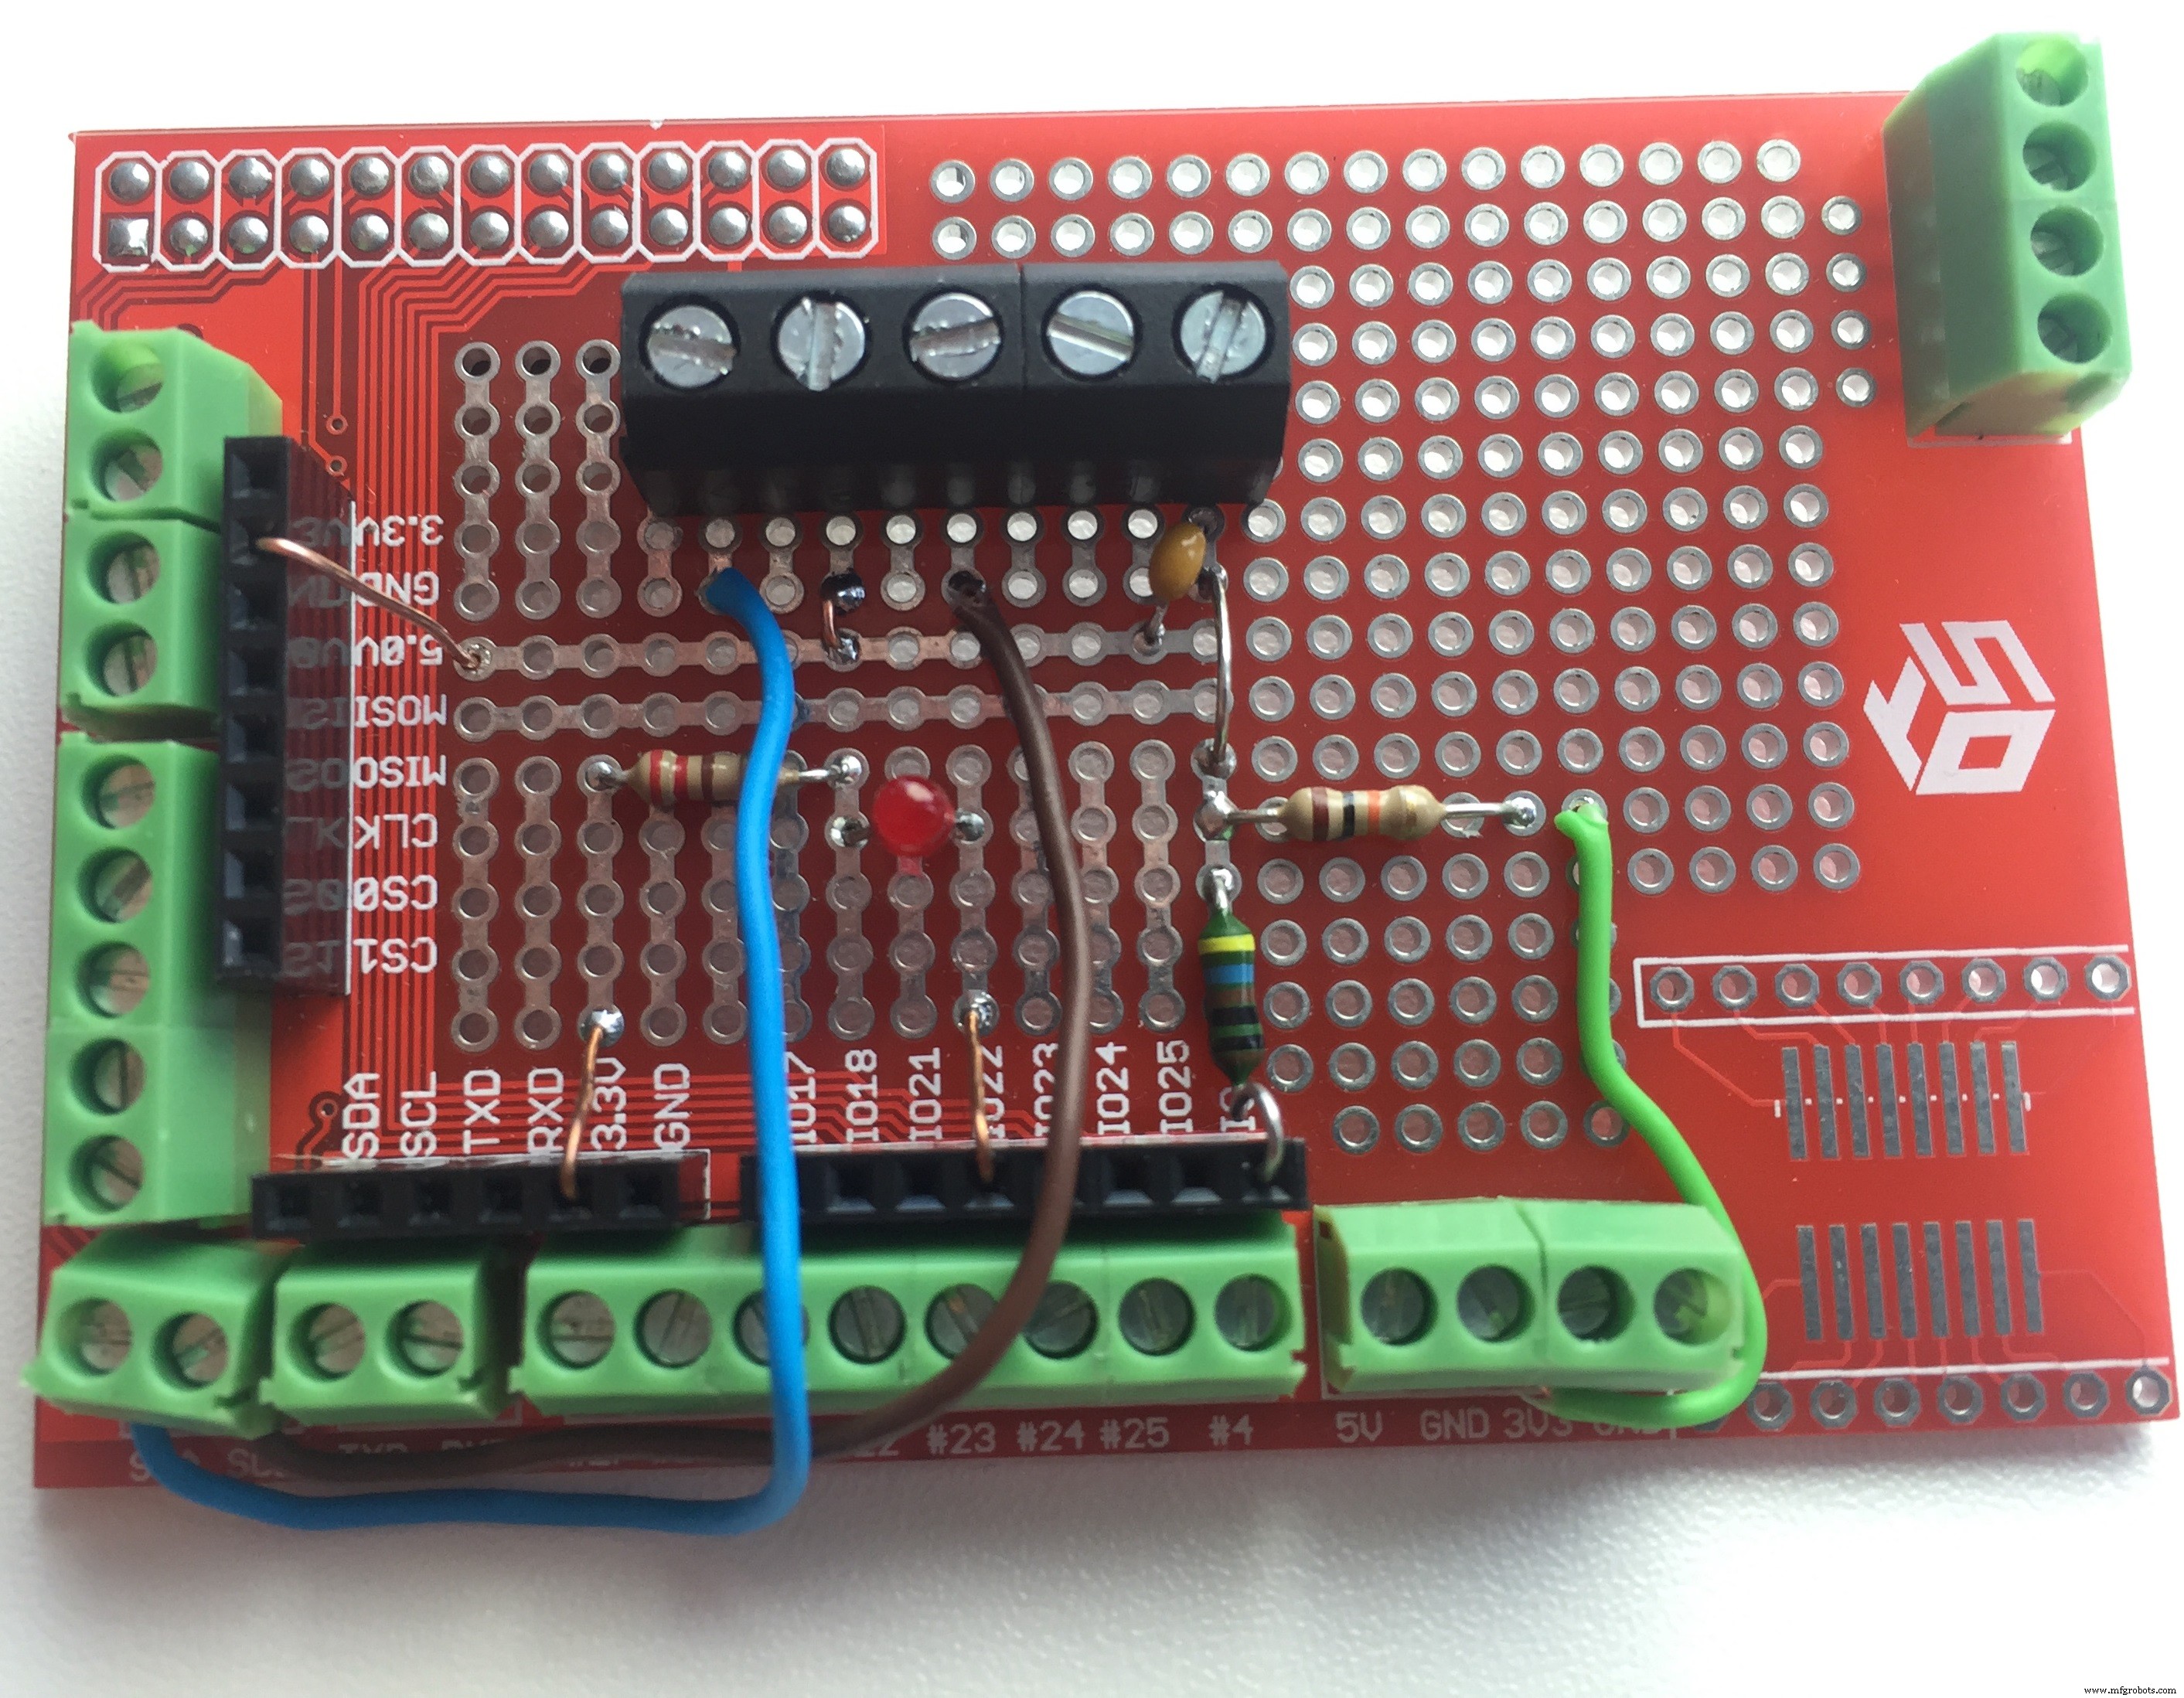
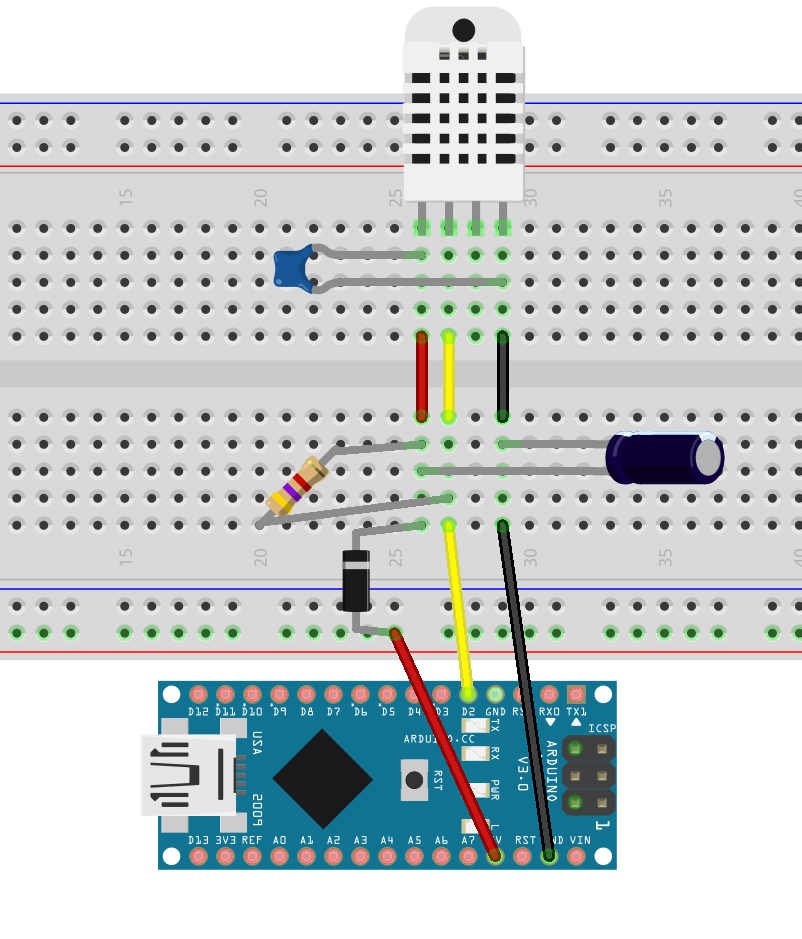
This is the circuit which us required to read the 433Mhz codes from the remote control.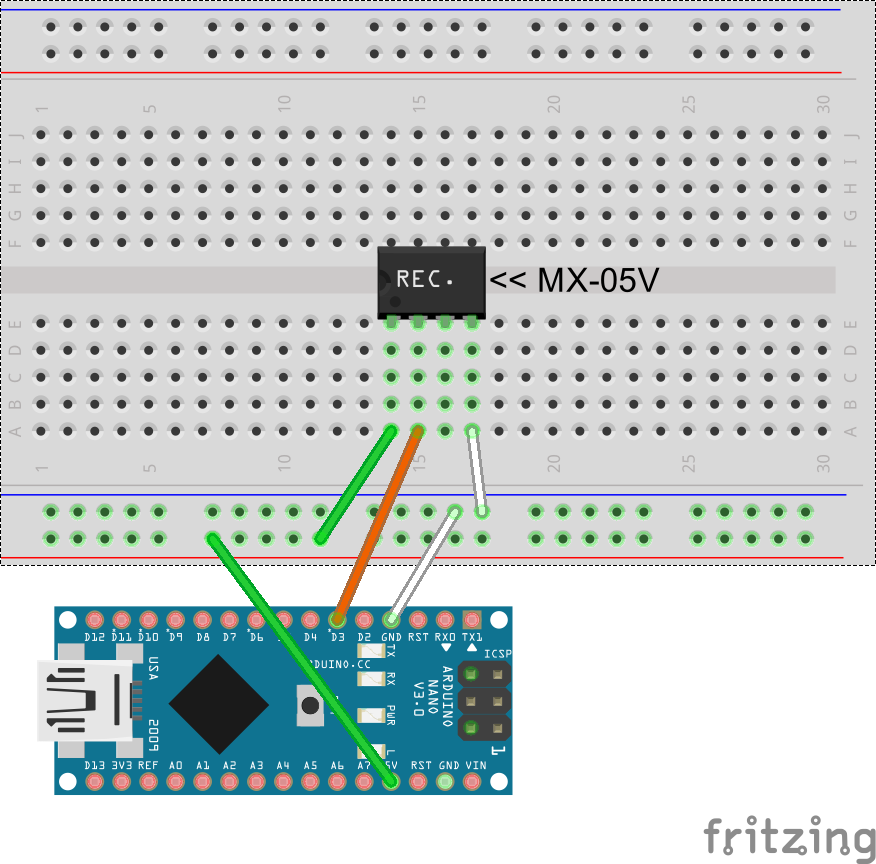 The sketch contains the circuit board of the DHT22 sensor which is mounted at every room.
  The shield contains a status LED and screw terminals for the I2C bus and the interrupt.
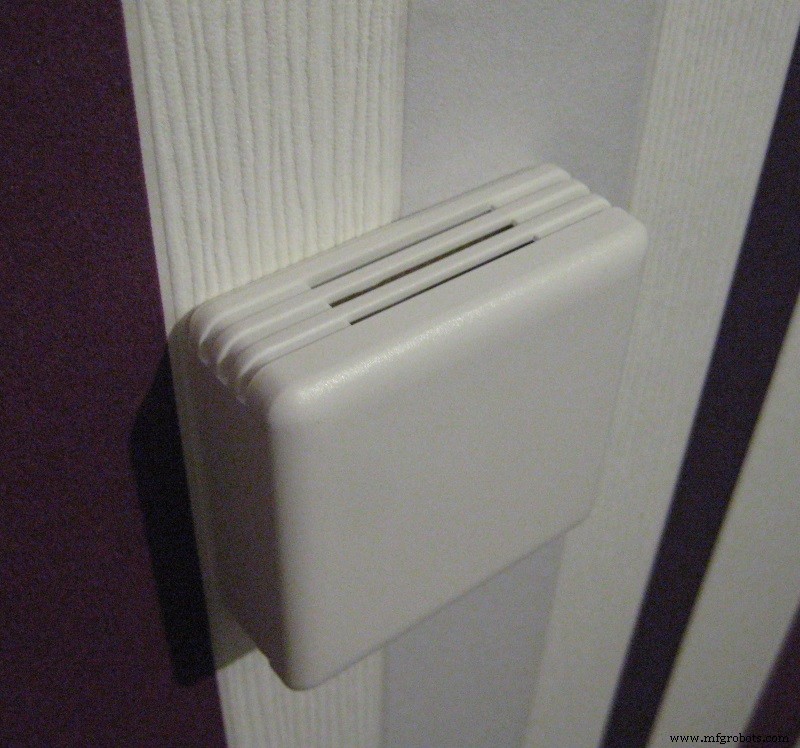
  This is a regular temperature and humidity sensor which conains a 433Mhz sender. Only one is required for the entire home.
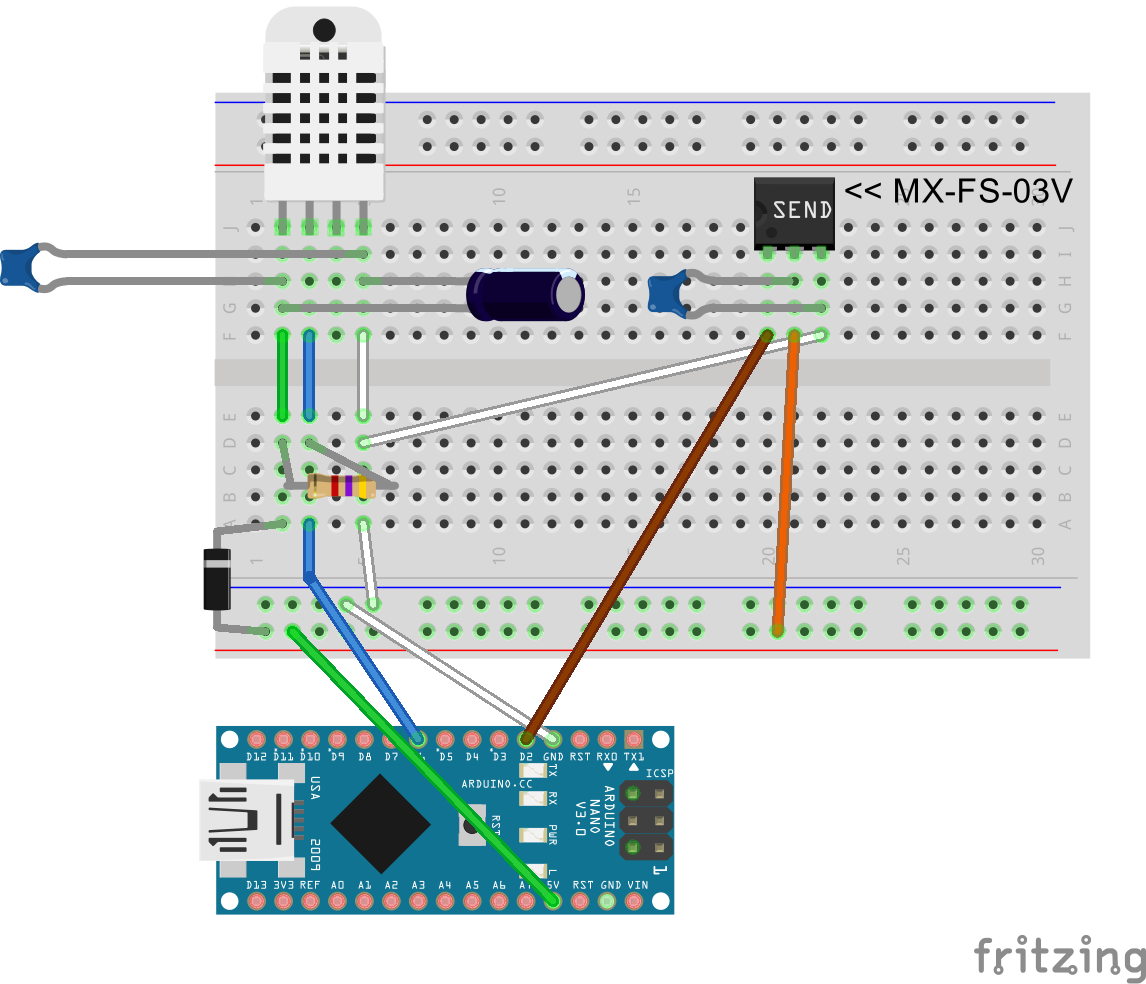
制造工艺
- Raspberry Pi 温度记录器
- 使用树莓派远程监测天气
- SensorTag 到 Blynk 使用 Node-RED
- 使用 Raspberry Pi 的运动传感器
- 使用 Raspberry Pi 监控家中温度
- Windows 10 IoT Core – 读取心率脉冲
- RASPBERRY PI 家庭自动化
- Raspberry Pi 2 上的 Windows 10 IoT Core – Adafruit 传感器数据
- Windows 10 IoT Core 和 SHT15
- Windows 10 IoT Core for Raspberry Pi 3 Model B+
- 使用 Raspberry Pi 和 Bridge Shield 的机器人
- Windows 10 IoT Core:语音控制机器人