

ARTIK + MKR1000 + DHT11 + MQTT
组件和用品
 |
| × | 2 | |||
 |
| × | 1 | |||
 |
| × | 2 |
应用和在线服务
 |
| |||
 |
|
关于这个项目
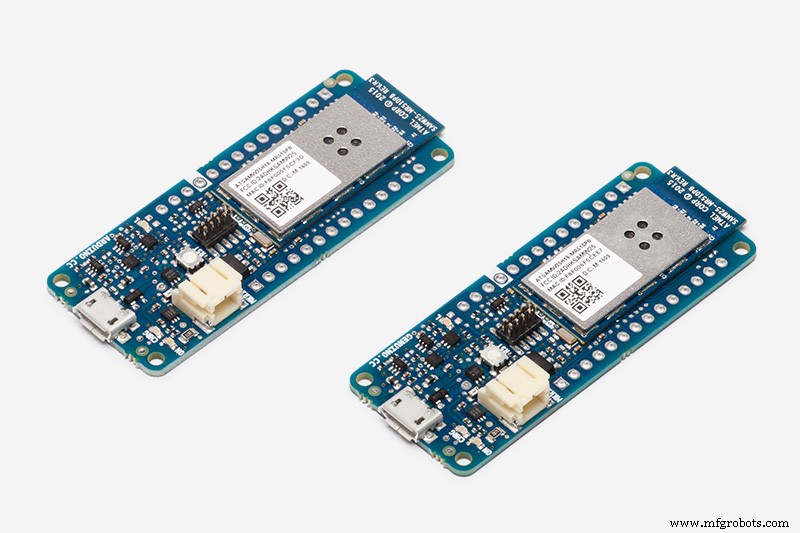
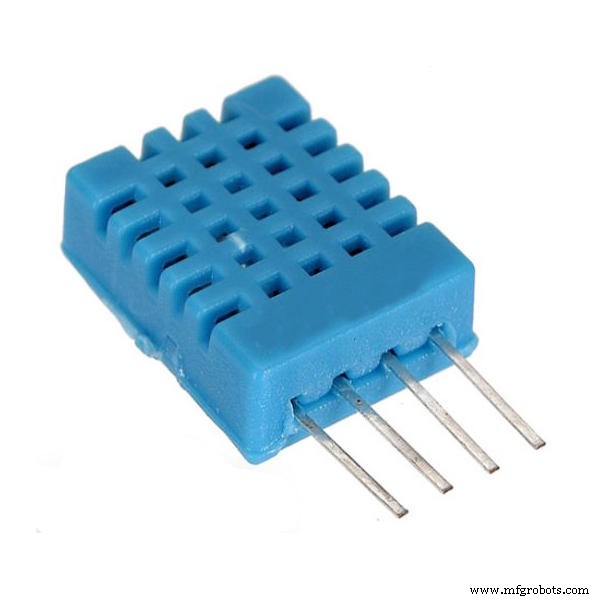
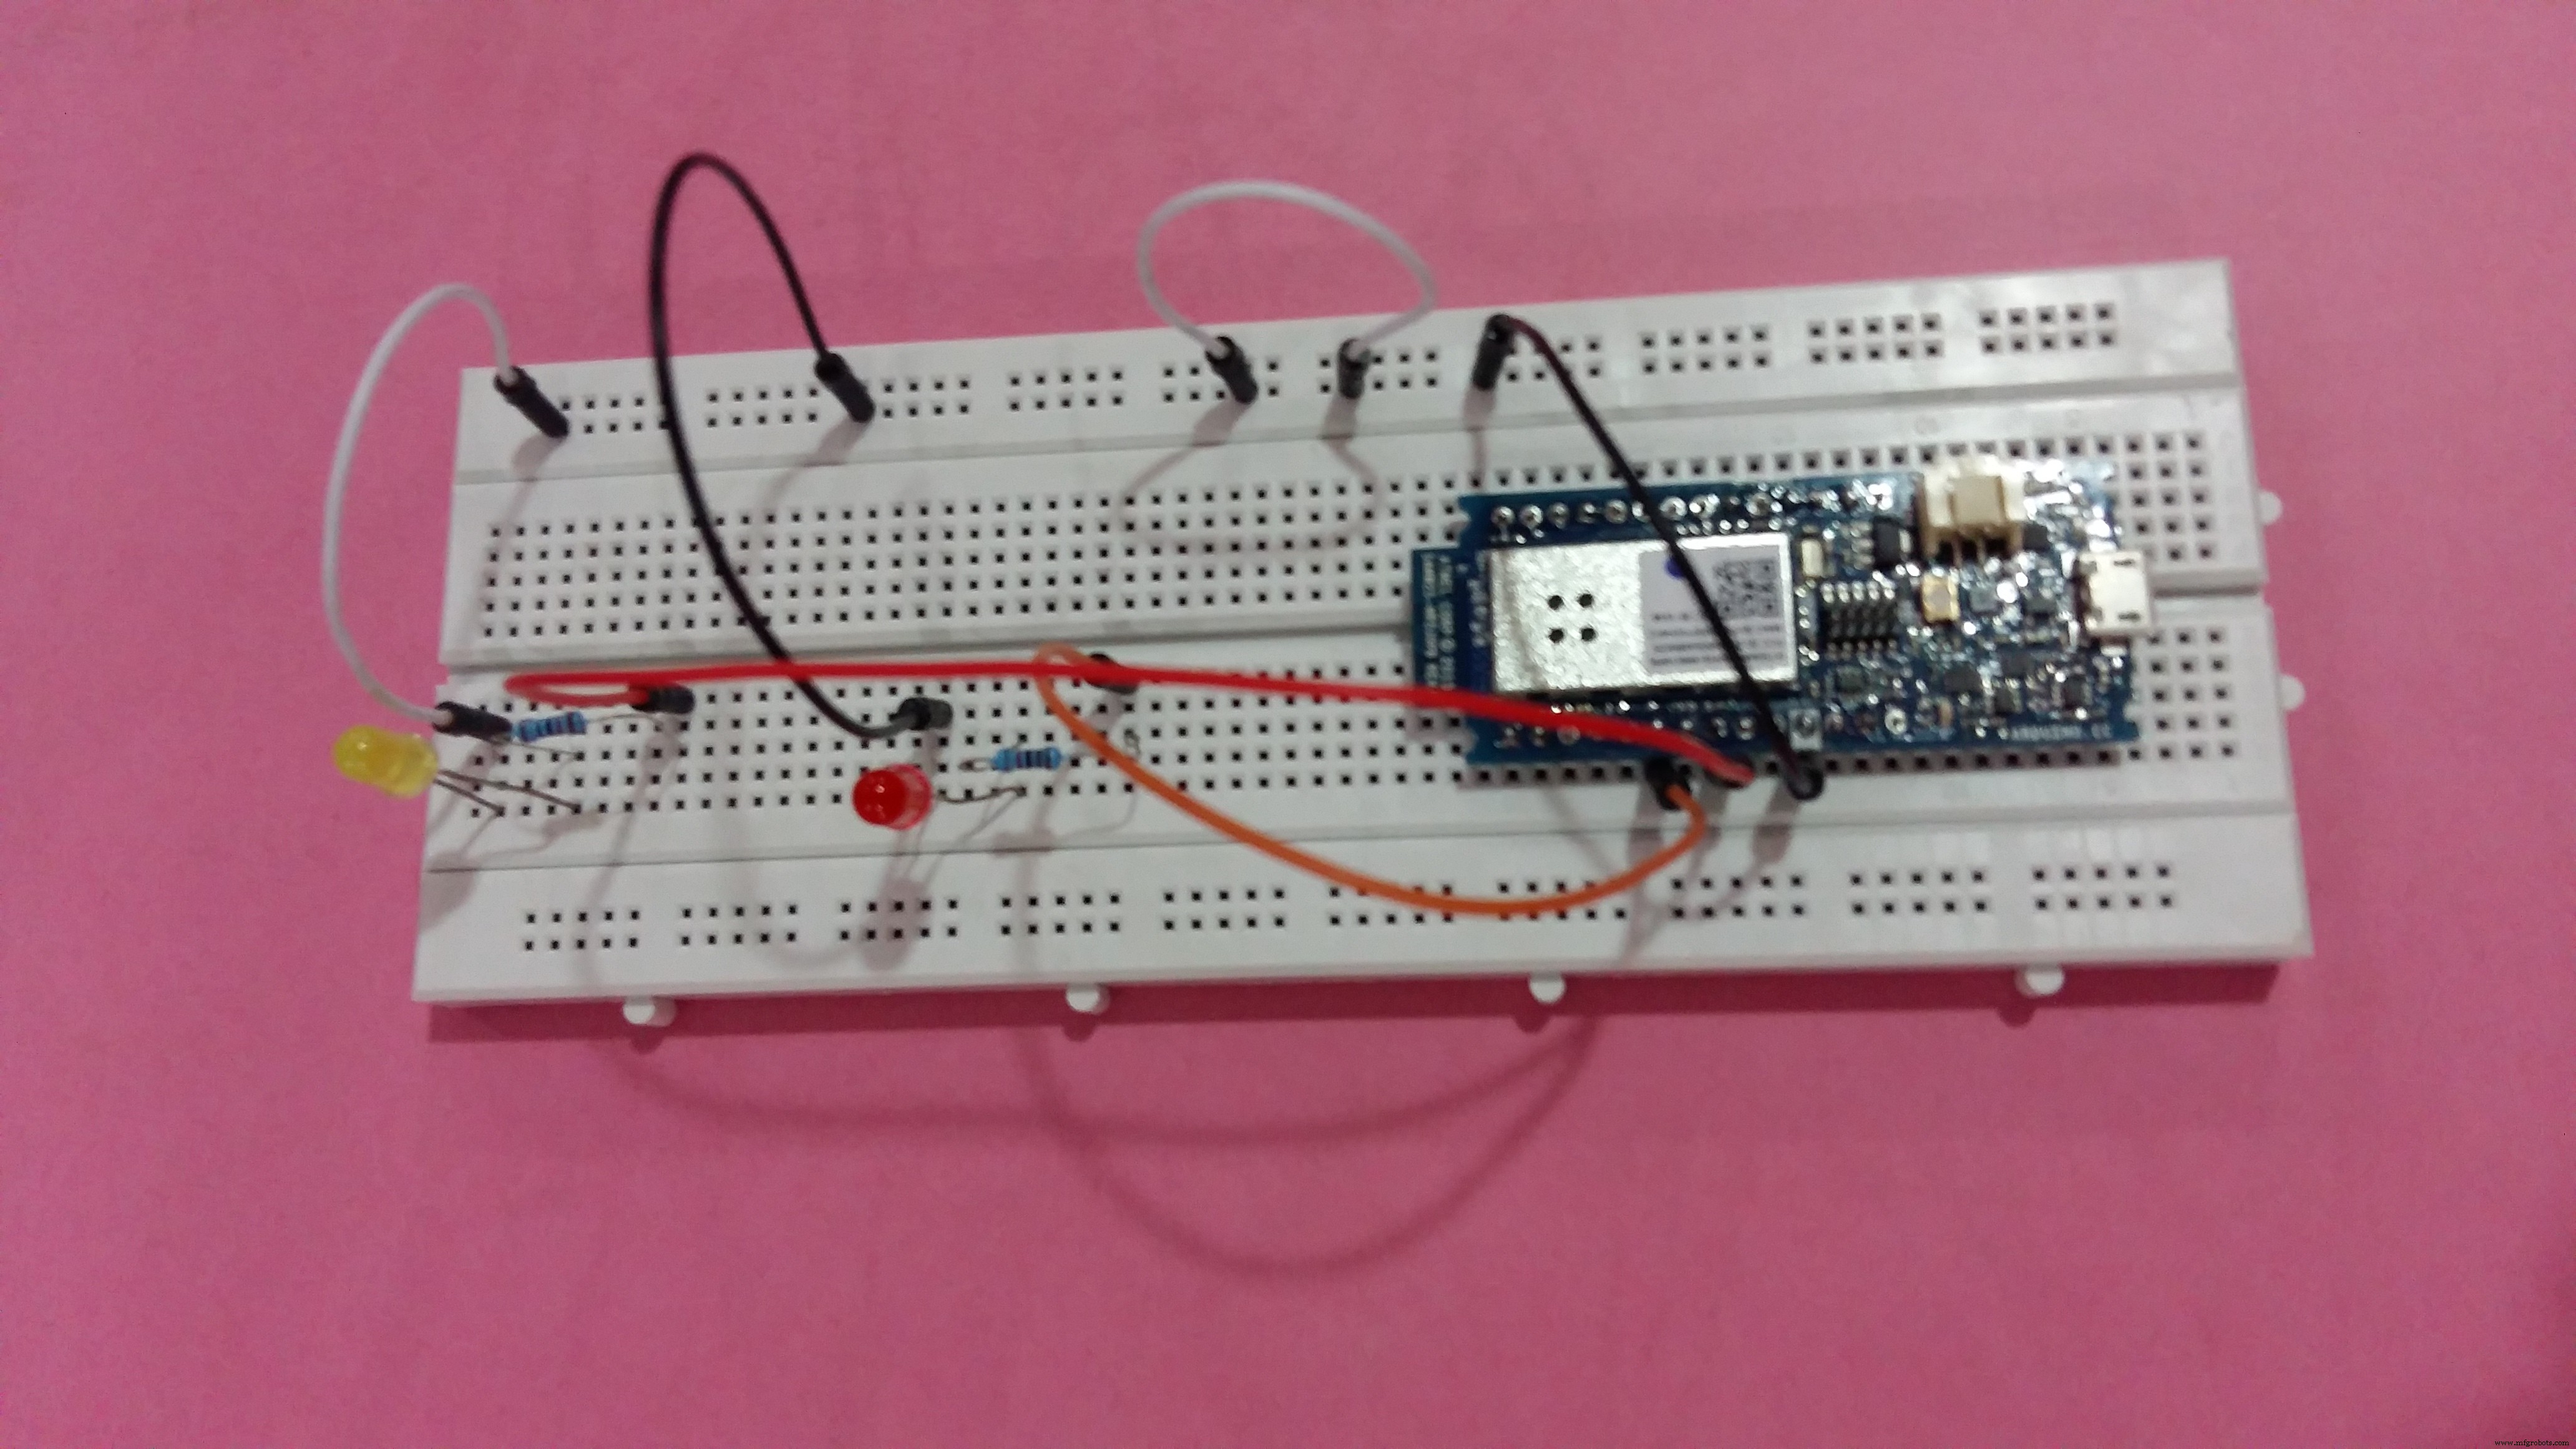
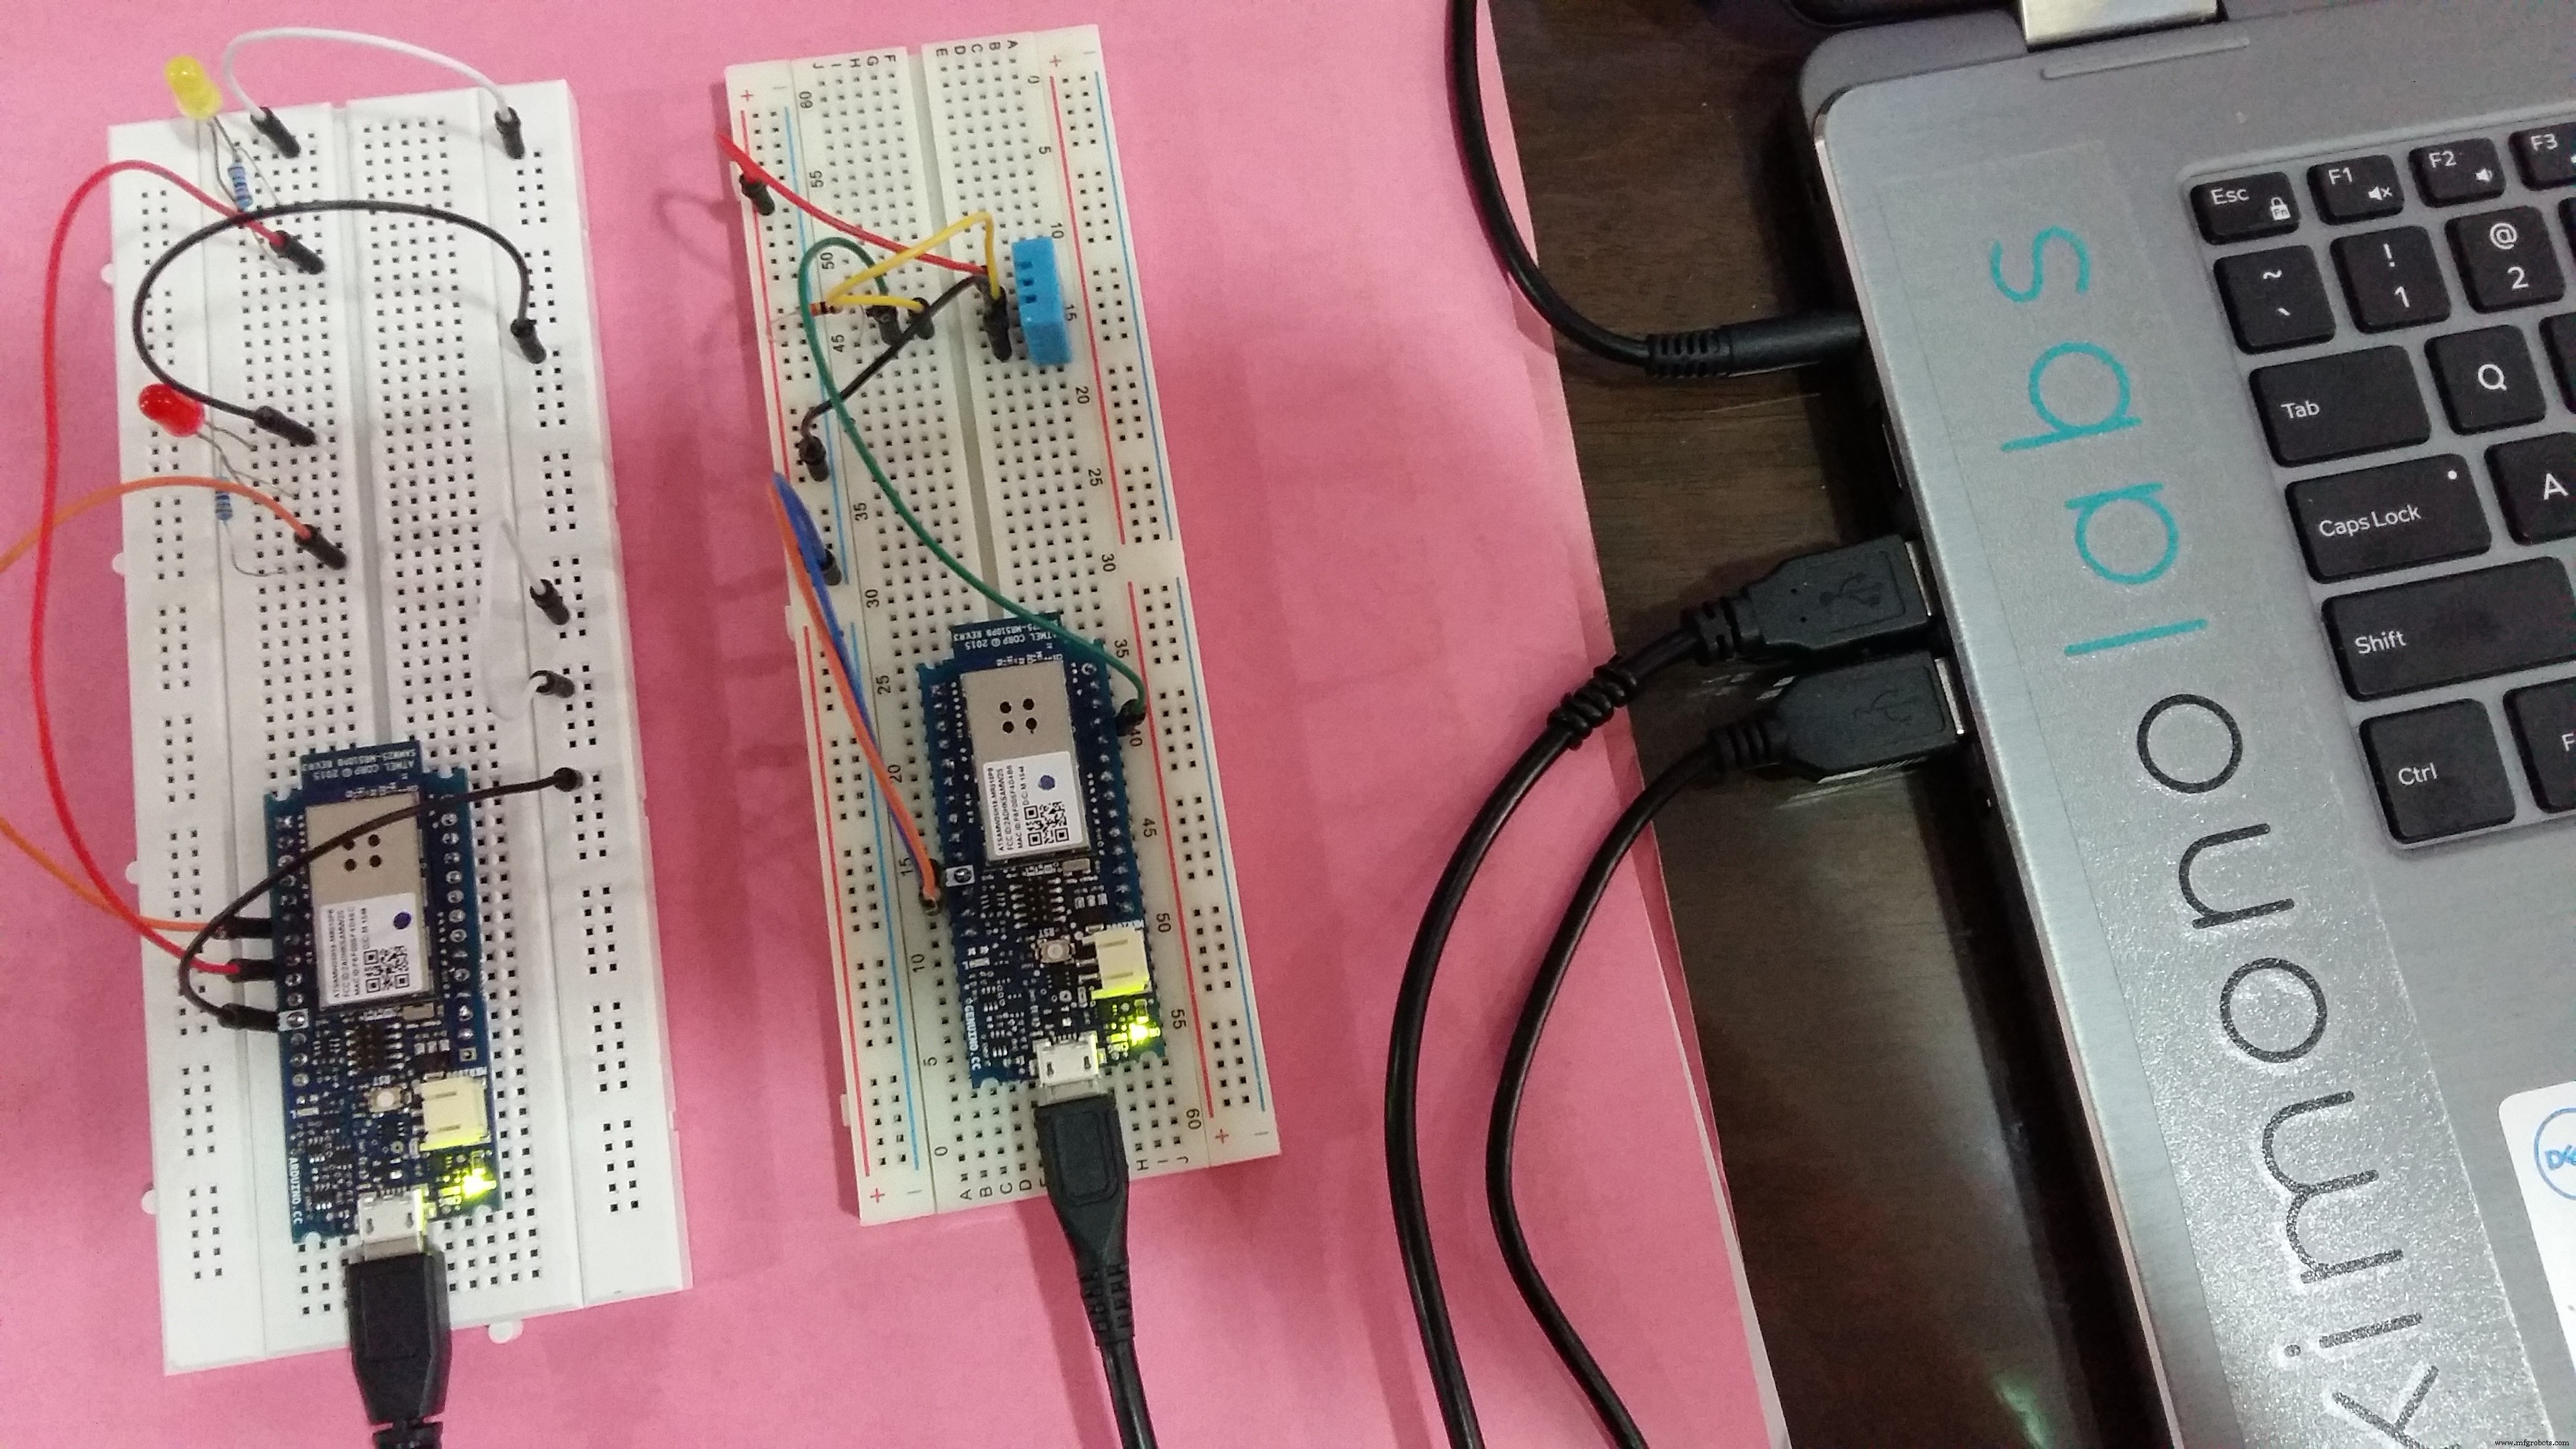
该项目使用两个 MKR1000,其中 DHT11 作为传感器,LED 作为隐喻执行器。真正的执行器可能是空调和吊扇。 DHT11 温湿度设备将数据发送到 ARTIK 云。已设置规则向红色和黄色 LED 发送命令。
设置 Arduino IDE
使用 Arduino IDE 的库管理器,安装以下库。
安装 WiFi101(请参阅本指南)

由 Joel Gaehwiler 安装 MQTT
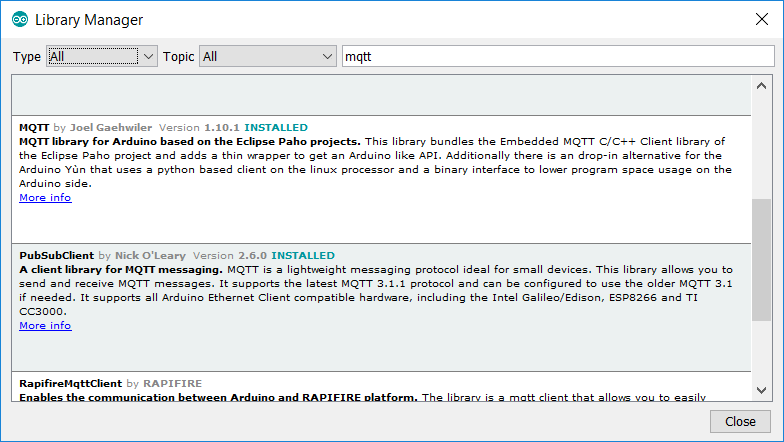
安装 ArduinoJson

注意:参考我的 之前的帖子 了解有关使用 ARTIK 云的详细信息。
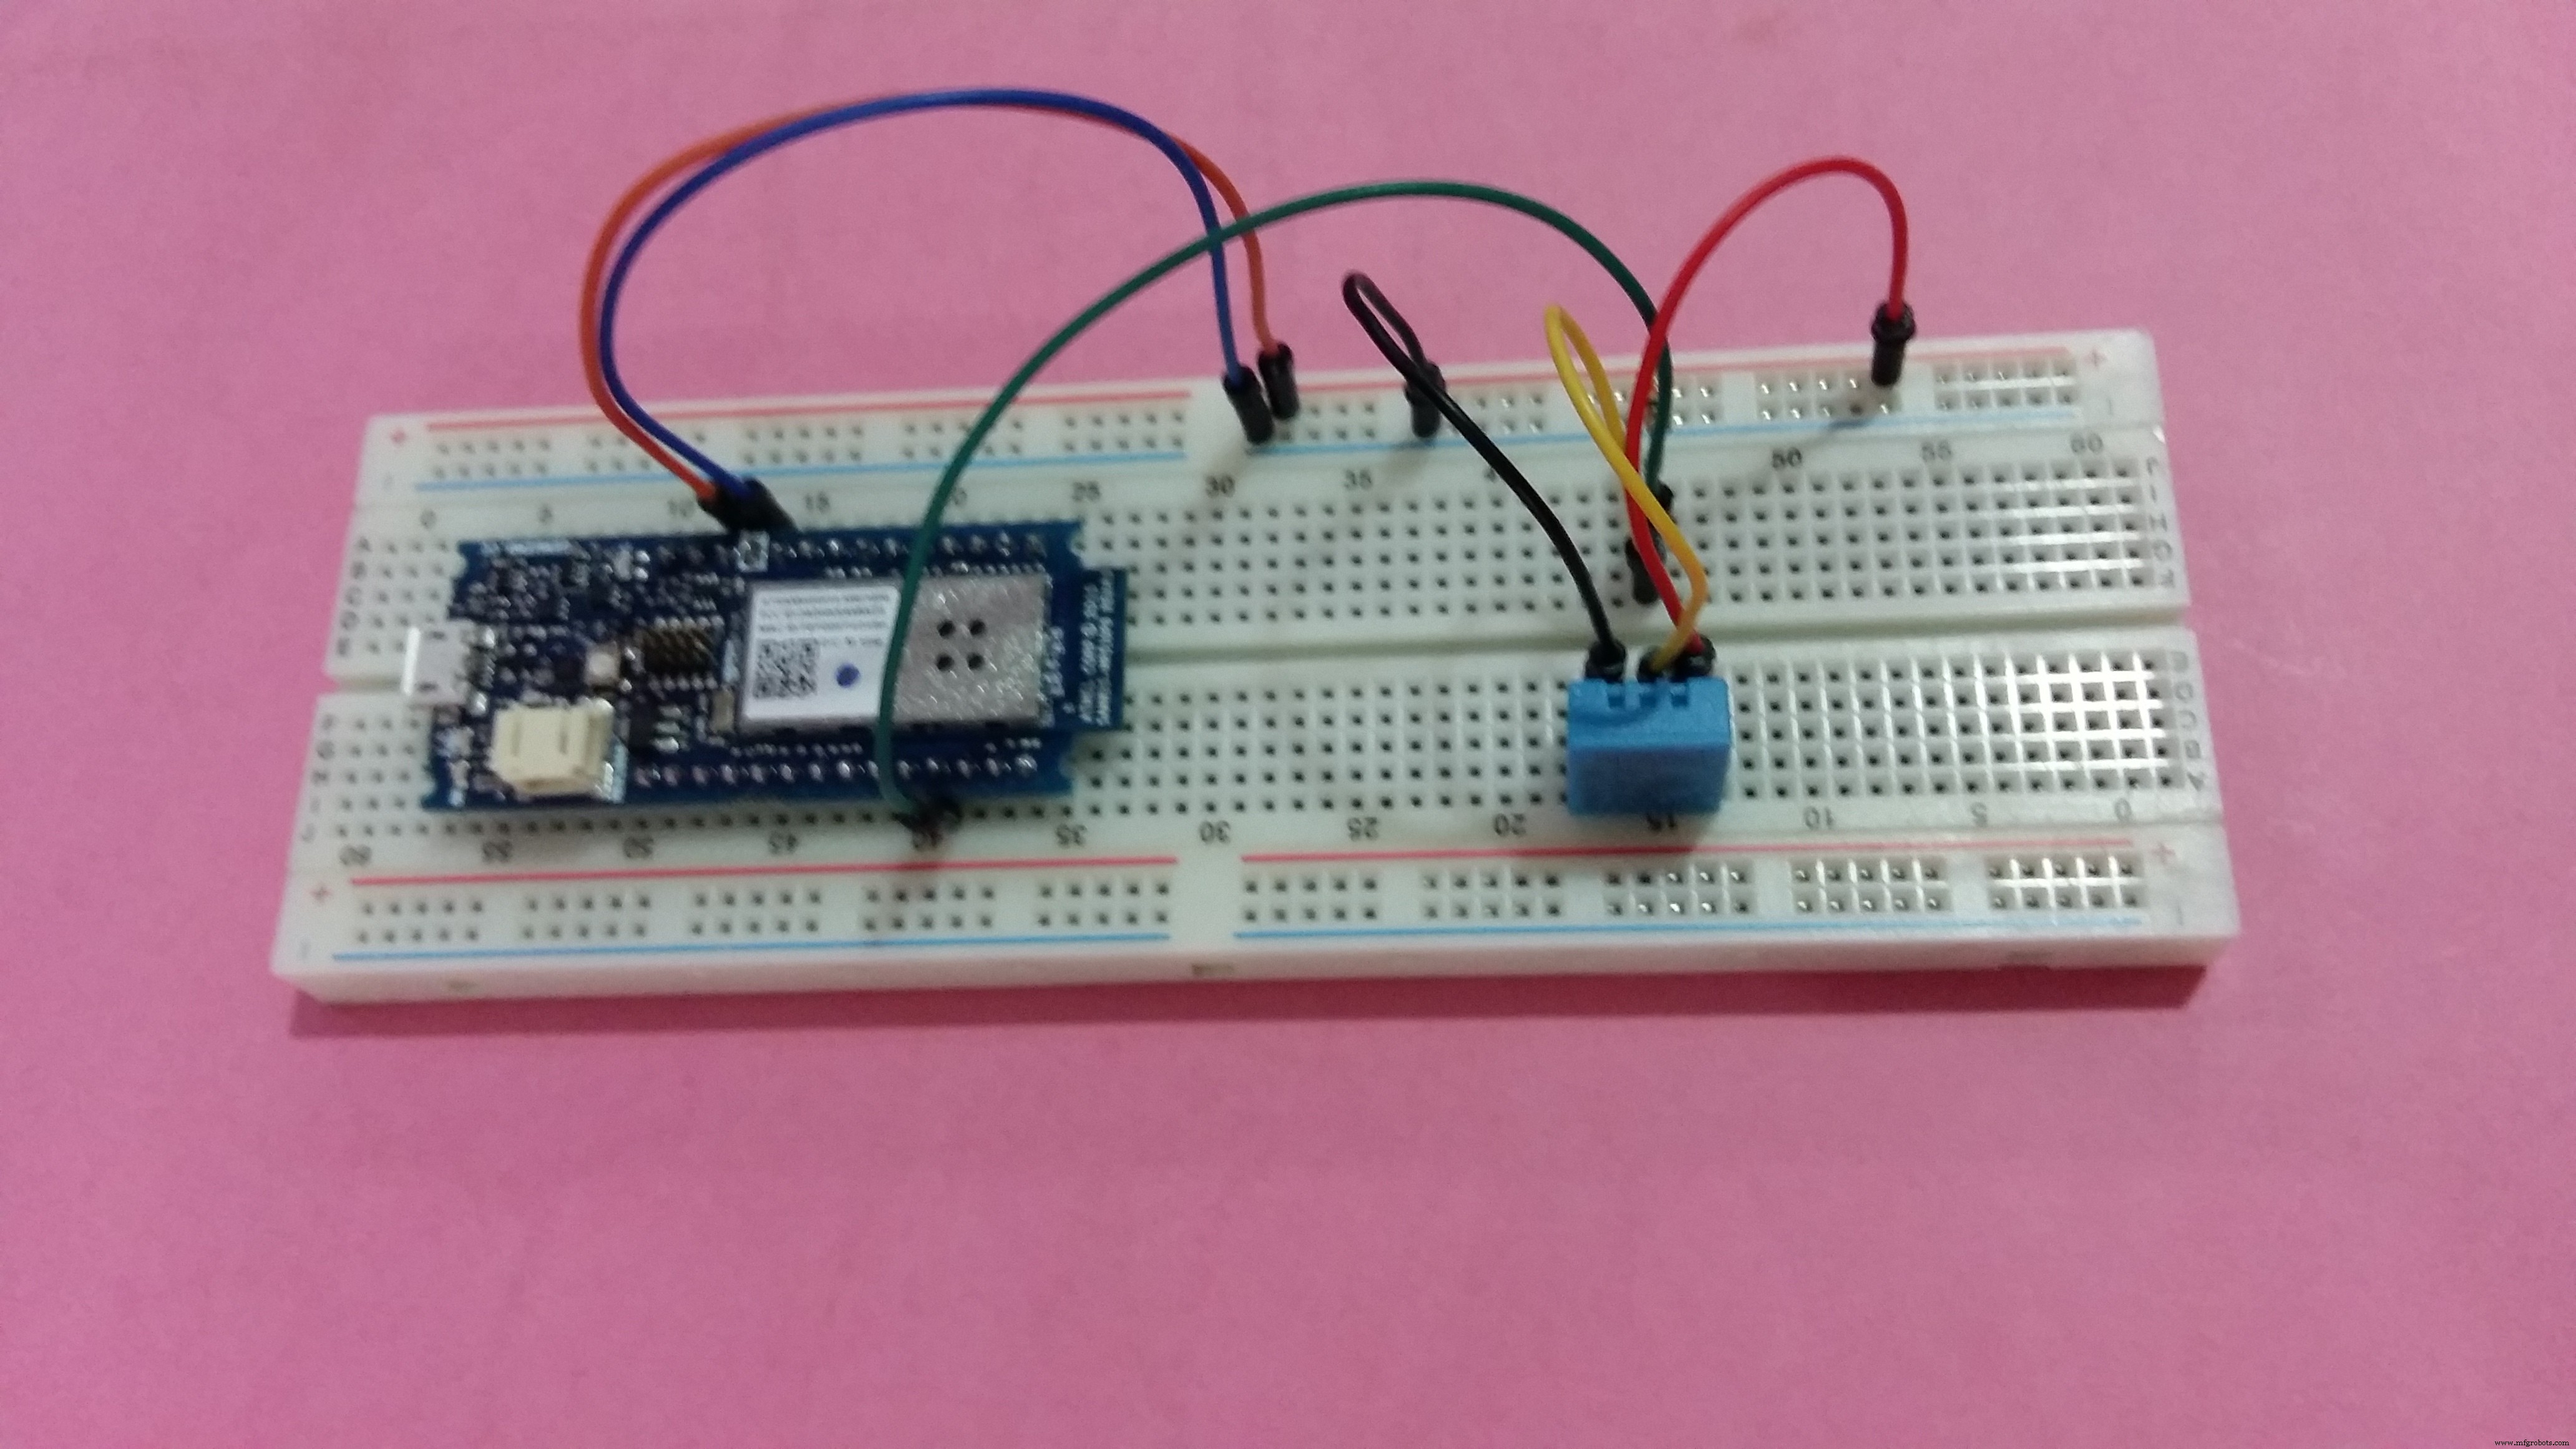
设置DHT11温湿度传感器
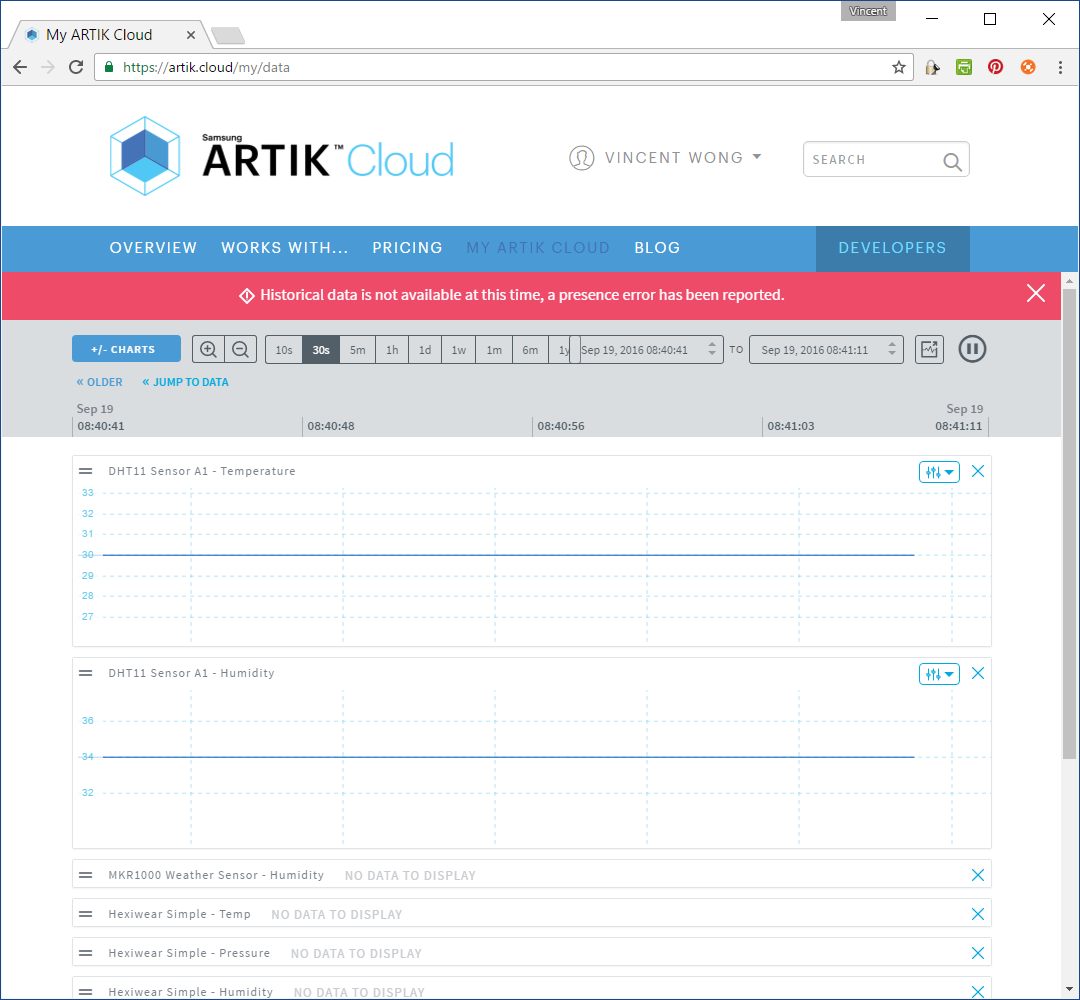
创建设备类型(DHT11 传感器 )
连接设备(DHT11 Sensor A1 )
连接物理设备
.
设置ARTIK云MQTT参数
char mqttCloudServer[] ="api.artik.cloud"; int mqttCloudPort =8883; char mqttCloudClientName[] ="ARTIK-Arduino"; char mqttCloudUsername[] ="[设备 ID]"; char mqttCloudPassword[] ="[设备令牌]"; char mqttCloudDataOut[] ="/v1.1/messages/[device-id]"; WiFiSSLClient ipCloudStack; MQTTClient mqttCloudClient; 向 ARTIK 云发送消息。
void sendToArtikCloud(浮动温度,浮动湿度){ loadBuffer(温度,湿度); // 将当前值加载到缓冲区 mqttCloudClient.publish(mqttCloudDataOut, buf); } void loadBuffer(浮动温度,浮动湿度){ StaticJsonBuffer<200> jsonBuffer; jsonObject&dataPair =jsonBuffer.createObject();数据对[“温度”] =温度;数据对[“湿度”] =湿度; dataPair.printTo(buf, sizeof(buf)); }

设置LED温湿度执行器
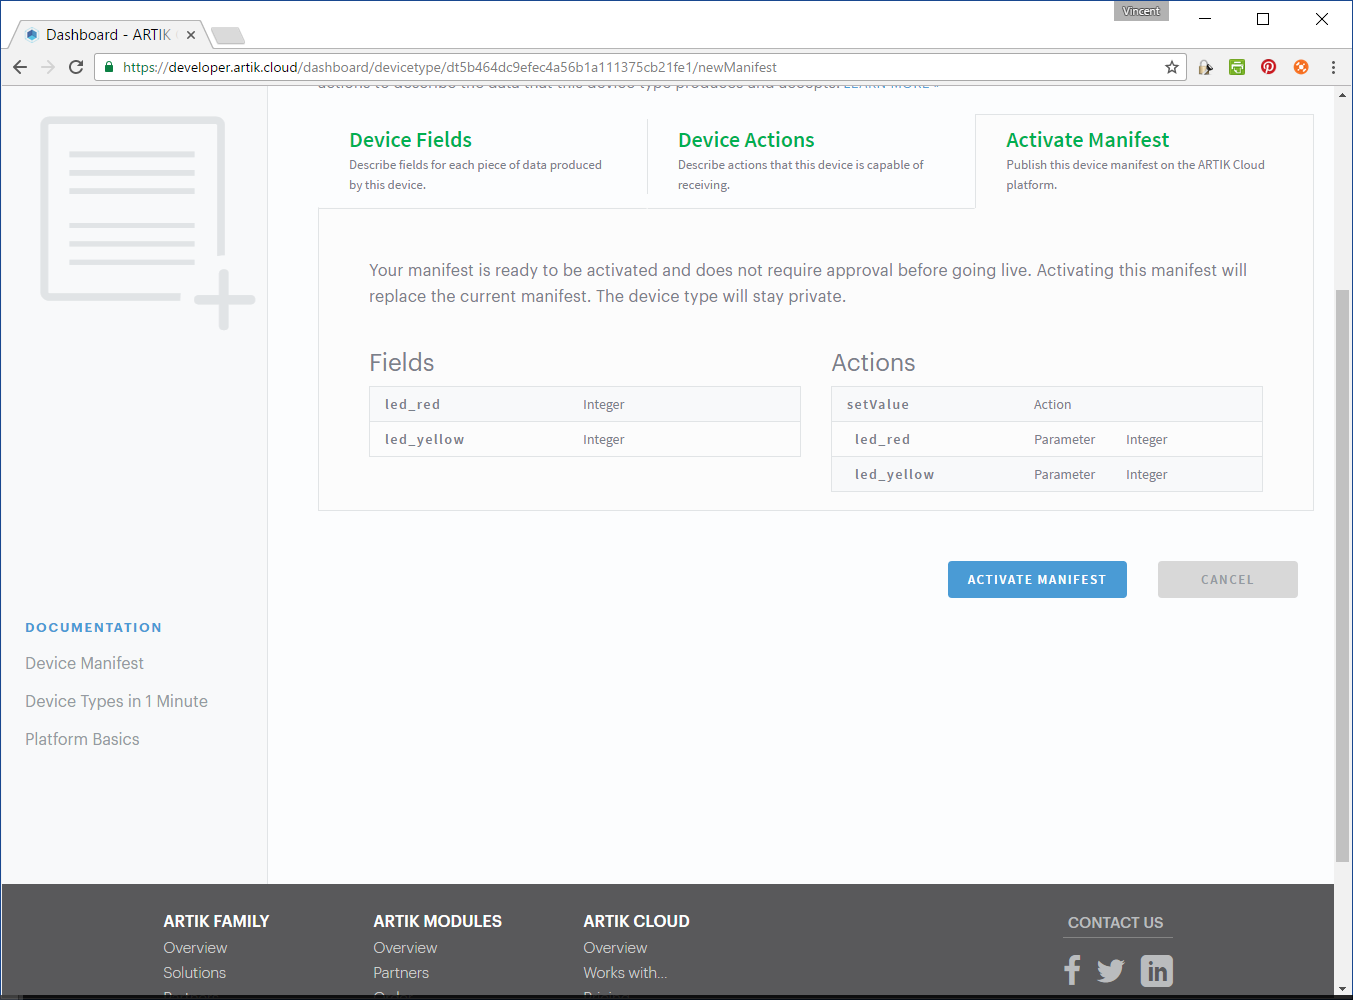
创建设备类型(DHT11 Actor )
连接设备(DHT11 Actor A1 )
连接物理设备
设置ARTIK云MQTT参数
// ARTIK Cloud MQTT params char mqttCloudServer[] ="api.artik.cloud"; int mqttCloudPort =1883; char mqttCloudClientName[] ="ARTIK-Arduino"; char mqttCloudUsername[] ="[设备 ID]"; char mqttCloudPassword[] ="[设备令牌]"; char mqttCloudActionsIn[] ="/v1.1/actions/[device-id]"; WiFiClient ipCloudStack; MQTTClient mqttCloudClient; 接收 MQTT 操作。
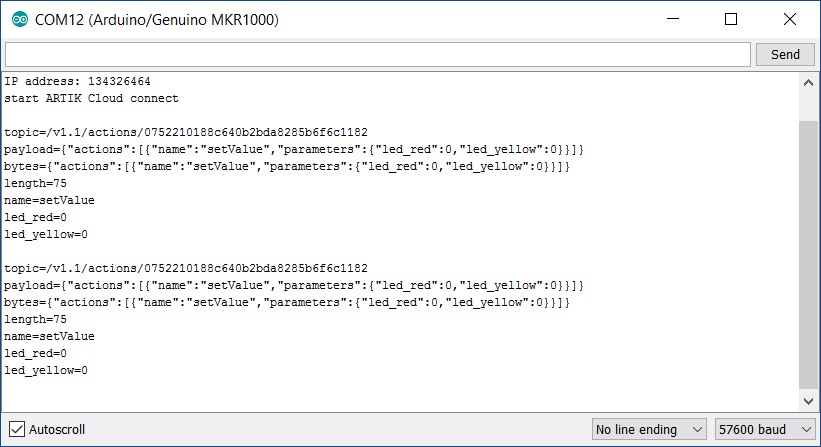
void messageReceived(String topic, String payload, char * bytes, unsigned int length) { Serial.print("topic="); Serial.println(主题); Serial.print("payload="); Serial.println(payload); Serial.print("bytes="); Serial.println(字节); Serial.print("length="); Serial.println(长度);解析缓冲区(有效载荷); } 解析和处理来自 ARTIK 云的动作。
void parseBuffer(String payload) { StaticJsonBuffer<200> jsonBuffer;字符串 json =有效载荷; jsonObject&root =jsonBuffer.parseObject(json); const char* nameparam =root["actions"][0]["name"]; const int actionLEDRed =root["actions"][0]["parameters"]["led_red"]; const int actionLEDYellow =root["actions"][0]["parameters"]["led_yellow"]; Serial.print("name="); Serial.println(nameparam); Serial.print("led_red="); Serial.println(actionLEDRed); Serial.print("led_yellow="); Serial.println(actionLEDYellow); Serial.println(); if (actionLEDRed ==1) { if (savedRedValue !=actionLEDRed) { digitalWrite(LED_RED_PIN, HIGH); SavedRedValue =actionLEDRed; saveRedTime =毫秒(); } else { if (savedRedValue !=actionLEDRed) { if (millis() - savedRedTime> RED_DELAY) { digitalWrite(LED_RED_PIN, LOW); SavedRedValue =actionLEDRed; } } } if (actionLEDYellow ==1) { if (savedYellowValue !=actionLEDYellow) { digitalWrite(LED_YELLOW_PIN, HIGH); SavedYellowValue =actionLEDYellow;保存的黄色时间 =毫秒(); } else { if (savedYellowValue !=actionLEDYellow) { if (millis() - savedYellowTime> YELLOW_DELAY) { digitalWrite(LED_YELLOW_PIN, LOW); SavedYellowValue =actionLEDYellow; } } } }
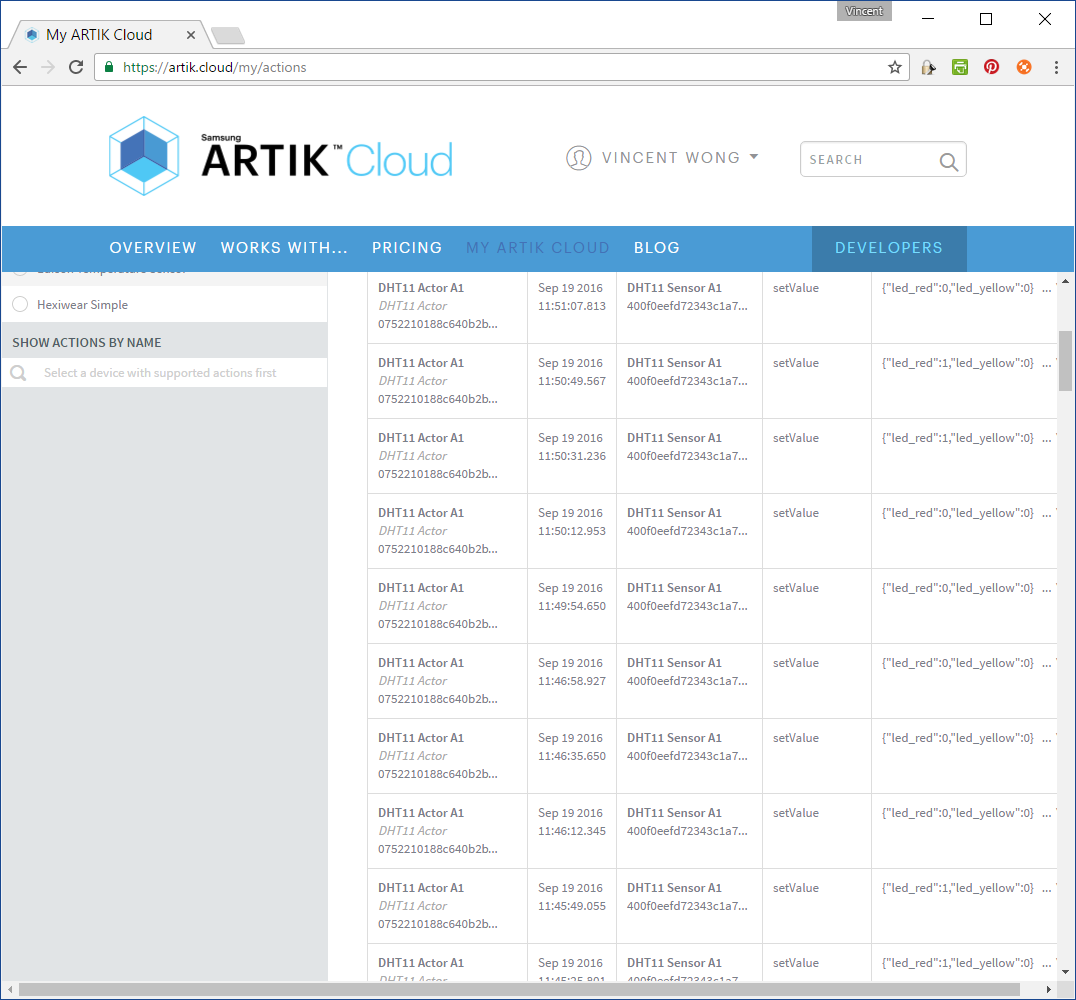
创建规则
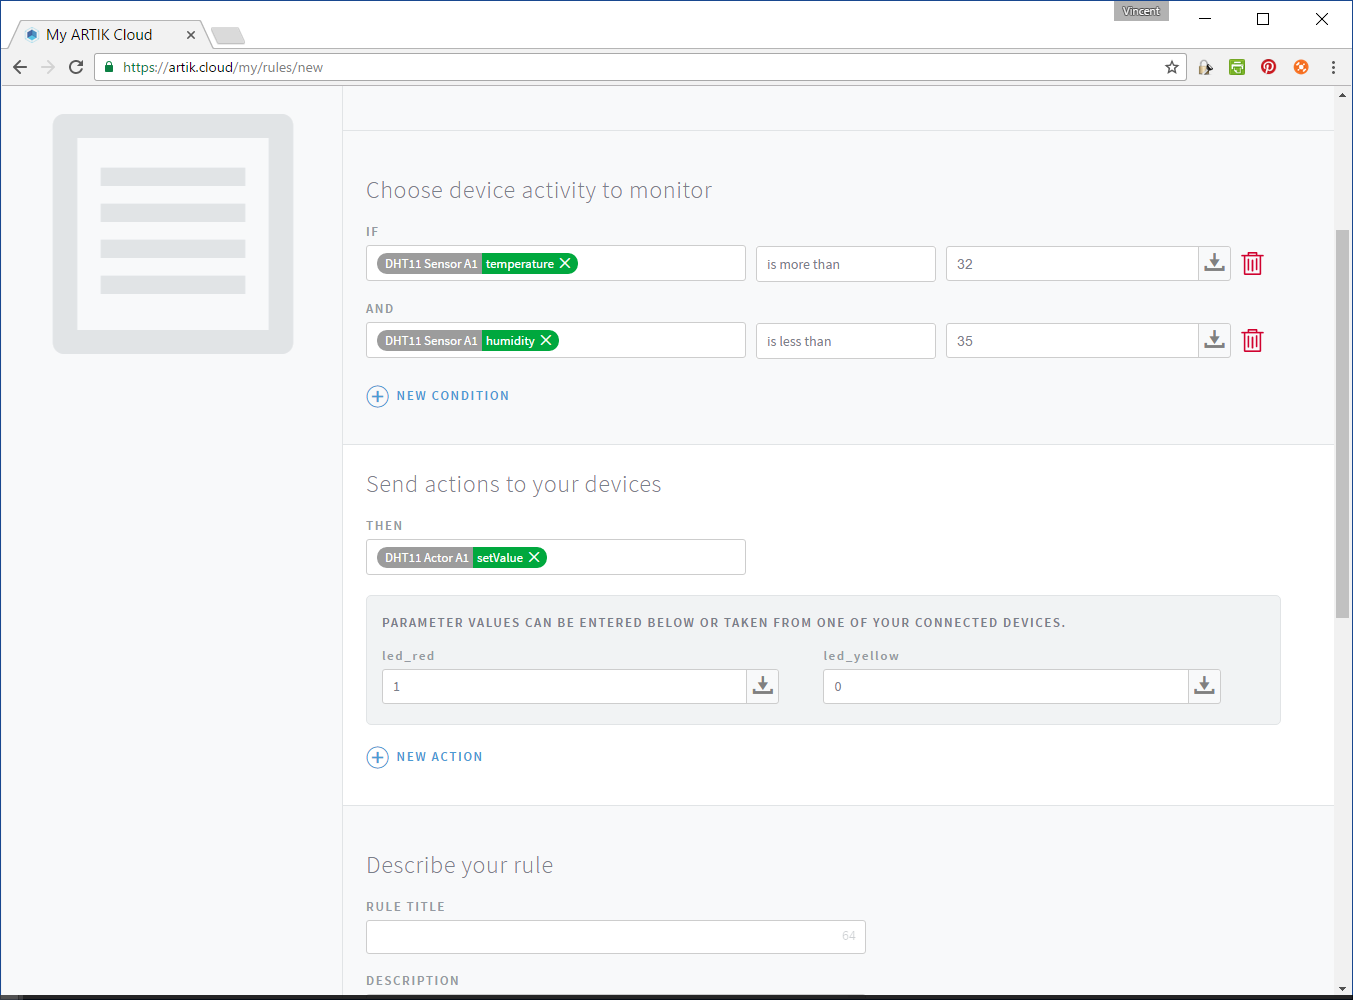
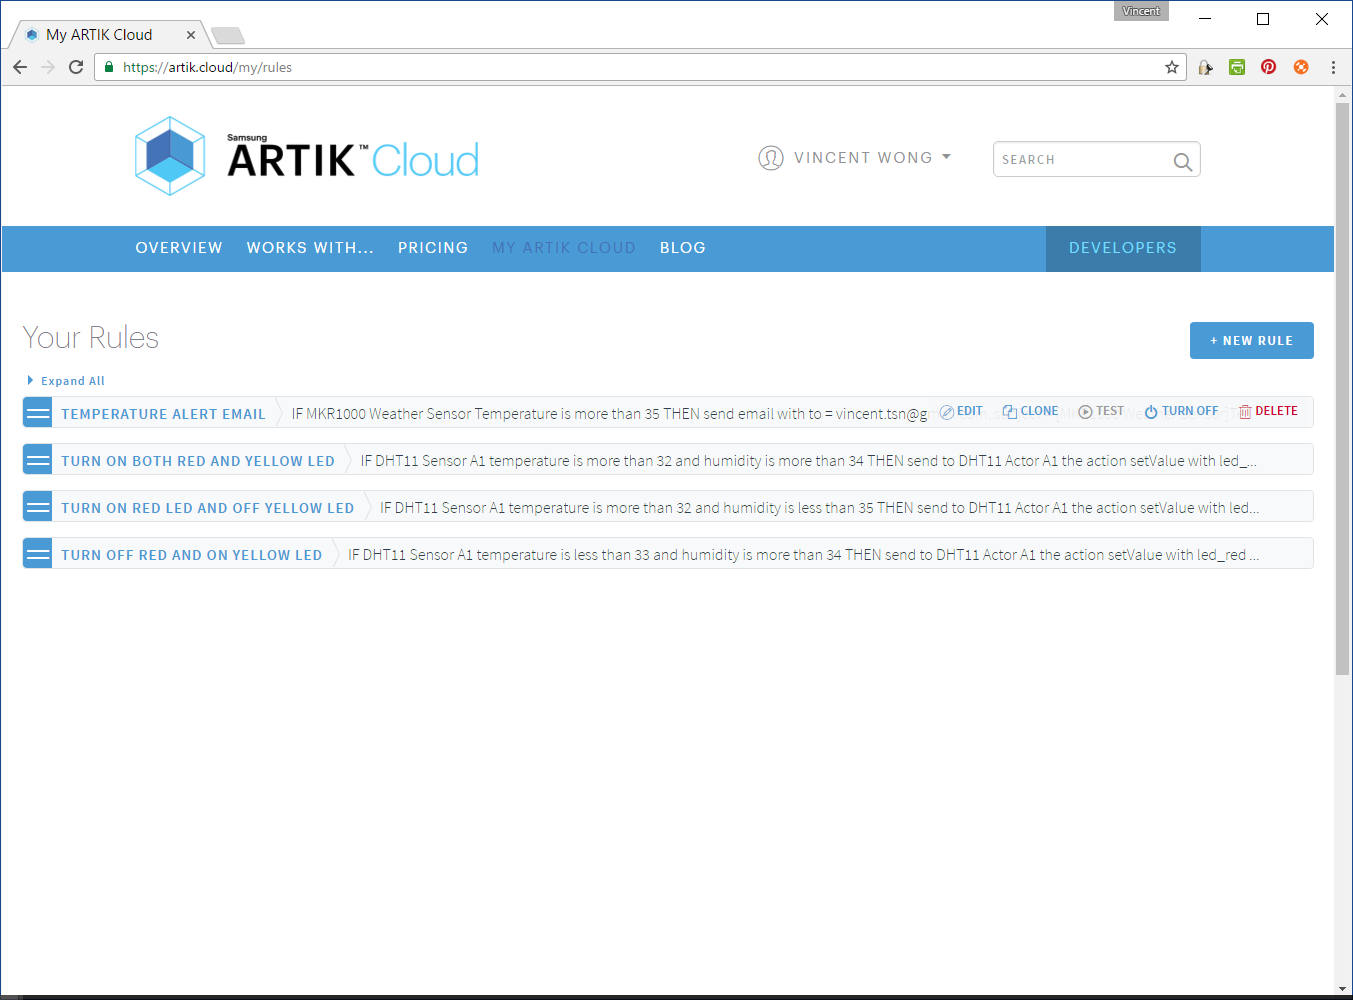
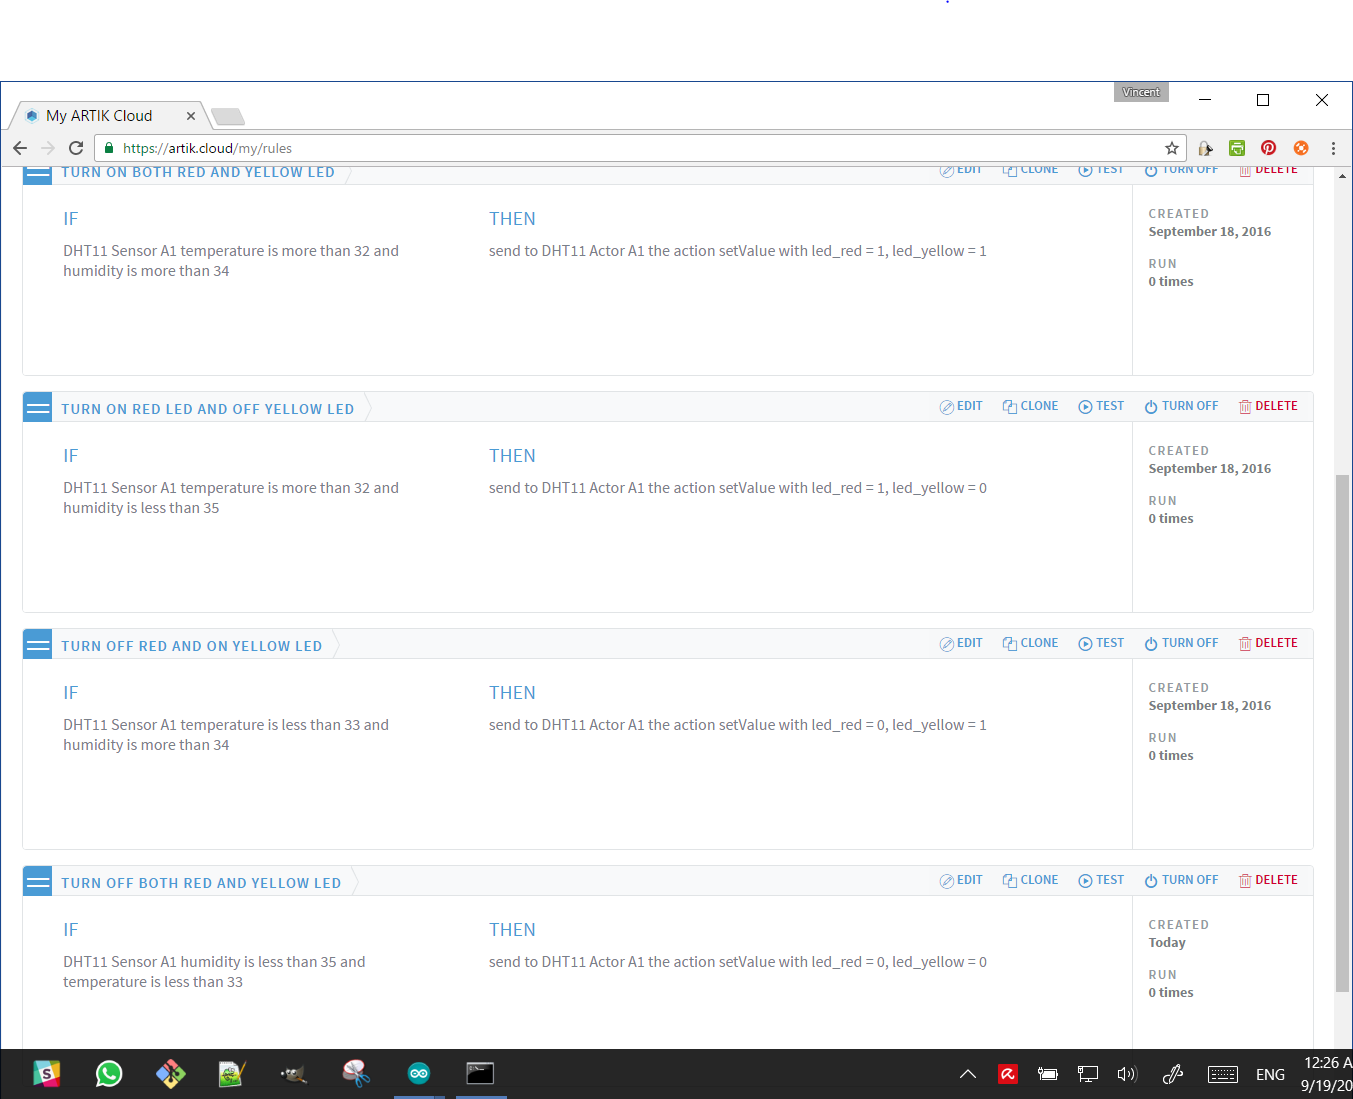
有4条规则:
- IF DHT11 Sensor A1 温度大于 32 湿度大于 34 THEN 向DHT11 Actor A1发送动作setValue,led_red =1, led_yellow =1
- IF DHT11 Sensor A1 温度大于 32 湿度小于 35 THEN 向DHT11 Actor A1发送动作setValue,led_red =1, led_yellow =0
- IF DHT11 Sensor A1 温度小于 33 湿度大于 34 THEN将led_red =0, led_yellow =1的动作setValue发送给DHT11 Actor A1
- IF DHT11 Sensor A1 湿度小于 35 且温度小于 33 THEN 向DHT11 Actor A1发送动作setValue,led_red =0, led_yellow =0
演示视频
请注意,您需要等待温度升高(LED 点亮)和冷却(LED 熄灭)。红色 LED 在 37 秒时亮起,在 1:13 秒时熄灭。演示视频仅显示温度变化。我用吹风机改变了 DHT11 传感器周围的温度。
.
代码
- artik_dht11_sensor.ino
- artik_led_actor.ino
artik_dht11_sensor.inoC/C++
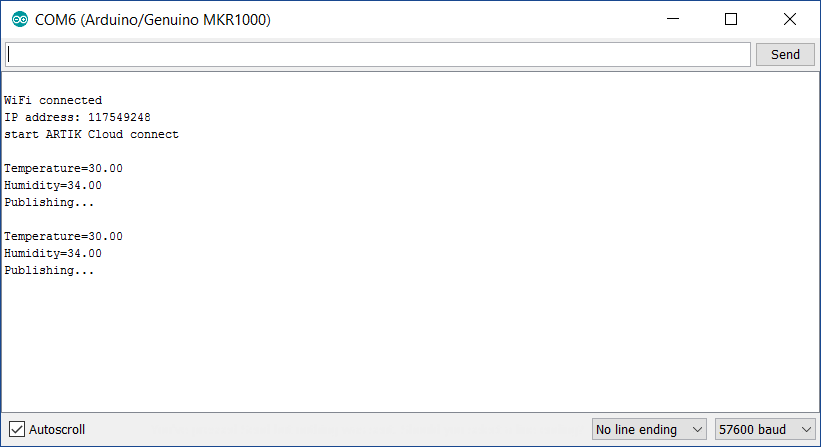
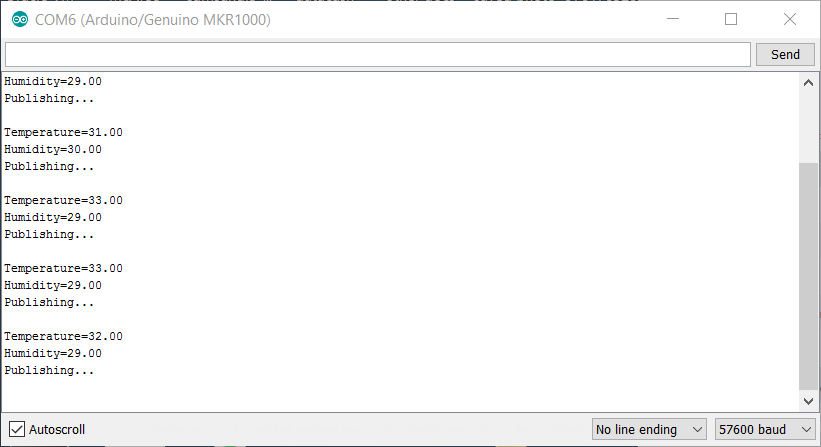
#include#include #include #include "DHT.h"#define DHTPIN 2 // 我们连接的数字引脚#define DHTTYPE DHT11 / / DHT 11DHT dht(DHTPIN, DHTTYPE);const char* _SSID ="[Wi-Fi SSID]";const char* _PASSWORD ="[Wi-Fi 密码]"; // ARTIK Cloud MQTT paramschar mqttCloudServer[] ="api.artik.cloud";int mqttCloudPort =8883;char mqttCloudClientName[] ="ARTIK-Arduino";char mqttCloudUsername[] ="[device-id]"; char mqttCloudPassword[] ="[设备令牌]"; char mqttCloudDataOut[] ="/v1.1/messages/[device-id]"; WiFiSSLClient ipCloudStack;MQTTClient mqttCloudClient;char buf[128];浮动温度,湿度;int n =0;void getNextSample(float* Temperature, float* Humidity){ // 在测量之间等待几秒钟。延迟(2000); // 读取温度或湿度大约需要 250 毫秒! // 传感器读数也可能长达 2 秒“旧”(它是一个非常慢的传感器) *Humidity =dht.readHumidity(); // 读取摄氏温度(默认) *Temperature =dht.readTemperature(); // 将温度读取为华氏度 (isFahrenheit =true) // float f =dht.readTemperature(true); //printf("Temp=%.2f, Pres=%.2f, Humi=%.2f\n", Temp_c__f, Pres_hPa__f, Humi_pct__f); Serial.print("温度="); Serial.println(*温度); Serial.print("湿度="); Serial.println(*Humidity);}void setup() { Serial.begin(57600); dht.begin(); // Wifi 设置 WiFi.begin(_SSID, _PASSWORD);而(WiFi.status()!=WL_CONNECTED){延迟(500); Serial.print("."); Serial.println(); Serial.println("WiFi 已连接"); Serial.print("IP地址:"); Serial.println(WiFi.localIP()); mqttCloudClient.begin(mqttCloudServer, mqttCloudPort, ipCloudStack); Serial.println("开始ARTIK Cloud 连接"); Serial.println();而 (!mqttCloudClient.connect(mqttCloudClientName, mqttCloudUsername, mqttCloudPassword)) { Serial.print("*");延迟(500); }}void messageReceived(String topic, String payload, char * bytes, unsigned int length) {}void sendToArtikCloud(浮动温度,浮动湿度) { loadBuffer(温度,湿度); // 将当前值加载到缓冲区 mqttCloudClient.publish(mqttCloudDataOut, buf);}void loadBuffer(float temperature, float conditions) { StaticJsonBuffer<200> jsonBuffer; jsonObject&dataPair =jsonBuffer.createObject();数据对[“温度”] =温度;数据对[“湿度”] =湿度; dataPair.printTo(buf, sizeof(buf));}void loop() { if (++n> 10) { Serial.println("Stopped.");退出(0); } mqttCloudClient.loop();延迟(1000); getNextSample(&温度, &湿度); Serial.println("发布中..."); Serial.println(); sendToArtikCloud(温度,湿度);延迟(15000);}
artik_led_actor.inoC/C++
#include#include #include #define LED_RED_PIN 11#define LED_YELLOW_PIN 13#define RED_DELAY 5000#define YELLOW_DELAY 10000const char* _SSID ="[Wi-Fi SSID ]";const char* _PASSWORD ="[Wi-Fi 密码]"; // ARTIK Cloud MQTT paramschar mqttCloudServer[] ="api.artik.cloud";int mqttCloudPort =1883;char mqttCloudClientName[] ="ARTIK-Arduino";char mqttCloudUsername[] ="[device-id]"; char mqttCloudPassword[] ="[设备令牌]"; char mqttCloudActionsIn[] ="/v1.1/actions/[device-id]"; WiFiClient ipCloudStack;MQTTClient mqttCloudClient;char buf[128];int savedRedValue,savedYellowValue;unsigned long savedRedTime,savedYellowTime;void setup() {Serial.begin(57600); pinMode(LED_RED_PIN,输出); pinMode(LED_YELLOW_PIN,输出);保存的红色值 =保存的黄色值 =0; // Wifi 设置 WiFi.begin(_SSID, _PASSWORD);而(WiFi.status()!=WL_CONNECTED){延迟(500); Serial.print("."); Serial.println(); Serial.println("WiFi 已连接"); Serial.print("IP地址:"); Serial.println(WiFi.localIP()); mqttCloudClient.begin(mqttCloudServer, mqttCloudPort, ipCloudStack); Serial.println("开始ARTIK Cloud 连接"); Serial.println();而 (!mqttCloudClient.connect(mqttCloudClientName, mqttCloudUsername, mqttCloudPassword)) { Serial.print("*");延迟(500); } mqttCloudClient.subscribe(mqttCloudActionsIn);}void messageReceived(String topic, String payload, char * bytes, unsigned int length) { Serial.print("topic="); Serial.println(主题); Serial.print("payload="); Serial.println(payload); Serial.print("bytes="); Serial.println(字节); Serial.print("length="); Serial.println(长度); parseBuffer(payload);}void parseBuffer(String payload) { StaticJsonBuffer<200> jsonBuffer;字符串 json =有效载荷; jsonObject&root =jsonBuffer.parseObject(json); const char* nameparam =root["actions"][0]["name"]; const int actionLEDRed =root["actions"][0]["parameters"]["led_red"]; const int actionLEDYellow =root["actions"][0]["parameters"]["led_yellow"]; Serial.print("name="); Serial.println(nameparam); Serial.print("led_red="); Serial.println(actionLEDRed); Serial.print("led_yellow="); Serial.println(actionLEDYellow); Serial.println(); if (actionLEDRed ==1) { if (savedRedValue !=actionLEDRed) { digitalWrite(LED_RED_PIN, HIGH); SavedRedValue =actionLEDRed; saveRedTime =毫秒(); } else { if (savedRedValue !=actionLEDRed) { if (millis() - savedRedTime> RED_DELAY) { digitalWrite(LED_RED_PIN, LOW); SavedRedValue =actionLEDRed; } } } if (actionLEDYellow ==1) { if (savedYellowValue !=actionLEDYellow) { digitalWrite(LED_YELLOW_PIN, HIGH); SavedYellowValue =actionLEDYellow;保存的黄色时间 =毫秒(); } else { if (savedYellowValue !=actionLEDYellow) { if (millis() - savedYellowTime> YELLOW_DELAY) { digitalWrite(LED_YELLOW_PIN, LOW); SavedYellowValue =actionLEDYellow; } } } }void loop() { mqttCloudClient.loop();延迟(500); }
制造工艺