

基于 LoRa 的智能城市空气质量监测
组件和用品
 |
| × | 1 | |||
 |
| × | 1 | |||
 |
| × | 1 | |||
 |
| × | 1 | |||
 |
| × | 1 | |||
| × | 1 | ||||
| × | 1 | ||||
| × | 1 | ||||
| × | 1 | ||||
 |
| × | 1 |
必要的工具和机器
 |
|
应用和在线服务
 |
| |||
 |
| |||
 |
|
关于这个项目
智慧城市与空气质量
世界银行将智慧城市定义为技术密集型城市。这意味着高效的公共服务。
智慧城市的基本特征之一是提供可持续的环境。对于可持续的环境,有必要监测环境条件以识别污染源并减轻污染。在这种情况下,放置了数千个空气质量传感器,为政府和公民提供实时信息。这些数据可以转化为有用的信息,让我们能够做出更好的决策——是进行交通规划还是了解步行上班的最佳路线。
空气质量传感非常符合智慧城市的愿景——提供以前无法获得的城市信息,让人们能够做出可以改善生活质量的决策。
问题与解决方案
大城市空气污染程度的增加已成为一个主要问题,因为它对人类健康构成风险。在这种情况下,技术已成为污染监测和可能减轻其影响的非常有用的工具。特别是,有使用物联网 (IoT) 范式的不同建议,该范式使用互连的传感器来测量不同的污染物。可以部署低成本空气质量监测传感器节点网络来监测空气质量和气象参数。因此,通过污染源检测,城市可以采取纠正措施,改善环境健康。通过在您周围安装洪水和降雨监测解决方案等灾害检测系统。如果发生灾难性事件,可以提前通知公民。可以推导出整体视图,使当局能够制定数据驱动的基础设施和政策规划决策。
项目计划
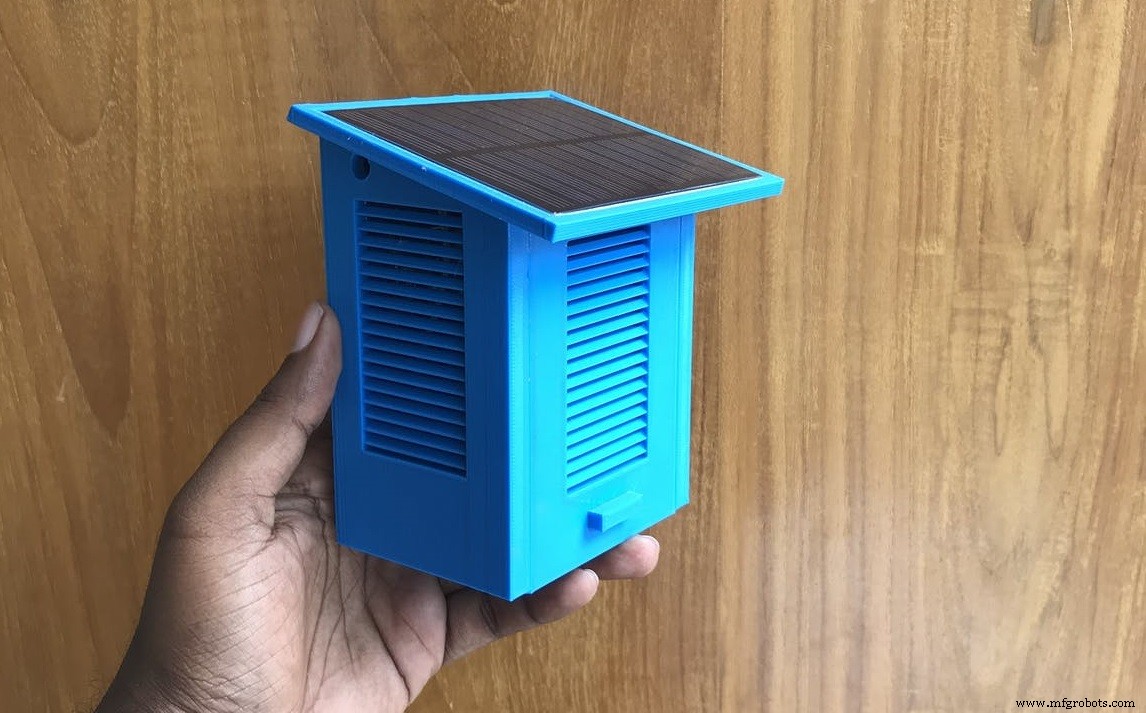
在这个项目中,我们将监测一些最重要的环境参数,如噪音、温度、湿度和空气质量。它通过无线通信协议将实时数据传输到云平台。该设备完全靠太阳能供电,并带有备用电池。可以在仪表板上访问来自设备的数据,该仪表板以所需格式可视化和分析数据。
对于智慧城市空气质量监测,您必须将传感器节点放置在不同的位置。在功耗和成本方面,将每个传感器节点单独连接到云端并不是一个好主意。相反,从一个小区域的所有传感器节点收集数据并将所有数据从单个网关发布到云是一个好主意。 LoRa 可以为我们提供这种优势,这就是我为我的项目选择 LoRa 的原因。
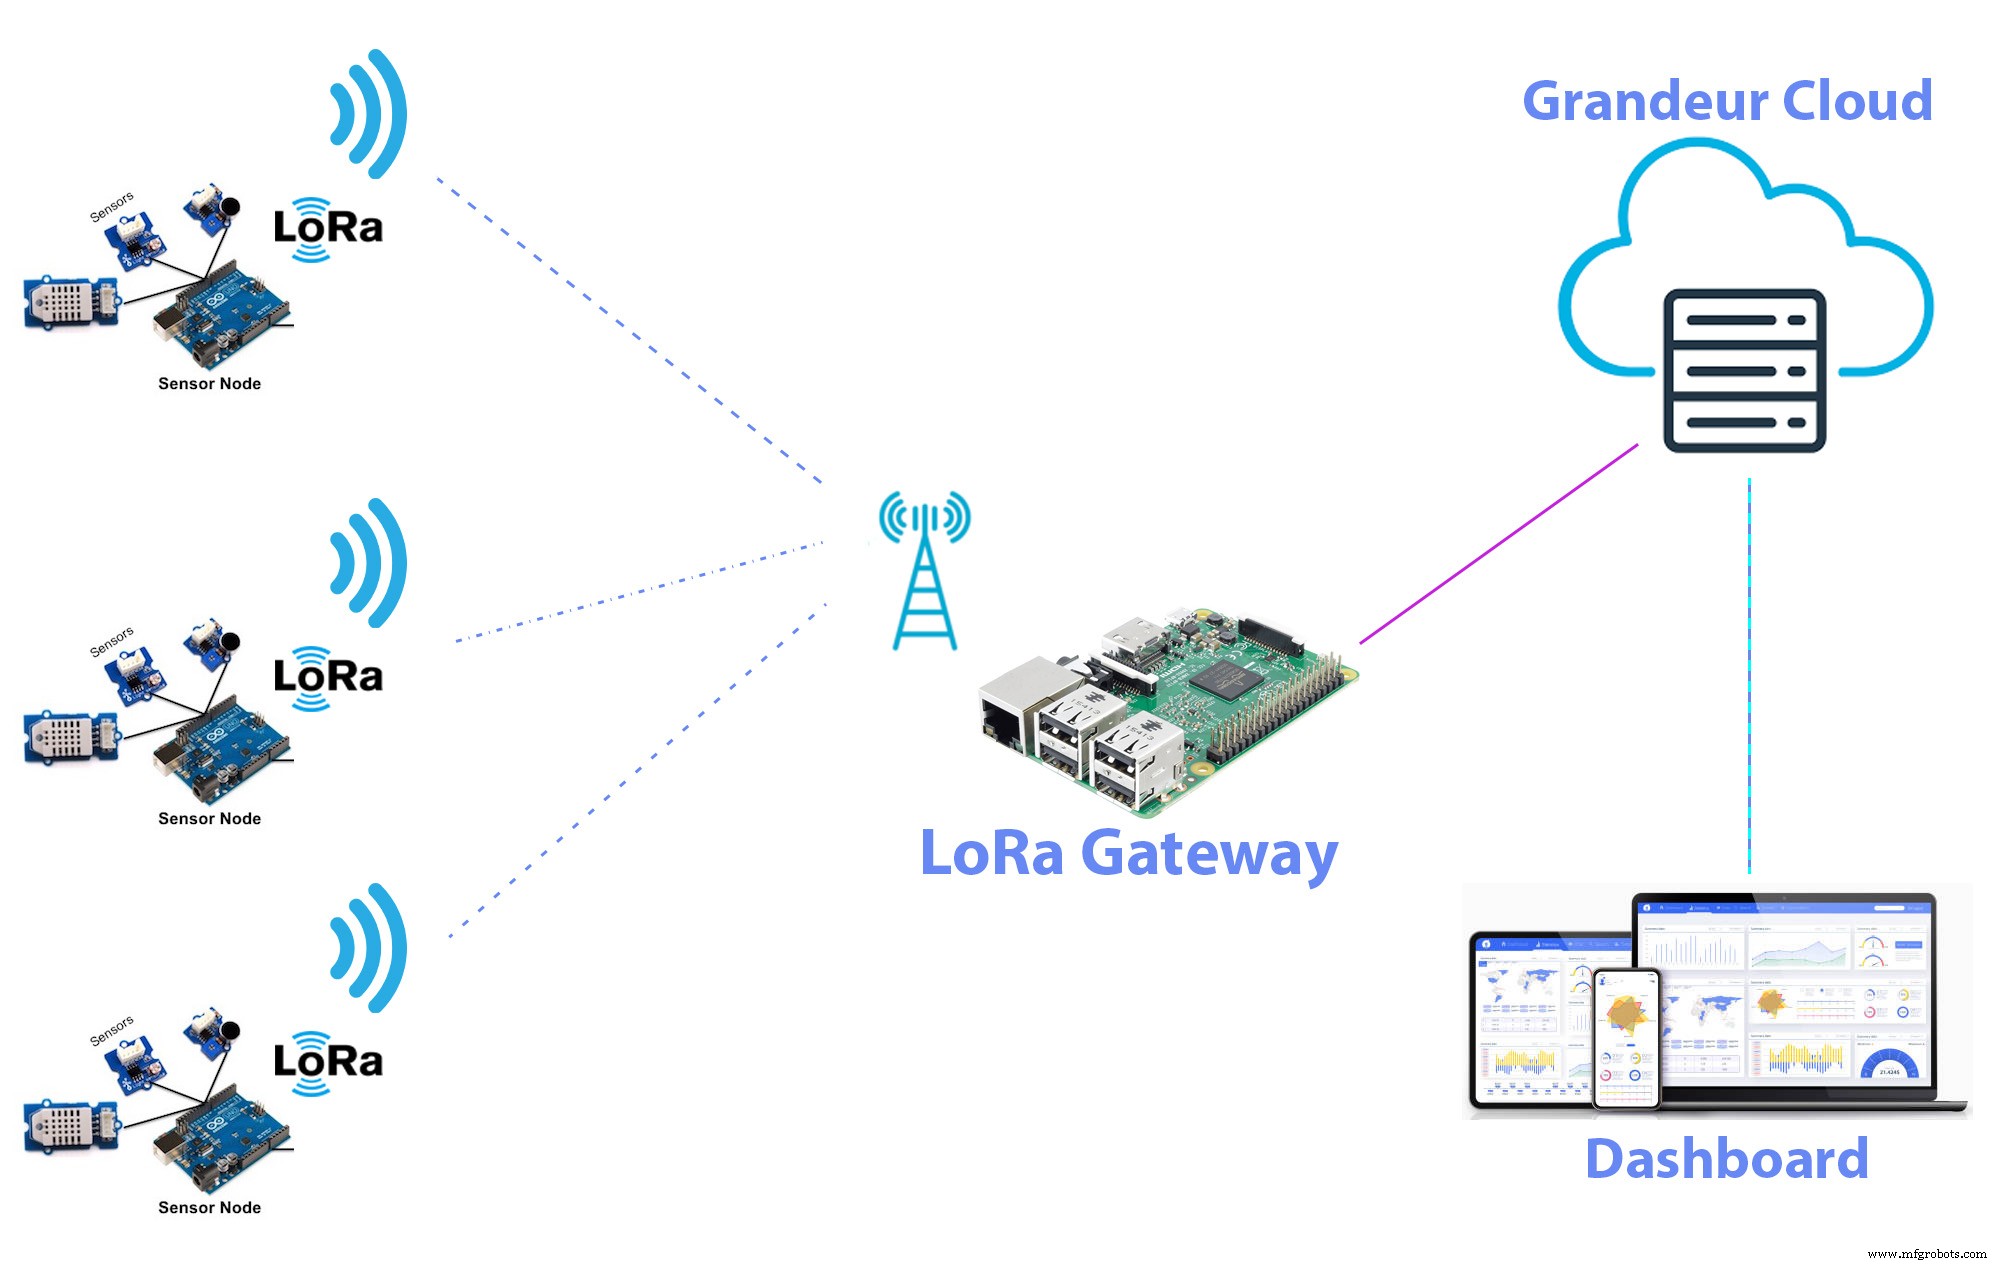
对于云服务,我在我的项目中使用了 Grandeur。 Grandeur 是一个相对较新的制造商友好型物联网平台,我们可以通过使用拖放方法制作图形小部件来存储数据并可视化数据。他们还提供带有示例代码的 Arduino、JavaScript 和 Python SDK。因此,您可以使用 Arduino、NodeMCU 和 Raspberry Pi 轻松连接到他们的服务。
为传感器节点供电的最佳方式是使用太阳能电池板。因为传感器节点位于不同的远程位置,经常更换电池或从公用电源供电并不总是可行的。我正在使用太阳能电池板和锂离子电池为我的传感器笔记供电。
制作传感器节点
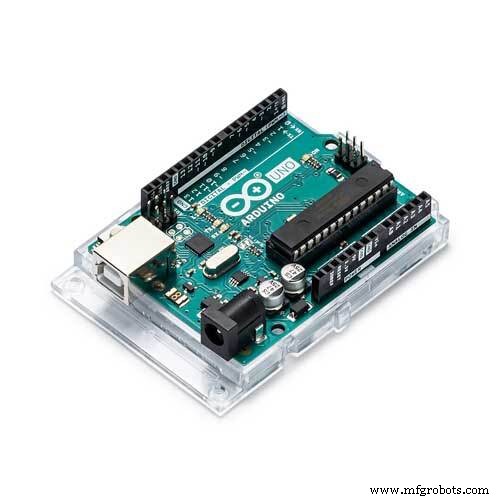
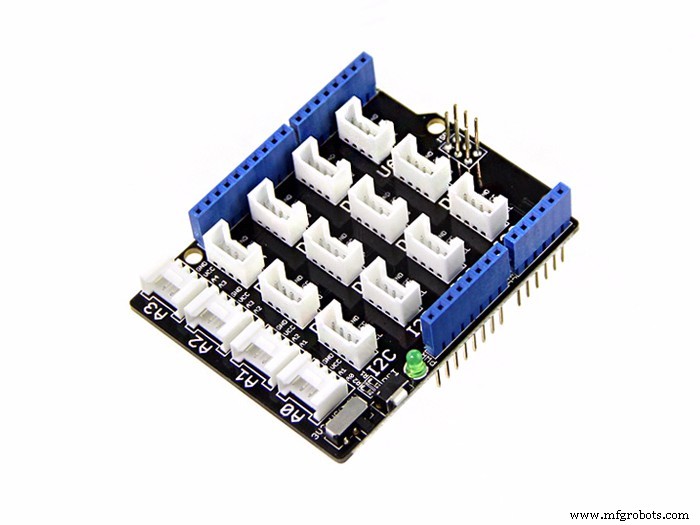
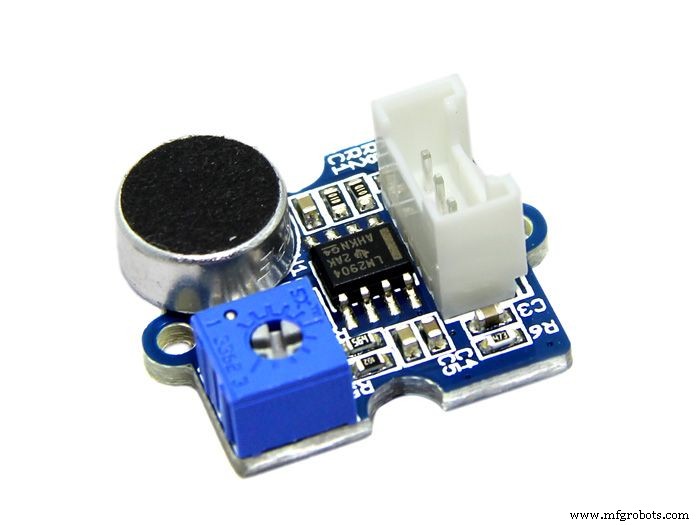
我想监测空气质量、噪音水平、温度和湿度。所以我使用了 Grove 空气质量传感器、Grove 噪音传感器和 Grove DHT11 温度和湿度传感器。 Grove 传感器的一个好处是,您可以使用 Grove base shield 将所有 Grove 传感器连接到 Arduino,无需任何焊接。
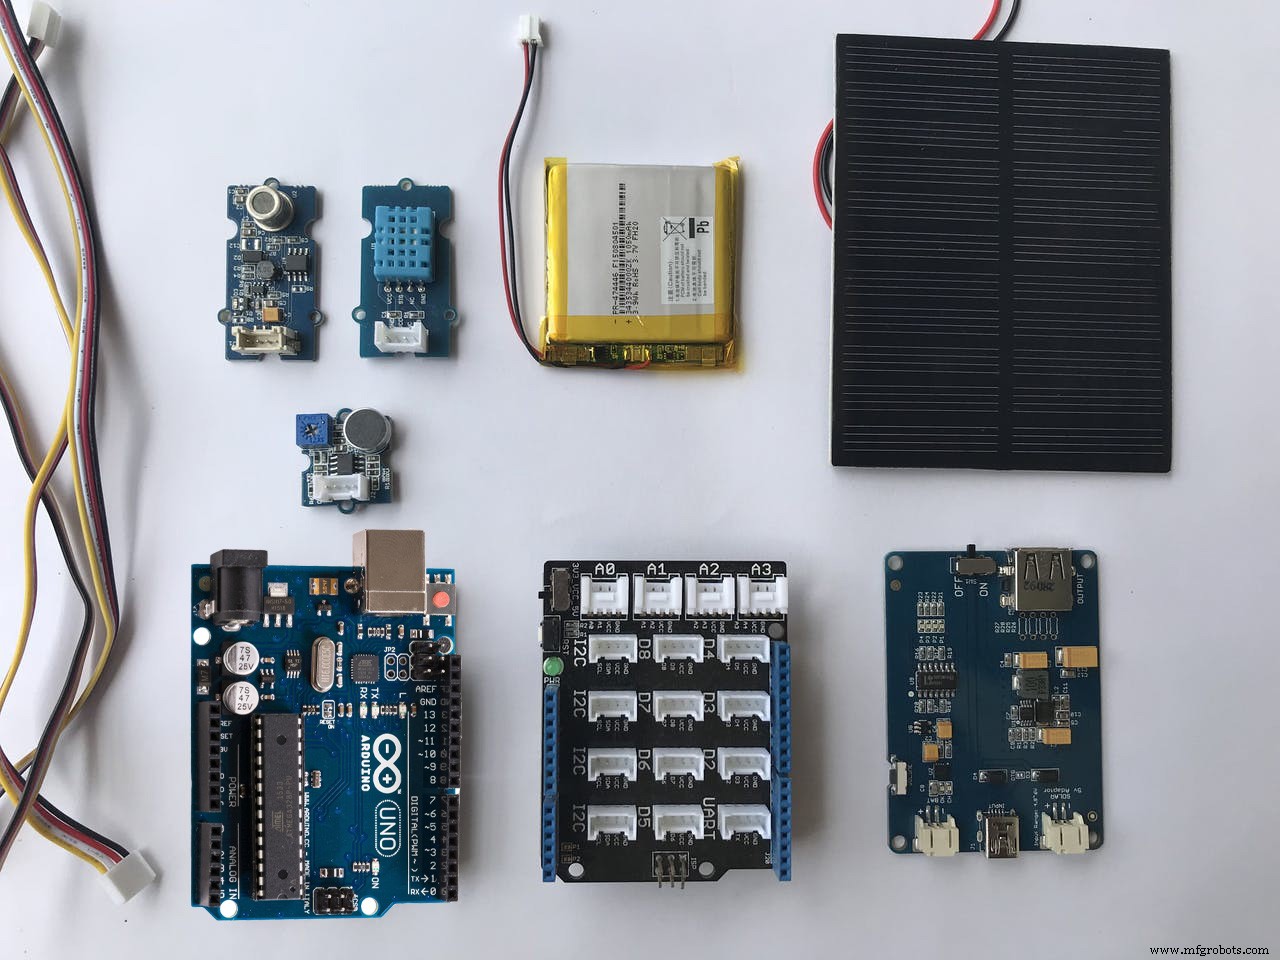
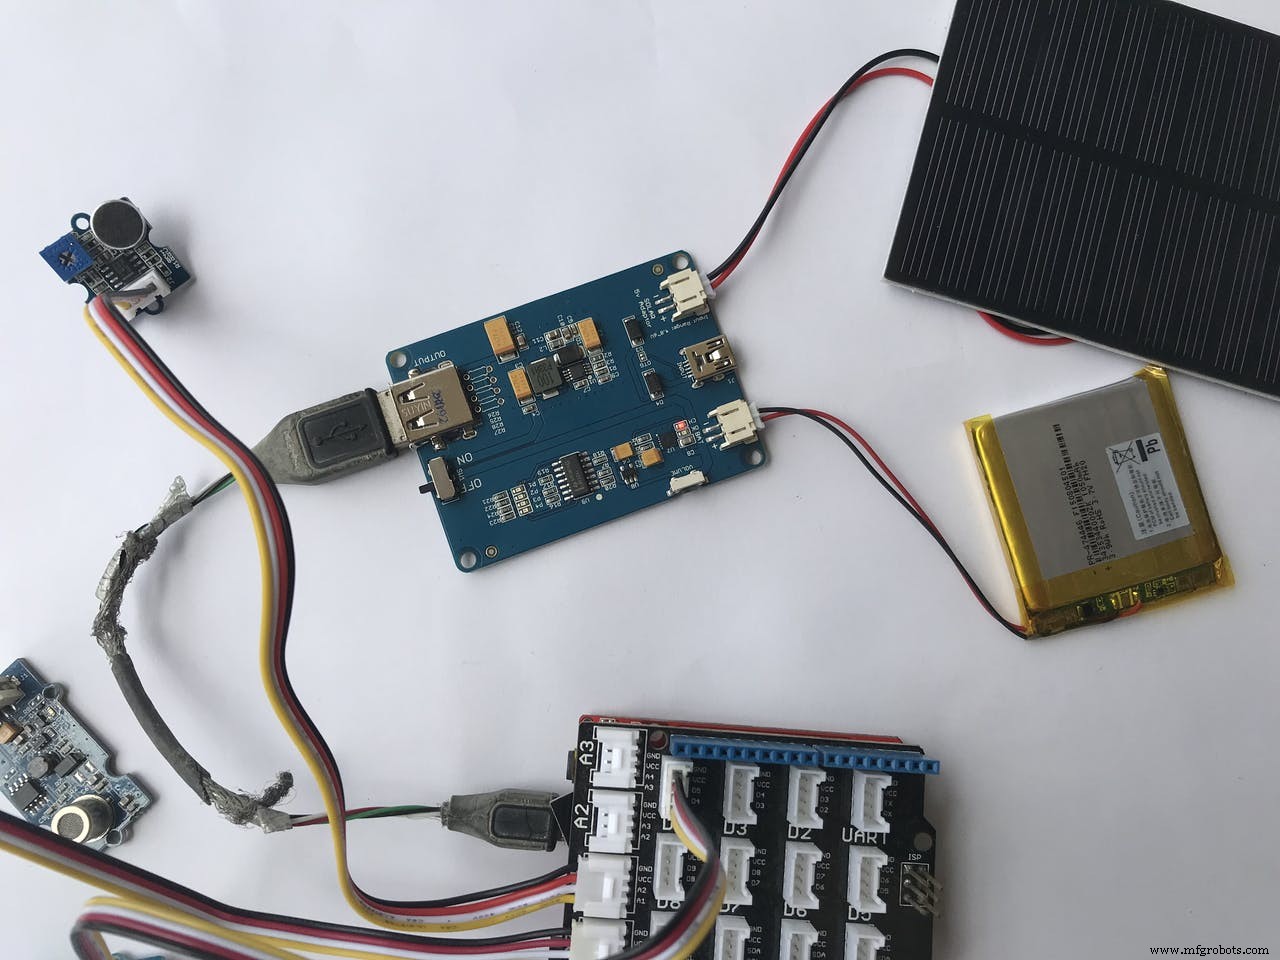
我使用 Grove 1W 太阳能电池板和锂离子电池为电路供电。为了使用太阳能电池板为电池充电,我使用了 Seeed LiPo Rider Pro 太阳能充电器,该充电器具有内置 5V 升压转换器。因此,我们可以使用 LiPo Rider 的输出轻松运行 Arduino。
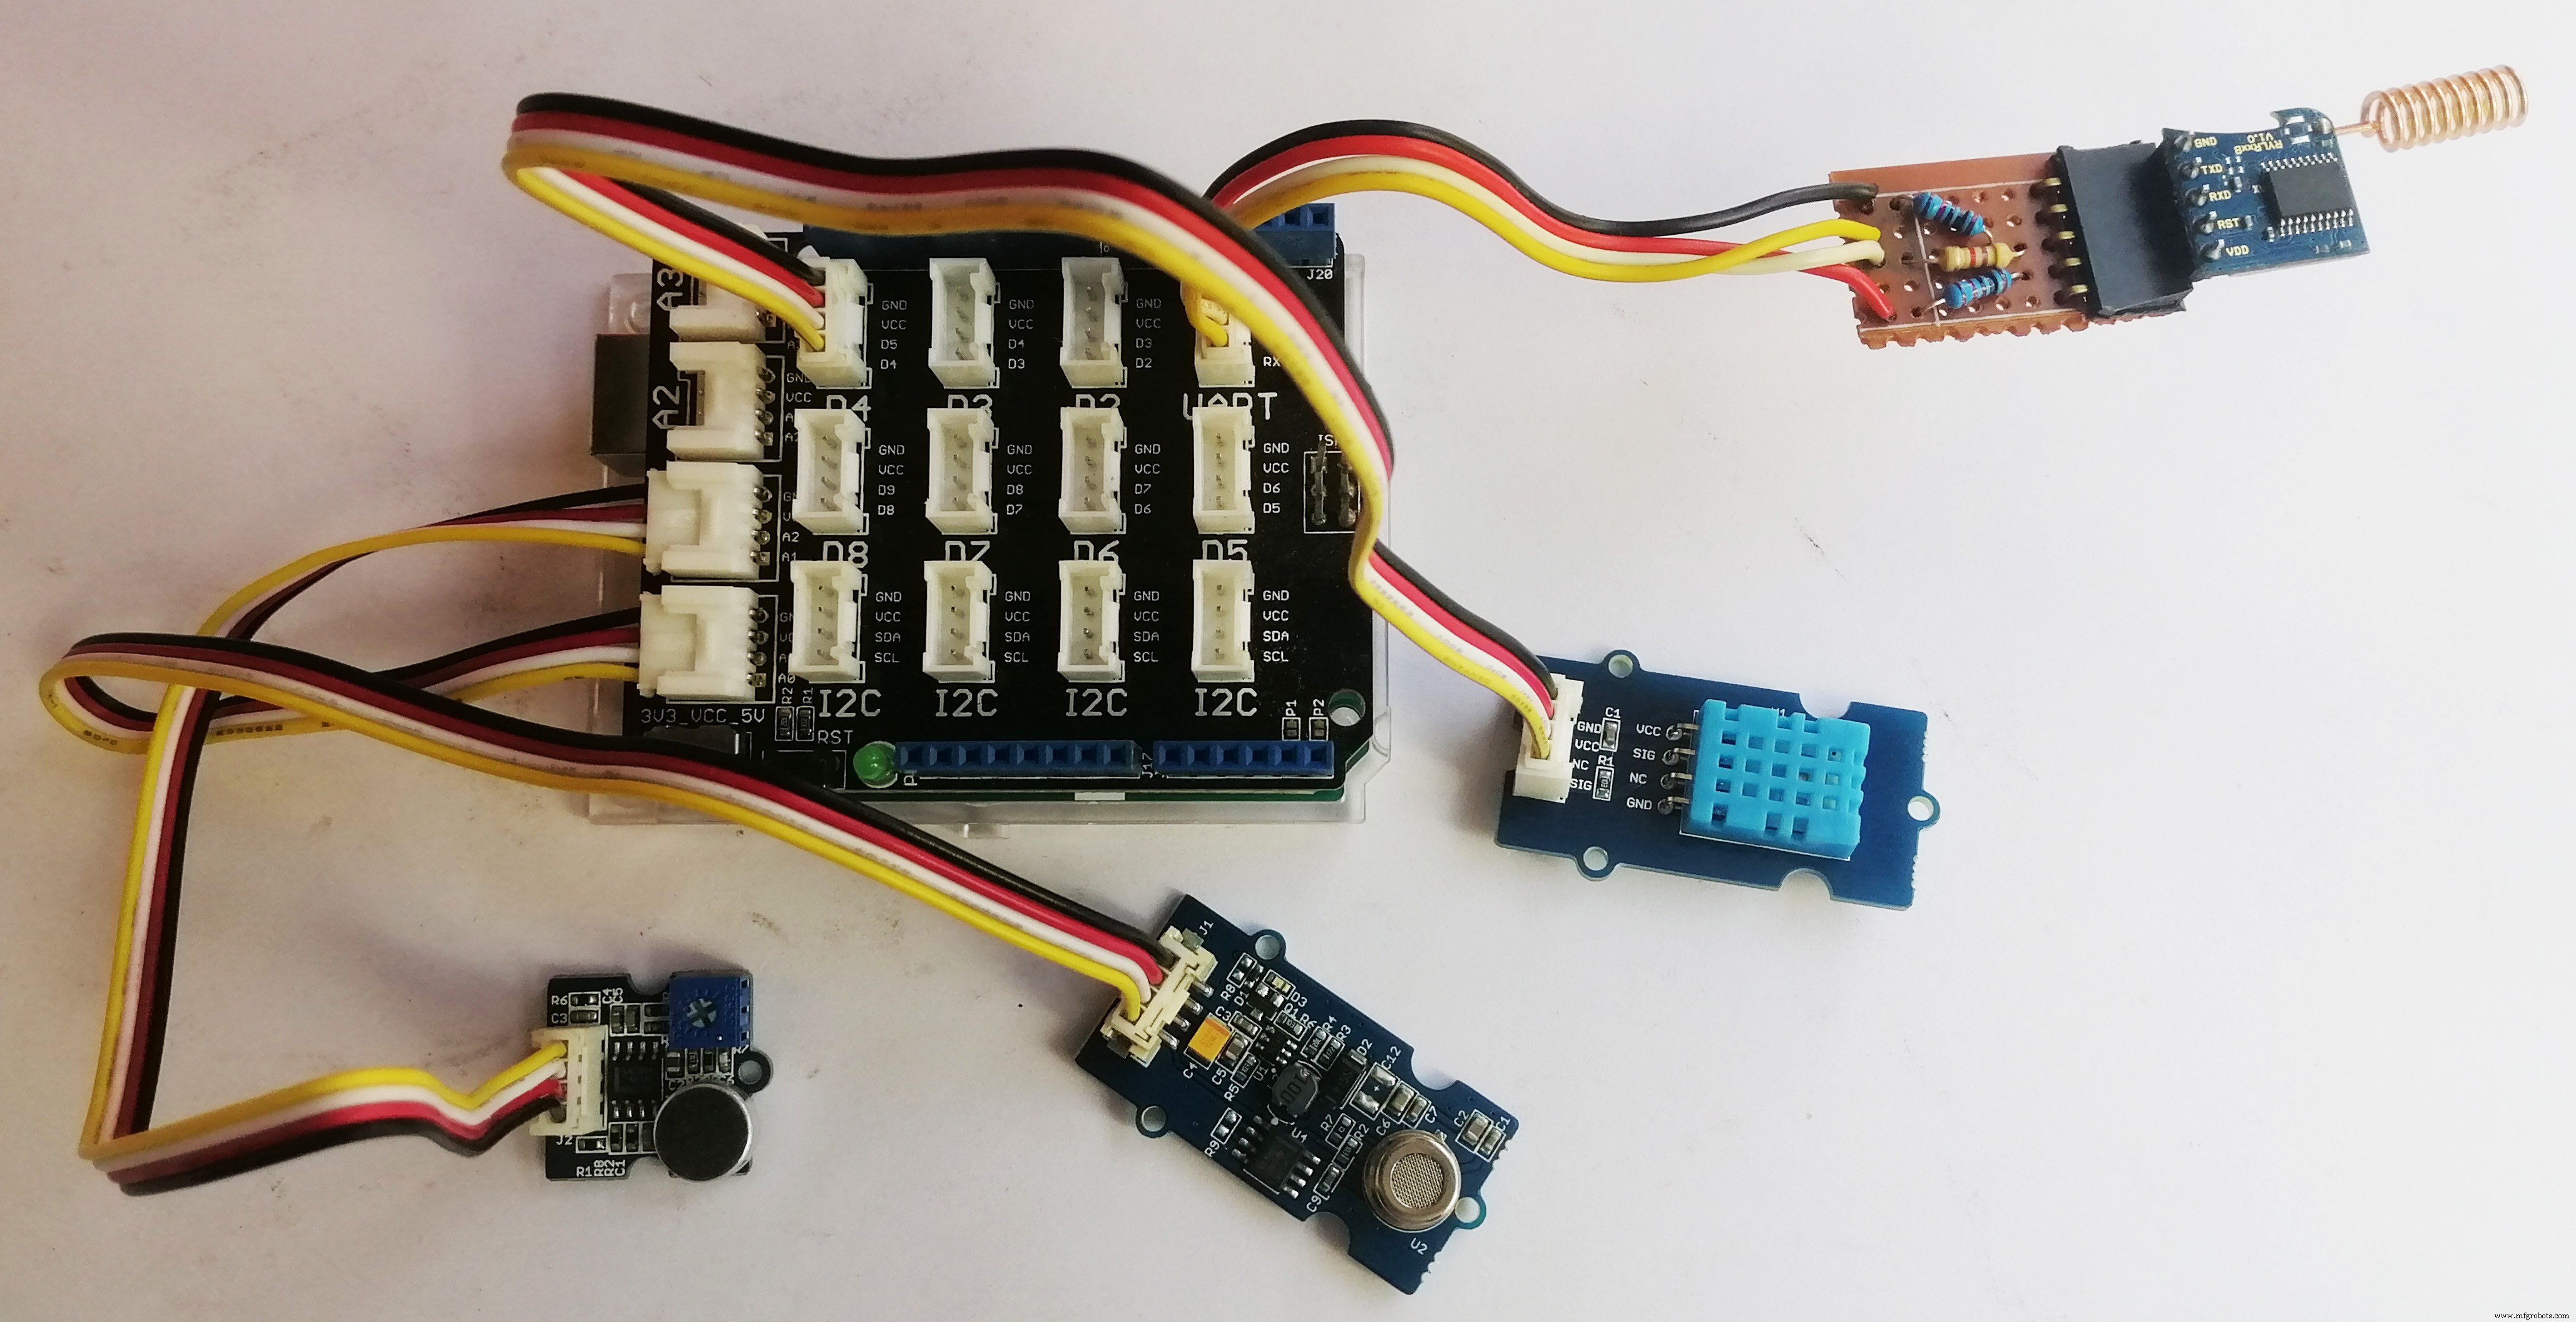
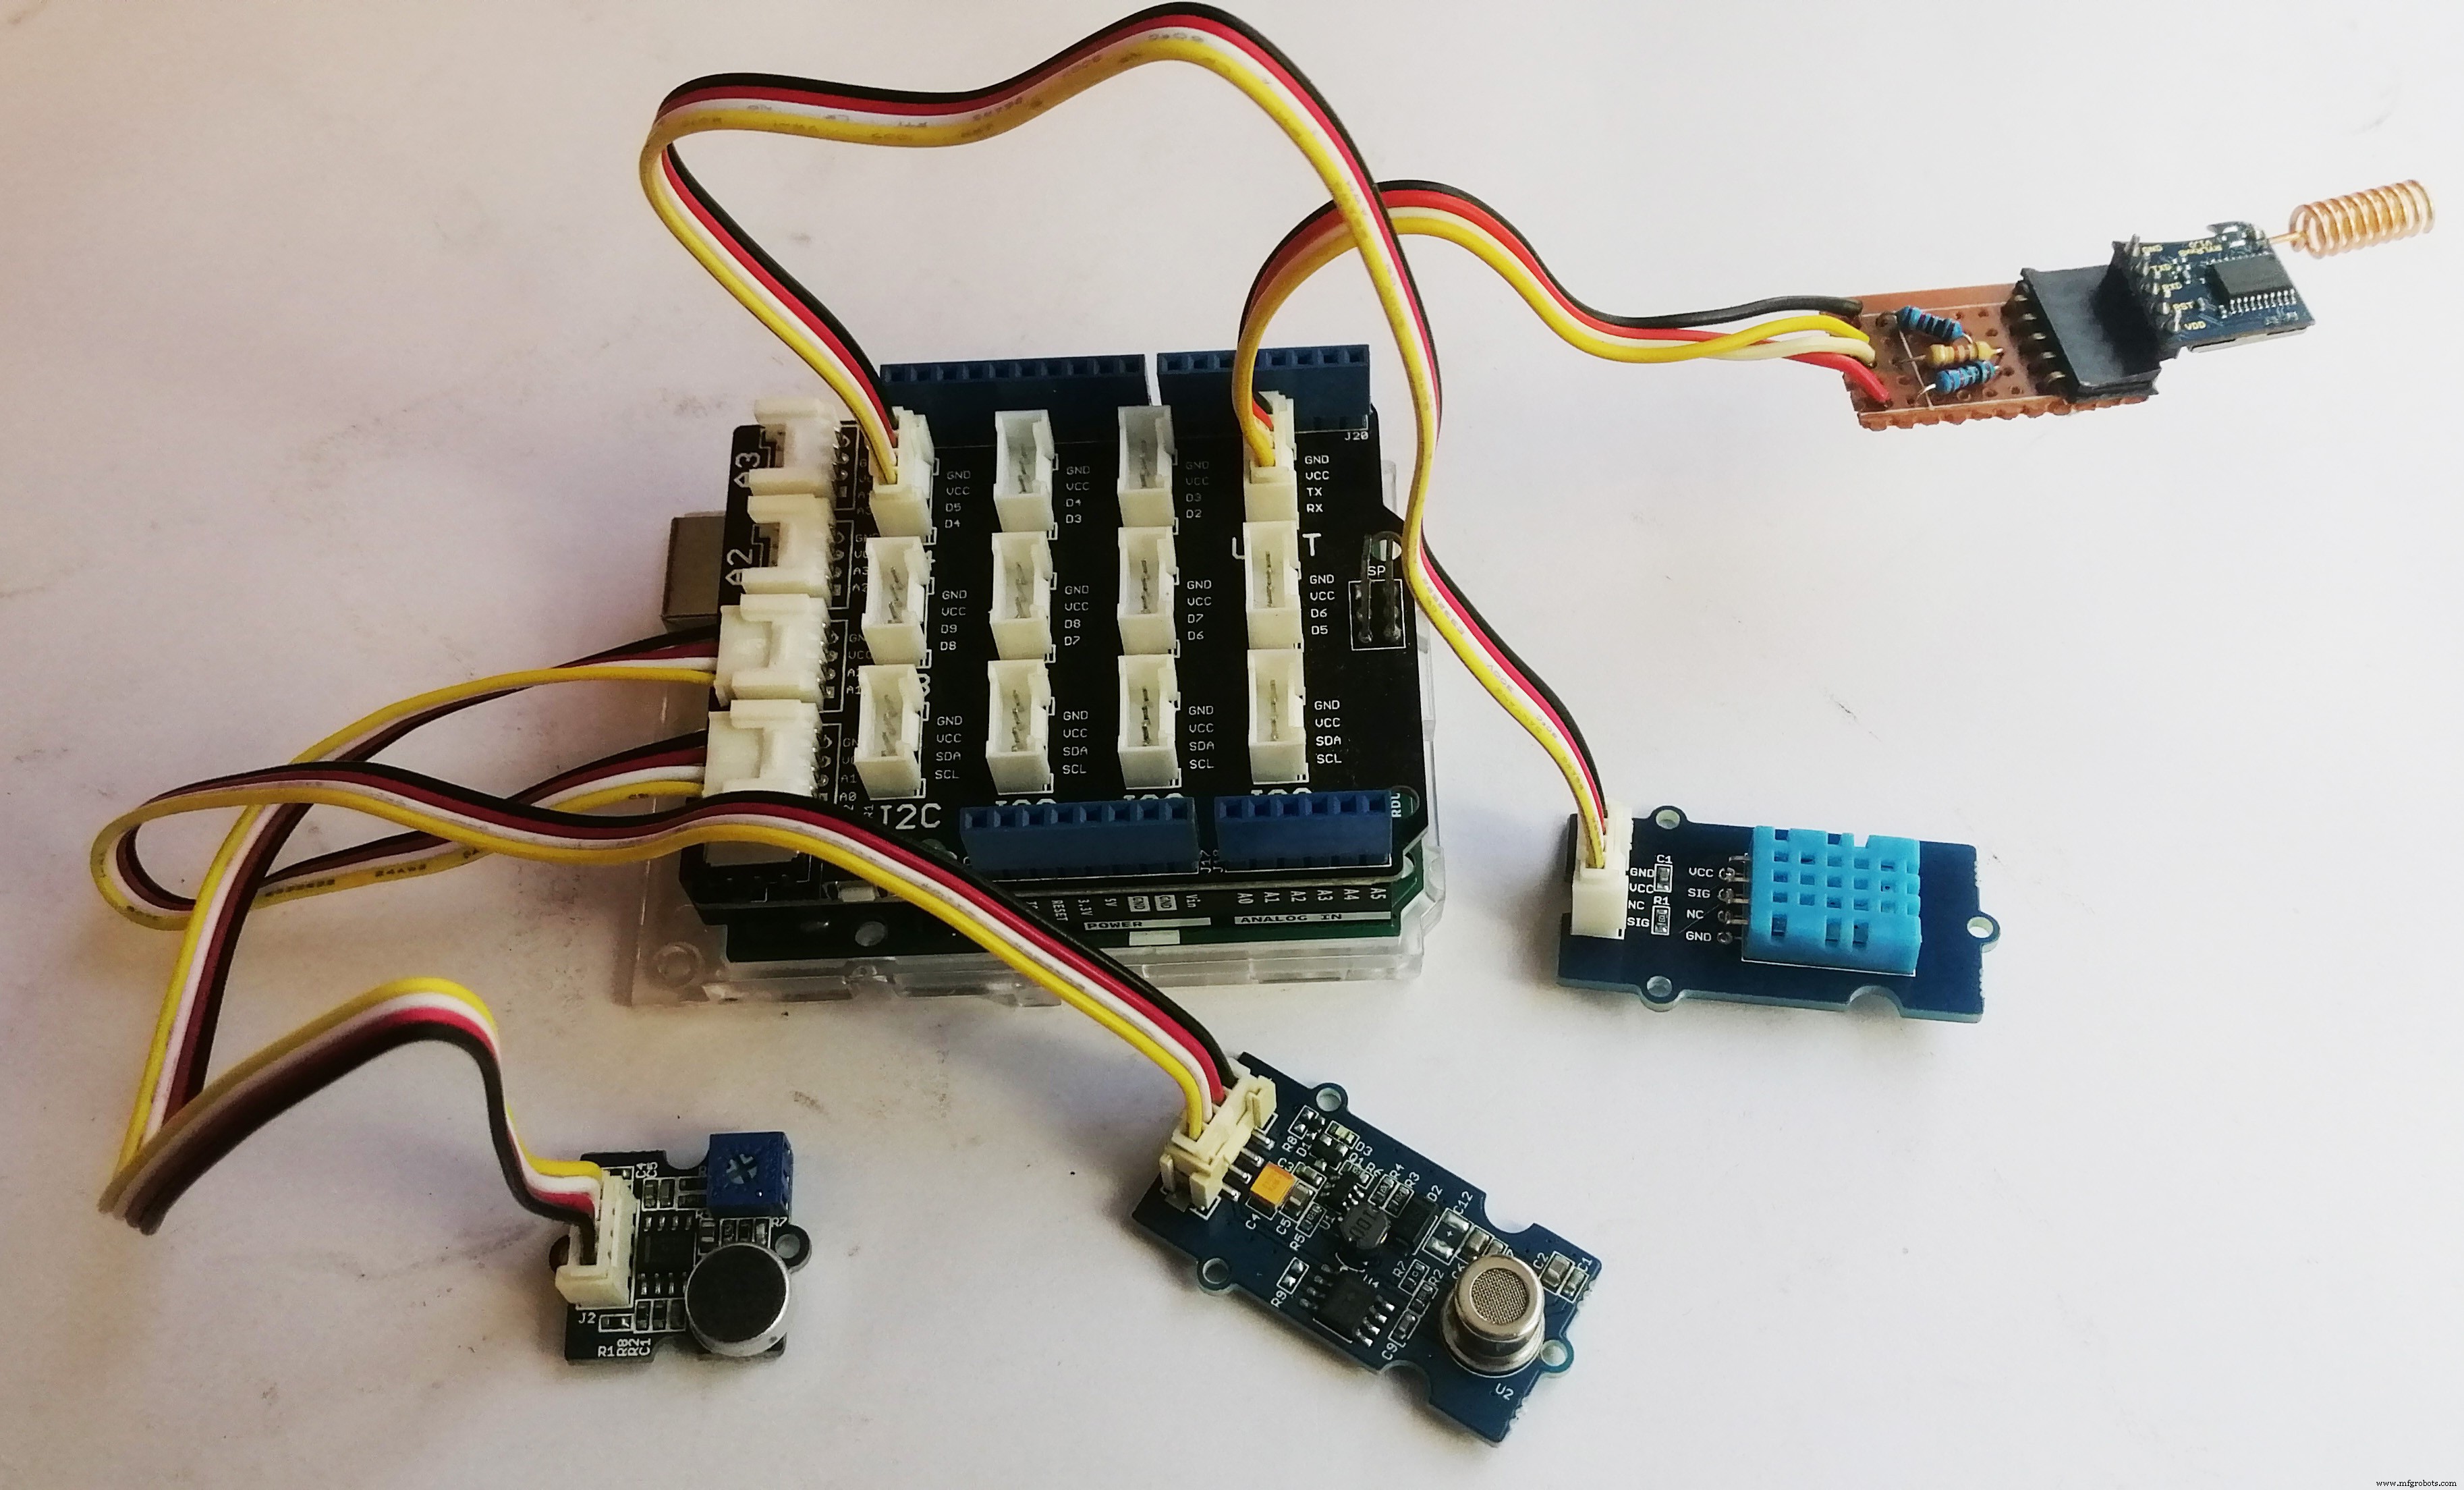
此处使用的大部分组件均可在 Seeedstudio.com 上获得。下图显示了传感器节点所有组件的即插即用测试连接。
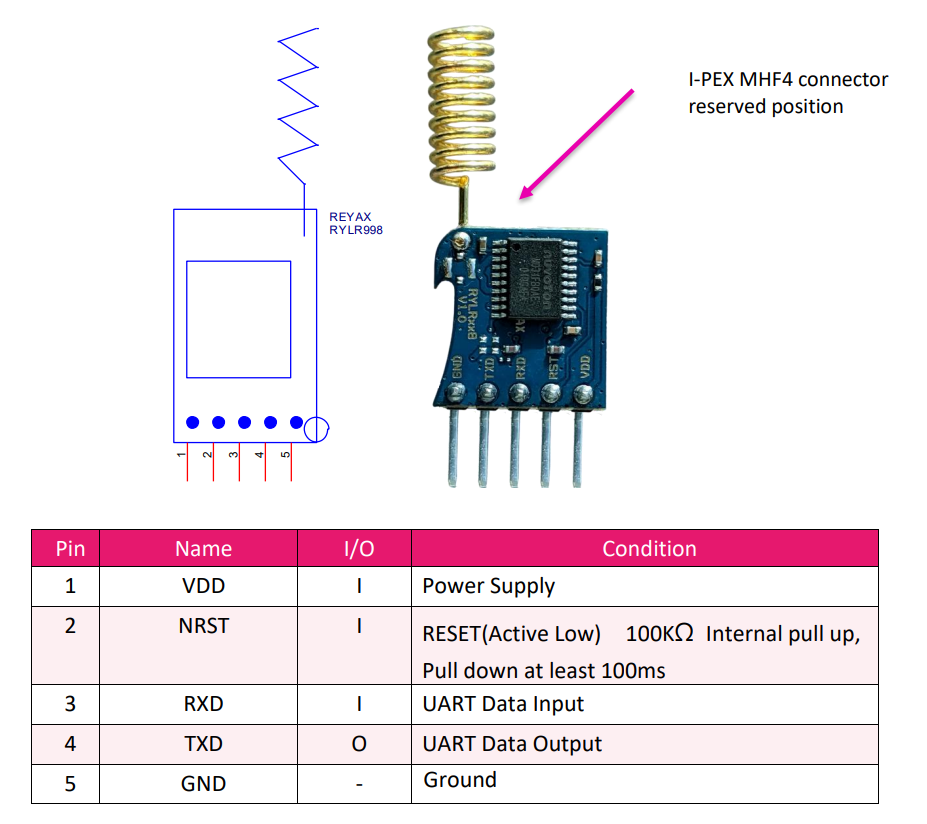
为了将传感器数据传输到 IoT 网关,我使用了 Reyax LoRa 收发器。下图显示了 Reyax RYLR998 Lora 模块及其引脚图。
准备 Reyax RYLR998 LoRa 引擎以连接 Arduino Base Shield
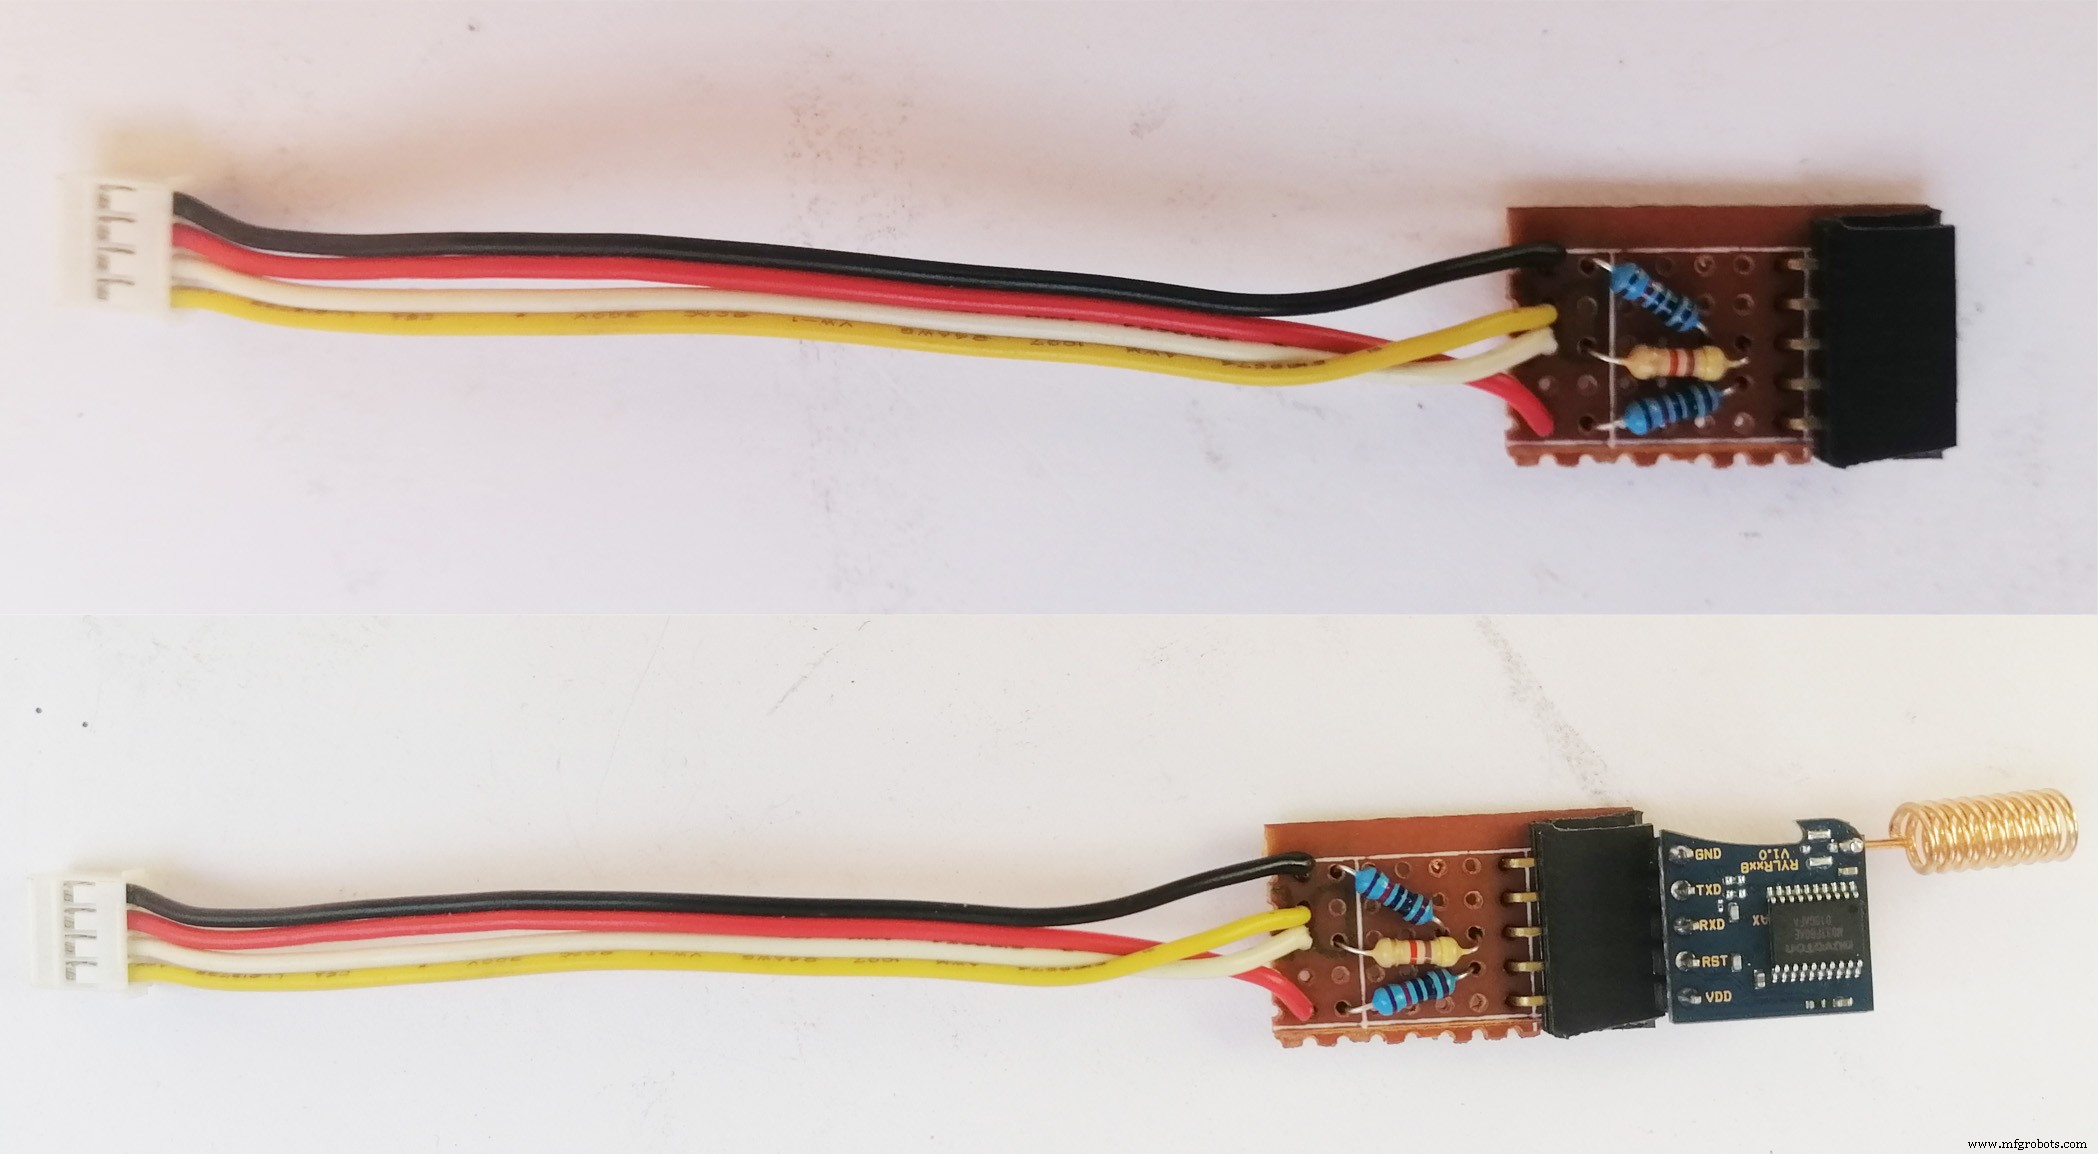
RYLR998 有 5 个公针输出,与 Grove 底座屏蔽不兼容。为了将它连接到 Grove Shield,我将 Grove 电缆焊接在带有 5 针母接头的穿孔板上。电路连接如下:
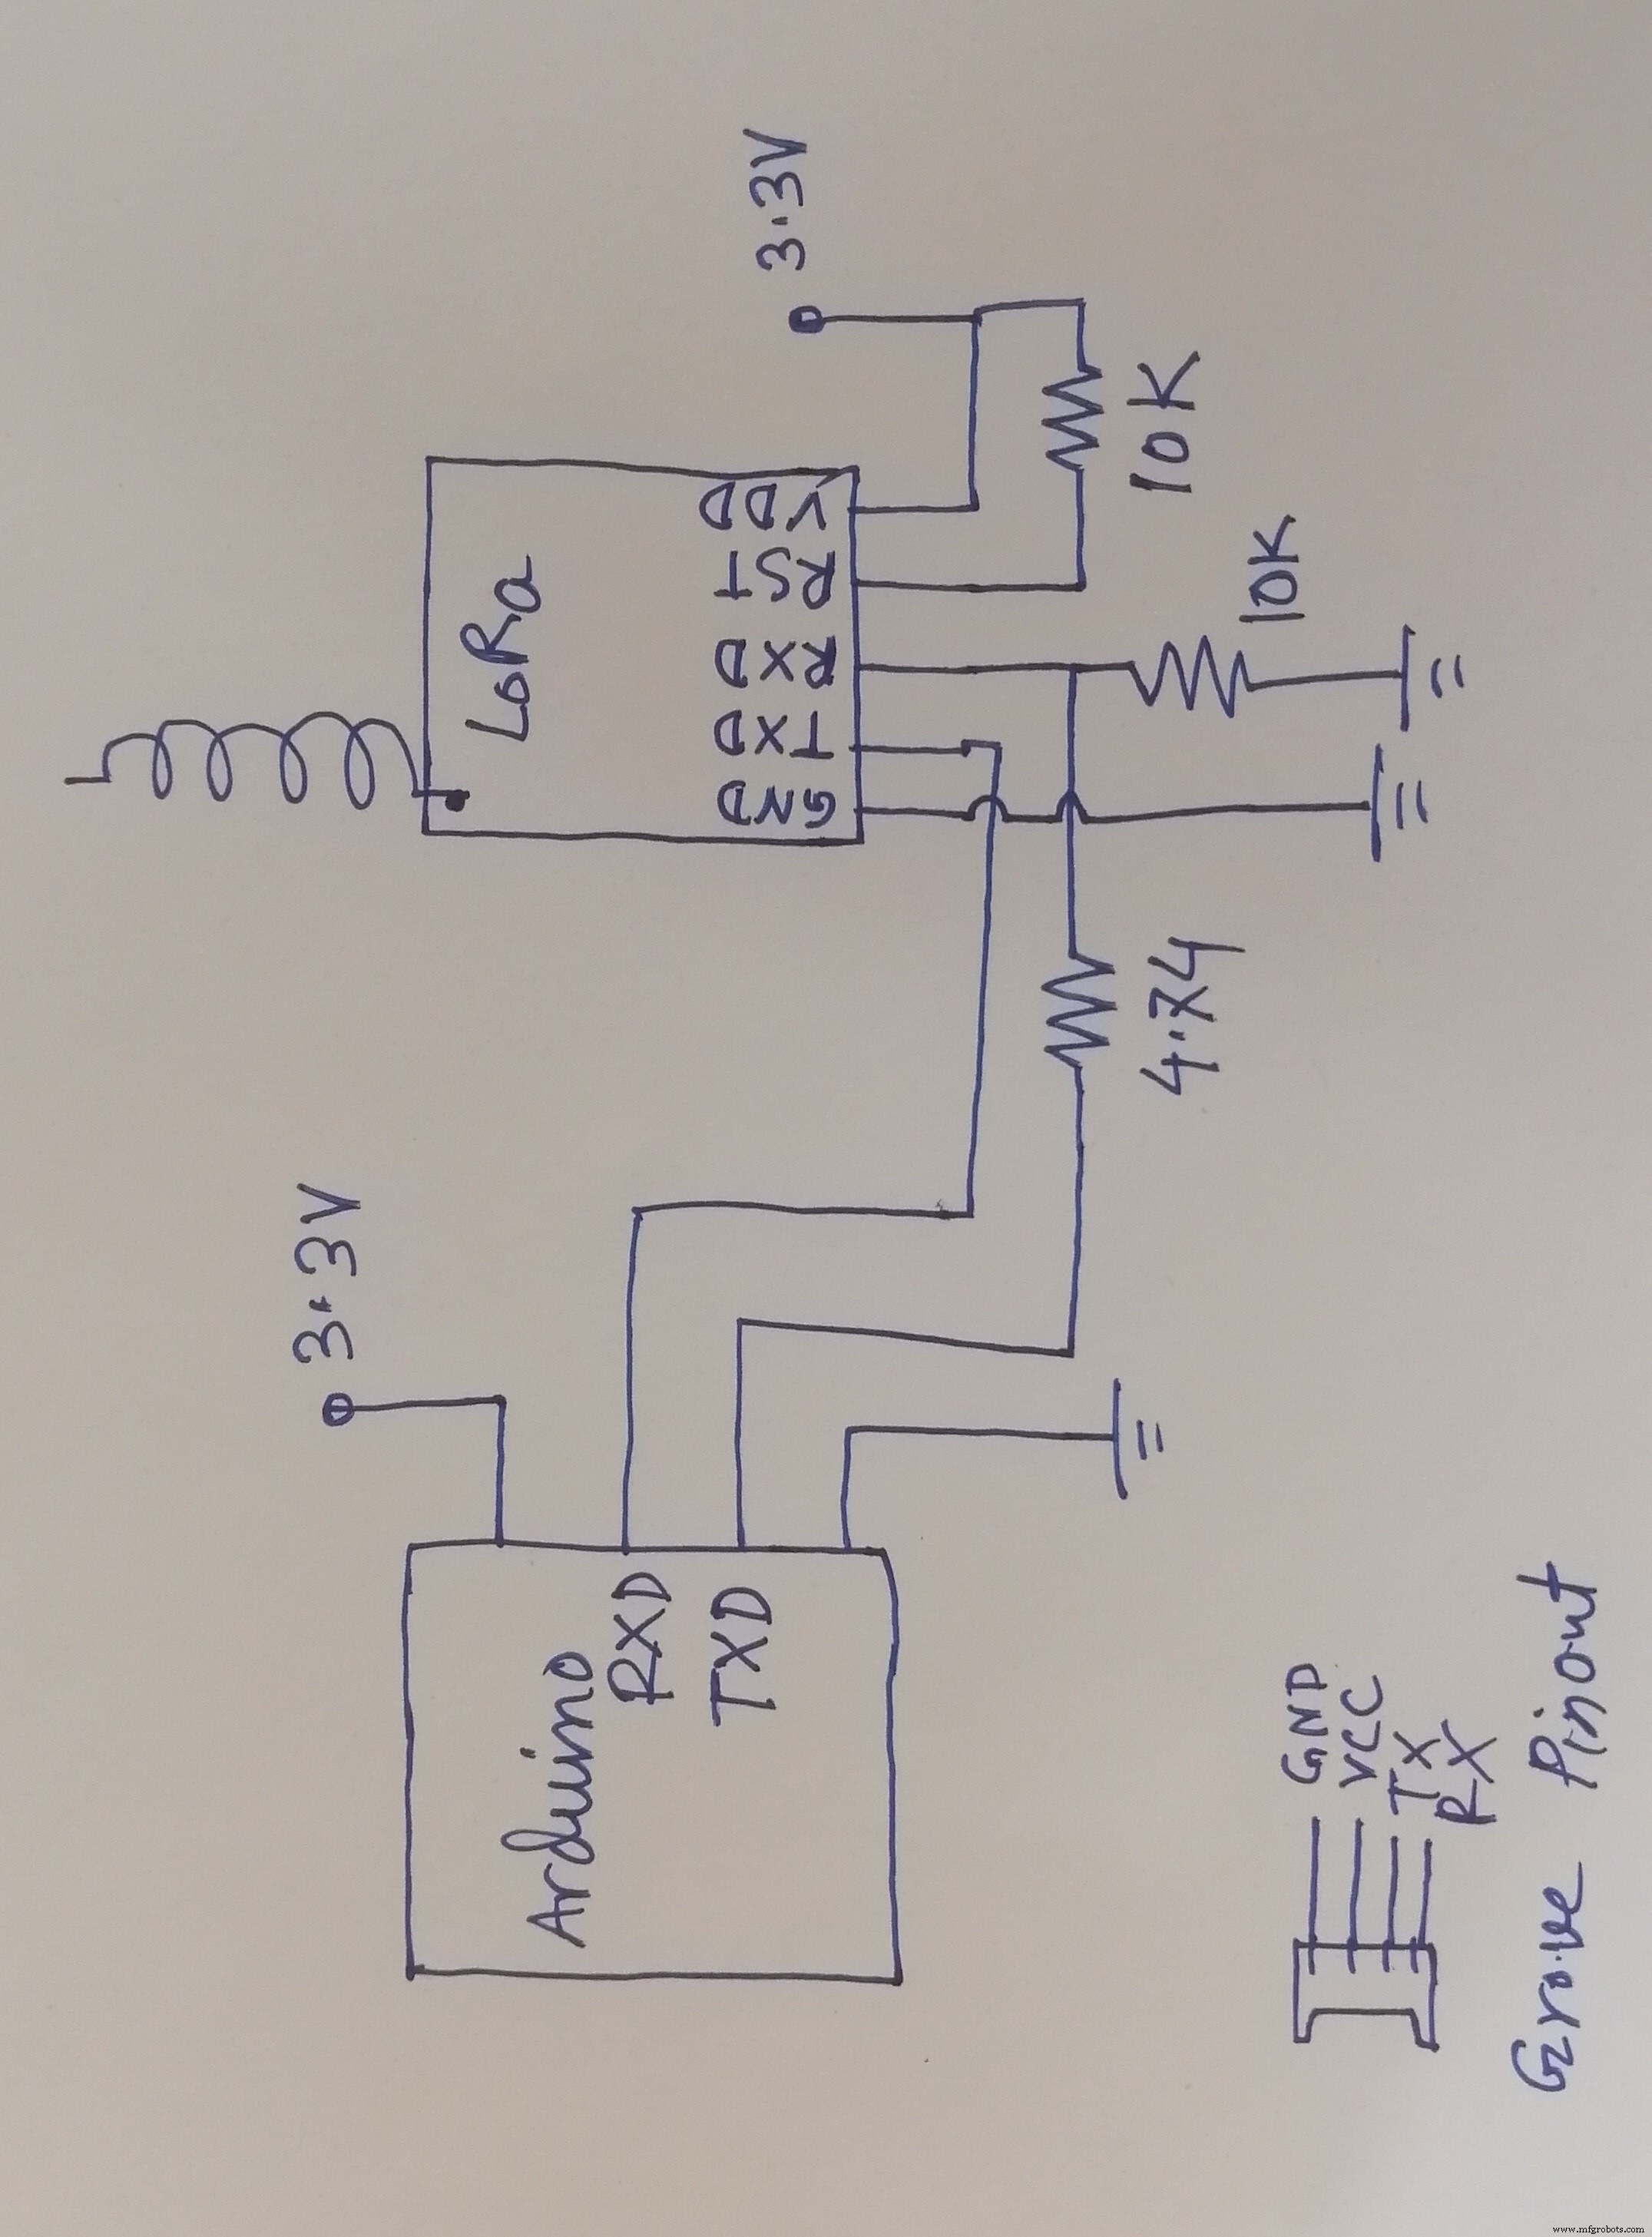
RYLR998 LoRa 模块可在高达 3.6V 的电压下安全运行。 Arduino TX 引脚产生对 LoRa 不安全的 5V 输出。因此,我使用分压器从 Arduino TX 引脚获得 3.4 V 电压。另一方面,Arduino RX 引脚在 3.3V 逻辑上完美运行。因此,我将 LoRa 的 TX 引脚直接连接到 Arduino 的 RX 引脚。正常工作时,LoRa 的 RST 引脚应处于高电平状态。
现在可以使用以下转换器电路将上述 LoRa 模块轻松连接到基本屏蔽。
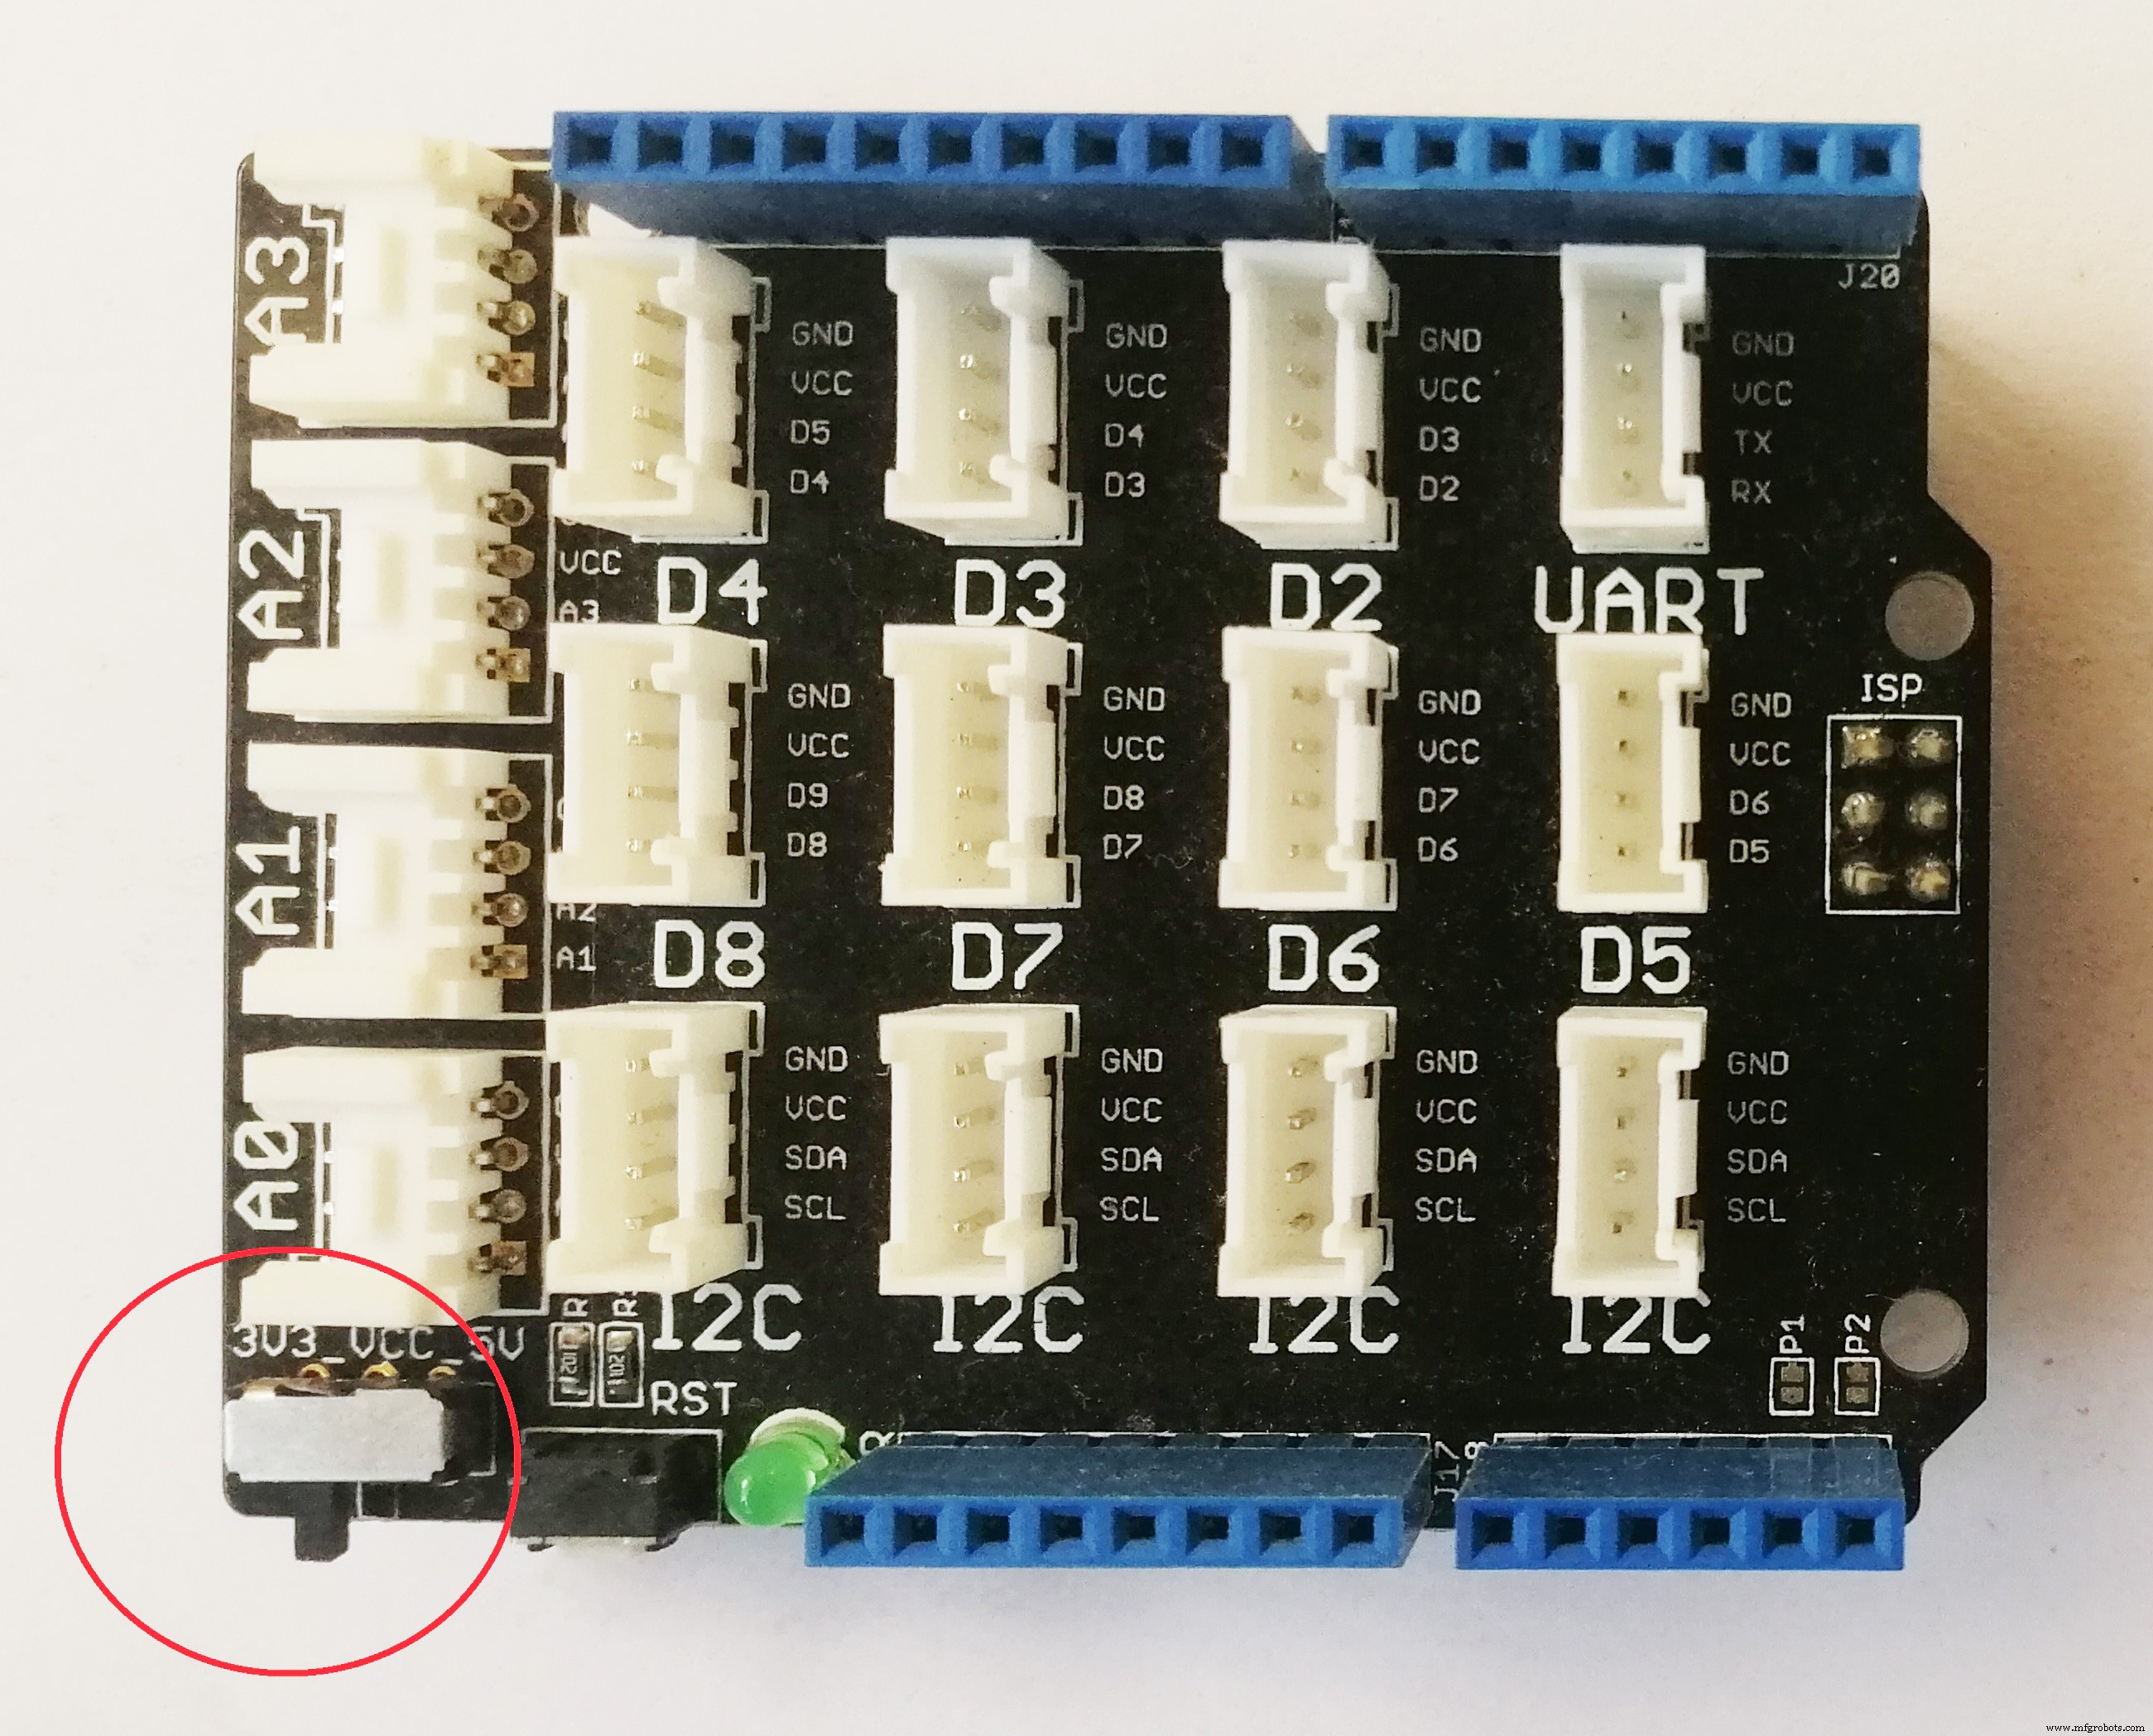
但是在将模块连接到底座之前,请确保底座电源按钮处于 3.3V 位置,如下图所示。
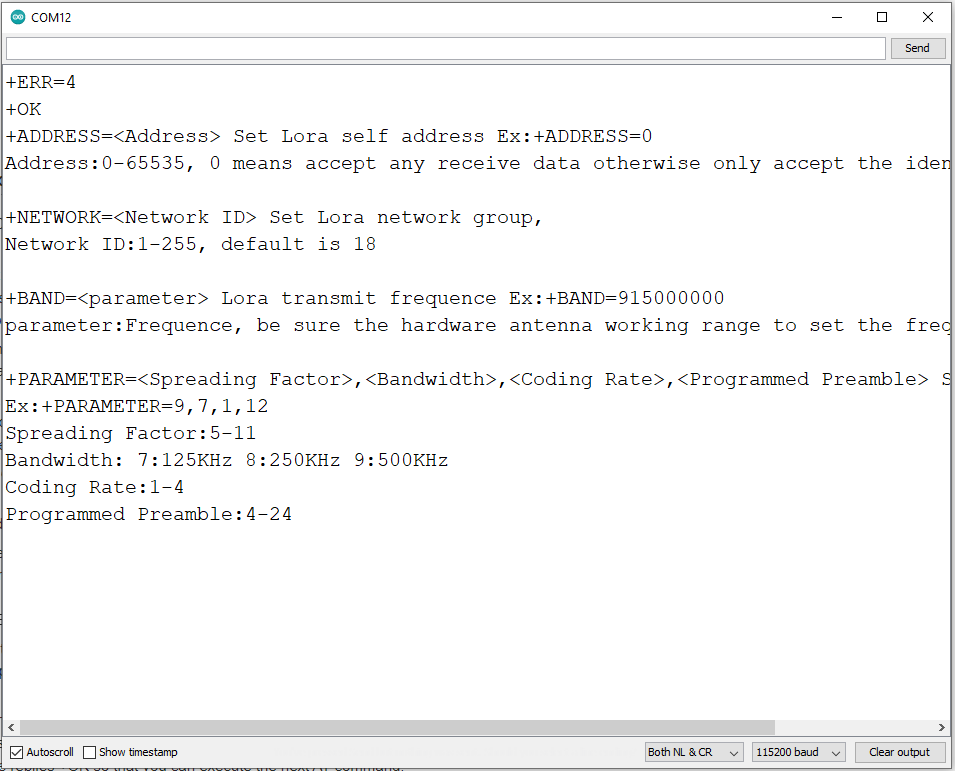
将 LoRa 模块连接到 base shield 后,我们可以通过从 Arduino 向模块发送 AT 命令来进行测试。

使用RYLR896 LoRa收发器进行通信
为了在两个 LoRa 模块之间建立通信,它们必须能够通过地址找到彼此。 LoRa 生态系统的寻址方案在一定程度上取决于模块和实现。简单地说,该模块使我们能够设置网络 id 和地址。同一网络(同一网络id)上的模块可以相互通信。每个模块都应该在网络中具有唯一的 id(地址)。如果模块的地址为 0,则该模块能够从网络上的所有设备接收数据。
每个模块都带有默认频率、网络 ID 和地址,但您可能需要更改默认值。上述模块的默认网络id为18,地址为0。
我们目前不需要为我们的演示项目更改任何内容。但如果您想更改任何参数,请查看数据表了解 AT 命令的详细信息。
为了发送消息(HELLO RECEIVER!),我们只需要发送命令“AT+SEND=0, 15, HELLO RECEIVER!”在模块的串行连接处。第一个参数值“0”是接收器模块的地址。下一个值“15”是要发送的字符/字节数。第三个参数值是要发送的消息:‘HELLO RECEIVER!’(15个字符)。
传感器节点代码
以下代码是为传感器节点开发的,用于收集所有传感器数据并将其传输到物联网网关。
#include "AirQuality.h" //grove 空气质量库
#include "Arduino.h"
#include "DHT.h"
# define DHTPIN 4 // DHT 传感器连接的数字引脚
#define DHTTYPE DHT11 // DHT11 传感器的型号
DHT dht(DHTPIN, DHTTYPE);
AirQuality airqualitysensor;
int current_quality =-1;
const int sampleWindow =50; // 以毫秒为单位的样本窗口宽度(50 毫秒 =20Hz)
unsigned int 样本;
浮动噪声;
浮动温度,潮湿;
int airQuality;
//---------------------------------------------- ----------------------------------------------
// 设置
//----------------------------------------- -------------------------------------------------- -
void setup()
{
Serial.begin(115200); //lora系列
airqualitysensor.init(14);
dht.begin();
}
//----- -------------------------------------------------- -------------------------------------
// 主循环
/ /------------------------------------------------- ----------------------------------------------------
void loop()
{
noise =calculate_sound_in_db();
airQuality =calculate_air_quality();
calculate_temp_warm();
String temperature =String (temp);
字符串湿度 =字符串(潮湿);
字符串声音 =字符串(噪音);
字符串空气 =字符串(空气质量);
字符串值=String(温度)+","+ String(湿度)+","+ String(声音)+","+ String(air);
String cmd ="AT+SEND=0,"+String (values.length())+","+values; //AT+SEND=<地址>,<有效载荷长度>,<数据>
Serial.println(cmd); //发送给lora
delay(15000);
}
//此函数计算声级dB
float calculate_sound_in_db(){
unsigned long startMillis=millis(); // 示例窗口开始
float peakToPeak =0; // 峰峰值电平
unsigned int signalMax =0; //最小值
unsigned int signalMin =1024; //最大值
// 收集 50 毫秒的数据
while (millis() - startMillis
sample =analogRead(A1); //从麦克风获取读数
if (sample <1024) // 丢弃虚假读数
{
if (sample> signalMax)
{
signalMax =sample; // 只保存最大电平
}
else if (sample
signalMin =sample; // 只保存最小电平
}
}
}
peakToPeak =signalMax - signalMin; // 最大值 - 最小值 =峰峰值幅度
//Serial.println(peakToPeak); //写入校准的deciBels
float db =map(peakToPeak,0,1000,48,120); //校准deciBels
//Serial.print(db); //写入校准的deciBels
//Serial.println(" dB"); //写入单位
return db;
}
int calculate_air_quality(){
current_quality=airqualitysensor.slope();
/*
if (current_quality>=0)// 如果返回有效数据。
{
if (current_quality==0)
Serial.println("高污染!强制信号激活");
else if (current_quality==1)
Serial.println("高污染!");
else if (current_quality==2)
Serial.println("低污染!") !");
else if (current_quality ==3)
Serial.println("新鲜空气");
}
*/
return current_quality;
/>}
void calculate_temp_warm(){
// 读取温度或湿度大约需要 250 毫秒!
// 传感器读数也可能长达 2 秒“旧”(它是一个非常慢的传感器)
float h =dht.readHumidity();
// 读取摄氏温度(默认)
float t =dht.readTemperature();
// 检查是否有任何读取失败并提前退出(重试)。
if (isnan(h) || isnan(t)) {
//Serial.println("DHT 传感器读取失败!");
return;
}
temp =t;
humd =h;
/*
Serial.print("Humidity:");
Serial.print(h);
Serial.print("%\t");
Serial.print("温度:");
Serial.print(t);
Serial.print(" *C ");
*/
}
//中断空气质量传感器服务程序
ISR(TIMER1_OVF_vect)
{
if(airqualitysensor.counter==61)//设置2秒为检测到的值
{
airqualitysensor.last_vol=airqualitysensor.first_vol;
airqualitysensor.first_vol=analogRead(A0);
airqualitysensor.counter=0;
airqualitysensor.timer_index=1;
PORTB=PORTB^0x20;
}
else
{
airqualitysensor.counter++;
}
} 该代码每 15 秒发送一次传感器数据。根据您的要求更改时间。
上传和测试
现在连接所有传感器,上传上述代码并在串行监视器中测试。源文件附在代码部分。
将组件放入 Box 内
现在我们将把所有的传感器和电池放在盒子里。首先,3D 打印附件部分中附加的两个 STL 文件。打印出来的图片如下图所示。

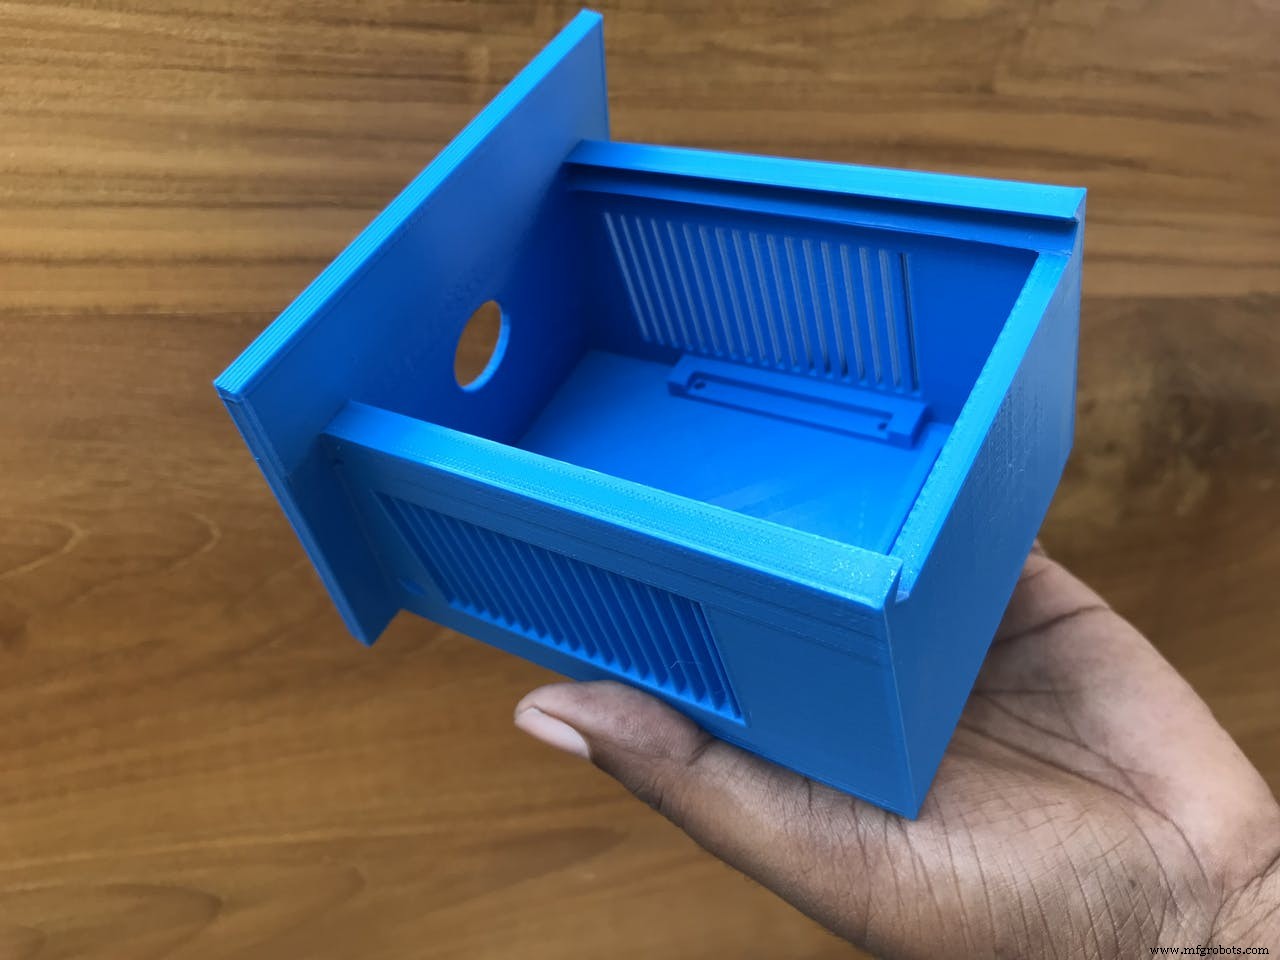
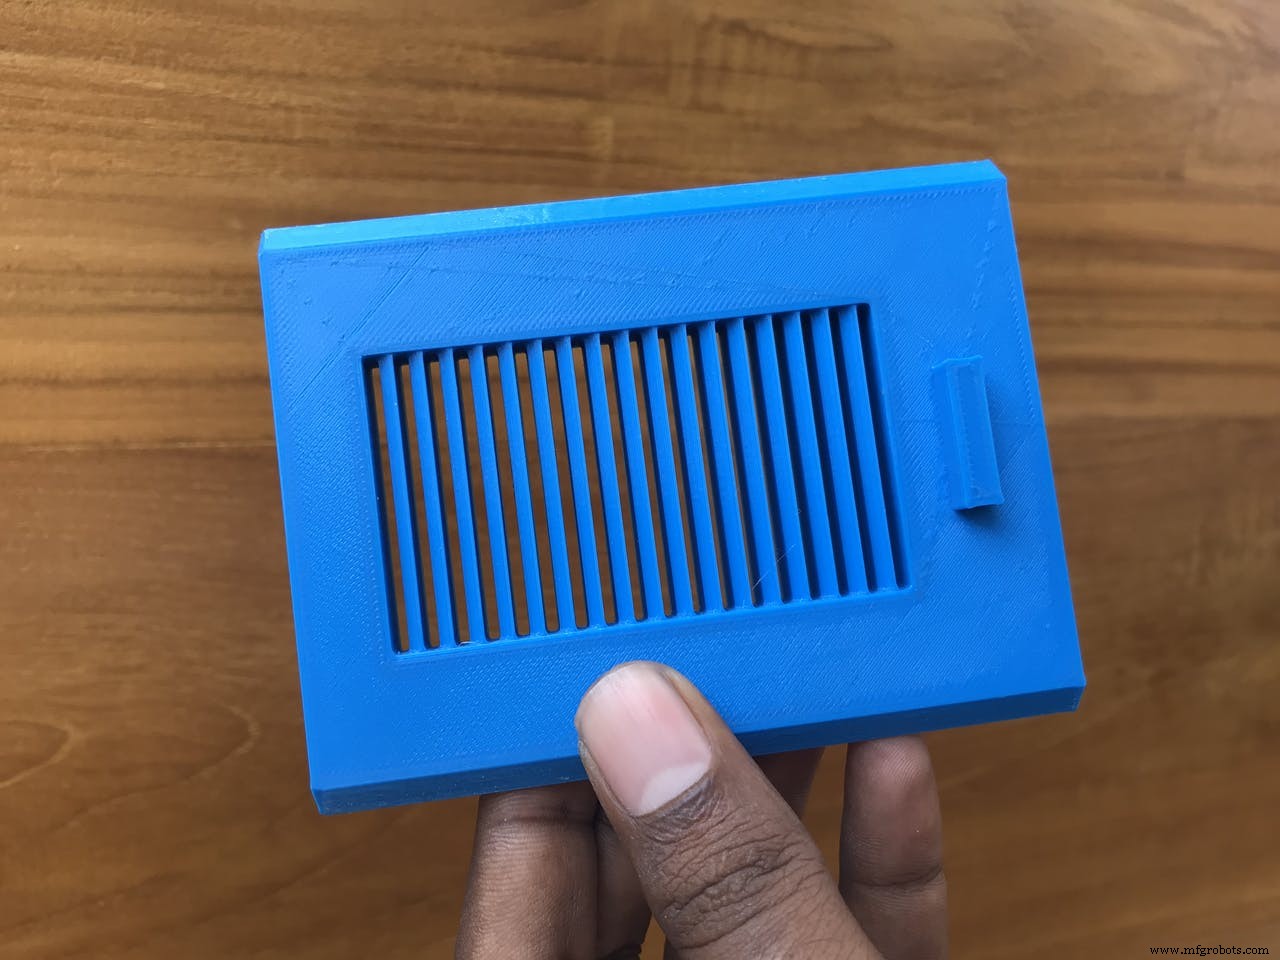
完整的框将如下所示。您可能需要根据打印机的质量进行一些发送。

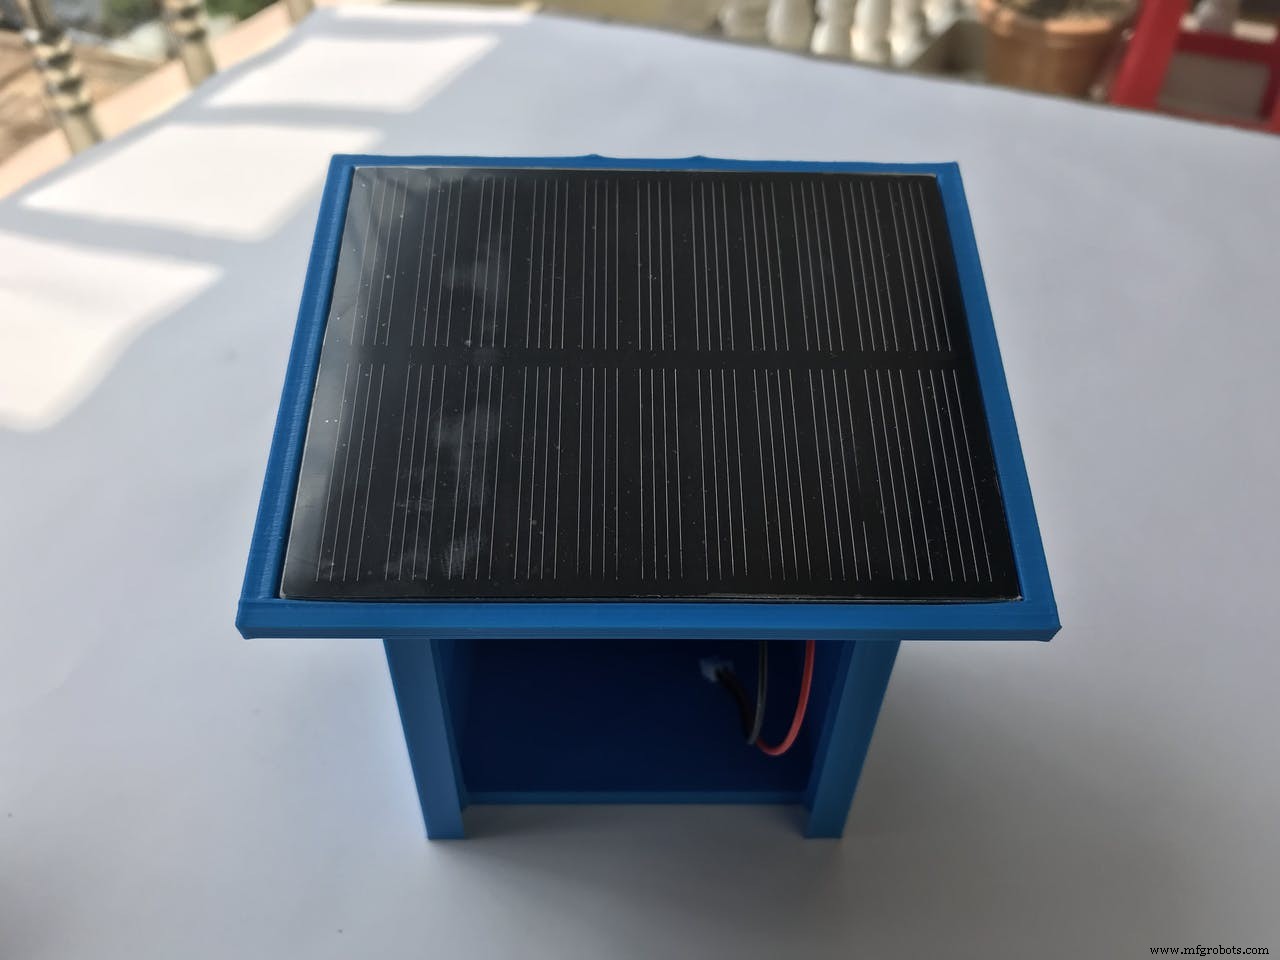
准备好盒子后,首先将太阳能电池板安装在盒子的顶部。盒子内部的连接线通过顶孔。
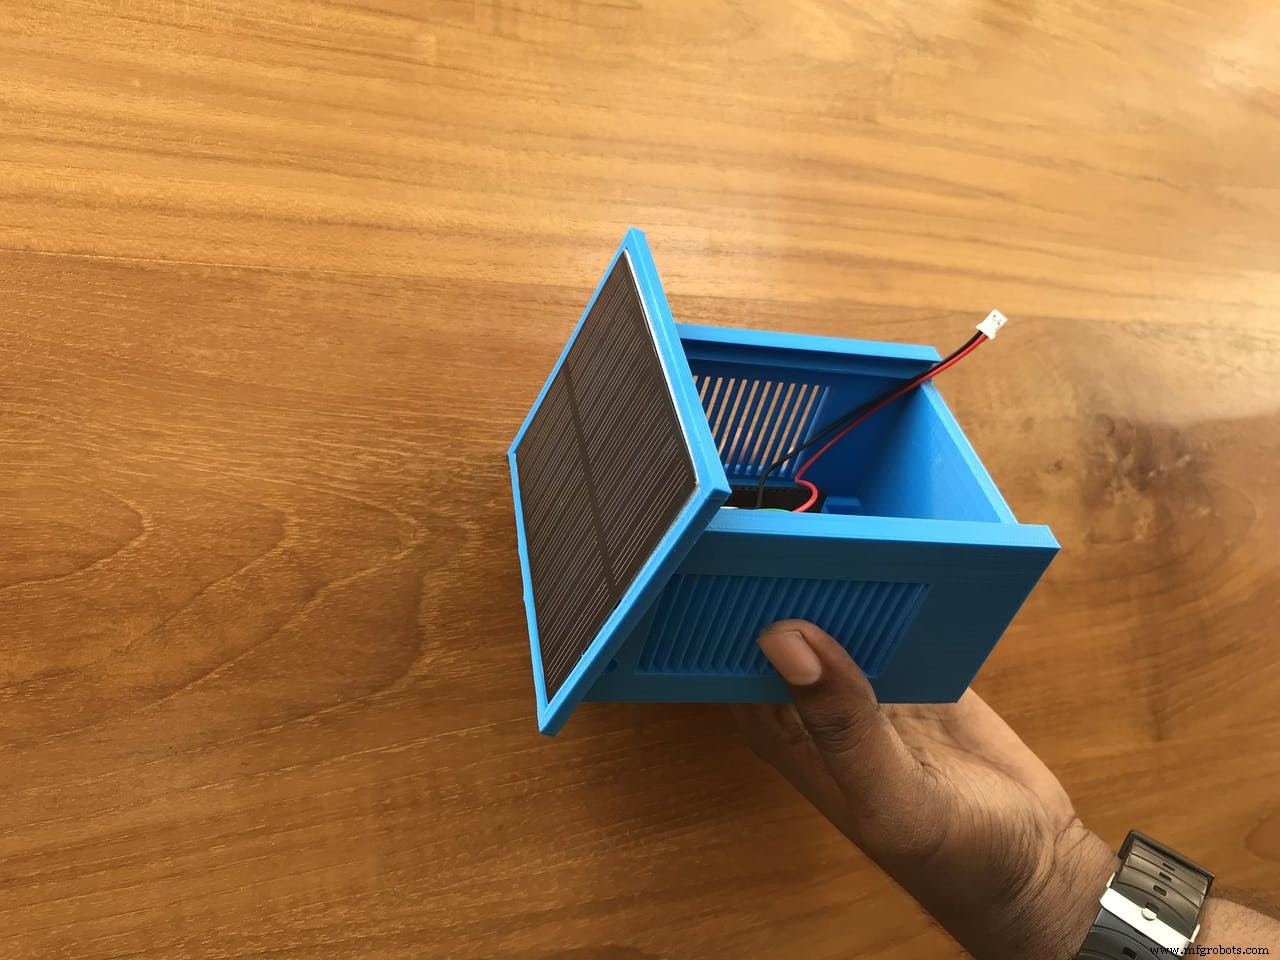
然后首先用一些热胶或双面胶带放置带有附加底座屏蔽的 Arduino。将其他传感器一个一个放置,并使用热胶将它们固定在固定位置。
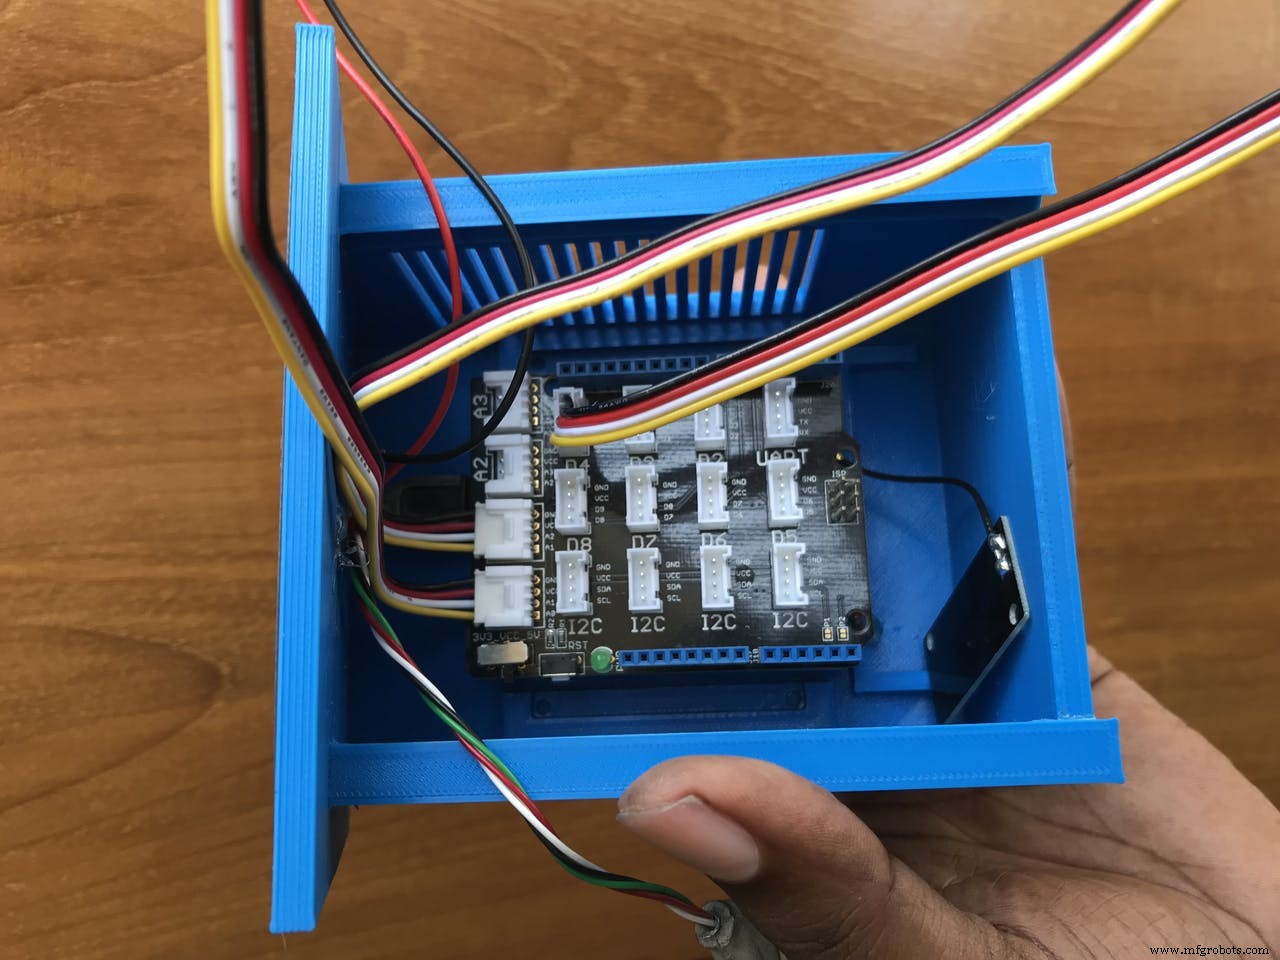
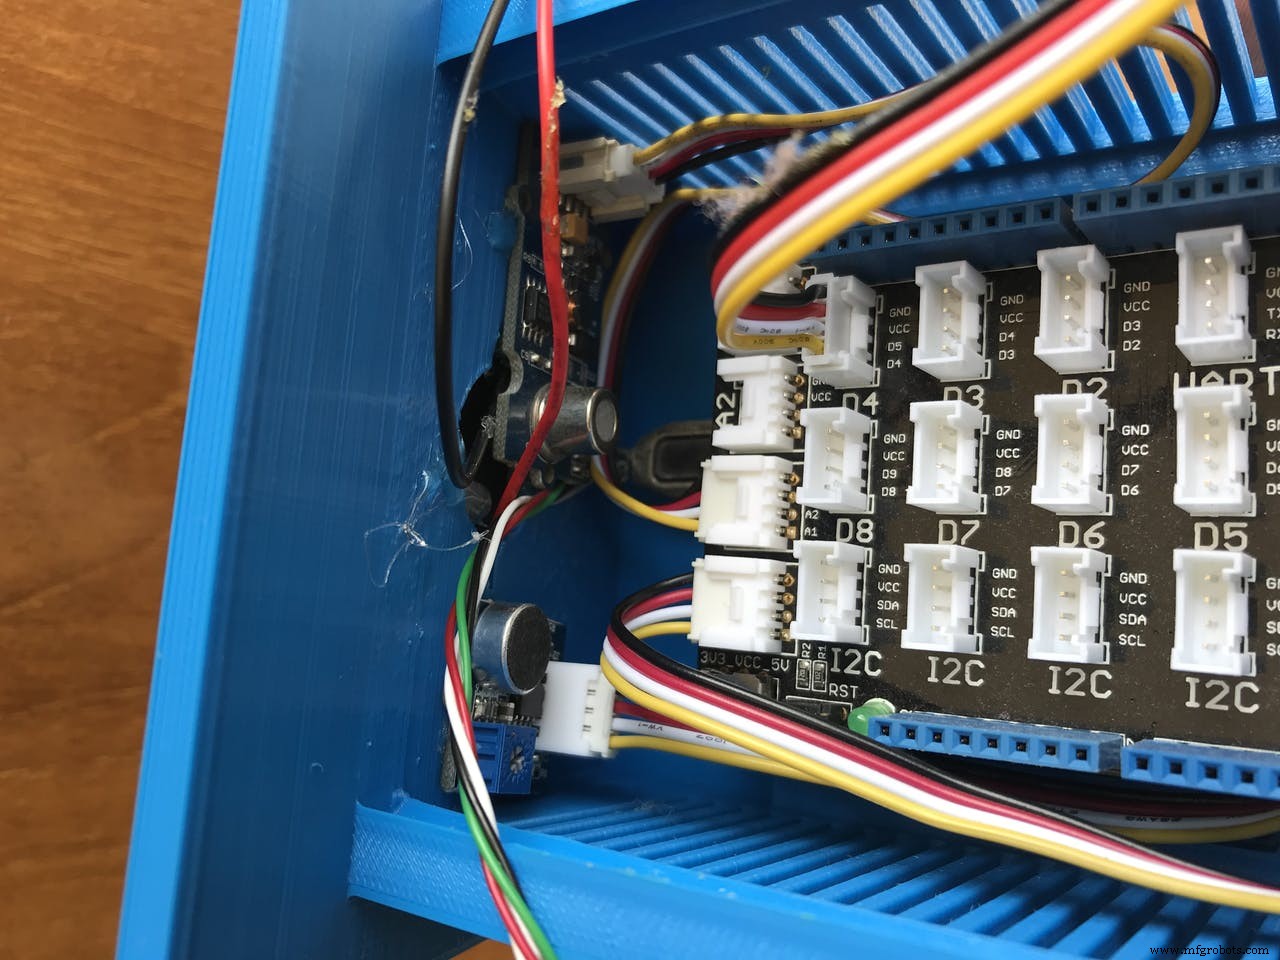
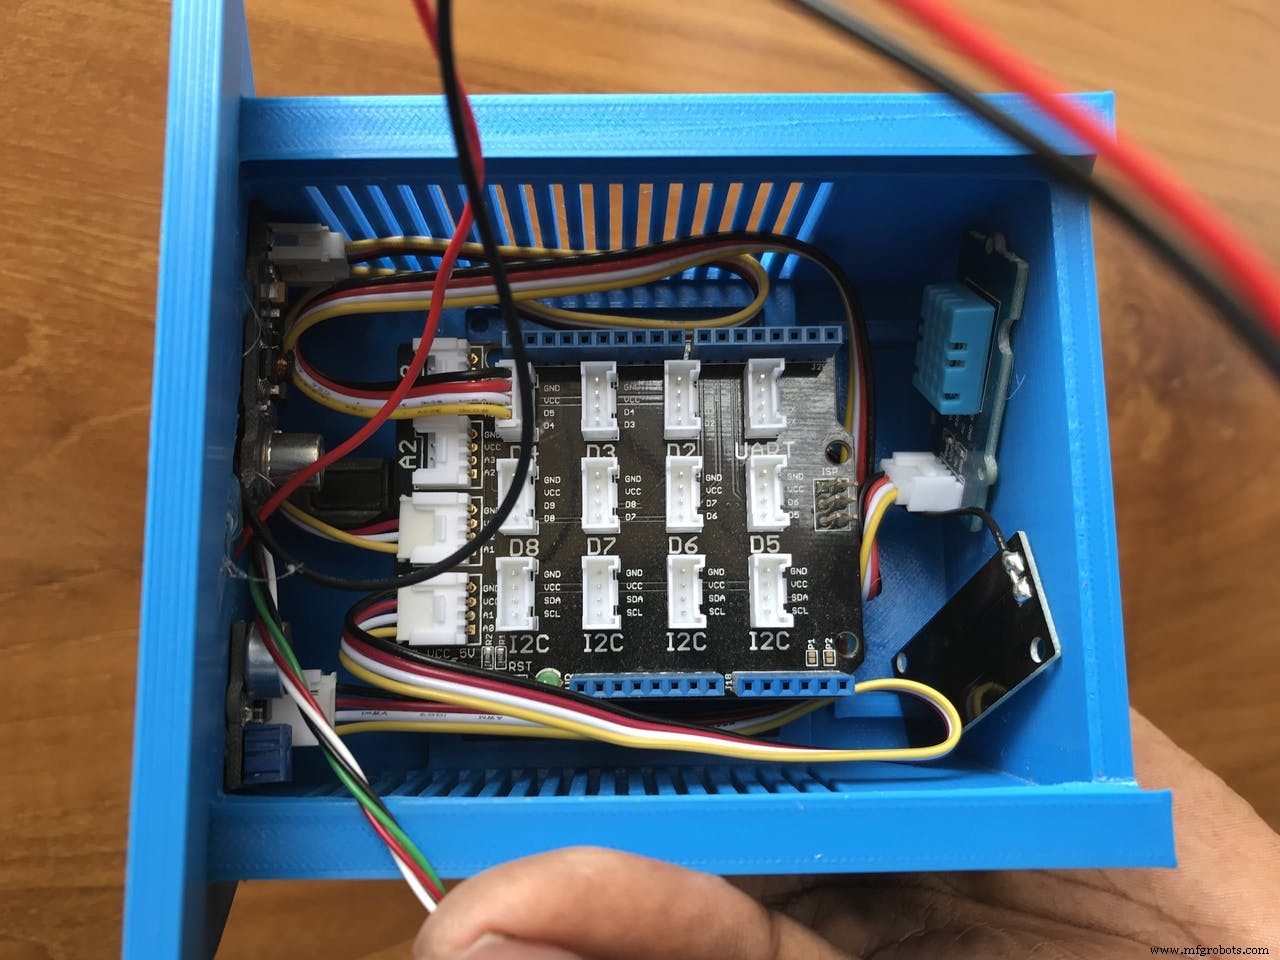
放置电池和lipo Rider pro,最后添加LoRa模块。
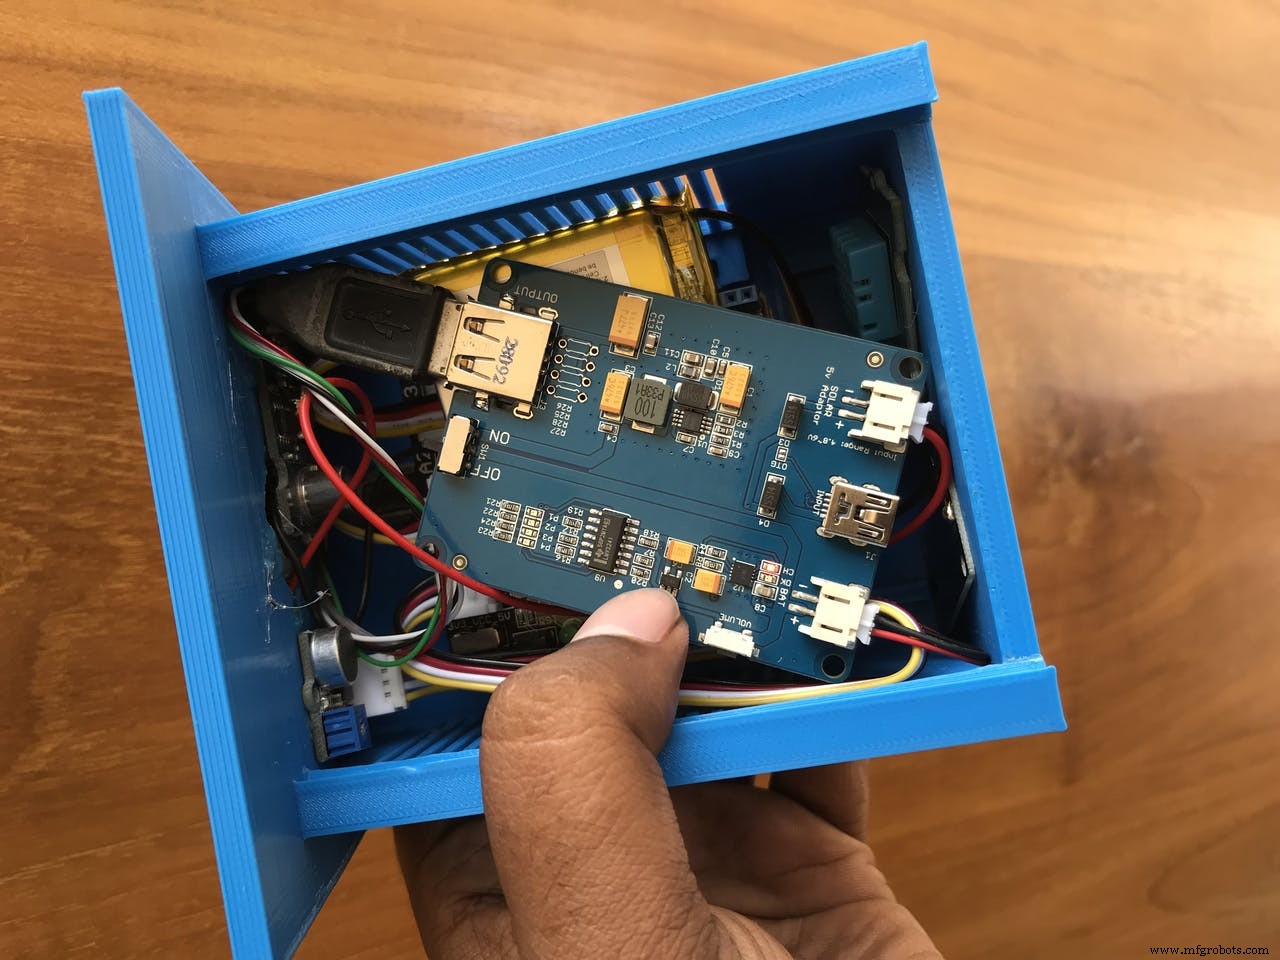
传感器节点已准备好部署。
配置 Grandeur
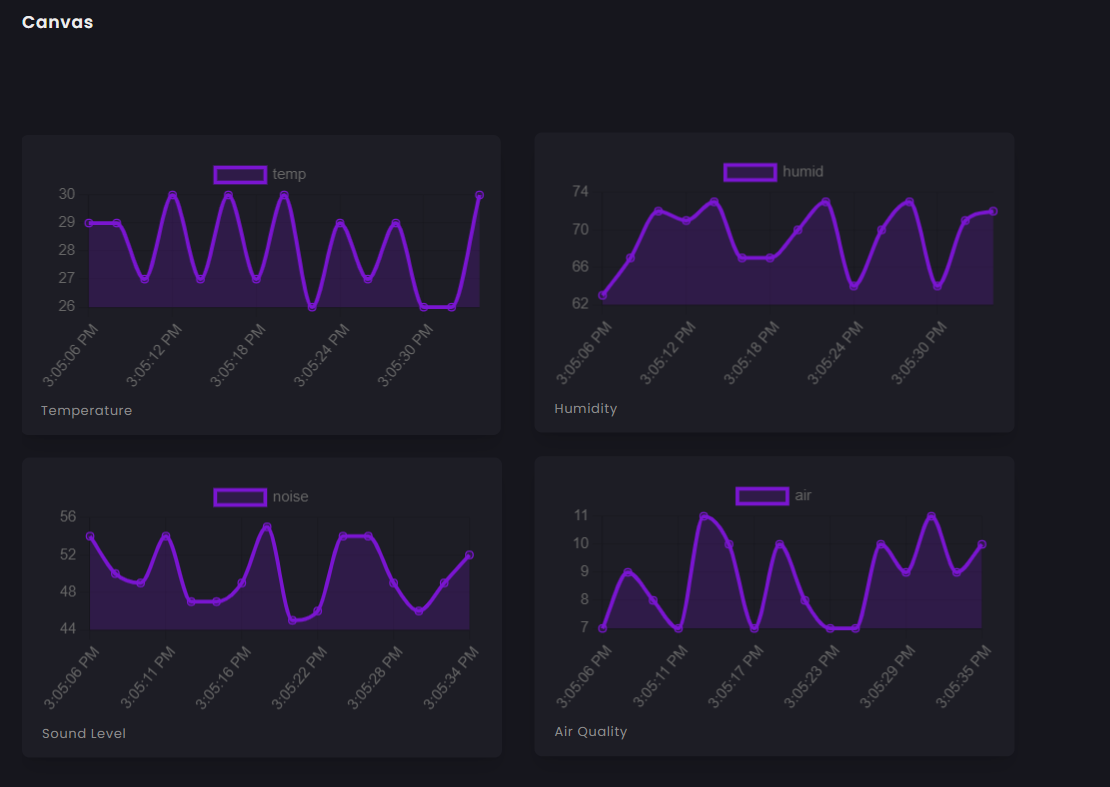
Grandeur 为创建虚拟设备-用户对的 IoT 设备提供后端服务。设备模型在创建时被描述为一个 JSON 对象,其中包含可以读取和写入的各种变量(在我们的例子中是温度、湿度、noise_level、air_quality)。 Grandeur Canvas 是一个 Web 应用程序,可用于使用图形小部件将配对设备的设备状态可视化。
为了使用Grandeur,我们必须在平台上创建我们的帐户并进行一些重要的配置。查看他们的网站 https://grandeur.dev/ 进入游戏。
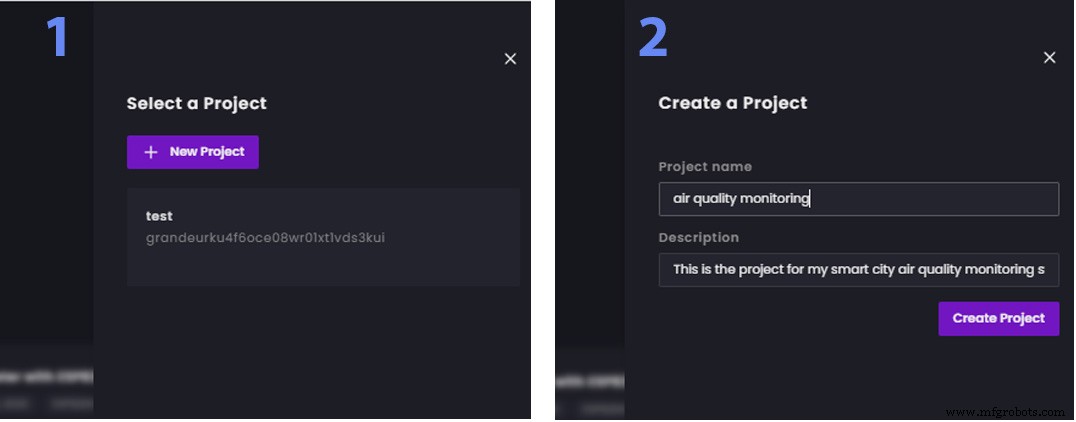
1. 登录root账户后创建一个新项目 :
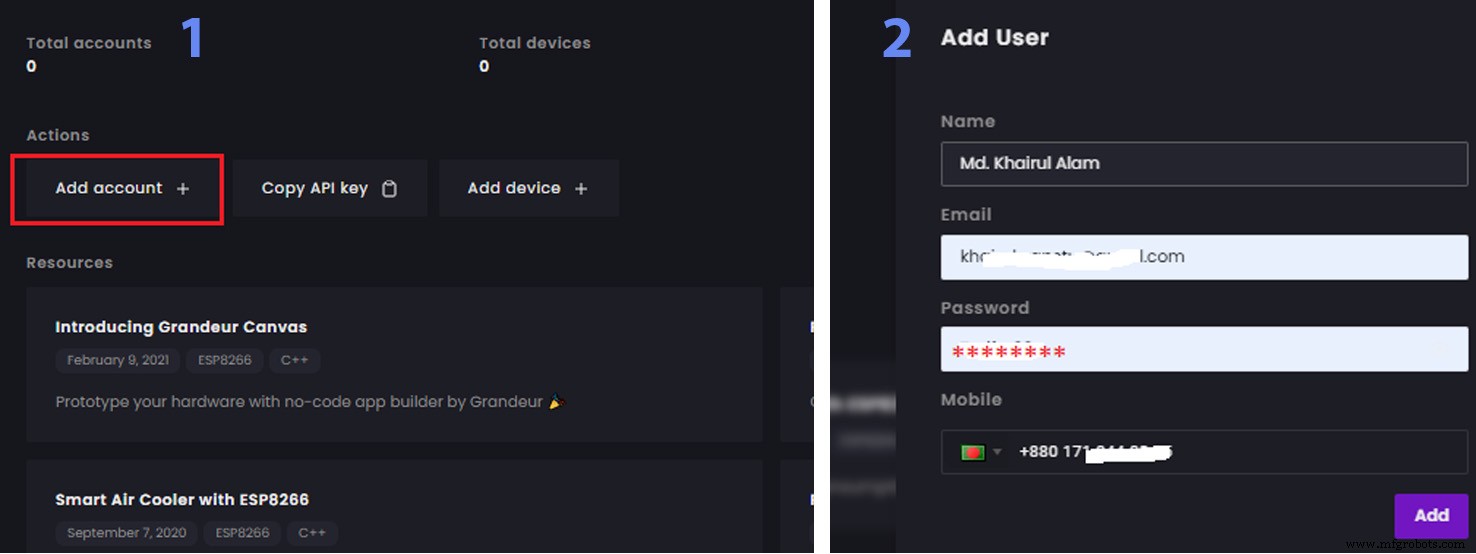
2. 创建一个新的用户帐户 从添加帐户 主页选项卡或帐户选项卡中的选项。我们稍后将使用我们现在创建的电子邮件和密码登录我们的应用程序。这是 Grandeur 的另一个很酷的功能:多个用户可以通过使用他们的电子邮件和密码登录来使用您的应用 .每个用户都可以配对自己的设备,一个用户配对的设备对其他人不可用。身份验证建立在 Grandeur 的核心。用户创建如下图所示:
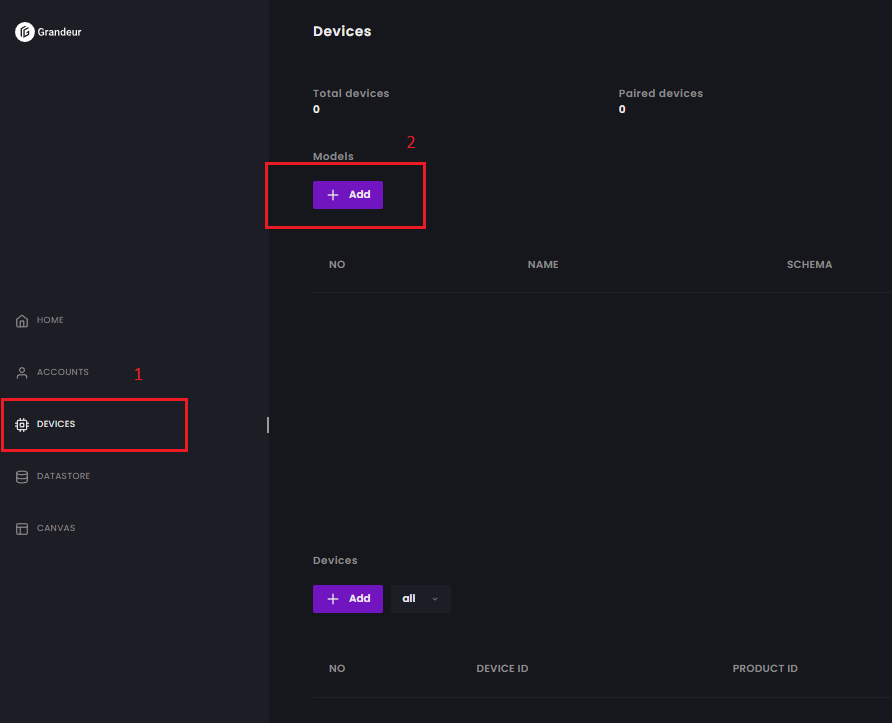
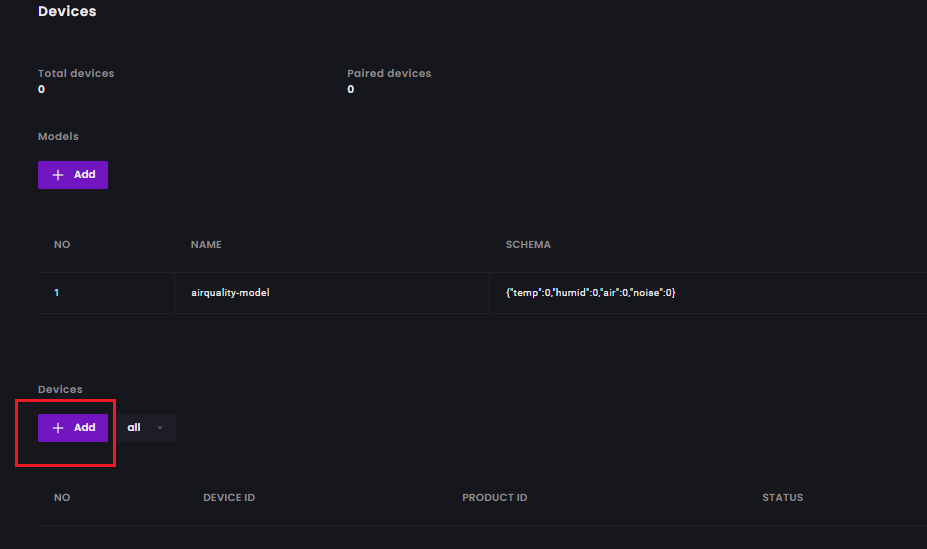
3. 现在创建一个新设备 通过设备选项卡。此操作会生成一个新的唯一设备 ID,我们将在为我们的硬件编写代码时使用它,并且需要此设备 ID 才能使用 API 连接到 Grandure。创建设备还会生成一个 accessToken。 不要忘记复制它,它将在硬件代码中使用,关闭对话框后将无法访问 .您必须在使用以下过程添加设备之前添加设备型号。设备模型用于描述哪些变量可以通过/与设备进行通信。
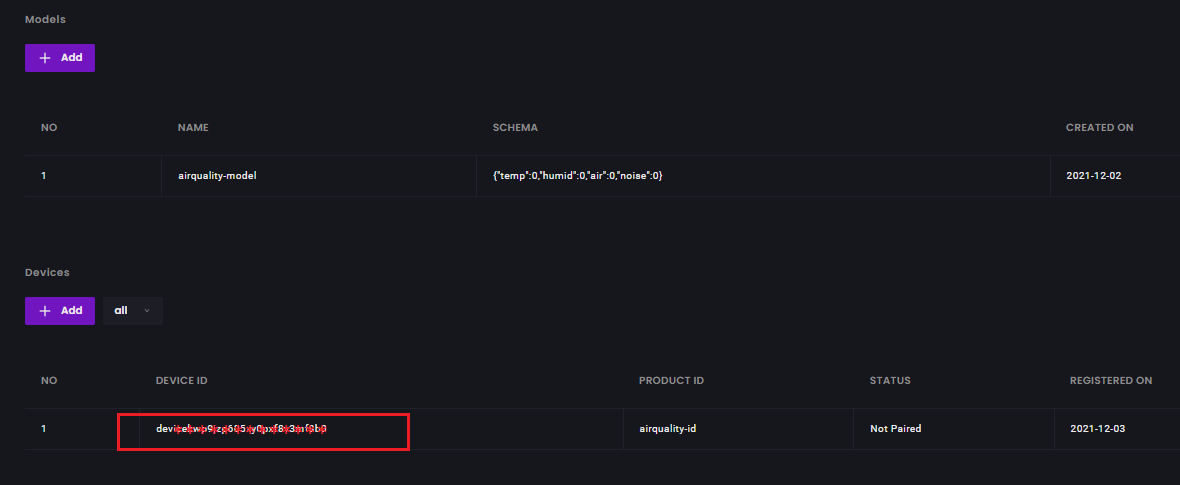
从模型中点击添加 并给出模型名称。在 Schema 中,将所有变量(在我们的例子中为 4)放入 JSON 格式。此时保持值 0。当我们从设备节点发送数据时,这些变量将自动更新。
{"temp":0, "humb":0, "air":0, "noise":0} 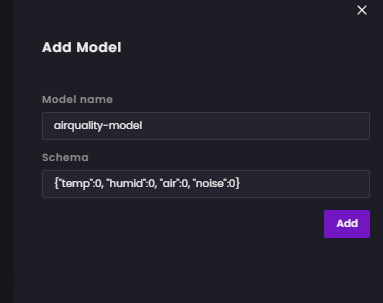
放置架构后,单击“添加”。
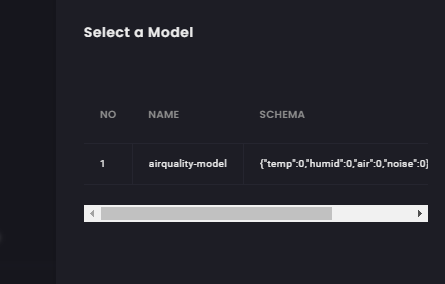
添加设备模型后,单击从设备添加选项并选择您刚刚创建的模型以将模型链接到设备。
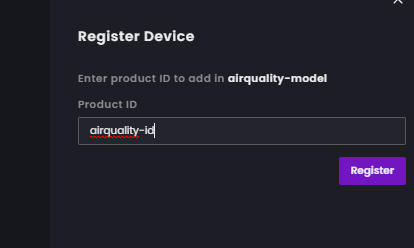
提供设备 ID 并单击以注册。
复制访问令牌,它将在硬件代码中使用,关闭对话框后将无法访问。
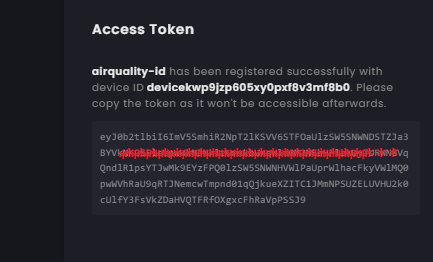
设备已成功创建并记下设备 ID。编码也需要它。

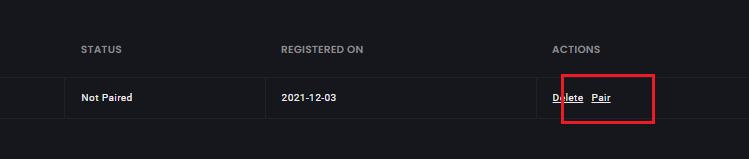
除非与设备配对,否则用户无法与设备交互。您可以通过两种方式配对您的设备 :1) 使用 Cloud Dashboard,或 2) 使用 pairDevice() 通过网络应用程序 设备 API 的功能。如果从生产的角度来看,第二种方式具有非常重要的意义。就像您现在可以运送硬件产品一样,您的用户可以登录您的应用程序并通过配对来声明对硬件的所有权。以下是使用 Cloud Dashboard 将设备与用户配对的方法:
要配对设备,请单击配对并选择一个帐户。您已准备好进入下一步。

4. 我们现在将创建一个画布。
在仪表板的左侧菜单中,单击画布,或转到 https://canvas.grandeur.tech。如果这是您第一次访问 Canvas,请授权 按钮将出现。授权使 Canvas 可以访问您项目的用户和设备。单击“授权”按钮会将您重定向回 Grandeur 仪表板,系统会提示您选择希望 Canvas 绑定到的项目。
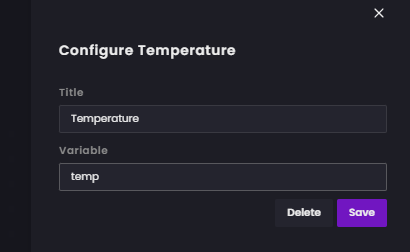
选择一个图表小部件并单击它。将出现配置菜单,然后单击配置以给出图形的标题并设置要在此图形中显示其值的变量。
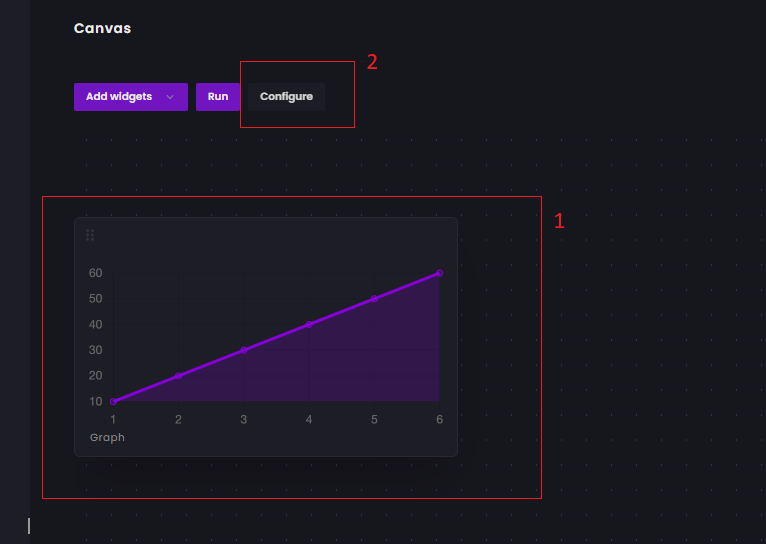
单击以保存。
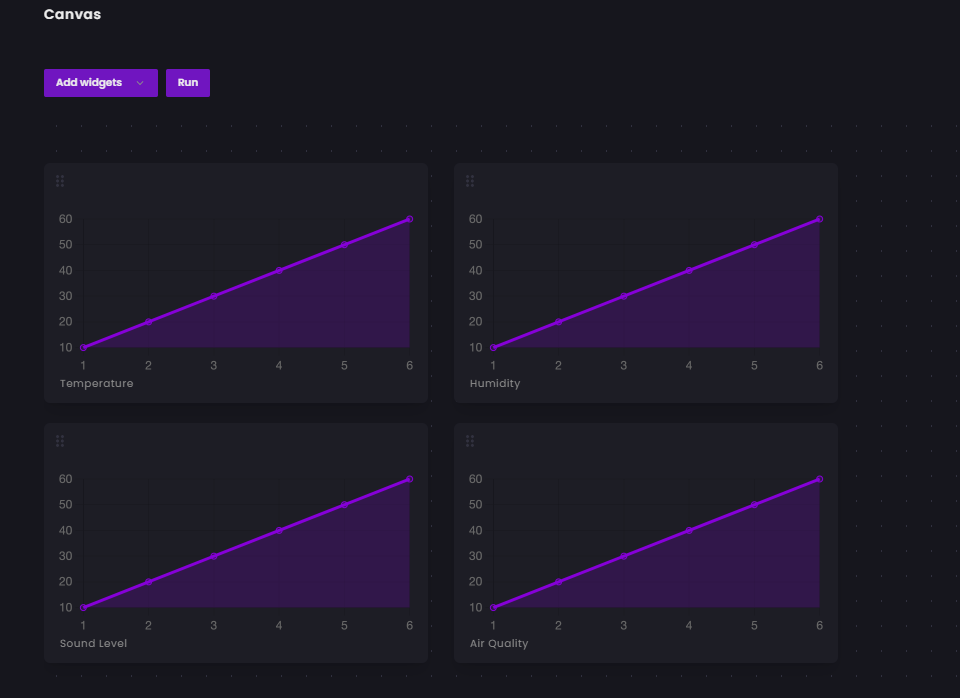
按照相同的过程为 4 个变量添加 4 个图形小部件。
将 Canvas 连接到您的项目后,您可能会看到一个登录屏幕。您需要以您之前创建的项目的用户身份在此处登录,您需要在您的项目中为其创建一个用户帐户。您可以通过访问仪表板的帐户页面来做到这一点。然后您就可以使用这个新用户的凭据登录 Canvas。
准备物联网 LoRa 网关
简单来说,物联网网关就像将传感器、物联网模块和智能设备连接到云的家庭或办公室网络路由器或网关。这样的网关有助于您的设备之间的通信,维护安全性,并提供一个管理界面,您可以在其中执行基本功能。
真正的物联网网关包含将终端设备(传感器、执行器或更复杂的设备)和后端平台(数据、设备和订户管理)连接到网关的通信技术。它有一个计算平台,允许预安装或用户定义的应用程序来管理数据(用于边缘的路由和计算)、设备、安全、通信和网关的其他方面。
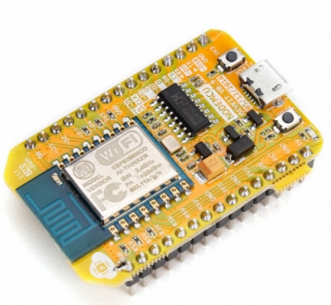
对于具有很多灵活性的网关,Raspberry Pi 可能是一个不错的选择,但为了保持简单,我使用 Node MCU 作为该项目的网关。 Node MCU 将使用 UART 从 LoRa 模块接收数据。然后使用 Arduino SDK 我们将数据上传到 Grandeur 云平台。

网关固件
以下代码是使用Grandeur cloud提供的Arduino SDK为网关开发的。使用 UART 端口从 LoRa 以字符串形式接收数据。然后处理接收到的数据以将单个变量与逗号分隔的字符串值分开。然后使用 WiFi 将这些值发送到 Grandeur。以下函数用于分隔变量。
void process_received_data(){

 start_pos =inputString.indexOf(start_val);
 end_pos =inputString.indexOf(end_val);
 String data_string =inputString. substring(start_pos+1, end_pos-1);
 //Serial.println(data_string);
 //识别字符串中的逗号
 int firstCommaIndex =data_string.indexOf(',');
 int secondCommaIndex =data_string.indexOf(',', firstCommaIndex+1);
 intthirdCommaIndex =data_string.indexOf(',', secondCommaIndex+1);
 //逗号分隔
 String temperature =data_string.substring(0, firstCommaIndex);
 String height =data_string.substring(firstCommaIndex+1, secondCommaIndex);
 String noise_level =data_string.substring( secondCommaIndex+1,thirdCommaIndex);
 String air_auality =data_string.substring(thirdCommaIndex+1);

 //Serial.println(温度);
 //Serial.println(湿度);
 //Serial.println(噪音);
 //Serial.prin tln(air_auality);

 temp =temperature.toFloat();
 hum =湿度.toFloat();
 noise =noise_level.toFloat();
 air =air_auality.toFloat();

 Serial.println(temp);
Serial.println(潮湿);
Serial.println(噪音);
Serial.println(air);
 />
 inputString ="";
 stringComplete =false;
 }
完整代码附在代码部分。
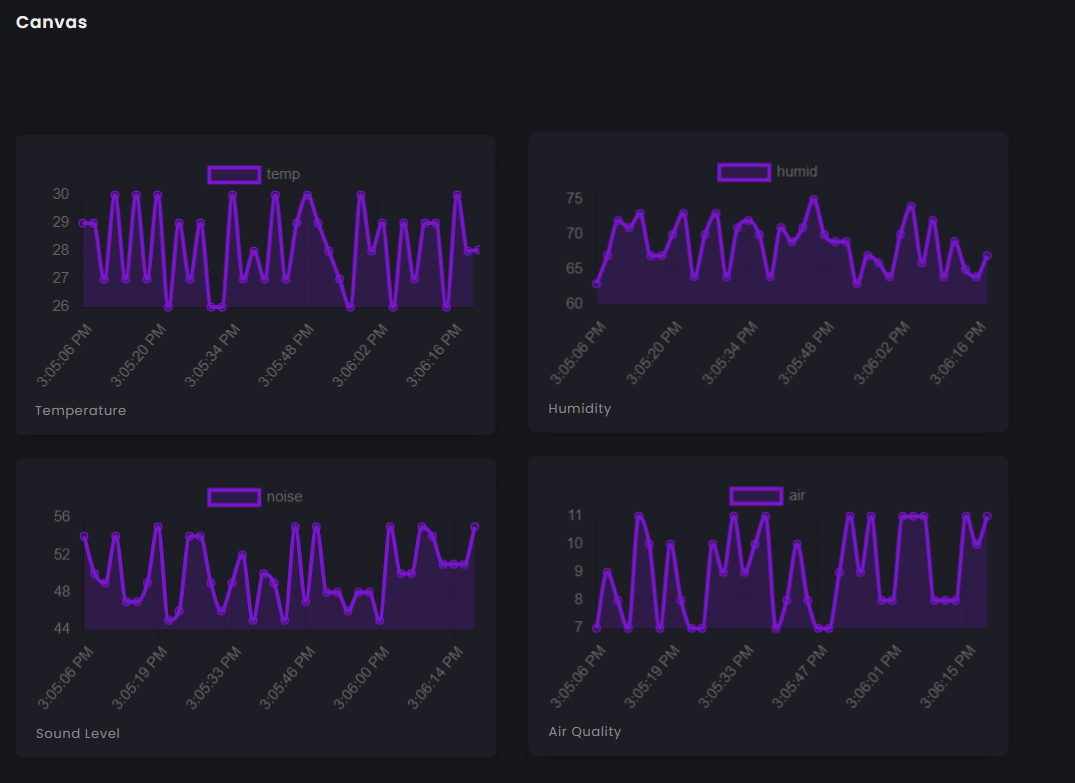
数据可视化
代码
- 传感器节点代码
- 网关代码
传感器节点代码Arduino
此代码用于传感器设备,该设备使用 LoRa 收集传感器数据并将数据发送到物联网网关。#include "AirQuality.h" //grove air quality library#include "Arduino.h"#include "DHT. h"#define DHTPIN 4 // DHT 传感器连接的数字引脚#define DHTTYPE DHT11 // 传感器型号 DHT11 DHT dht(DHTPIN, DHTTYPE);AirQuality airqualitysensor;int current_quality =-1;const int sampleWindow =50; // 以毫秒为单位的采样窗口宽度(50 毫秒 =20Hz)无符号整数样本;浮动噪声;浮动温度,潮湿;int airQuality; //------------------------------------------------ - - - - - - - - - - - - - - - - - - - - - - // 设置 //- -------------------------------------------------- -----------------------------------------void setup() { Serial.begin( 115200); //lora airqualitysensor.init(14) 的序列号; dht.begin();} //---------------------------------------- -------------------------------------------------- -// 主循环//------------------------------------------- - - - - - - - - - - - - - - - - - - - - - - - - - 空白循环(){噪声=计算声音输入数据库(); airQuality =calculate_air_quality(); calculate_temp_humid(); String temperature =String(temp); String humidity =String(humid); String sound =String(noise); String air =String(airQuality); String values =String(temperature)+","+ String(humidity)+","+ String(sound)+","+ String(air); String cmd ="AT+SEND=0,"+String(values.length())+","+values; //AT+SEND=,, Serial.println(cmd); //sent to lora delay(15000);}//this function calculate sound level in dBfloat calculate_sound_in_db(){ unsigned long startMillis=millis(); // Start of sample window float peakToPeak =0; // peak-to-peak level unsigned int signalMax =0; //minimum value unsigned int signalMin =1024; //maximum value // collect data for 50 mS while (millis() - startMillis signalMax) { signalMax =sample; // save just the max levels } else if (sample =0)// if a valid data returned. { if (current_quality==0) Serial.println("High pollution! Force signal active"); else if (current_quality==1) Serial.println("High pollution!"); else if (current_quality==2) Serial.println("Low pollution!"); else if (current_quality ==3) Serial.println("Fresh air"); } */ return current_quality;}void calculate_temp_humid(){ // Reading temperature or humidity takes about 250 milliseconds! // Sensor readings may also be up to 2 seconds 'old' (its a very slow sensor) float h =dht.readHumidity(); // Read temperature as Celsius (the default) float t =dht.readTemperature(); // Check if any reads failed and exit early (to try again). if (isnan(h) || isnan(t)) { //Serial.println("Failed to read from DHT sensor!");返回; } temp =t; humid =h; /* Serial.print("Humidity:"); Serial.print(h); Serial.print(" %\t"); Serial.print("Temperature:"); Serial.print(t); Serial.print(" *C "); */}//interrupt service routine for air quality sensorISR(TIMER1_OVF_vect){ if(airqualitysensor.counter==61)//set 2 seconds as a detected duty { airqualitysensor.last_vol=airqualitysensor.first_vol; airqualitysensor.first_vol=analogRead(A0); airqualitysensor.counter=0; airqualitysensor.timer_index=1; PORTB=PORTB^0x20; } else { airqualitysensor.counter++; }} Code for GatewayArduino
Receives data from the sensor nodes, process the data and sends to Grandeur cloud/* Including the SDK and WiFi library */#include#include #include SoftwareSerial LORA(D7, D8);/* Configurations */String deviceID ="your device id";String apiKey ="your api key";String token ="your device token";/* WiFi credentials */String ssid ="your wifi ssid";String password ="your wifi password";/* Create variable to hold project and device */Grandeur::Project project;Grandeur::Project::Device device;/* Variable to keep track of connection state and time */int connected =0;uint32_t lastUpdate =0;String inputString =""; // a string to hold incoming databoolean stringComplete =false; // whether the string is complete//:and % was set from the transmitter node for the eage of data separationchar start_val =':';char end_val ='%';int start_pos =0;int end_pos =0;float temp =0;float humid =0;float air =0;float noise =0;/* Function to check device's connection status */void onConnection(bool status) { switch(status) { case CONNECTED:Serial.println("Device is connected to the cloud."); /* Record connection state and time */ connected =1; lastUpdate =millis();返回; case DISCONNECTED:Serial.println("Device is disconnected from the cloud."); connected =0;返回; }}/* Function to connect to WiFi */void connectWiFi() { /* Set mode to station */ WiFi.mode(WIFI_STA); /* Connect using the ssid and password */ WiFi.begin(ssid, password); /* Block till the WiFi is connected */ while (WiFi.status() !=WL_CONNECTED) { delay(500); Serial.print("."); } /* Print message */ Serial.println(""); Serial.println("WiFi connected"); /* And IP address */ Serial.println(WiFi.localIP());}/* Function to confirm that data has been updated */void dataCallback(const char* code, Var res) { /* If the update was recorded successfully */ if(code =="DEVICE-DATA-UPDATED") { //Serial.println("Updated DATA"); /* Get data */ double temp_data =(double) res["update"]["temp"]; double humid_data =(double) res["update"]["humid"]; double noise_data =(double) res["update"]["noise"]; double air_data =(double) res["update"]["air"]; /* Print */ Serial.printf("Temperature:%f Humidity:%f Noise Level:%f Air Quality:%f\n", temp_data, humid_data, noise_data, air_data);返回; } /* If the summary could not be updated. */ Serial.println("Failed to Update DATA"); return;}/* Function to send updated current and power readings */void sendUpdate() { Var data; //JSON data format set in Grandeur:{"temp":0, "humid":0, "air":0, "noise":0} data["temp"] =temp; data["humid"] =humid; data["noise"] =noise; data["air"] =air; /* Record update */ //device.data().set("", data, dataCallback); //send JSON device.data().set("temp", temp, dataCallback); device.data().set("humid", humid, dataCallback); device.data().set("noise", noise, dataCallback); device.data().set("air", air, dataCallback); //delay(2000);}void setup() { /* Begin the serial */ Serial.begin(9600); LORA.begin(115200); inputString.reserve(200); /* Connect to WiFi */ connectWiFi(); /* Initializes the global object "grandeur" with your configurations. */ project =grandeur.init(apiKey, token); /* Get reference to device */ device =project.device(deviceID); /* Sets connection state update handler */ project.onConnection(onConnection);}void loop() { serialEvent(); project.loop(WiFi.status() ==WL_CONNECTED); /* Send update to server */ if (stringComplete) { process_received_data(); if (connected) sendUpdate(); }}void serialEvent() { while (LORA.available()) { // get the new byte:char inChar =(char)LORA.read(); // if the incoming character is a newline, set a flag // so the main loop can do something about it:if (inChar =='\n') { stringComplete =true; } else // add it to the inputString:inputString +=inChar; }}void process_received_data(){ start_pos =inputString.indexOf(start_val); end_pos =inputString.indexOf(end_val); String data_string =inputString.substring(start_pos+1, end_pos-1); //Serial.println(data_string); //identifying commas inn the string int firstCommaIndex =data_string.indexOf(','); int secondCommaIndex =data_string.indexOf(',', firstCommaIndex+1); int thirdCommaIndex =data_string.indexOf(',', secondCommaIndex+1); //seperating comma seperated value from the data string String temperature =data_string.substring(0, firstCommaIndex); String humidity =data_string.substring(firstCommaIndex+1, secondCommaIndex); String noise_level =data_string.substring(secondCommaIndex+1, thirdCommaIndex); String air_auality =data_string.substring(thirdCommaIndex+1); //Serial.println(temperature); //Serial.println(humidity); //Serial.println(noise); //Serial.println(air_auality); temp =temperature.toFloat(); humid =humidity.toFloat(); noise =noise_level.toFloat(); air =air_auality.toFloat(); Serial.println(temp); Serial.println(humid); Serial.println(noise); Serial.println(air); inputString =""; stringComplete =false; }
Custom parts and enclosures
示意图
制造工艺