

智能消毒和环卫隧道
组件和用品
 |
| × | 1 | |||
 |
| × | 1 | |||
 |
| × | 2 | |||
| × | 1 | ||||
| × | 1 | ||||
 |
| × | 1 | |||
| × | 1 | ||||
 |
| × | 1 | |||
 |
| × | 1 | |||
 |
| × | 1 | |||
| × | 1 | ||||
 |
| × | 1 | |||
| × | 1 | ||||
| × | 1 | ||||
| × | 1 | ||||
| × | 1 | ||||
| × | 1 | ||||
| × | 1 | ||||
| × | 1 | ||||
| × | 1 | ||||
| × | 1 | ||||
| × | 1 | ||||
| × | 1 | ||||
| |
| × | 1 |
必要的工具和机器
| ||||
| ||||
 |
| |||
 |
| |||
 |
|
应用和在线服务
 |
| |||
 |
| |||
 |
|
关于这个项目
简介
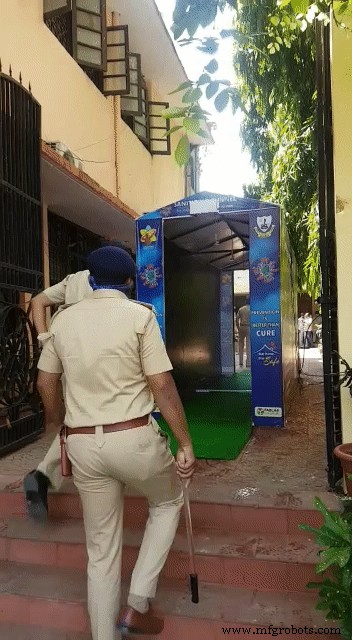
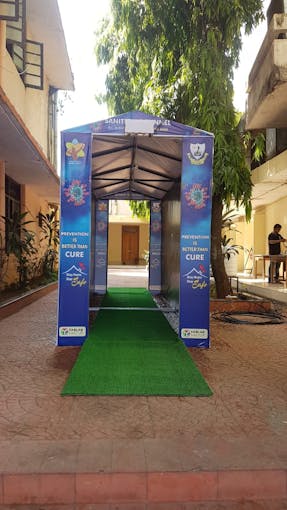
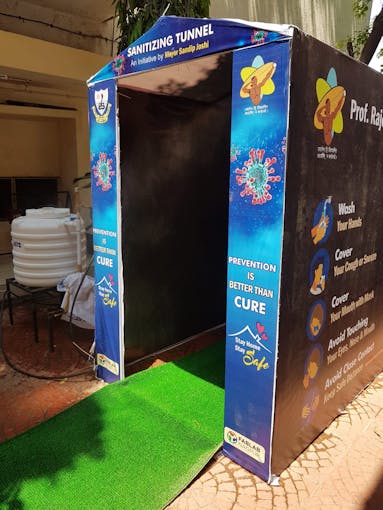
智能消毒和卫生隧道展示了它如何设计为在大约 15 秒内为穿过隧道的人们提供最大程度的保护。这可以帮助社区对抗 COVID-19。
该项目的主要思想是建造一个可以尝试阻止 COVID-19 传播的隧道。
这条消毒和卫生隧道的准备是为了在15秒内对任何可能的细菌进行消毒。
使用的消毒剂溶液由次氯酸钠 (NaOCl) 和水 (H2O) 组成。消毒剂不挥发,因此能够延长真实和杀菌活性,并对表面进行消毒。
所以,我主动做了这个智能消毒和卫生隧道。这条隧道是在 12 小时内建成的。它可以在短短 15 秒的时间内为一个人从头到脚彻底消毒,并且所使用的溶液完全无害*。隧道的总成本约为 ₹ 30,000 或 400 美元。 (修订成本)

在哪里使用?
- 食品市场
- 办公室
- 购物中心
- 机场
- 公交车站
- 火车站
- 警察局
- 大学
- 医院
- 殖民地
工作原理
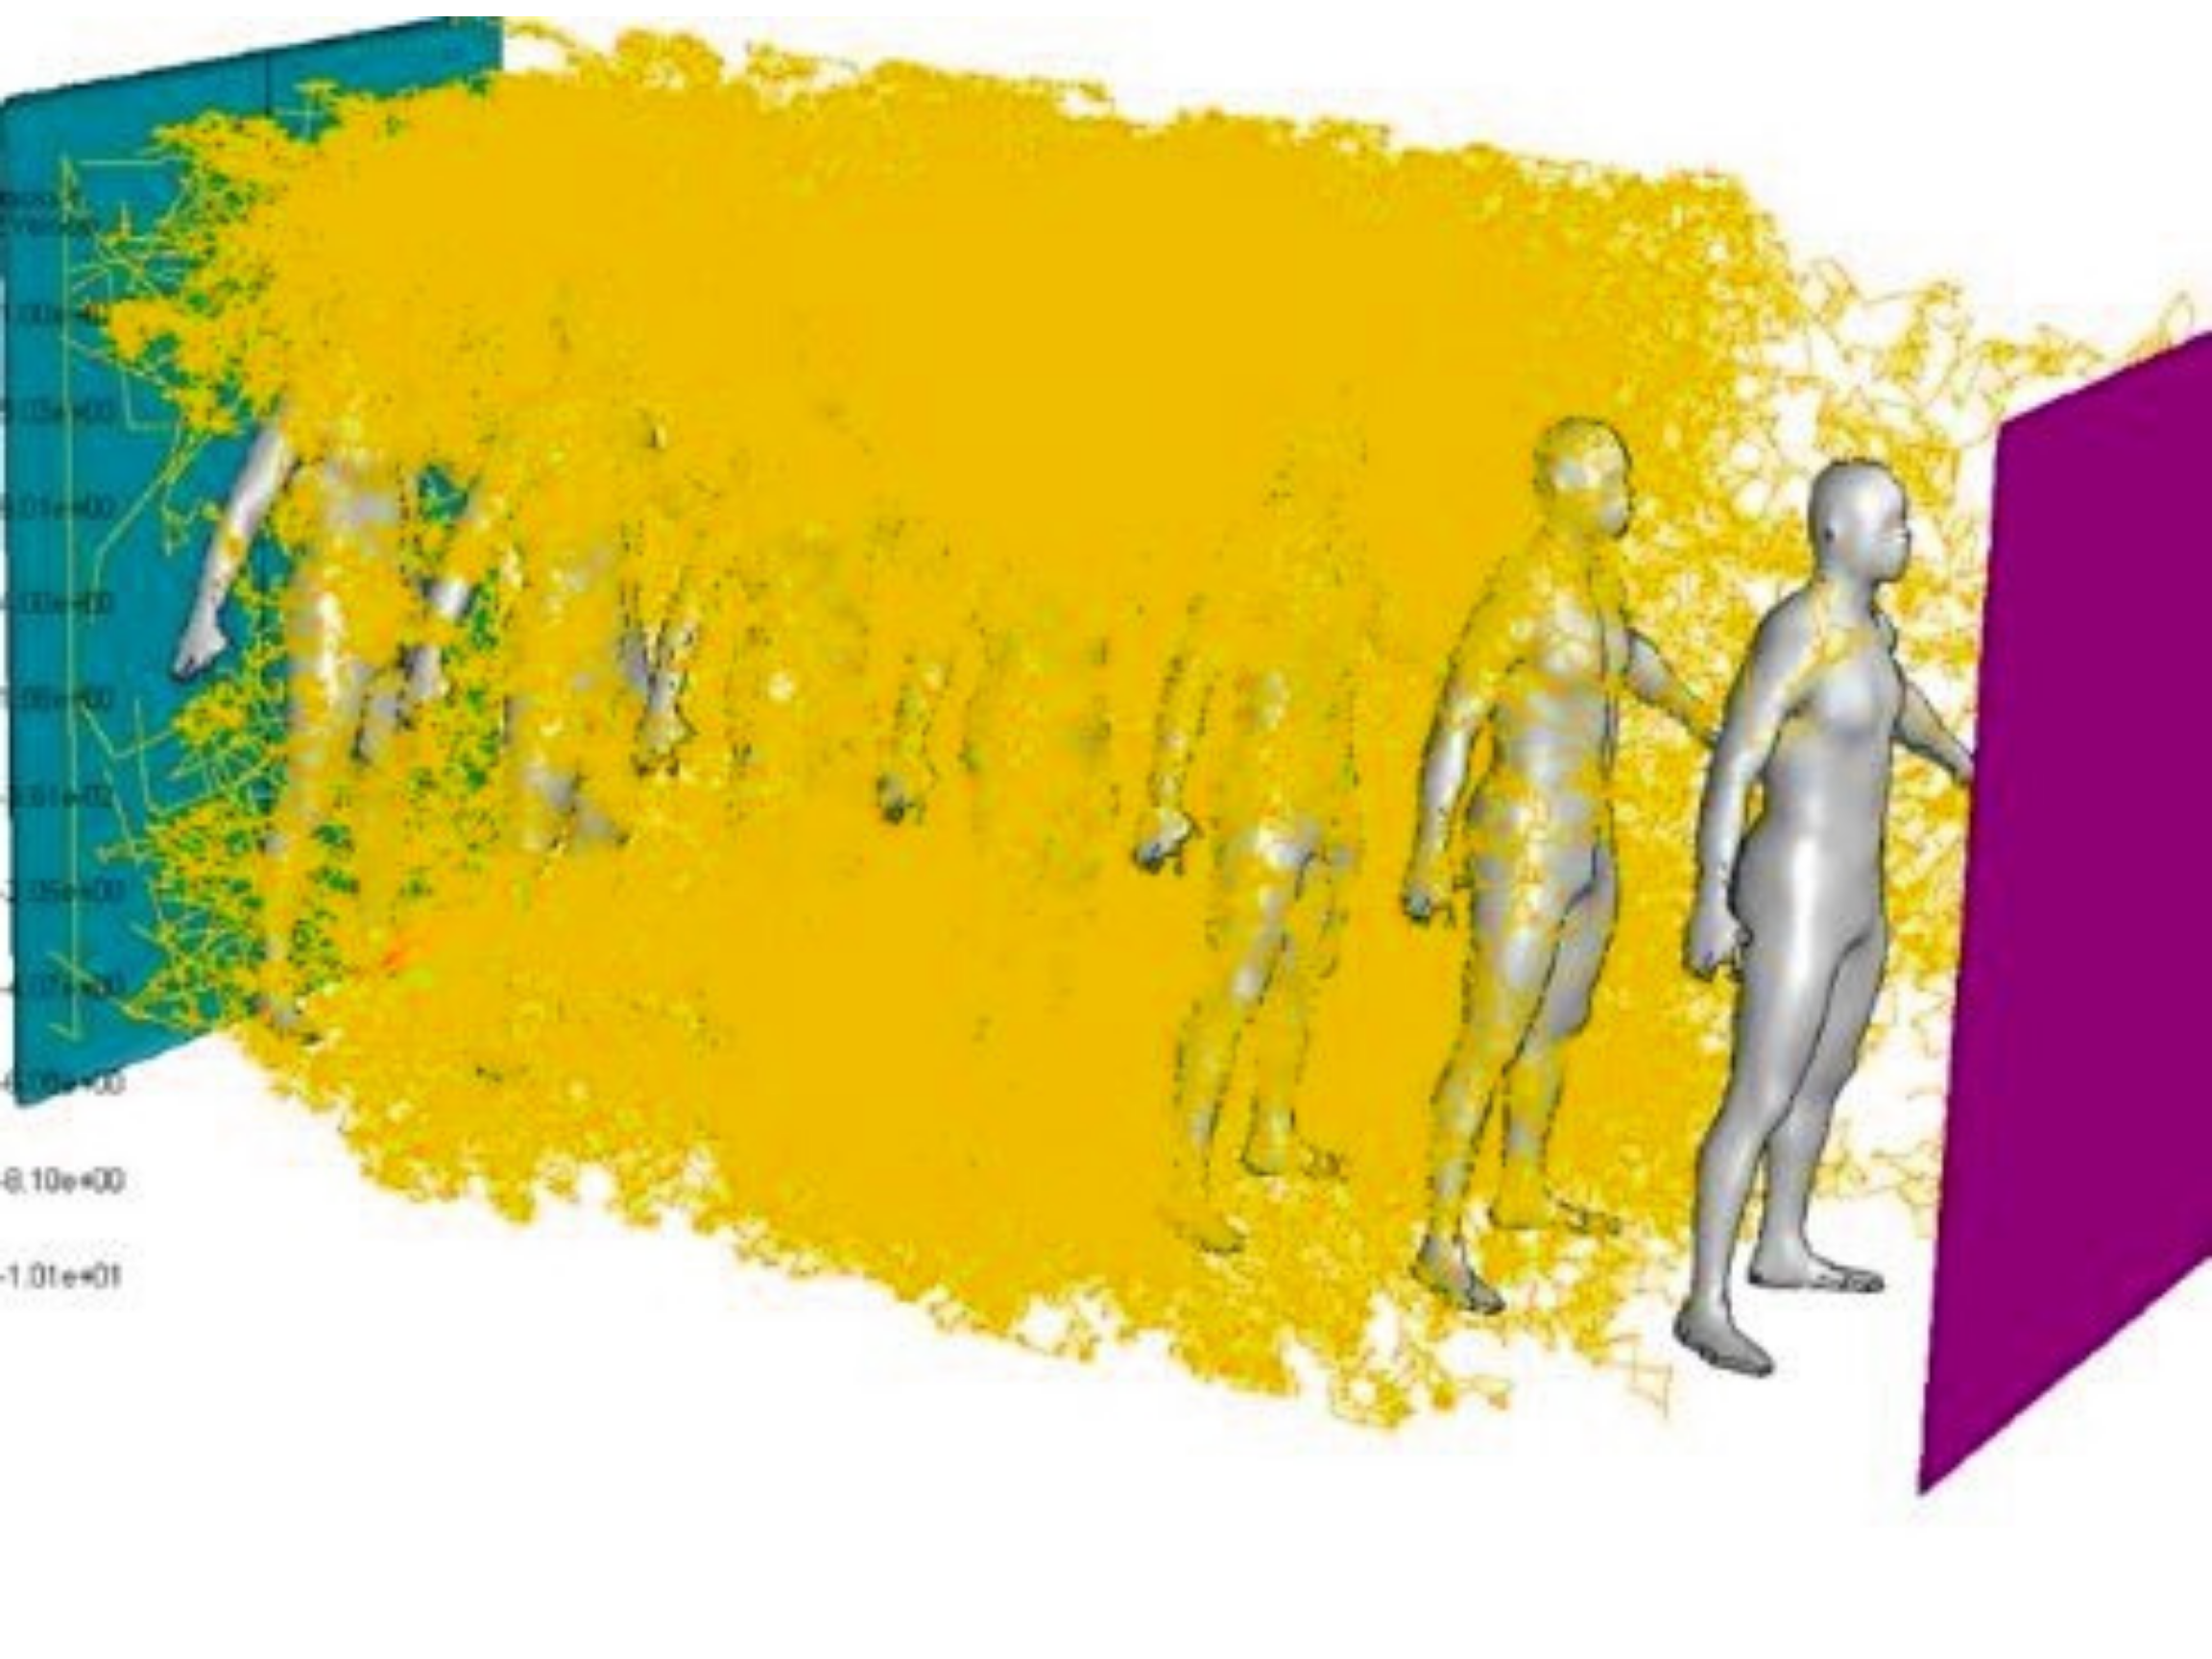
1HP 水泵机放置在每个隧道的一侧,从水箱中抽取 0.4% 次氯酸钠溶液在 100 升水中的溶液。由于机器是自动的,它可以感应是否有人进入隧道。当任何人进入隧道时,水泵将启动 15 秒。这样用户就可以通过那个隧道,如果隧道里没有人,泵将关闭以节省水和电。雾状消毒喷雾可在至少 60 分钟(大约*)的时间内保护市民免于感染细菌。因为它可以对空气、暴露的皮肤和人体衣物进行消毒。
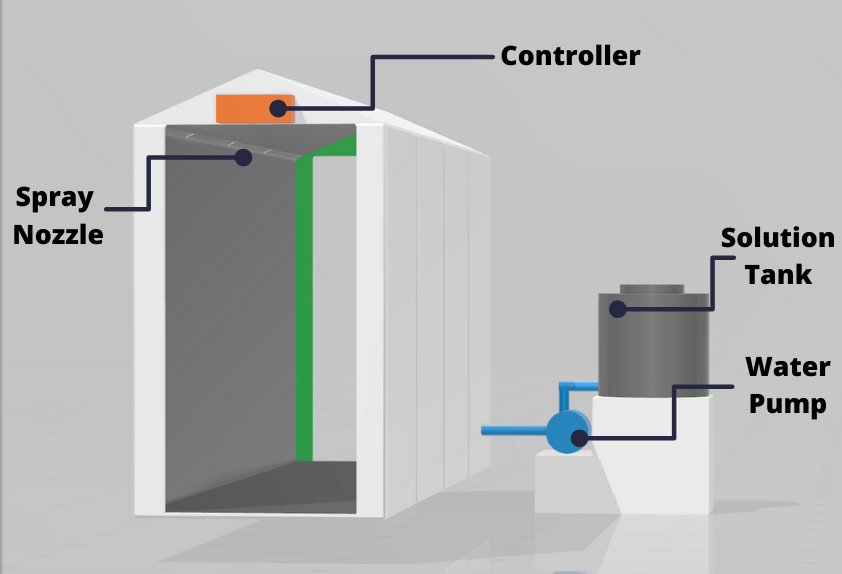
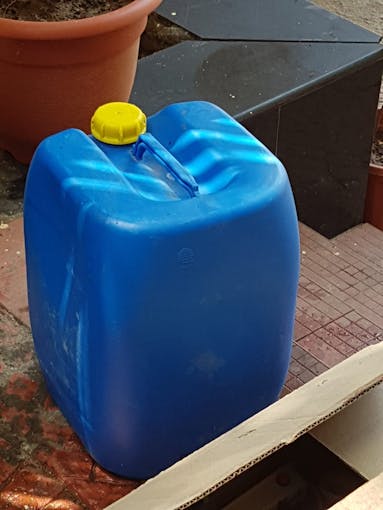
用于 200 升溶液的塑料罐和用于高压管道系统的泵位于隧道的一侧。根据计算,该溶液应足以使用 8-10 小时。因为它在入口上方有一个运动传感器,以节省防腐剂。 (可能因进入隧道的人数而异**)
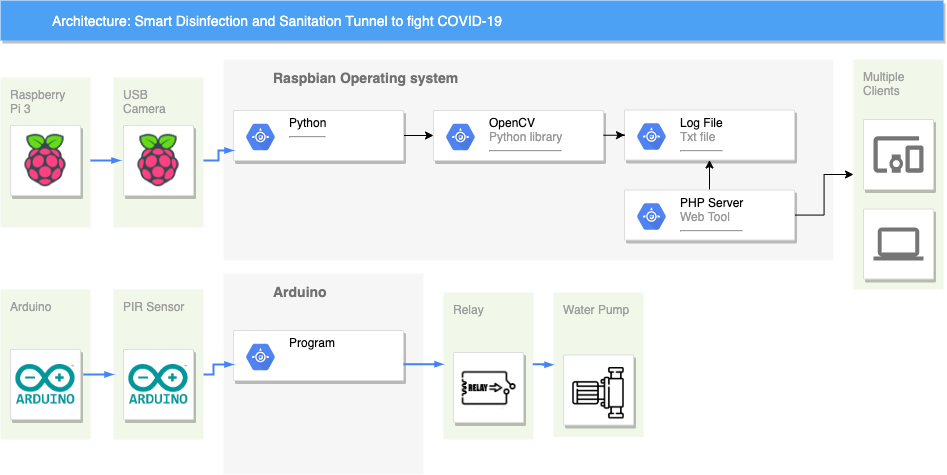
流程图
硬件设置
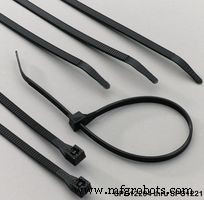
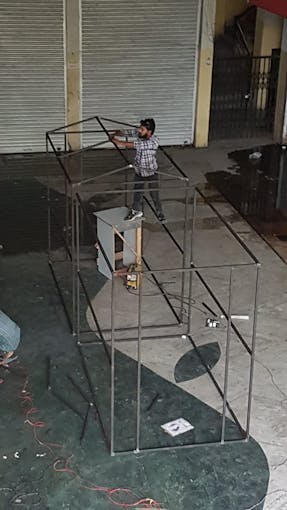
我用金属型材铺设了框架,可折叠,以便它可以从一个地方运输到另一个地方,当它全部完成时,存放以备下一次启示录。覆盖物由横幅(用于户外h户外广告 )。横幅很容易与带有塑料系带的金属型材固定在一起。速度很快,不需要特殊技能。

查看模型 - https://skfb.ly/6RGvZ
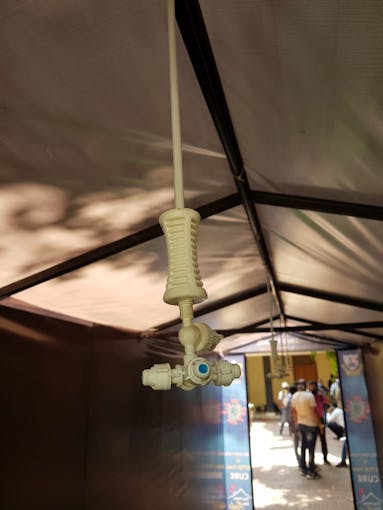
 用于200升溶液的塑料罐和用于高压管道系统的泵位于与四通雾化器组件相连的隧道一侧。
 _yOvU8LUx6F.jpeg?auto=compress%2Cformat&w=680&h=510&fit=max) =51">
=51"> 整个隧道均采用微管为雾化器提供溶液。
_bDYXyY5wFt.jpeg?auto=compress%2Cformat&w=680&h=510&fit=max) =51">
=51"> 里面有一个高压管道,可以连接4个四通雾化器。雾气不会在衣服上留下任何痕迹,同时将进入的人完全包裹起来,即使在难以触及的衣服褶皱中也能消灭病毒,并在离开后提供一段时间的保护。
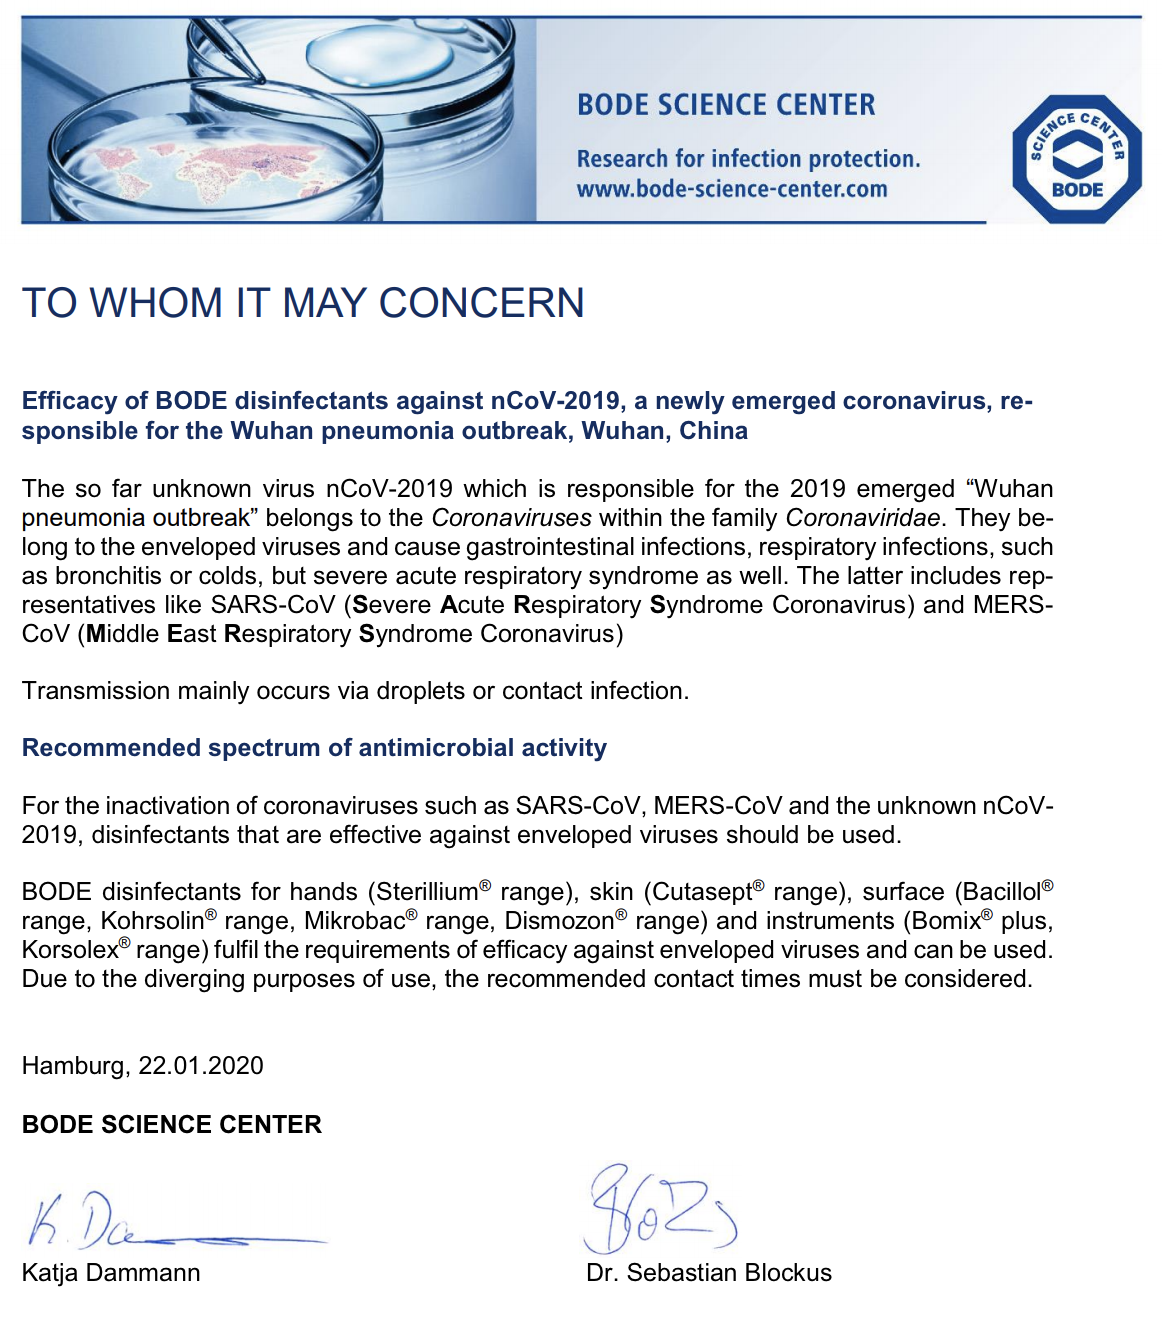
作为解决方案,该项目中使用了经过认证的解决方案。 (证书附在下面)
 max"
max" 四路雾化器
- 放电率:30 LPH/0.5 LPM(1 个雾化器)
- 推荐压力:45-60 psi
- 平均液滴尺寸:65 微米(55-60 psi)
- 需要过滤:130 微米(120 目)
- 需要泵:40 到 45 米扬程
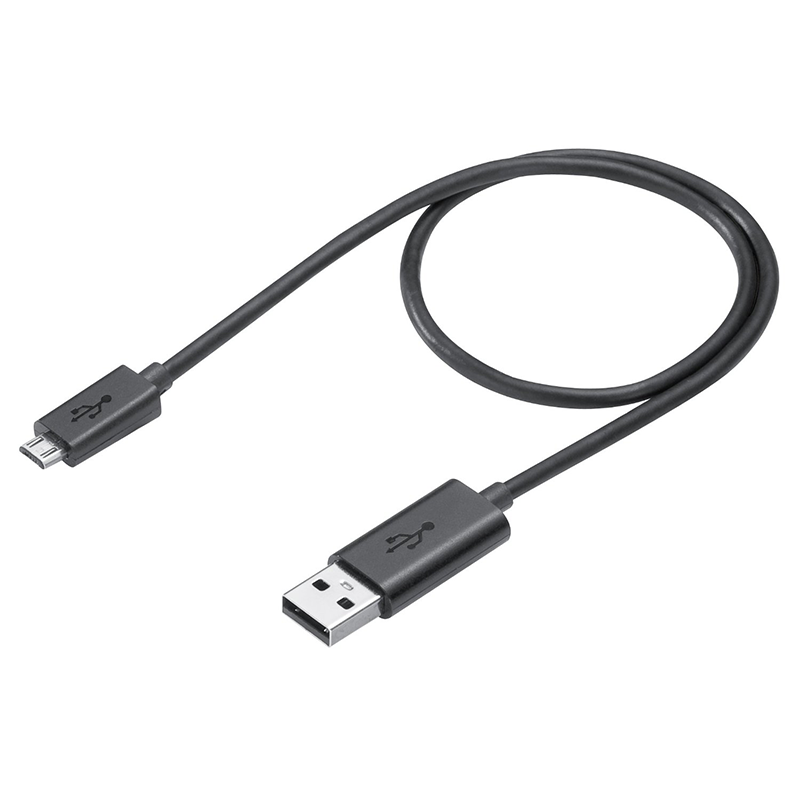
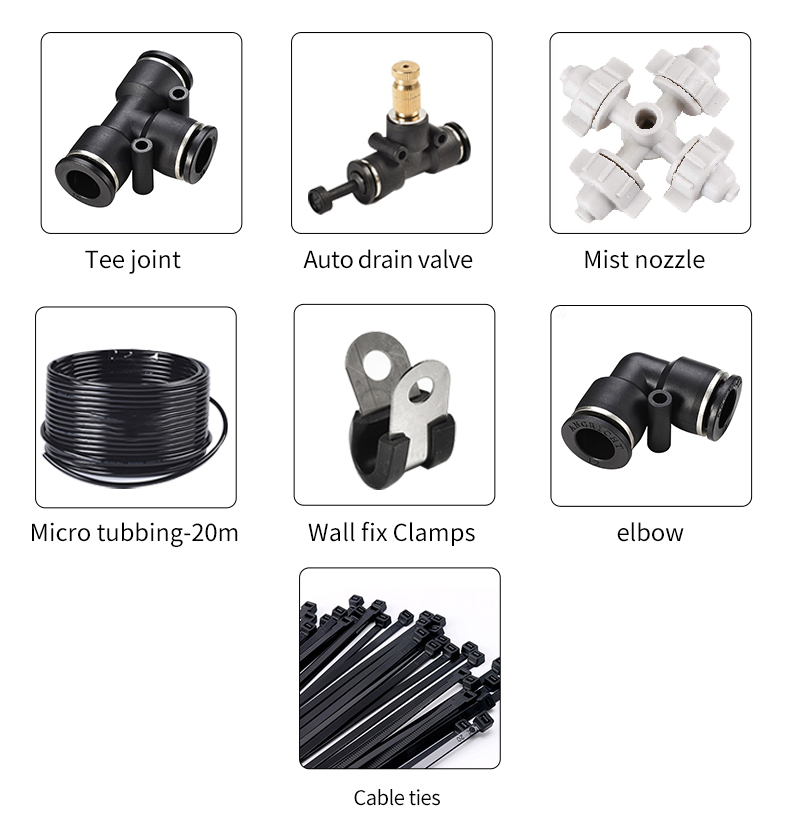
使用的其他配件

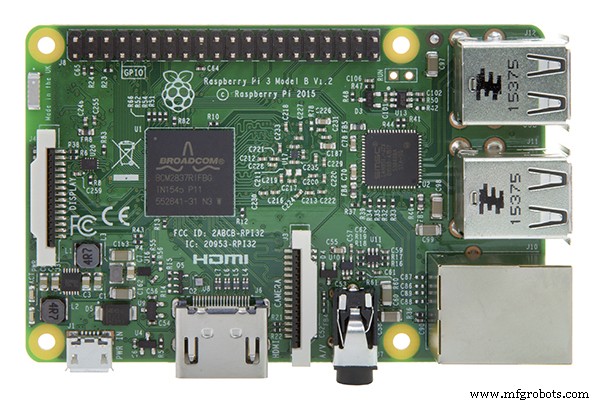
准备 Arduino
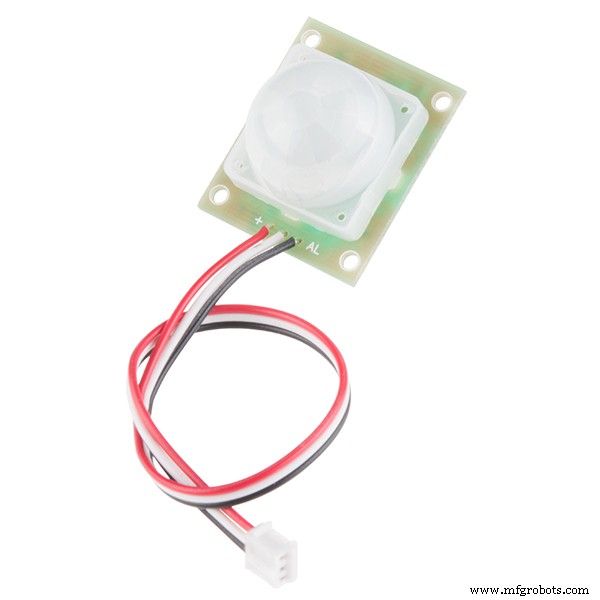
水泵实际上是通过检测红外线来工作的。每当人体靠近运动传感器时,人体会反射红外线,运动传感器会检测到这种红外线,并通过输出引脚为我们提供高电平信号。然后这个 HIGH 信号被 Arduino 读取。因此,如果 Arduino 读取到 HIGH 信号,它将向继电器模块发出一个 HIGH 信号,这意味着继电器将打开,因此电源继电器将打开并打开水泵 15 秒(可以被改变)。同样,如果 Arduino 读取到一个低电平信号,它将使继电器引脚变为低电平,因此水泵将保持关闭状态。
在这里,我使用了 2 个 PIR 传感器使其更精确,如果它们中的任何一个感应到运动,那么继电器将打开 15 秒(可以更改)。
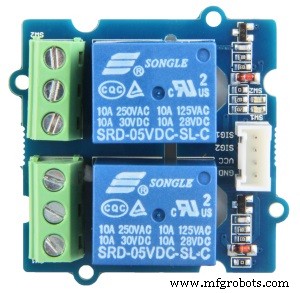
我们不能将 5V 继电器直接与水泵一起使用,因为在我的情况下,我在这个项目中使用的水泵的安培(A)额定值为 16 安培,而 5V 继电器的最大负载为 10 安培,因此可以控制水泵我又使用了一个带有 5V 继电器模块的继电器。 12V电源继电器。

代码:
/*
 * 智能消毒卫生隧道
 */

int relayPin =12; // 选择继电器引脚的引脚

int inputPin =2; // 选择输入引脚(用于 PIR 传感器)
int inputPin2 =3; // 选择输入引脚(用于 PIR 传感器 02)

int pirState =LOW; // 在开始时,假设没有检测到运动
int val =0; // 读取引脚状态的变量
int val2 =0; // 读取引脚状态的变量


void setup() {
 pinMode(relayPin, OUTPUT); // 将 Relay 声明为输出
 pinMode(inputPin, INPUT); // 将传感器声明为输入
 pinMode(inputPin2, INPUT);
 Serial.begin(9600);
}

void loop(){
 val =digitalRead(inputPin); // 读取输入值
 val2 =digitalRead(inputPin2); // 读取输入值
 if (val ==HIGH || val2 ==HIGH) { // 检查输入是否为HIGH
 digitalWrite(relayPin, HIGH); // 打开继电器
 if (pirState ==LOW) {
 // 打开
 Serial.println("Motion detection!");
 // 15 秒延迟
 延迟(15000);
 pirState =HIGH;
 }
 } else {
 digitalWrite(relayPin, 0); // 关闭继电器
 if (pirState ==HIGH){
 // 关闭
 Serial.println("运动结束!");
 pirState =LOW;
 }
 }

}
该项目的最终布线看起来有点乱,但效果很好。
_NesuSpBJwr.jpeg?auto=compress%2Cformat&w=680&h=510&fit=max) &figure=510>
&figure=510> 全部连接好后,我只是用基本的传感对其进行了测试,然后继续检查继电器是否在触发。
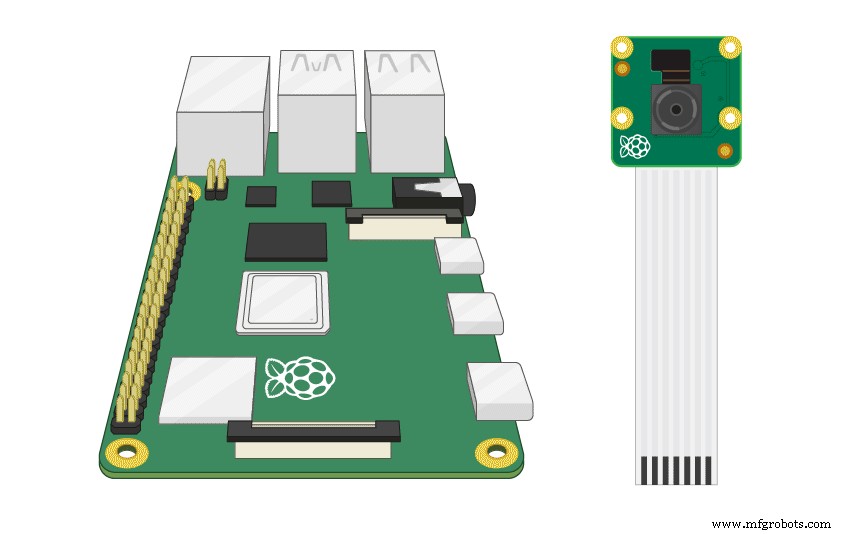
准备树莓派 3(可选)
这是可选的。如果您需要对数据进行一些分析并精确计算使用此隧道的人数。你可以实现这部分。
虽然,有很多方法可以使用一些物理传感器(例如 PIR 传感器和超声波传感器)来计算,但我发现在考虑所有可能性时更精确。
有一个机器学习模型,使用 Python 中的 OpenCV 检测人体并将日志存储在文件中,该文件可以处理以在应用程序中显示数据。
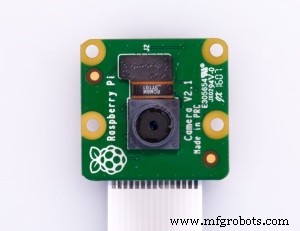
连接 Pi 相机
- 关闭树莓派
- 在 USB 模块和 HDMI 模块之间找到摄像头模块。
- (轻轻)向上拉以解锁黑色塑料夹
- 插入摄像头模块带状电缆(金属连接器朝外 来自 Raspberry Pi 上的以太网/USB 端口 4)
- 锁定黑色塑料夹
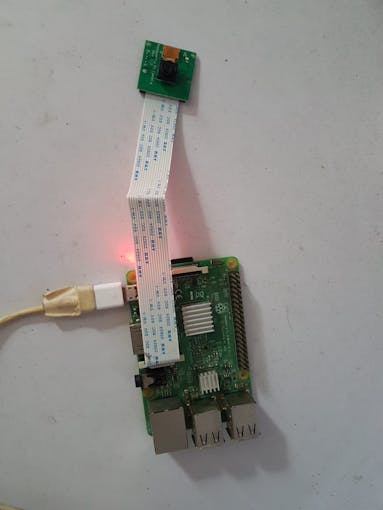
启用 Pi 相机
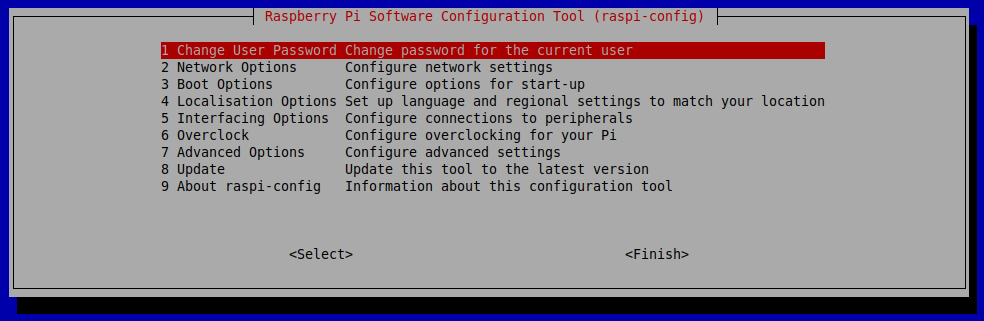
- 运行
sudo raspi-config - 从 Raspberry Pi 软件配置工具的主菜单中选择接口选项(即第 4 个选项)。按 ENTER。
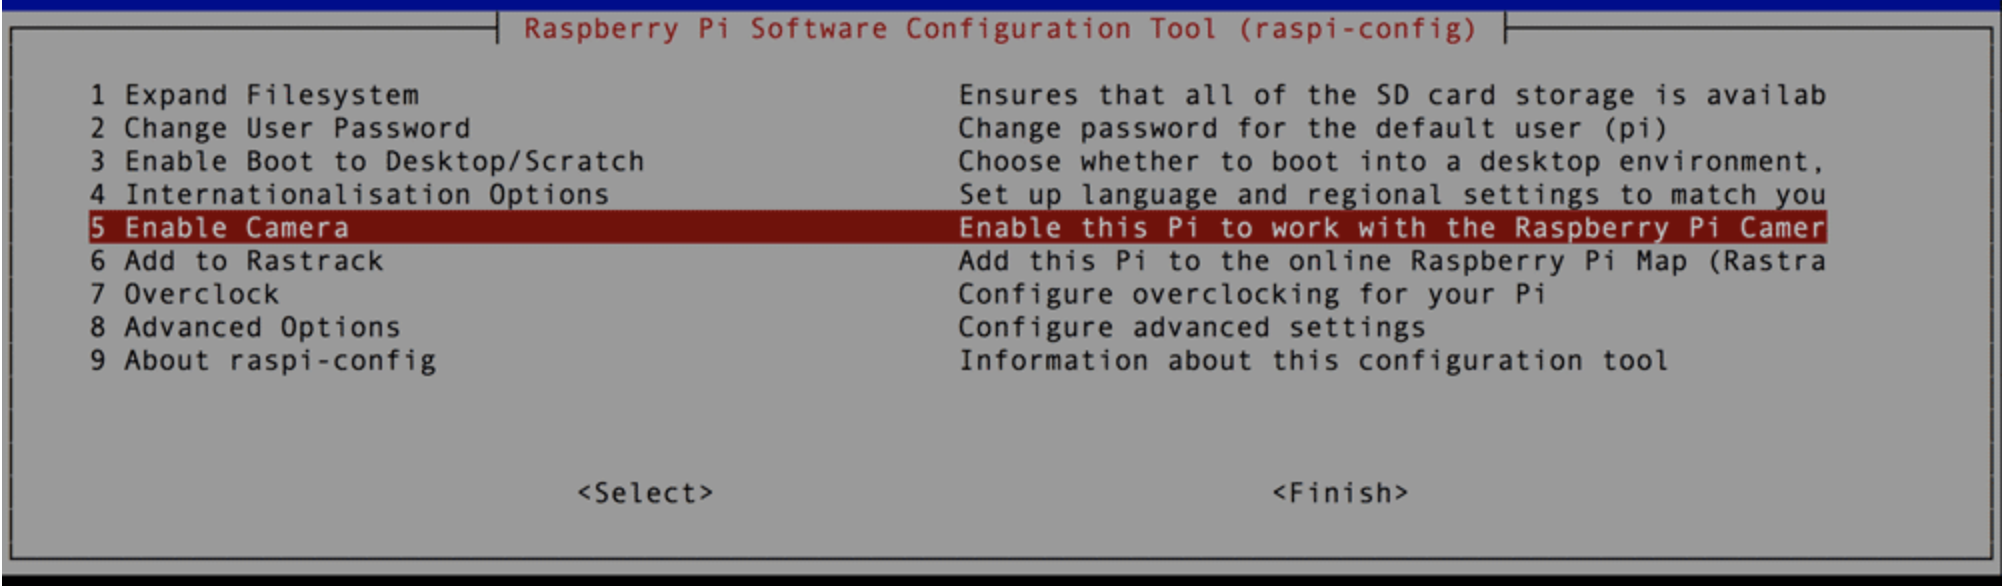
- 选择
启用相机(即第 5 个选项)菜单选项,然后按 ENTER。
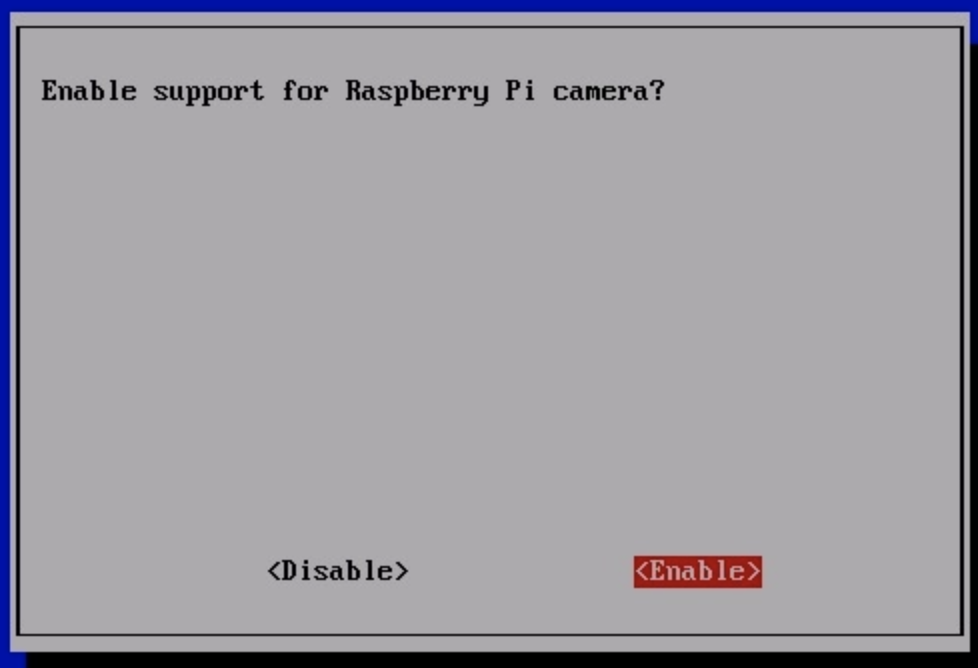
- 在下一个菜单中,使用右箭头键突出显示
ENABLE并按 ENTER。
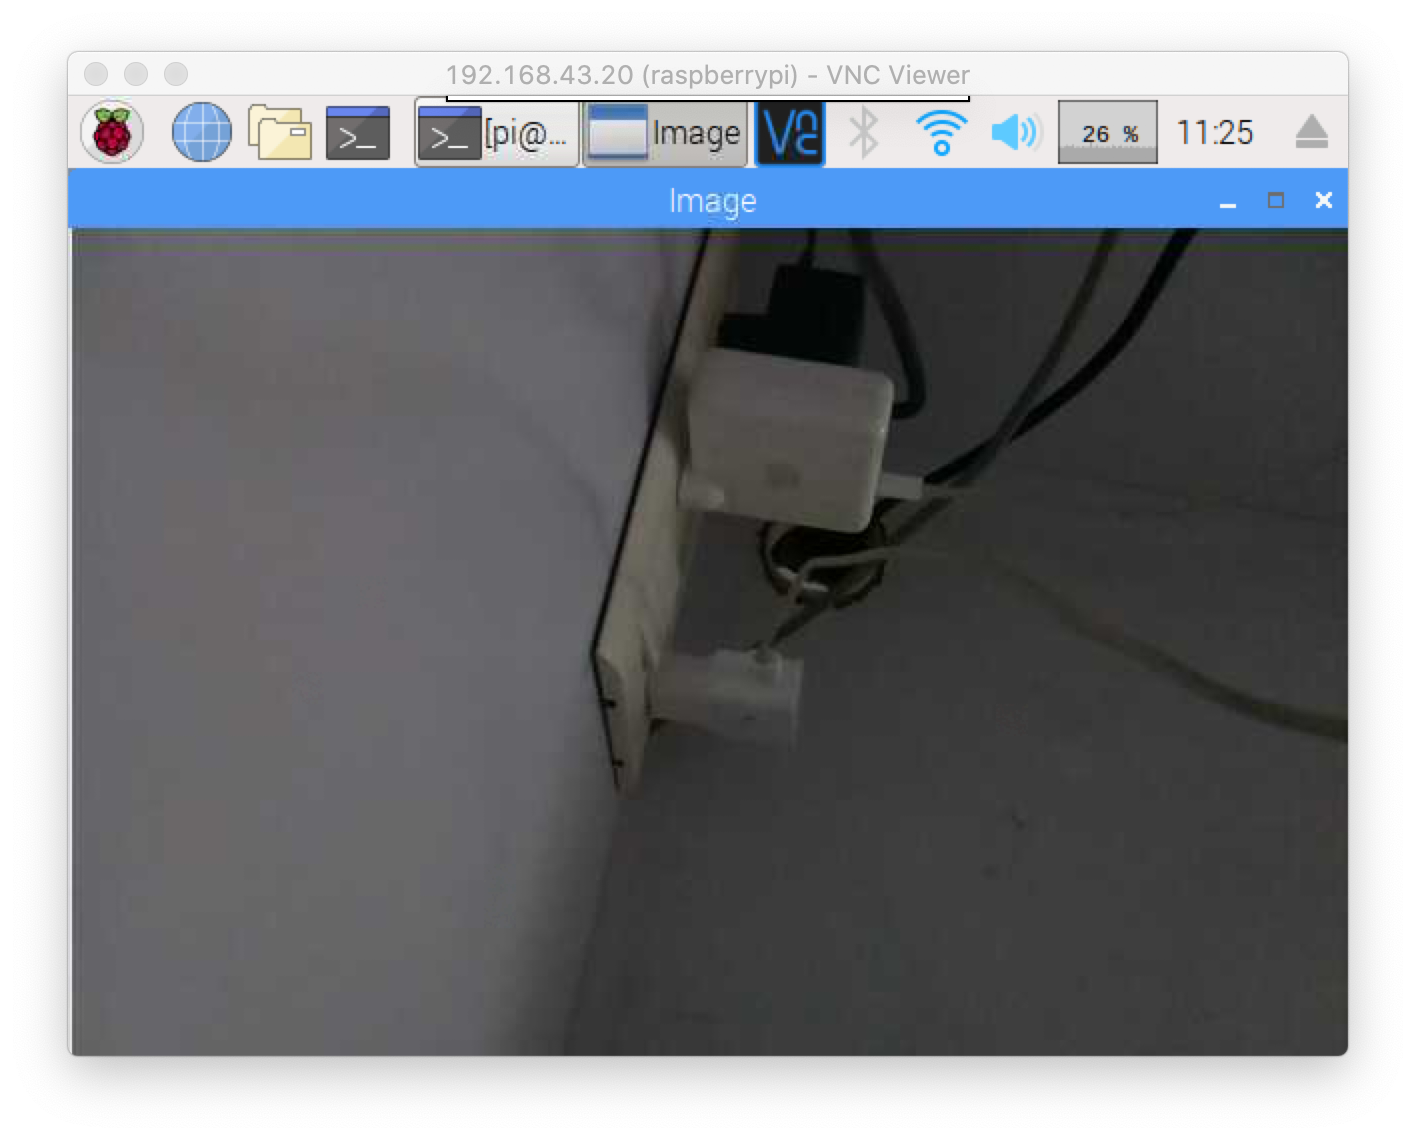
测试 Pi 相机
接下来,通过启动相机的预览覆盖来验证 Pi 相机是否已正确安装。叠加层将呈现在屏幕上。
- 使用 VNC 查看器连接到 Raspberry Pi。
- 运行以下命令:
raspistill -v -o test.jpg 如果您正确安装了 Pi 相机,您应该会看到来自相机的镜头渲染到您的屏幕上。
安装 OpenCV
请按照此链接安装 OpenCV
https://www.learnopencv.com/install-opencv-4-on-raspberry-pi/
代码
运行以下命令创建并打开一个新的脚本文件:
cd Desktop
sudo nano main.py
复制脚本,然后将其粘贴到您创建的新文件中。
import cv2.cv as cv
from datetime import datetime
import time
import sys
import datetime
count=0
class MotionDetector():
def onChange(self, val):#用户改变ceil时回调
self.ceil =val
def __init__(self,ceil=8, doRecord=True, showWindows=True):
self.writer =None
self.font =None
self.doRecord=doRecord #要么不记录移动物体
self.show =showWindows #要么不显示2个窗口
self.frame =None
self.capture=cv.CaptureFromCAM(0)
self.frame =cv.QueryFrame(self.capture) #Take a frame to init recorder
if doRecord:
self.initRecorder()
self.frame1gray =cv.CreateMat(self.frame.height, self.frame.width, cv.CV_8U) #Gray frame在 t-1
cv.CvtColor(self.frame, self.frame1gray, cv.CV_RGB2GRAY)
#将保持阈值结果
self.res =cv.CreateMat(self.frame.高度,self.frame.width,cv.CV_8U)
self.frame2gray =cv.CreateMat(self.fra me.height, self.frame.width, cv.CV_8U) #t
self.width =self.frame.width
self.height =self.frame.height
self 处的灰框.nb_pixels =self.width * self.height
self.ceil =ceil
self.isRecording =False
self.trigger_time =0 #保持上次检测的时间戳
if showWindows :
cv.NamedWindow("Image")
#cv.CreateTrackbar("Mytrack", "Image", self.ceil, 100, self.onChange)
def initRecorder(self):#创建记录器
codec =cv.CV_FOURCC('D', 'I', 'V', 'X')
#codec =cv.CV_FOURCC("D", "I", " B", " ")
self.writer=cv.CreateVideoWriter(datetime.now().strftime("%b-%d_%H:%M:%S")+".avi", codec, 15, cv.GetSize(self.frame), 1)
#FPS 设置为 15 因为它似乎是我的 cam 的 fps 但应该根据您的需要进行调整
self.font =cv.InitFont (cv.CV_FONT_HERSHEY_SIMPLEX, 1, 1, 0, 2, 8) #创建字体
def run(self):
global count
started =time.time()
而真:
curframe =cv.QueryFrame(self.capture)
instant =time.time() #获取帧的时间戳
self.processImage(curframe) #处理图像
if not self.isRecording:
if self.somethingHasMoved():
self.trigger_time =instant #更新trigger_time
if instant> started +5:#网络摄像头启动后等待5秒进行亮度调整等。
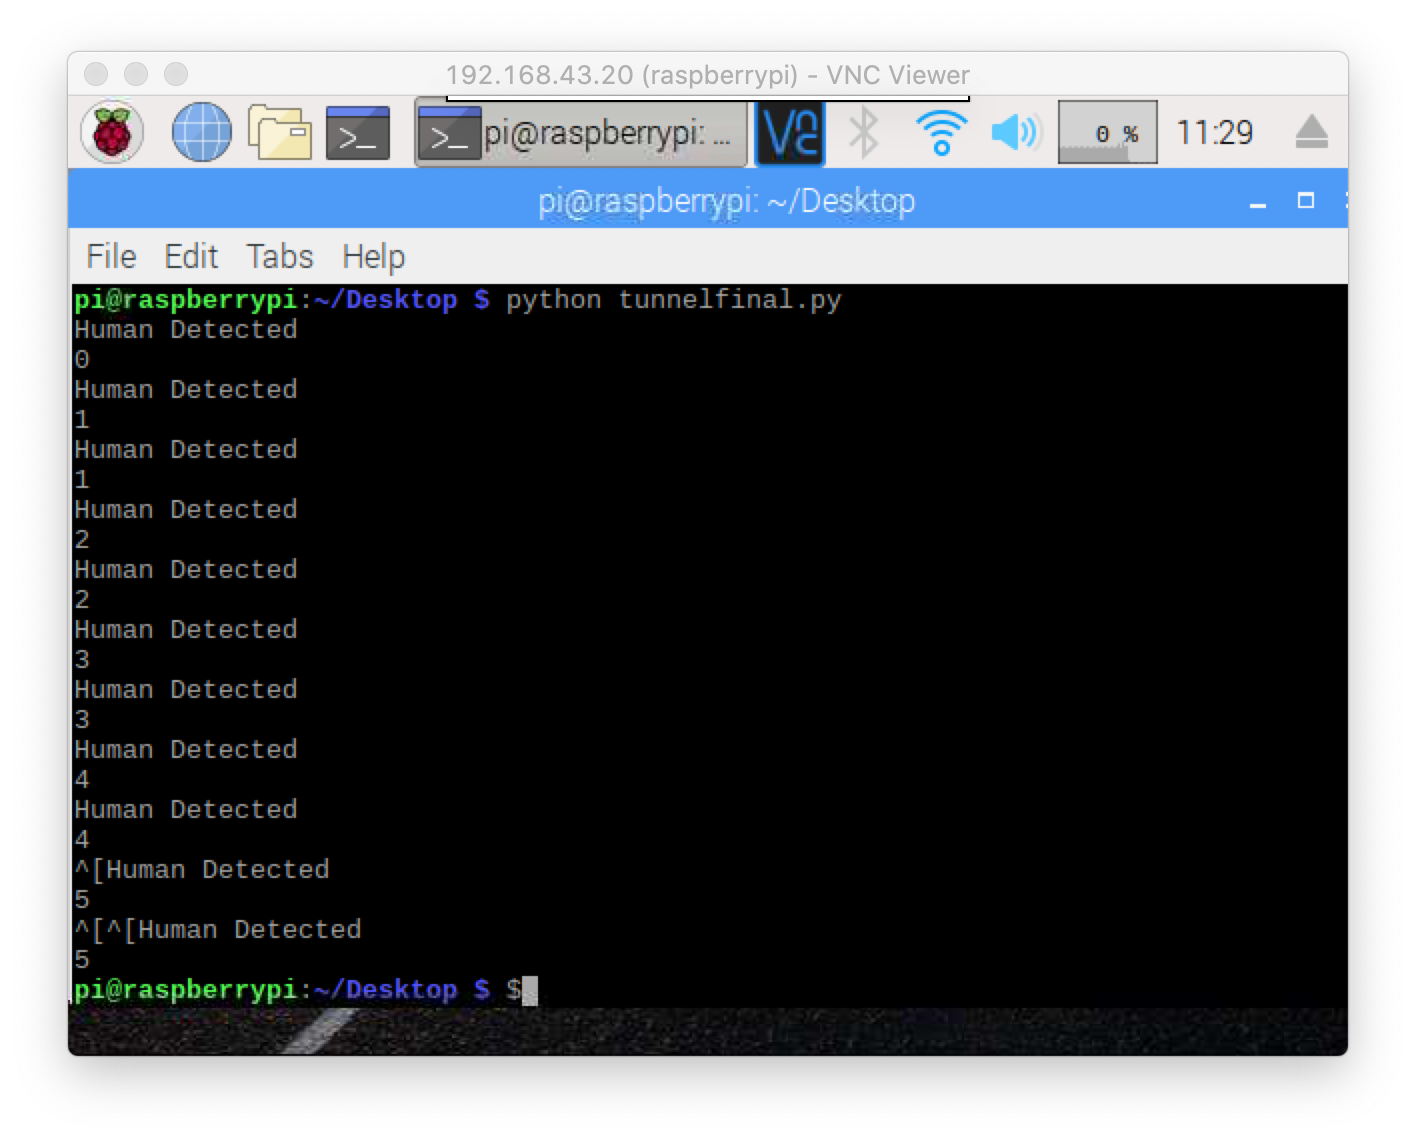
打印“检测到人”
count +=1
print(count/2)
orig_stdout =sys.stdout
f =open('out.txt', 'a+')
sys.stdout =f
print(count/2)
sys.stdout =orig_stdout
f.close()
#timestamp log
orig_stdout =sys.stdout
f =open('log.txt', 'a+')
sys.stdout =f
timestampc =('时间戳:{:%Y-%b-%d %H:%M:%S }'.format(datetime.datetime.now()))
print(timestampc+' Log Entry :1')
sys.stdout =orig_stdout
f.close()
if self.doRecord:#set isRecording=True only if we record a video
self.isRecording =True
else:
if instant>=self.trigger_time +10:#Record during 10 seconds
打印“停止录音"
self.isRecording =False
else:
cv.PutText(curframe,datetime.now().strftime("%b %d, %H:%M:%S" ), (25,30),self.font, 0) #把日期放在框架上
cv.WriteFrame(self.writer, curframe) #写框架
if self.show:
cv.ShowImage("Image", curframe)
#cv.ShowImage("Res", self.res)
cv.Copy(self.frame2gray, self.frame1gray)
c=cv.WaitKey(1)
if c==27 or c ==1048603:#Break if user enter 'Esc'.
break
def processImage(self, frame):
cv.CvtColor(frame, self.frame2gray, cv.CV_RGB2GRAY)
#Absdiff 获取帧之间的差异
cv.AbsDiff(self.frame1gray, self.frame2gray, self.res)
#去除噪声做阈值
cv.Smooth(self.res, self.res, cv.CV_BLUR, 5,5)
element =cv.CreateStructuringElementEx(5*2+1 , 5*2+1, 5, 5, cv.CV_SHAPE_RECT)
cv.MorphologyEx(self.res, self.res, None, None, cv.CV_MOP_OPEN)
cv.MorphologyEx(self.res , self.res, None, None, cv.CV_MOP_CLOSE)
cv.Thresho ld(self.res, self.res, 10, 255, cv.CV_THRESH_BINARY_INV)
def somethingHasMoved(self):
nb=0 #将保持黑色像素数
for y in range(self.height):#Iterate thehole image
for x in range(self.width):
if self.res[y,x] ==0.0:#If the pixel is black keep it
nb +=1
avg =(nb*100.0)/self.nb_pixels #计算图像中黑色像素的平均值
#print "Average:",avg, "%\ r",
if avg> self.ceil:#如果超过ceil触发报警
return True
else:
return False
if __name__=="__main__ ":
detect =MotionDetector(doRecord=False)
detect.run() 下载 - https://www.hackster.io/code_files/438321/download
完成后,只需通过键入“CTRL+X”、Y 和 ENTER 来保存文件。可以通过键入以下命令来运行该脚本:
python main.py 您应该能够在屏幕上看到图像,如果需要,请查看视频以验证终端中的程序是否有人数。
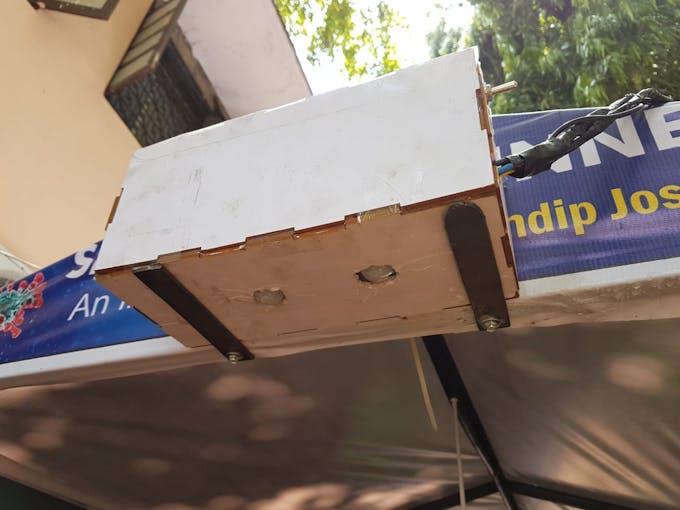
我刚刚为 Arduino 和 Raspberry Pi 3 创建了一个带有 MDF 板的外壳
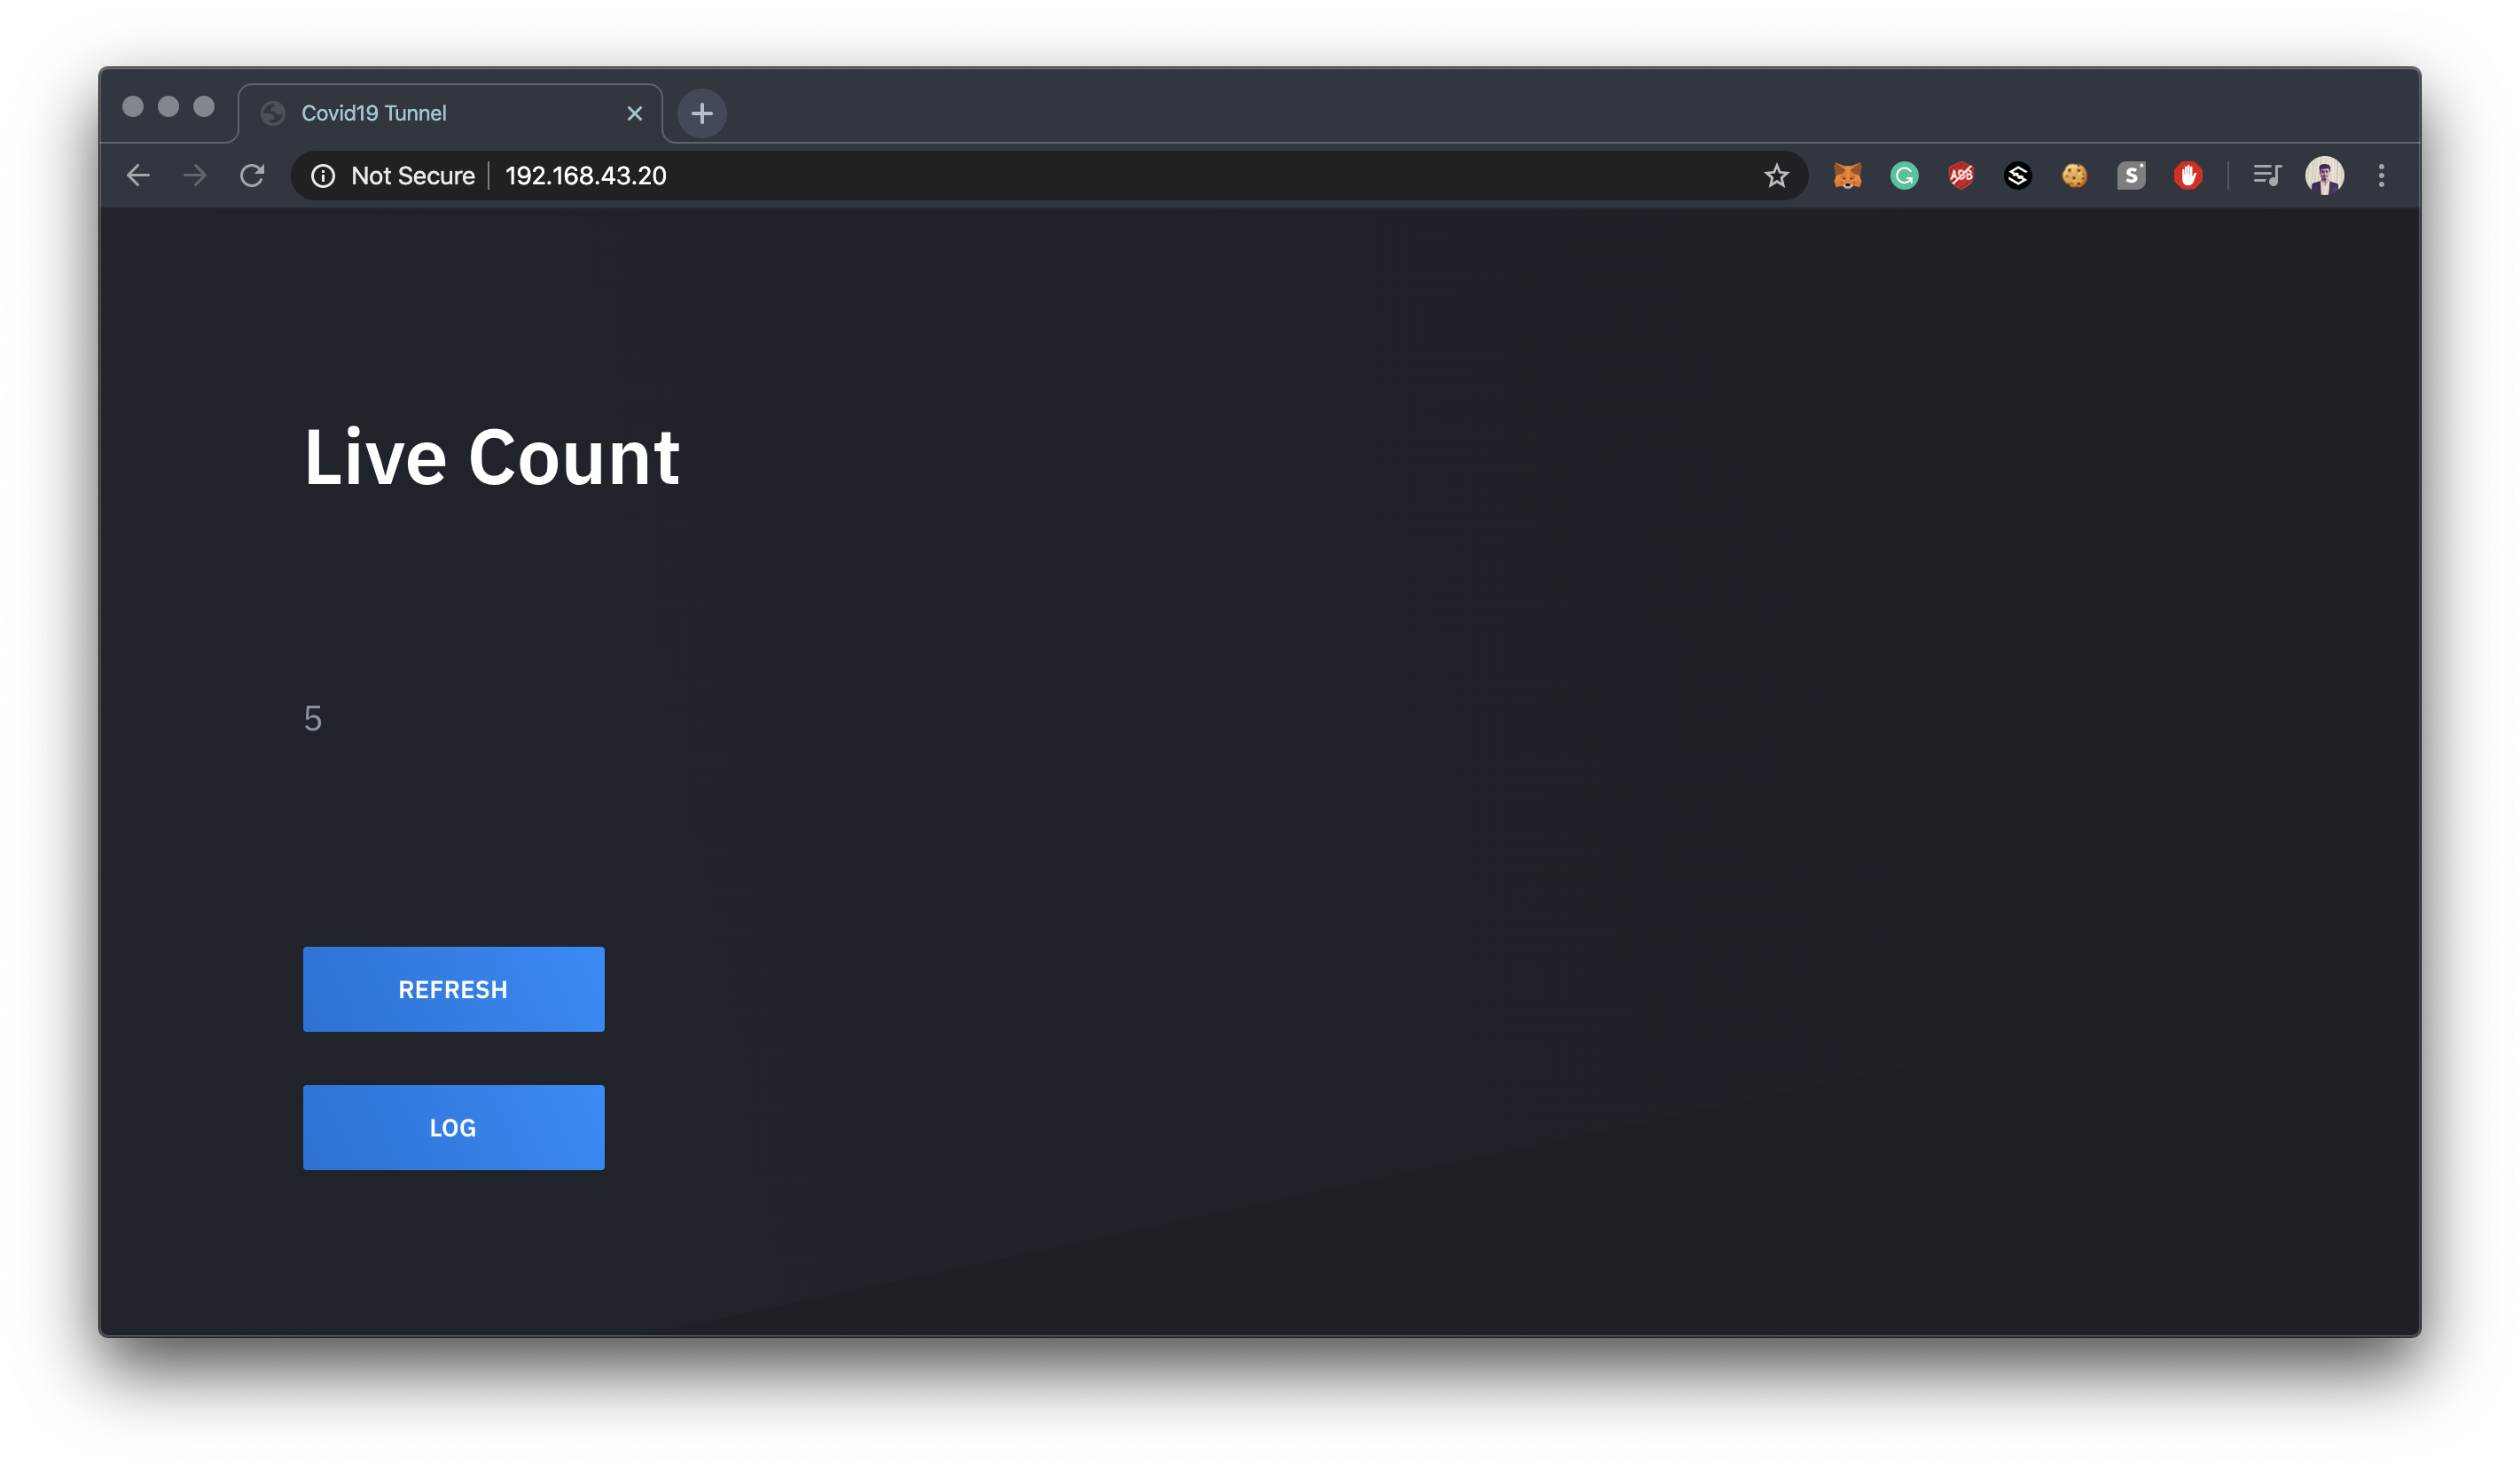
为桌面/应用创建仪表板
第一步:安装Apache
安装 apache2 使用此命令打包:
sudo apt install apache2 -y
第二步:安装PHP
要允许您的 Apache 服务器处理 PHP 文件,您需要安装最新版本的 PHP 和适用于 Apache 的 PHP 模块。输入以下命令来安装这些:
sudo apt install php libapache2-mod-php -y
现在下载 Dashboard.zip :
cd /var/www/html
wget "https://hacksterio.s3.amazonaws.com/uploads/attachments/1097966/Dashboard.zip"
并安装解压:
sudo apt-get install 解压 从 ZIP 文件中提取文件:
解压 Dashboard.zip 现在保存并刷新浏览器。你应该看到

将 Raspberry Pi 设置为无线接入点
请点击此链接 https://www.raspberrypi.org/documentation/configuration/wireless/access-point.md
注意:将无线接入点命名为 SanitizingTunnel
interface=wlan0
driver=nl80211
ssid=SanitizingTunnel
hw_mode=g
channel=7
wmm_enabled=0
macaddr_acl=0
auth_algs=1
ignore_broadcast_ssid=0
wpa=2
wpa_passphrase=SecretPassword
wpa_key_mgmt=WPA-PSK
wpa_pairwise=TKIP
rsn_pairwise =CCMP 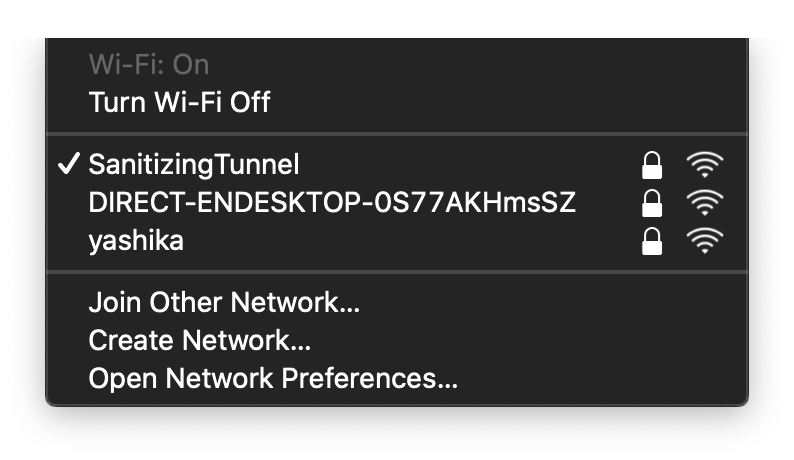
现在让我们开始构建应用。
安卓应用:
先决条件:Android Studio
您可以直接从这里下载代码。
并根据需要更改您的凭据,例如树莓派的 IP 地址。

iOS 应用:
先决条件:XCode
您可以直接从这里下载代码。
并根据需要更改您的凭据,例如树莓派的 IP 地址。

使用的化学溶液
消毒隧道每100升水中含有0.4%的次氯酸钠溶液。
更新 - 我看到很多评论说你在使用有害化学物质。
所以,我只是从向我提供这种化学品的供应商那里收集信息。所以他告诉我,我在这条隧道中使用的化学品来自 Raman &Weil Pvt。 Ltd 并且他们有“声明 " 来自 德国博德化学 , 关于对 COVID-19 的功效 .
官方链接 - http://ramanweil.com/pdf/Declaration%20from%20Bode%20Chemie%20Germany%20on%20efficacy%20against%20COVID%2019.pdf
放在一起
最后,是时候打开 Tunnel 电源并检查所有例程和应用程序是否按计划运行。
 max"
max"  max"
max"
成本
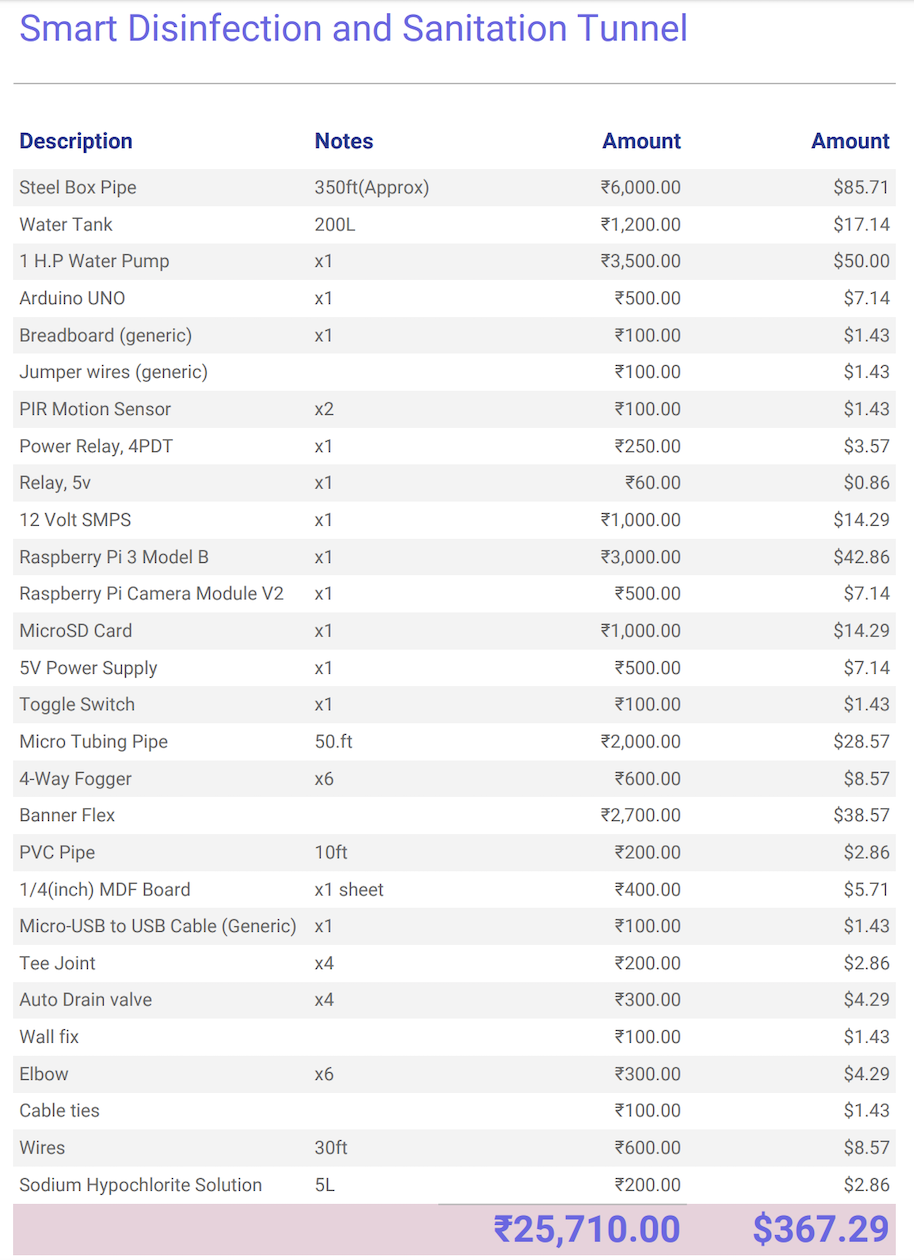
链接 - https://docs.google.com/spreadsheets/d/1jt-hy8N8IwuQnaLYt-25BywdlREkEhp5zjAfYC6eGqw/edit?usp=sharing
代码
- Arduino 代码隧道
- main.py
- 仪表板文件
- 卫生隧道 Android 源代码
- Sanitation-Tunnel Android 应用
- Sanitation-Tunnel iOS 源代码
Arduino 代码隧道C/C++
/* * 智能消毒和卫生隧道 */ int relayPin =12; // 选择继电器 Pinint inputPin =2 的引脚; // 选择输入引脚(用于 PIR 传感器)int inputPin2 =3; // 选择输入引脚(对于 PIR 传感器 02)int pirState =LOW; // 我们开始,假设没有检测到运动int val =0; // 读取引脚状态的变量int val2 =0; // 读取引脚状态的变量 void setup() { pinMode(relayPin, OUTPUT); // 将继电器声明为输出 pinMode(inputPin, INPUT); // 将 PIR 传感器声明为输入 pinMode(inputPin2, INPUT); Serial.begin(9600);} void loop(){ val =digitalRead(inputPin); // 读取输入值 val2 =digitalRead(inputPin2); // 读取输入值 if (val ==HIGH || val2 ==HIGH) { // 检查输入是否为 HIGH digitalWrite(relayPin, HIGH); // 打开继电器 if (pirState ==LOW) { // 我们刚刚打开了 Serial.println("Motion detection!"); // 15 秒延迟 delay(15000); // 我们只想打印输出变化,而不是 state pirState =HIGH; } } else { digitalWrite(relayPin, 0); // 关闭继电器 if (pirState ==HIGH){ // 我们刚刚关闭了 Serial.println("MotionEND!"); // 我们只想打印输出变化,而不是 state pirState =LOW; } } } main.pyPython
import cv2.cv as cvfrom datetime import datetimeimport timeimport sysimport datetimecount=0class MotionDetector():def onChange(self, val):#用户改变ceil时的回调 self.ceil =val def __init__(self,ceil=8 , doRecord=True, showWindows=True):self.writer =None self.font =None self.doRecord=doRecord #要么不记录移动物体 self.show =showWindows #要么不显示2个窗口 self.frame =None self.capture=cv.CaptureFromCAM(0) self.frame =cv.QueryFrame(self.capture) #Take a frame to init recorder if doRecord:self.initRecorder() self.frame1gray =cv.CreateMat(self.frame. height, self.frame.width, cv.CV_8U) #Gray frame at t-1 cv.CvtColor(self.frame, self.frame1gray, cv.CV_RGB2GRAY) #Will hold the thresholded result self.res =cv.CreateMat(self .frame.height, self.frame.width, cv.CV_8U) self.frame2gray =cv.CreateMat(self.frame.height, self.frame.width, cv.CV_8U) #Gray frame at t self.width =self. frame.width self.height =self.frame.height self.nb_p ixels =self.width * self.height self.ceil =ceil self.isRecording =False self.trigger_time =0 #Hold timestamp of the last detection if showWindows:cv.NamedWindow("Image") #cv.CreateTrackbar("Mytrack", "Image", self.ceil, 100, self.onChange) def initRecorder(self):#Create the recorder codec =cv.CV_FOURCC('D', 'I', 'V', 'X') #codec =cv.CV_FOURCC("D", "I", "B", " ") self.writer=cv.CreateVideoWriter(datetime.now().strftime("%b-%d_%H:%M:%S")+".avi", codec, 15, cv.GetSize(self.frame), 1) #FPS set at 15 because it seems to be the fps of my cam but should be ajusted to your needs self.font =cv.InitFont(cv.CV_FONT_HERSHEY_SIMPLEX, 1, 1, 0, 2, 8) #Creates a font def run(self):global count started =time.time() while True:curframe =cv.QueryFrame(self.capture) instant =time.time() #Get timestamp o the frame self.processImage(curframe) #Process the image if not self.isRecording:if self.somethingHasMoved():self.trigger_time =instant #Update the trigger_time if instant> started +5:#Wa it 5 second after the webcam start for luminosity adjusting etc.. print "Human Detected" count +=1 print(count/2) orig_stdout =sys.stdout f =open('out.txt', 'a+') sys.stdout =f print(count/2) sys.stdout =orig_stdout f.close() #timestamp log orig_stdout =sys.stdout f =open('log.txt', 'a+') sys.stdout =f timestampc =('Timestamp:{:%Y-%b-%d %H:%M:%S}'.format(datetime.datetime.now())) print(timestampc+' Log Entry :1') sys.stdout =orig_stdout f.close() if self.doRecord:#set isRecording=True only if we record a video self.isRecording =True else:if instant>=self.trigger_time +10:#Record during 10 seconds print "Stop recording" self.isRecording =False else:cv.PutText(curframe,datetime.now().strftime("%b %d, %H:%M:%S"), (25,30),self.font, 0) #Put date on the frame cv.WriteFrame(self.writer, curframe) #Write the frame if self.show:cv.ShowImage("Image", curframe) #cv.ShowImage("Res", self.res) cv.Copy(self.frame2gray, self.frame1gray) c=cv.WaitKey(1) if c==27 or c ==10 48603:#Break if user enters 'Esc'. break def processImage(self, frame):cv.CvtColor(frame, self.frame2gray, cv.CV_RGB2GRAY) #Absdiff to get the difference between to the frames cv.AbsDiff(self.frame1gray, self.frame2gray, self.res) #Remove the noise and do the threshold cv.Smooth(self.res, self.res, cv.CV_BLUR, 5,5) element =cv.CreateStructuringElementEx(5*2+1, 5*2+1, 5, 5, cv.CV_SHAPE_RECT) cv.MorphologyEx(self.res, self.res, None, None, cv.CV_MOP_OPEN) cv.MorphologyEx(self.res, self.res, None, None, cv.CV_MOP_CLOSE) cv.Threshold(self.res, self.res, 10, 255, cv.CV_THRESH_BINARY_INV) def somethingHasMoved(self):nb=0 #Will hold the number of black pixels for y in range(self.height):#Iterate the hole image for x in range(self.width):if self.res[y,x] ==0.0:#If the pixel is black keep it nb +=1 avg =(nb*100.0)/self.nb_pixels #Calculate the average of black pixel in the image #print "Average:",avg, "%\r", if avg> self.ceil:#If over the ceil trigger the alarm return True else:return Falseif __name__=="__main__":de tect =MotionDetector(doRecord=False) detect.run() Dashboard FilesPHP
No preview (download only).
Sanitation-Tunnel Android Source CodeJava
No preview (download only).
Sanitation-Tunnel Android AppJava
Demo AppNo preview (download only).
Sanitation-Tunnel iOS Source CodeSwift
No preview (download only).
Smart Disinfection and Sanitation Tunnel
https://github.com/yugn27/Smart-Disinfection-and-Sanitation-Tunnel定制零件和外壳
smart_disinfection_and_sanitation_tunnel_prlFu8ZRXO.3mf示意图
Circuit Diagram - fritzing file smart_disinfection_and_sanitation_tunnel_Zkb20Q5S2B.fzz制造工艺