

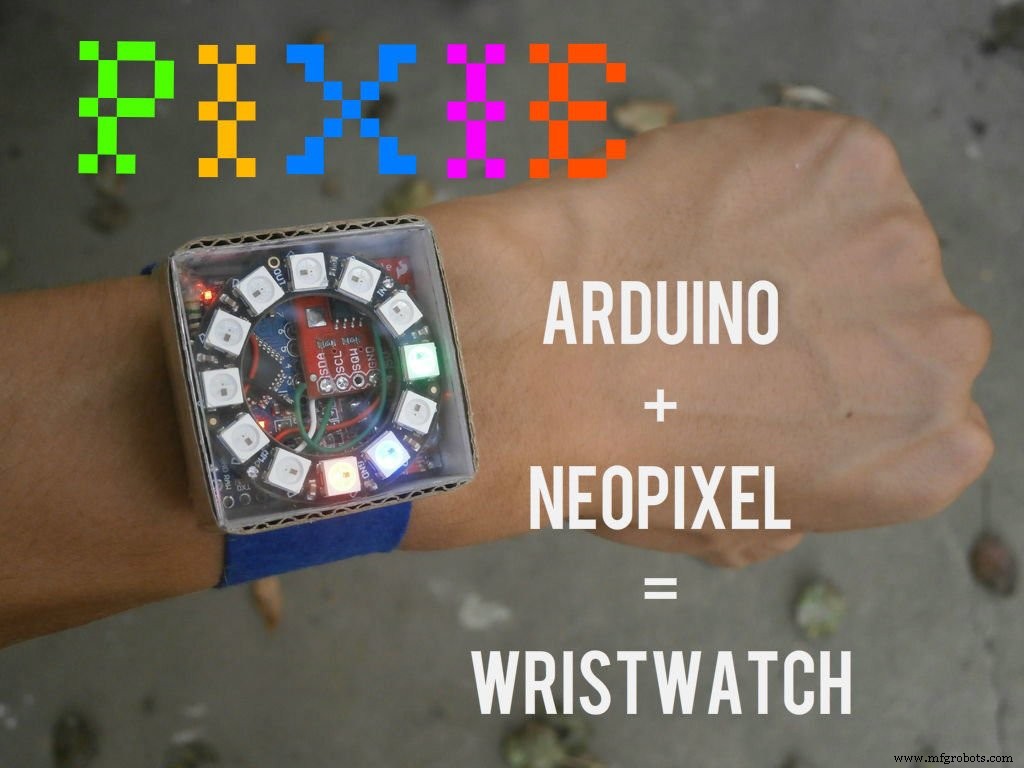
Pixie:基于 Arduino 的 NeoPixel 手表
组件和用品
 |
| × | 1 | |||
 |
| × | 1 | |||
 |
| × | 1 | |||
 |
| × | 1 | |||
 |
| × | 1 |
必要的工具和机器
 |
| |||
 |
| |||
 |
|
关于这个项目
自从有了时间,人们就开始分配时间。先是日晷,后出现水钟,是沙漏。几千年后,第一个摆钟被创造出来,几个世纪之后,电子表被创造出来。
今天给大家介绍一下如何制作Pixie,一款结合模拟和数字时钟技术,具有原子钟精度的手表。
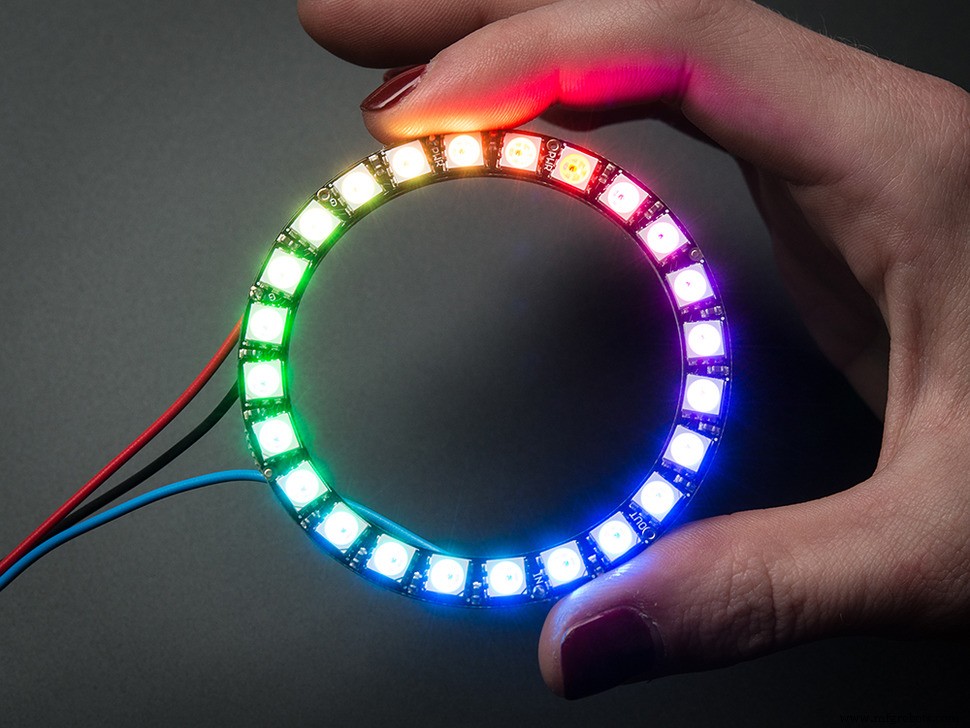
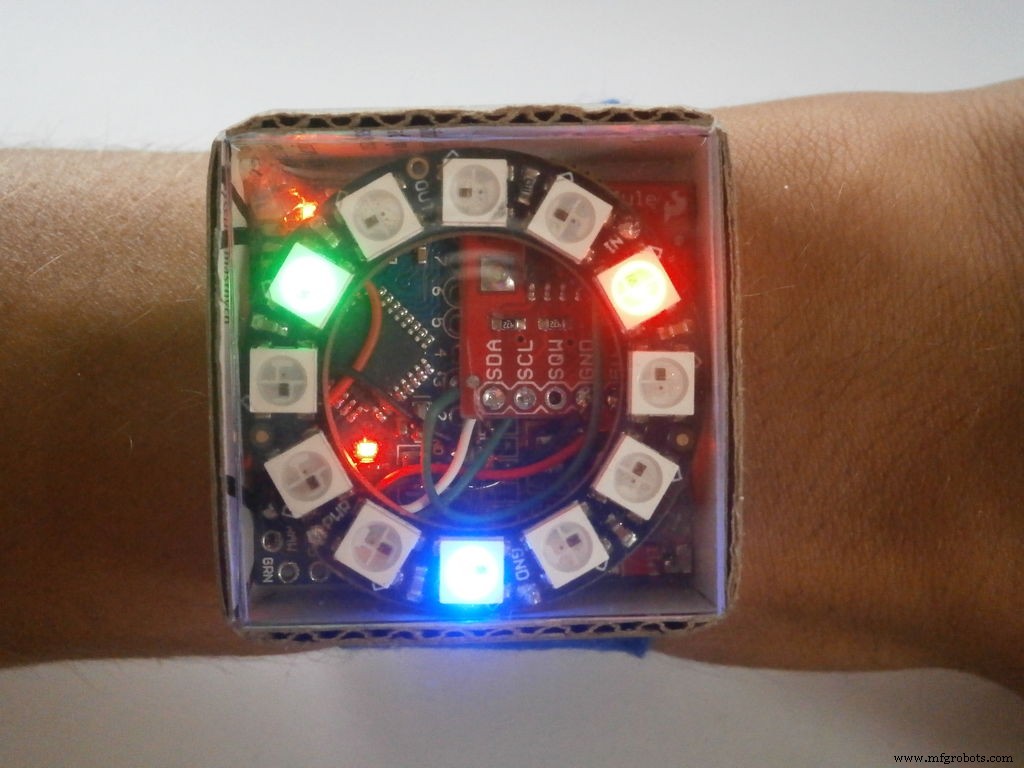
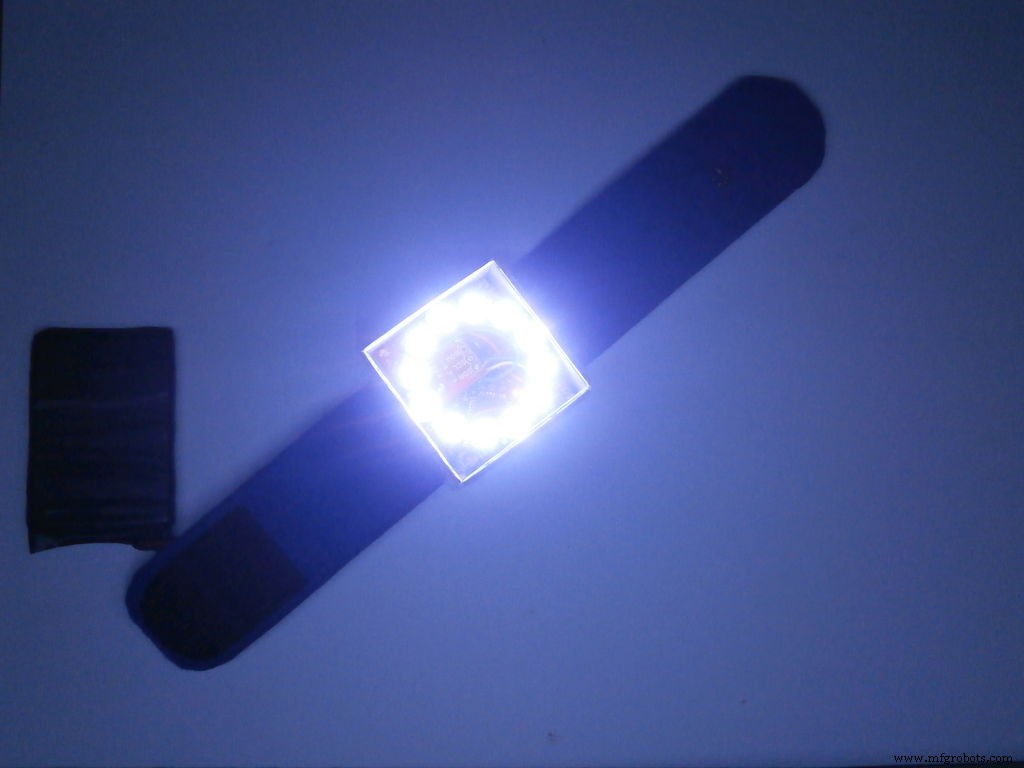
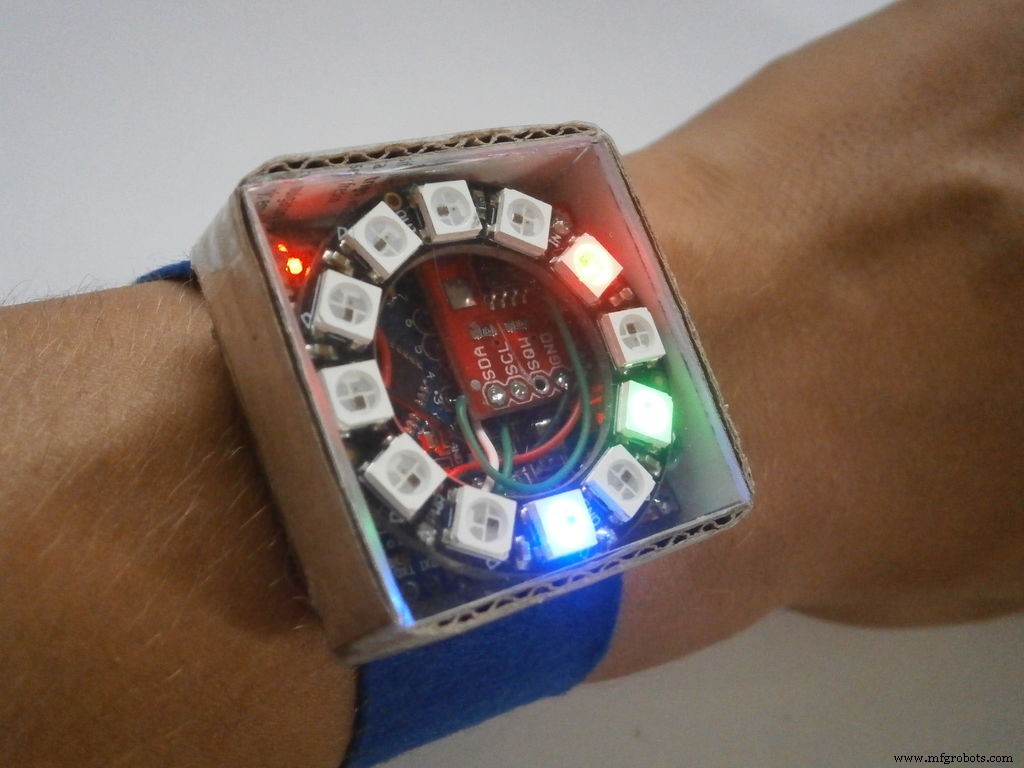
PIXIE 以蓝色显示小时, 红色的分钟 和绿色秒 ,它还有一个手电筒 通过电容式触摸开关激活的模式 , 10 秒。您可能会问为什么,那是因为 LED 发热并且它们可能会损坏,但如果您愿意,您可以自担风险增加时间!
时间格式:
营业时间: 1 个 LED =1 小时
分钟: 1 个 LED =5 分钟
秒: 1 个 LED =5 秒
观看视频!!!!
第 1 步:项目的零件、材料和工具
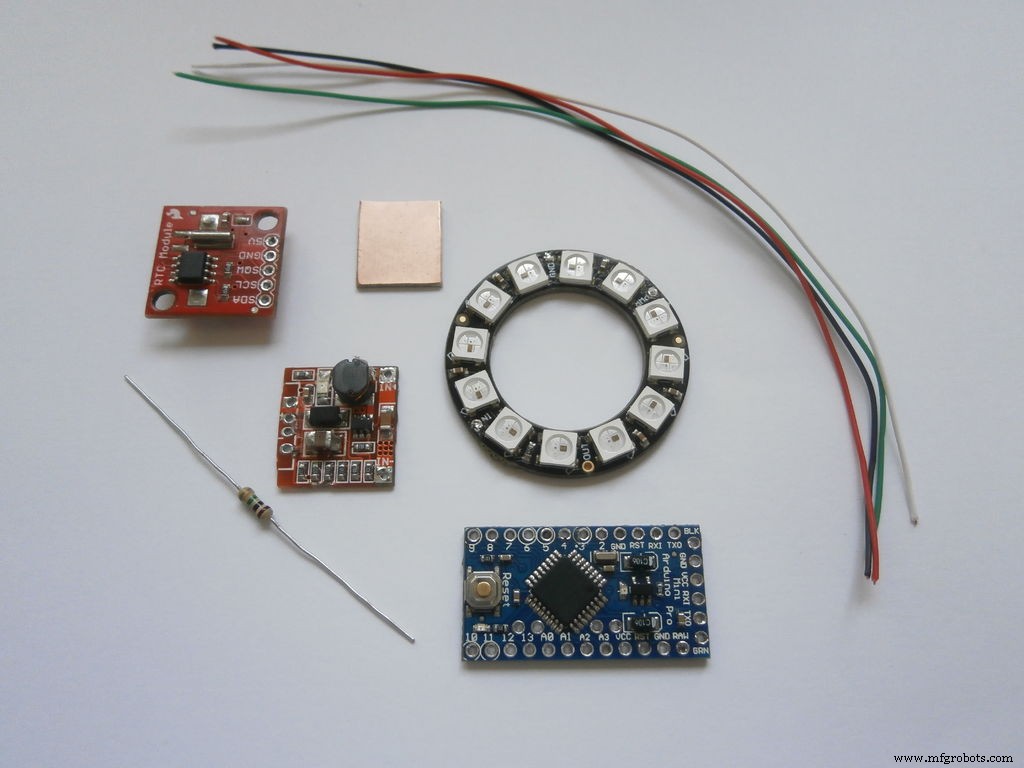
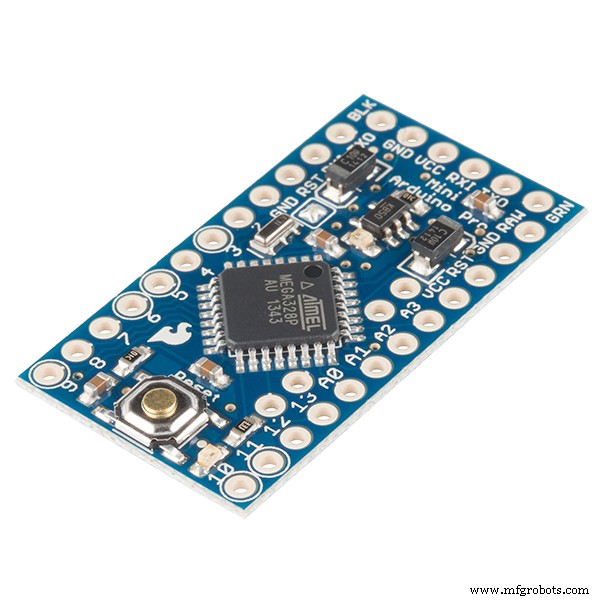
- Arduino Pro mini
- 带有 12 个 LED 的 NeoPixel 环
- DS1307 实时时钟模块
- 升压稳压器 5v
- 1 x 1M 欧姆电阻
- 锂离子电池 - 3.7v 850mAh
- 电线 - 不同颜色
- 导电材料的小和平
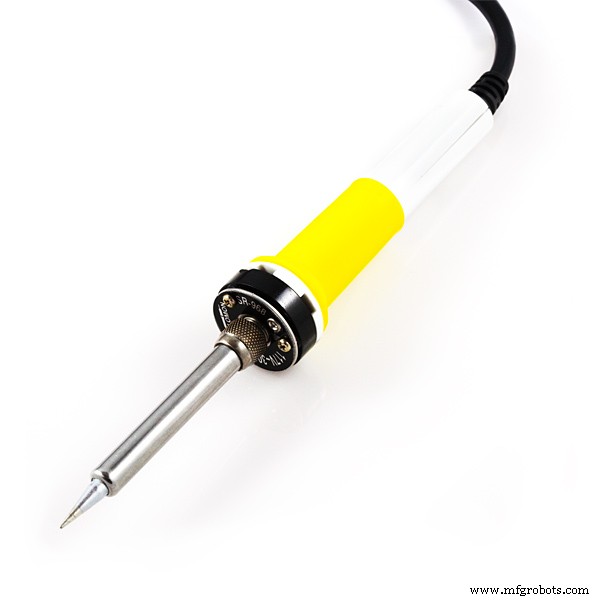
- 烙铁
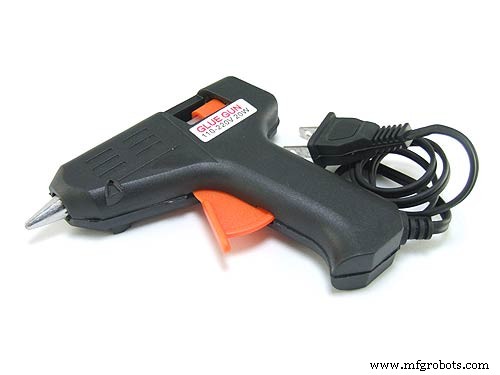
- 热胶枪
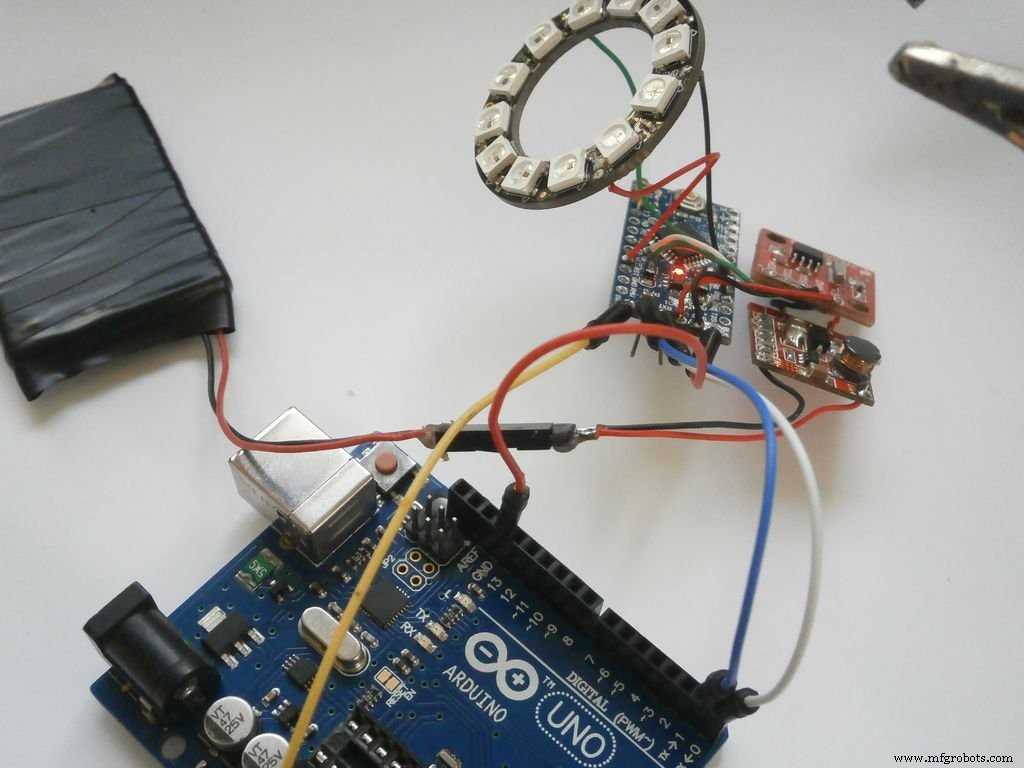
第二步:电气设计


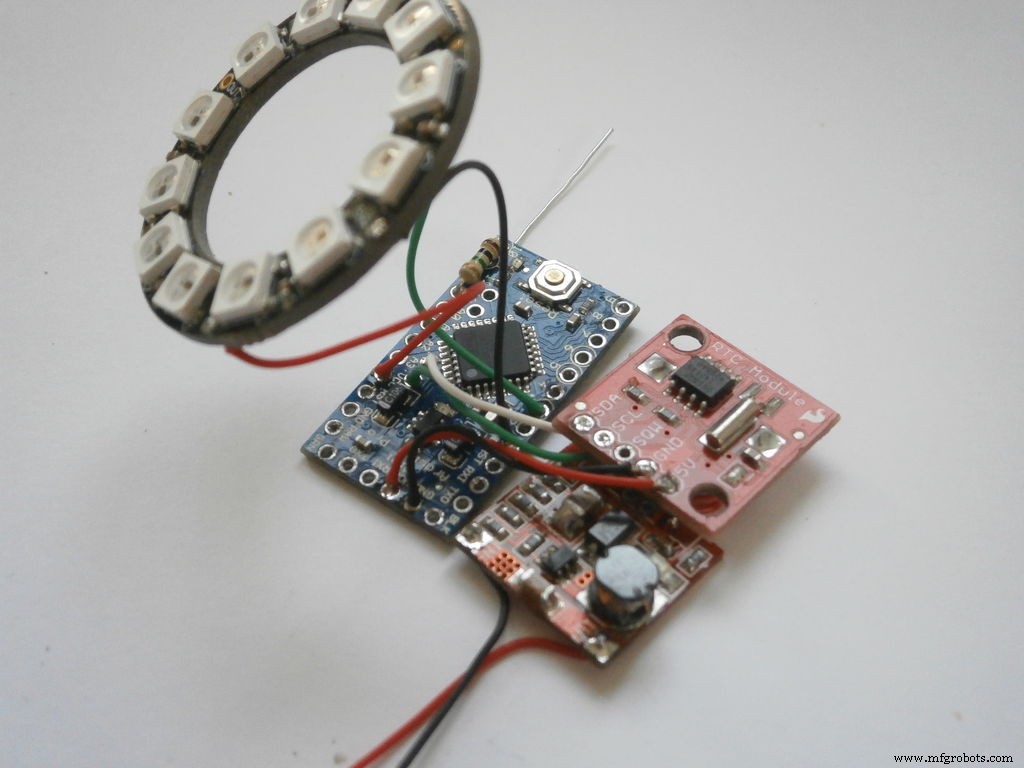
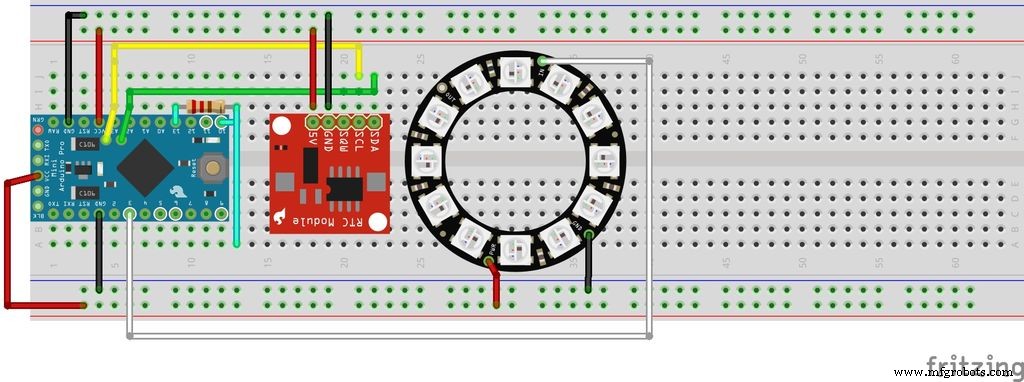
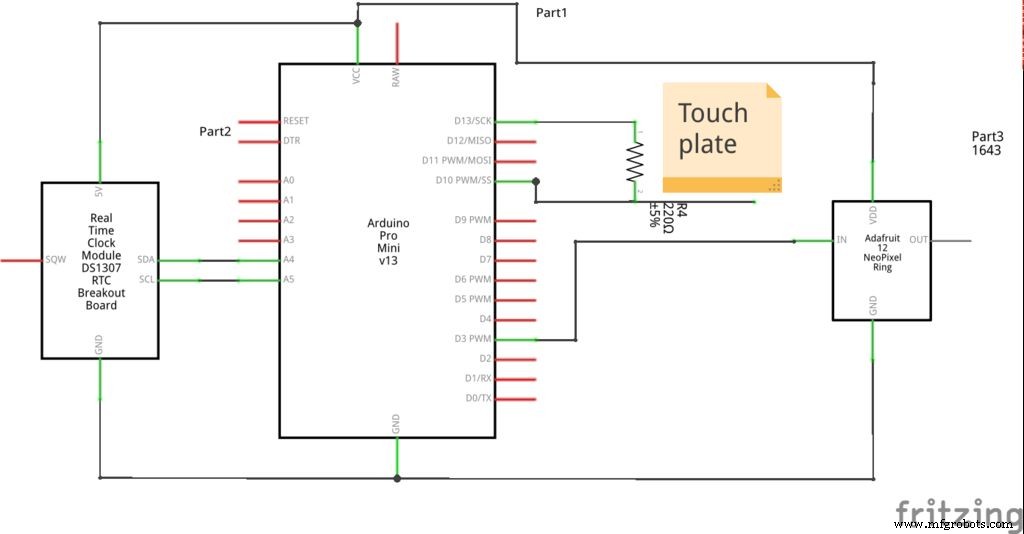
正如您在原理图上看到的,RTC 模块 DS1307 连接到Arduino板的TWI(I2C)接口(模拟引脚5(SCL)和4(SDA) )。 NeoPixel 环连接到Arduino的引脚3。
1M 欧姆电阻将引脚 10 和 13 连接在一起。 “触摸”线连接到引脚 10。
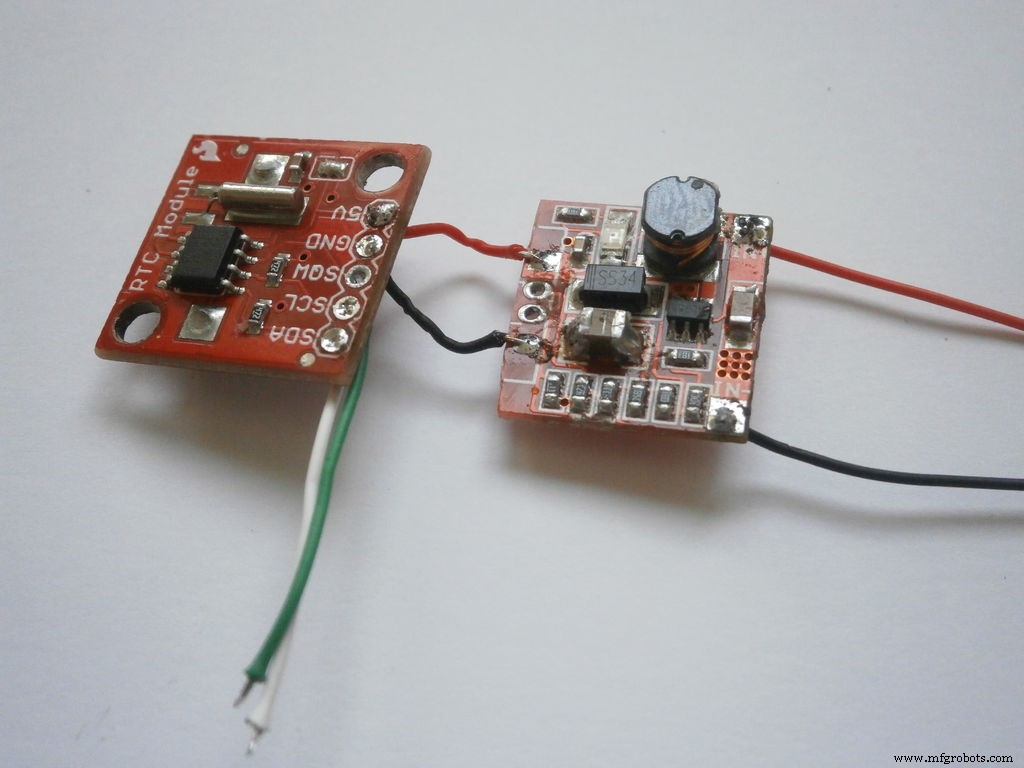
所有地 和 VSS 引脚连接到升压稳压器(在上面的任何原理图中都不存在 ).
第 3 步:构建手表
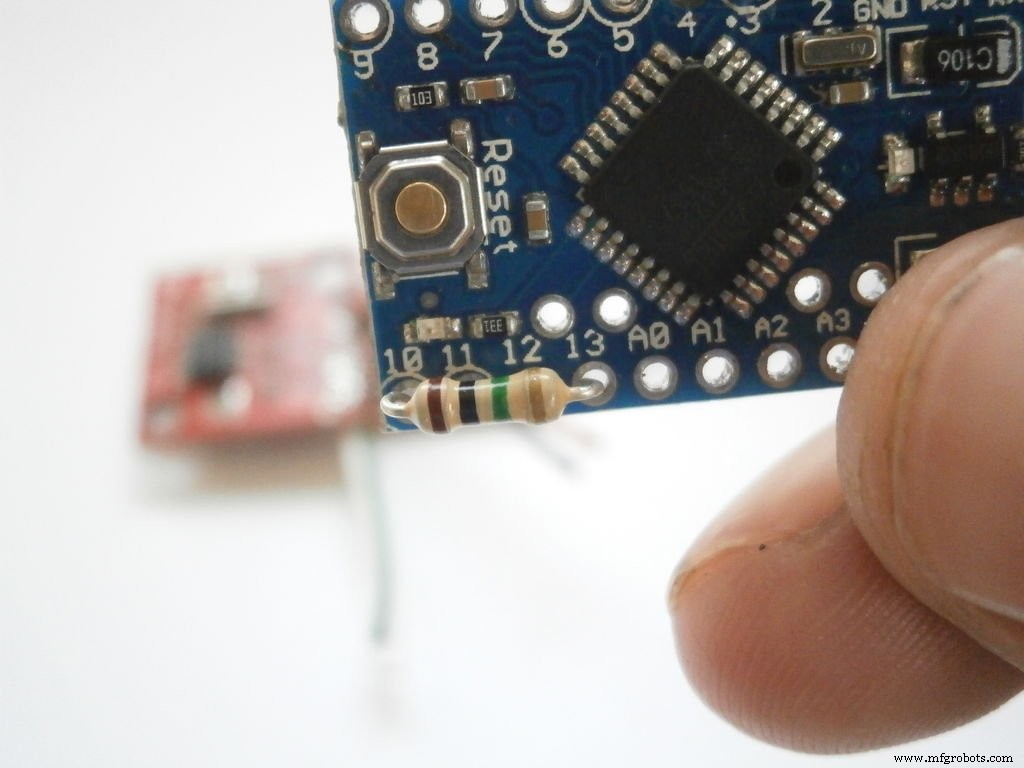

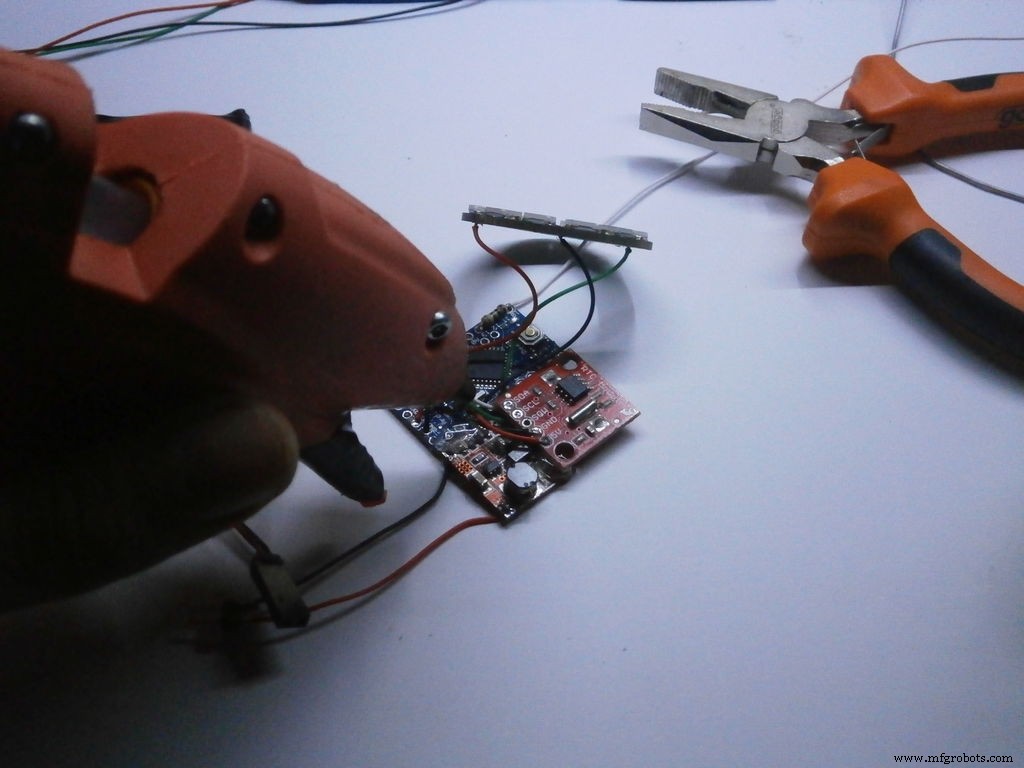
首先,我将 1M 欧姆电阻焊接到引脚 13 和 10,然后为 NeoPixel 环焊接 3 根电线,再为引脚 10 焊接一根电线。
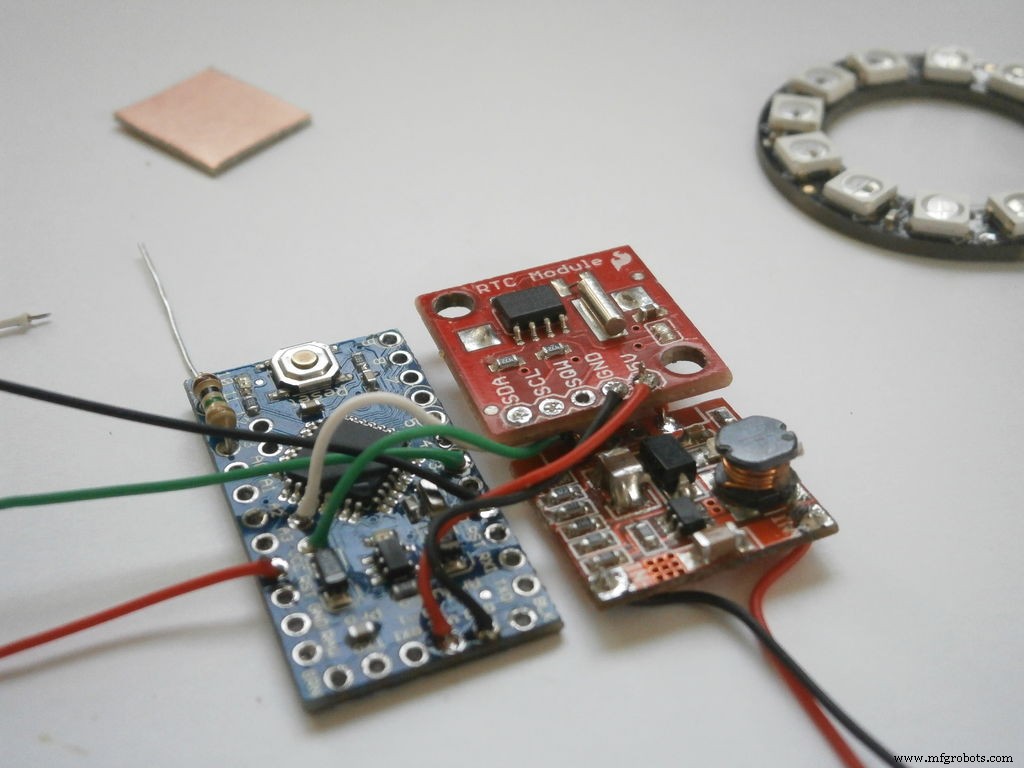
之后,我将升压调节器与 RTC 的 GND 和 VSS 连接,然后我将 RTC 的 SDA、SCL、GND 和 VSS 与 Arduino Pro Mini 板连接,再次通过焊接导线连接。
最后,我将所有板尽可能紧凑地热粘合在一起。
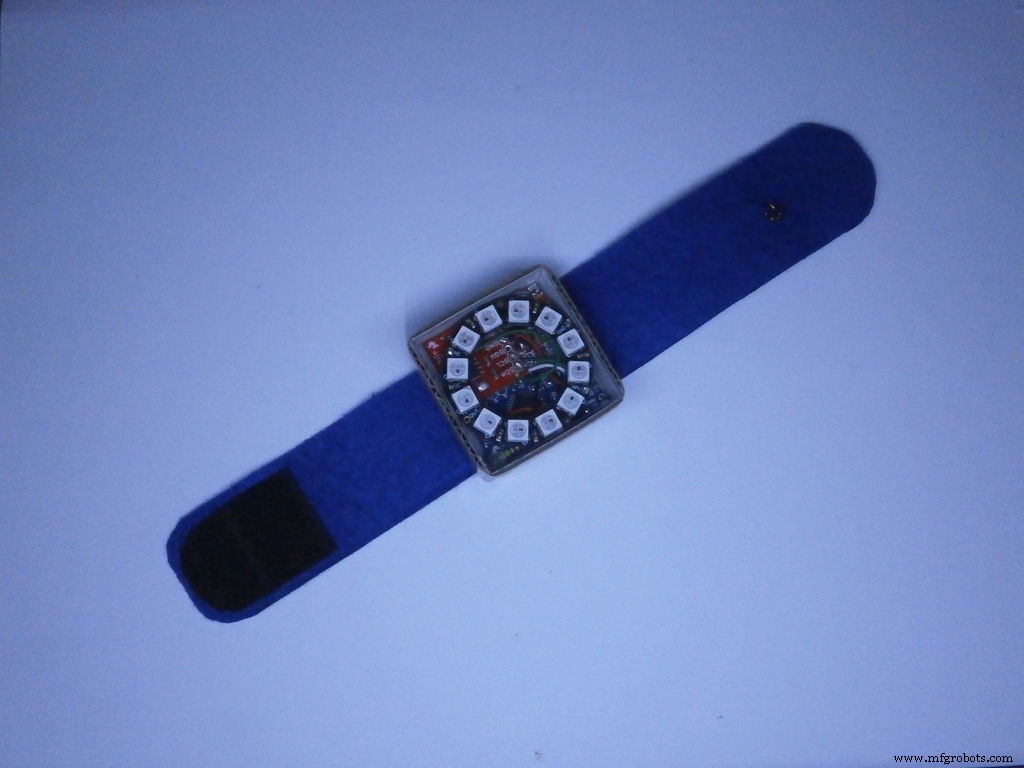
第 4 步:外壳和设计
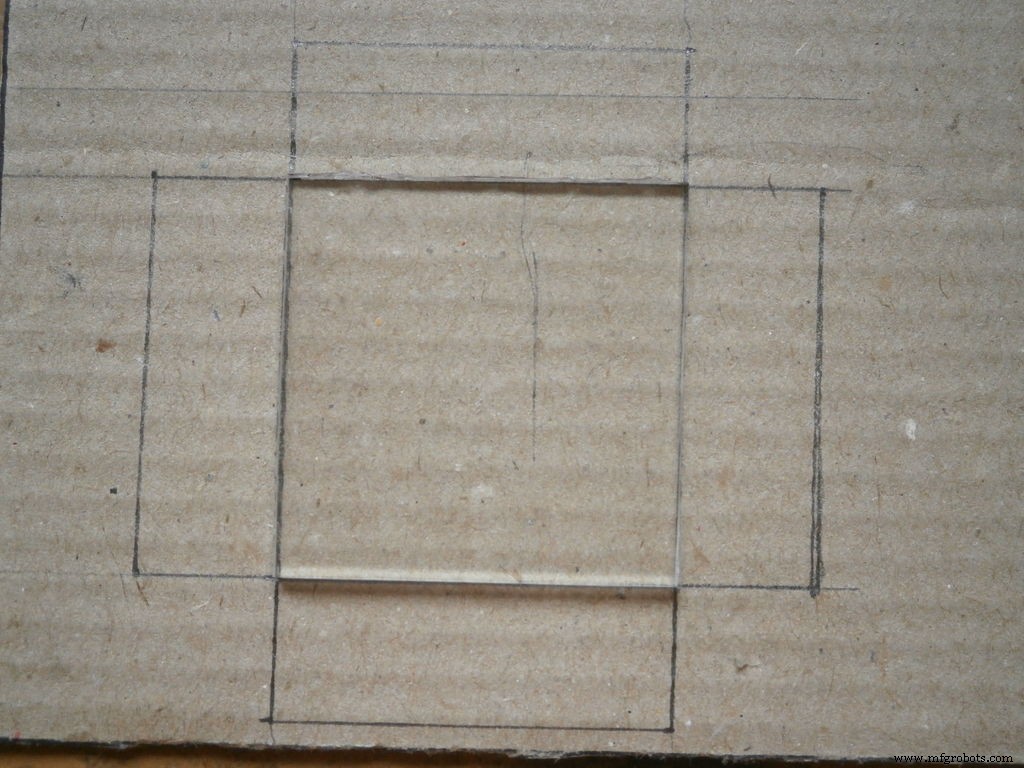
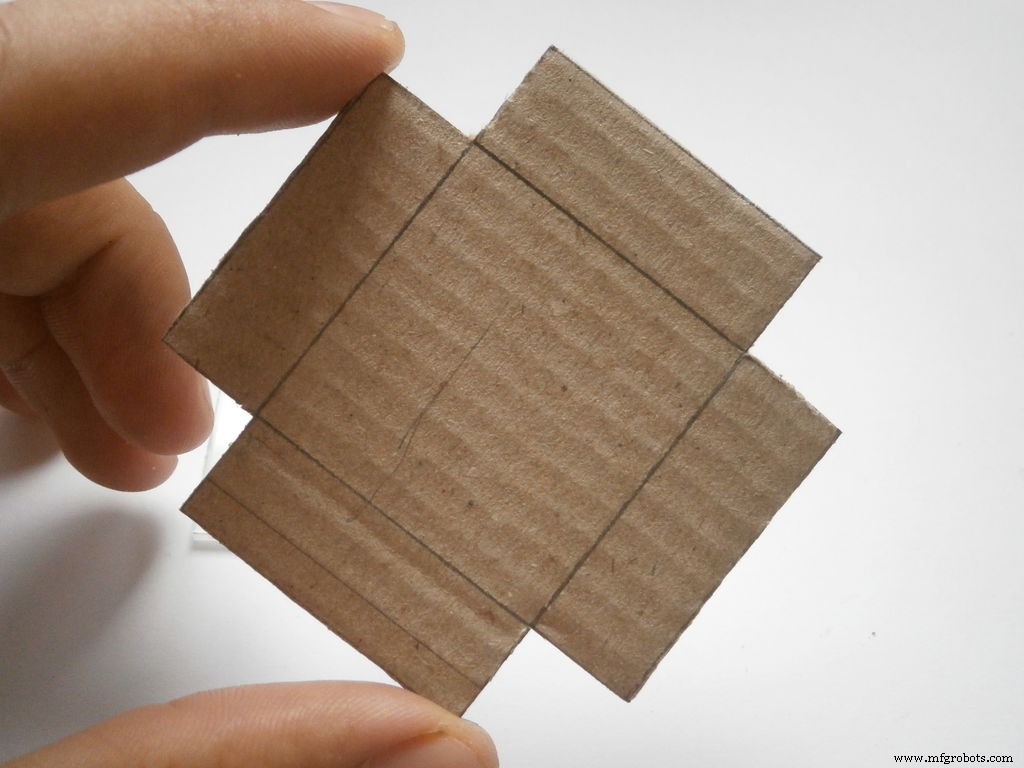
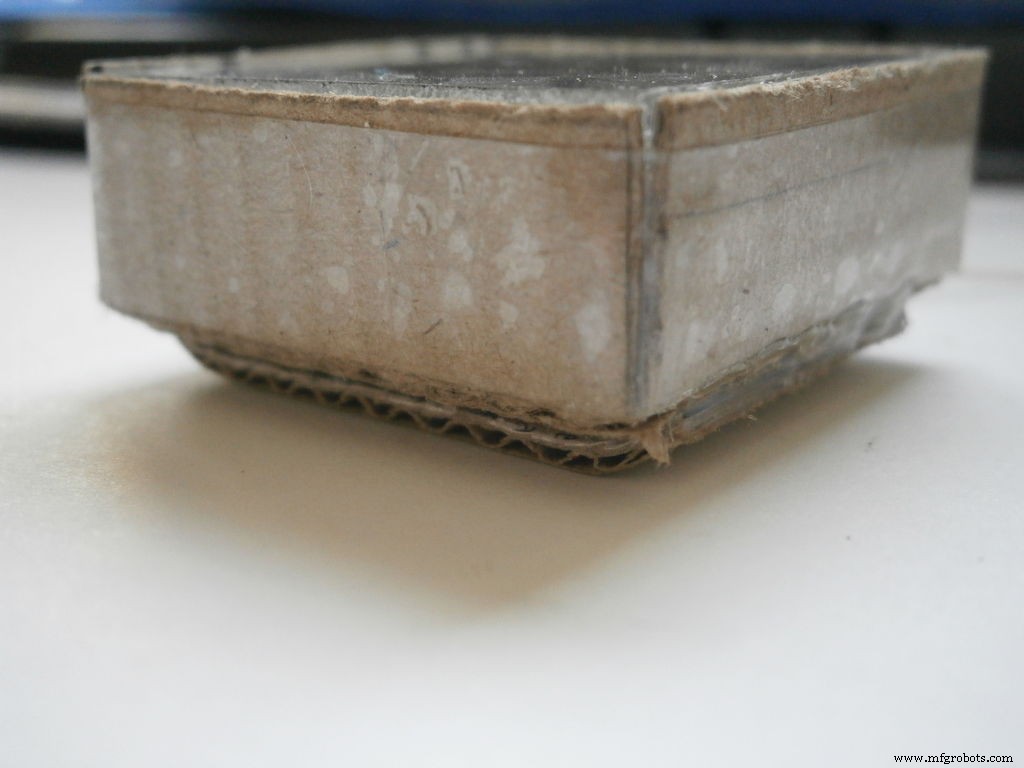

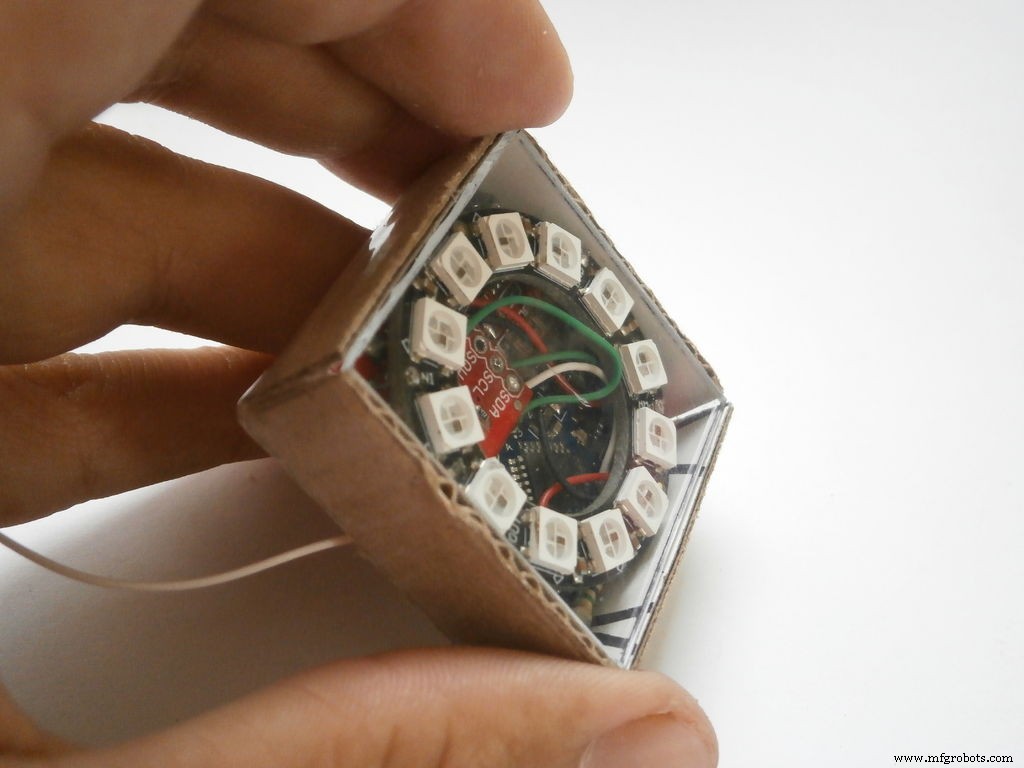
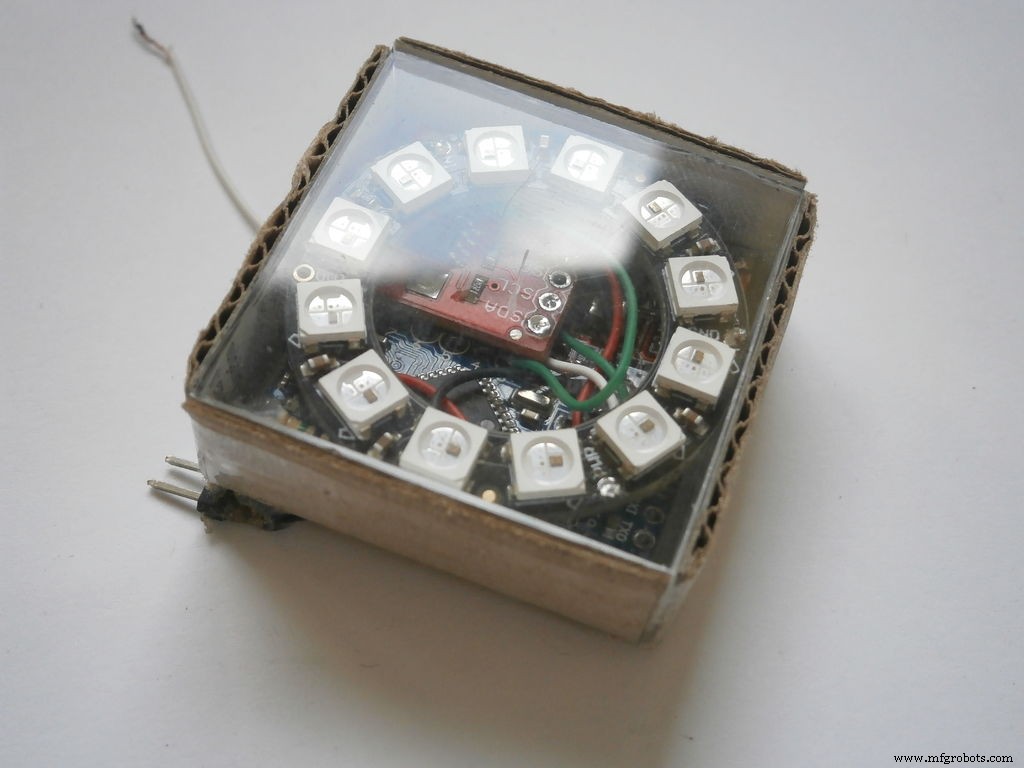

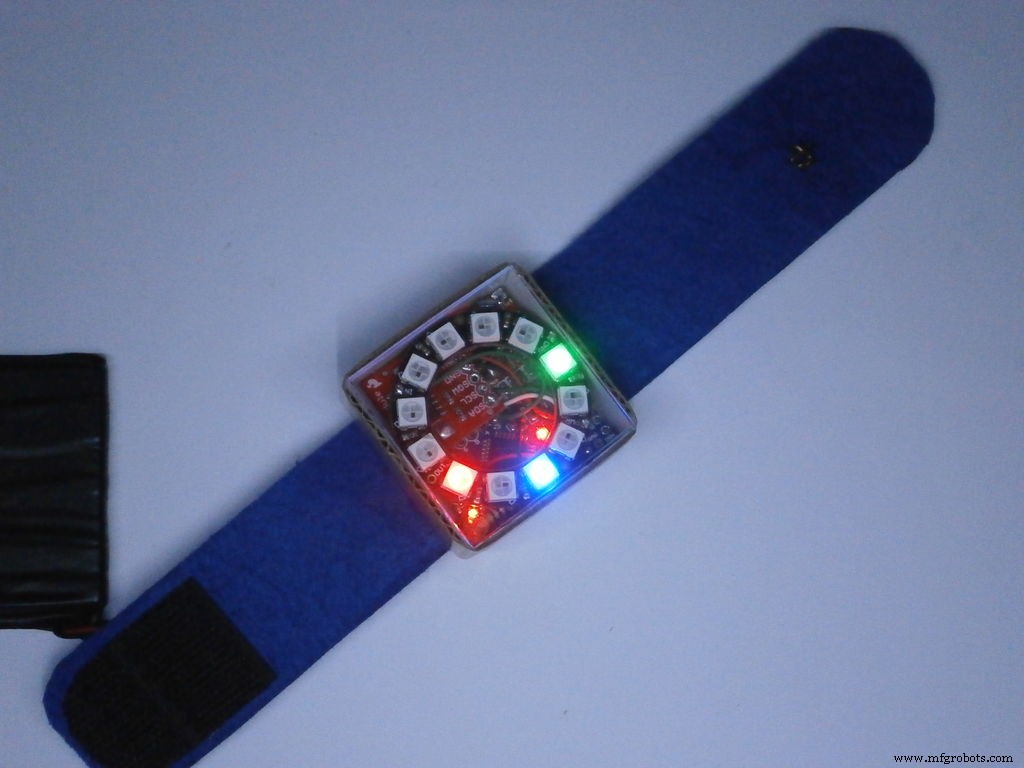
对于外壳,我使用了一个简单的纸板箱,我用一块纸板和一些胶带,以及一块 37 x 37 毫米和 3 毫米厚的透明有机玻璃作为顶部。
盒子的尺寸为 37 毫米 x 37 毫米 x 15 毫米。我还在盒子底部打了两个孔,用于电源线和“触摸”线。
对于带子,我使用了一块长约 8 英寸宽 1 英寸(约 20 厘米 x 2.5 厘米)的过滤带,两端各有一块魔术贴。
第 5 步:软件(源代码和库)
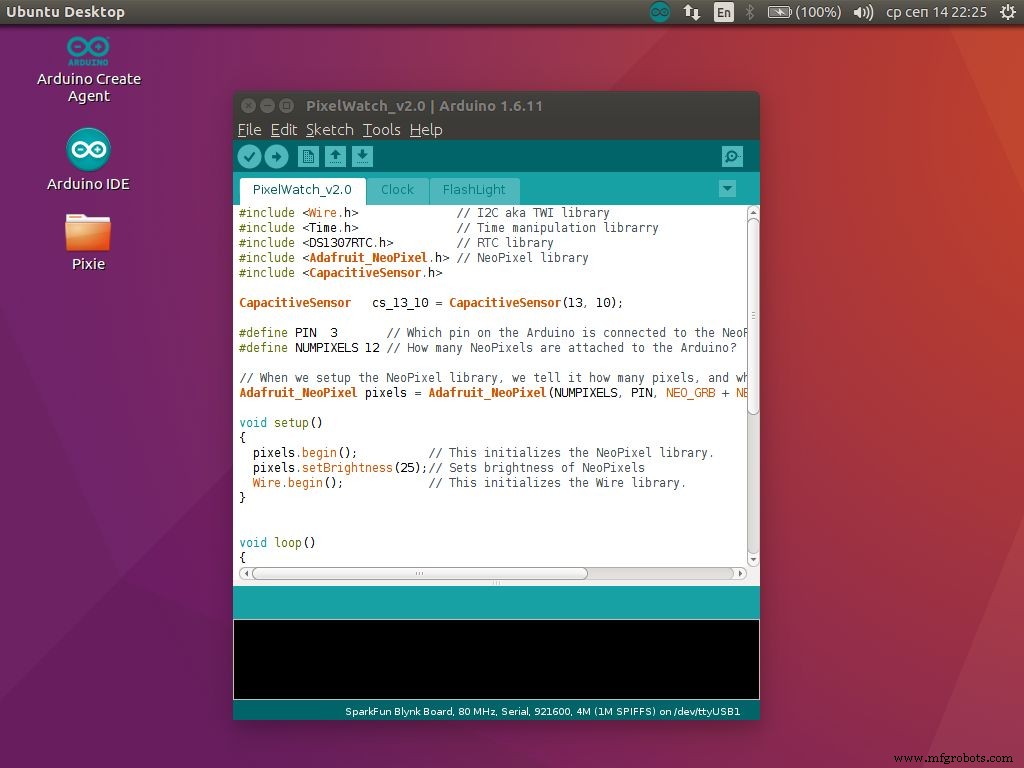
请随意下载包含手表完整源代码的 .zip 文件。
您还需要这些库:
Adafruit_NeoPixel
时间
DS1307RTC
Wire - 其内置的 Arduino IDE
电容式传感器
我使用 Arduino UNO 作为编程板将草图上传到 Pro mini。 我建议你使用 那个 .
FM7T39KIT22NPAW.zip
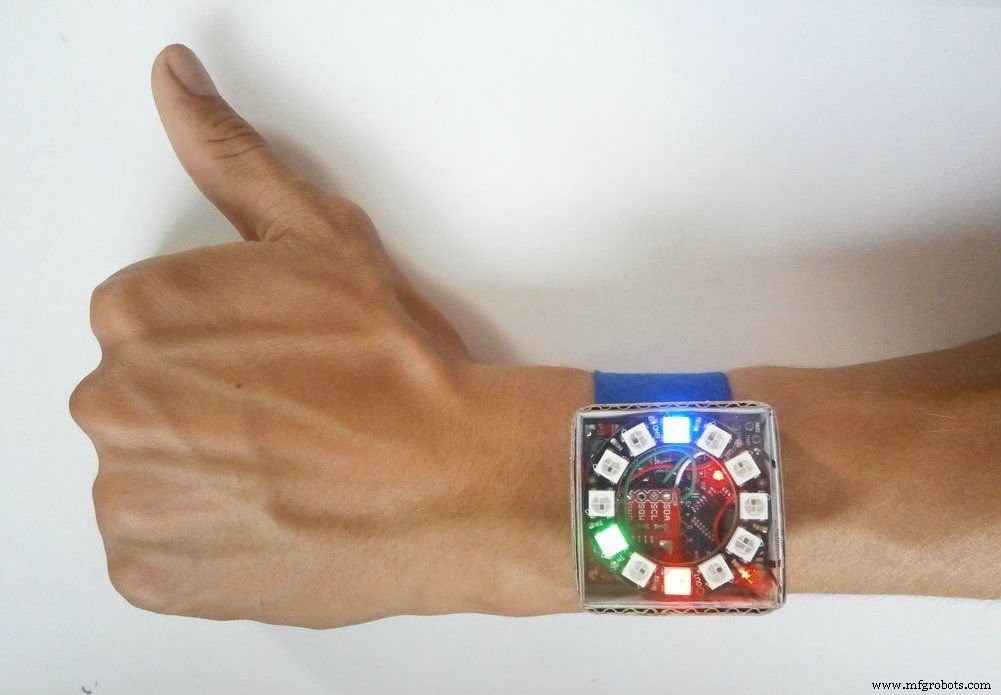
第 6 步:展示
代码
Github
https://github.com/PaulStoffregen/DS1307RTChttps://github.com/PaulStoffregen/DS1307RTCGithub
https://github.com/PaulStoffregen/CapacitiveSensorhttps://github.com/PaulStoffregen/CapacitiveSensorGithub
https://github.com/adafruit/Adafruit_NeoPixelhttps://github.com/adafruit/Adafruit_NeoPixelGithub
https://github.com/PaulStoffregen/Timehttps://github.com/PaulStoffregen/Time示意图
制造工艺