

Arduino无线气象站项目
在本教程中,我们将学习如何制作基于 Arduino 的无线气象站。您可以观看以下视频或阅读下面的书面教程。
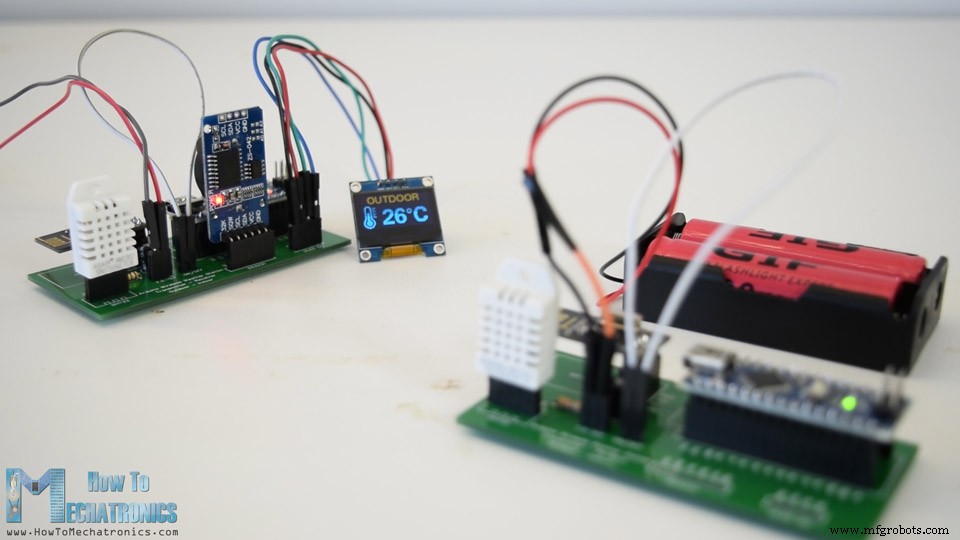
室外温度和湿度使用 DHT22 传感器测量,并使用 NRF24L01 收发器模块将该数据无线发送到室内单元。在室内机处,还有另一个用于测量室内温度和湿度的 DHT22 传感器,以及一个 DS3231 实时时钟模块,即使 Arduino 掉电也可以跟踪时间。所有这些数据都打印在 0.96 英寸 OLED 显示屏上。
让我们看一下电路图以及该项目的工作原理。请注意,我已经有关于这些模块如何工作的详细教程,因此有关更多详细信息,您可以查看它们:NRF24L01 教程、DHT22 教程、DS3231 教程。
您可以从以下链接获取此项目所需的组件:
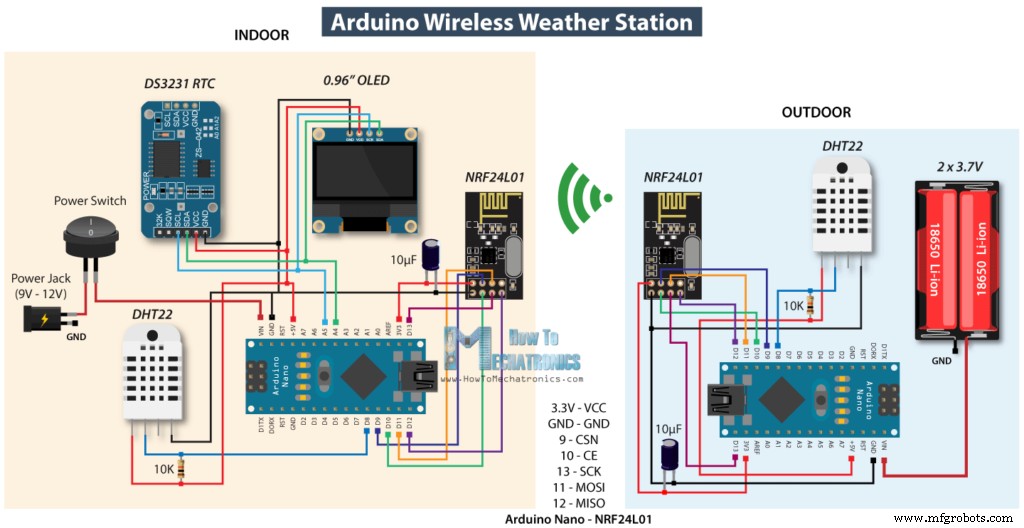
实时时钟模块和 OLED 显示器都使用 I2C 协议与 Arduino 通信,因此它们连接到 I2C 引脚或 Arduino Nano 板上的模拟引脚 4 和 5。在 NRF24L01 收发器模块旁边有一个电容器,以保持其电源更稳定。 DHT22数据管脚还有一个上拉电阻连接,以使传感器正常工作。
至于电源,我为室内机使用了 12V DC 电源适配器,另一方面,为室外机供电,我使用了两节锂电池,产生约 7.5V 的电压。使用这种配置,室外机可以在电池放电前运行大约 10 天,因为我们会定期传输数据,同时我们将 Arduino 置于睡眠模式,此时功耗仅为 7mA 左右。
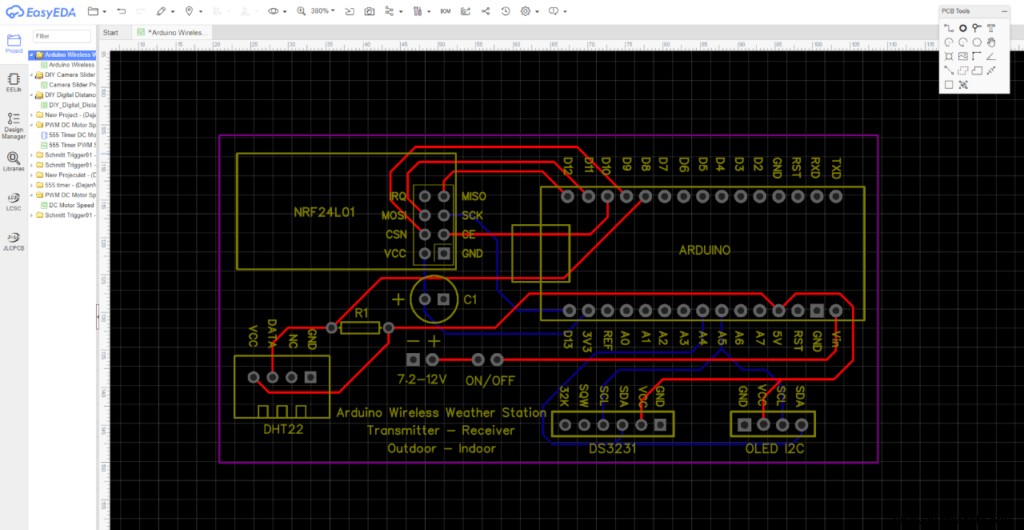
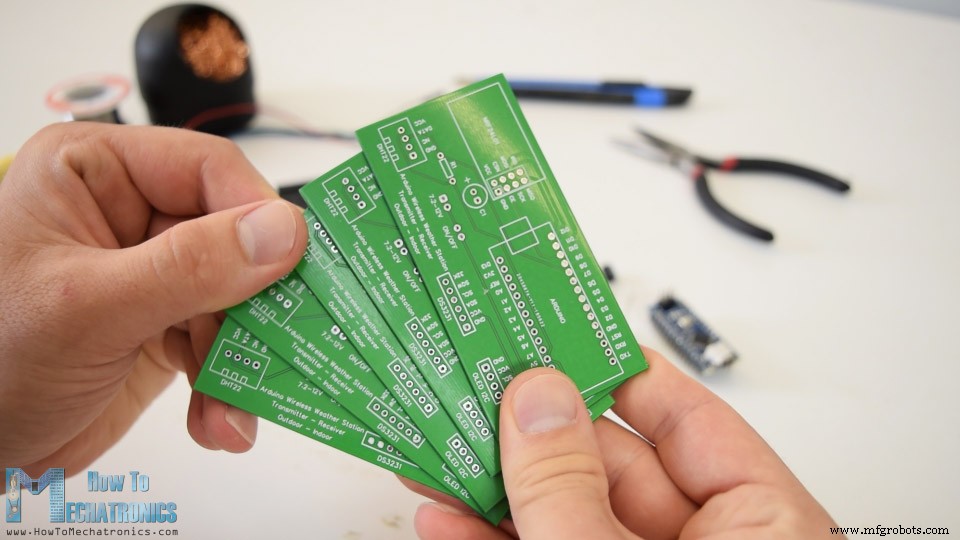
为了保持电子元件井井有条,根据电路图,我使用 EasyEDA 免费在线电路设计软件设计了一个定制的 PCB。我们可以注意到,室内机和室外机都可以使用相同的 PCB,只是 Arduino 板的编程方式不同。
一旦我们在这里完成设计,我们可以简单地导出用于制造 PCB 的 Gerber 文件。您可以在此处查看 Arduino 无线气象站的 EasyEDA 项目文件。
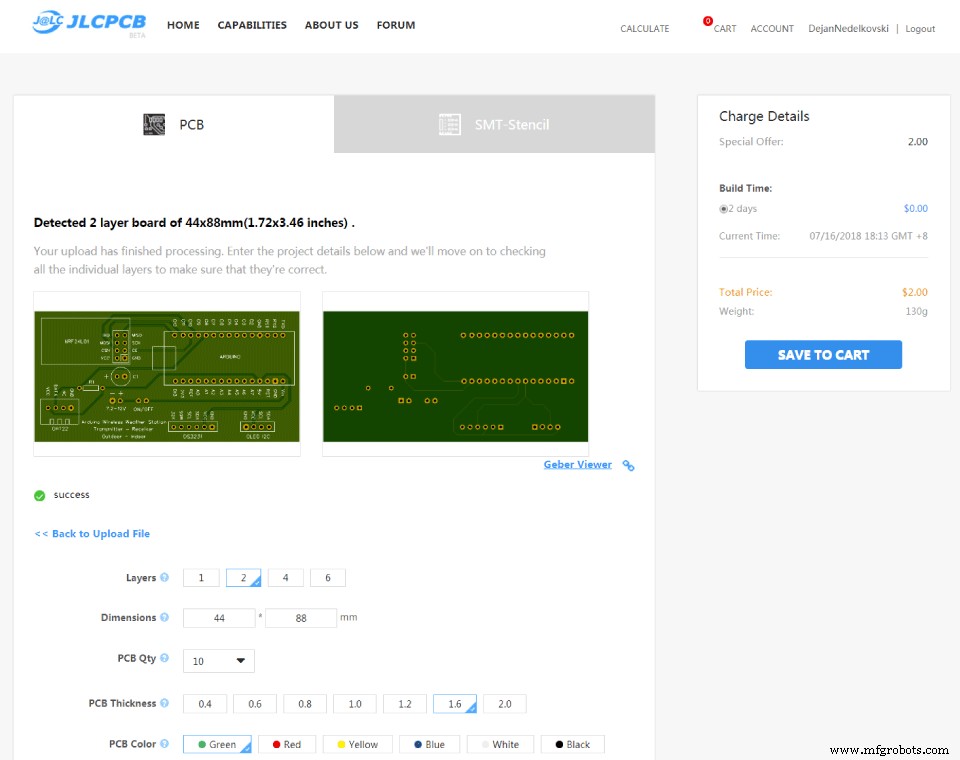
然后我们可以从JLCPCB订购我们的PCB,这实际上是这个视频的赞助商。
在这里,我们可以简单地拖放 Gerber 文件,上传后我们可以在 Gerber 查看器中查看我们的 PCB。如果一切正常,那么我们可以继续,为我们的 PCB 选择我们想要的属性,然后我们可以以合理的价格订购我们的 PCB。请注意,如果这是您从 JLCPCB 订购的第一个订单,您只需 2 美元即可获得多达 10 个 PCB。
然而,几天后,多氯联苯已经到货了。 PCB的质量很好,一切都与设计中的完全一样。
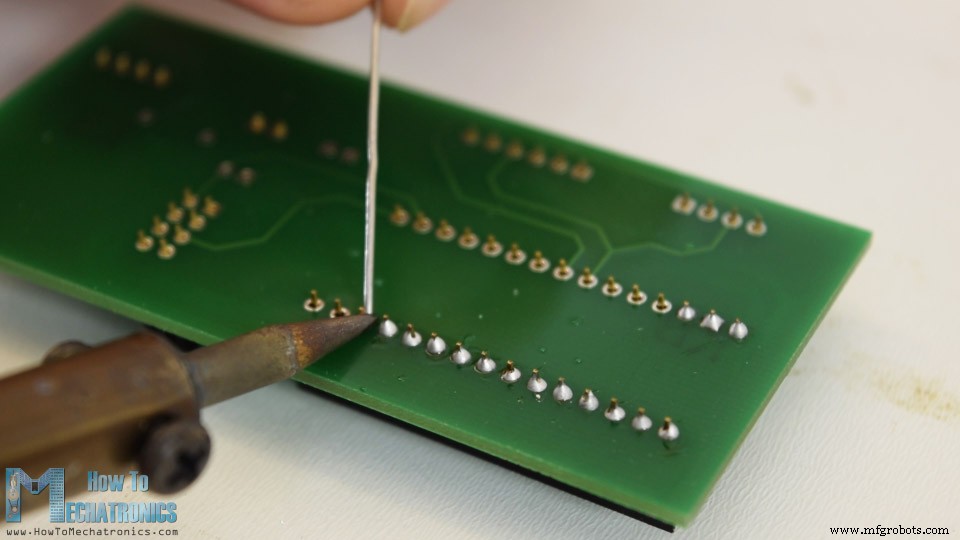
我开始通过将排针焊接到 PCB 上来组装这个项目的电子元件。通过这种方式,我们可以在需要时轻松连接和断开组件。
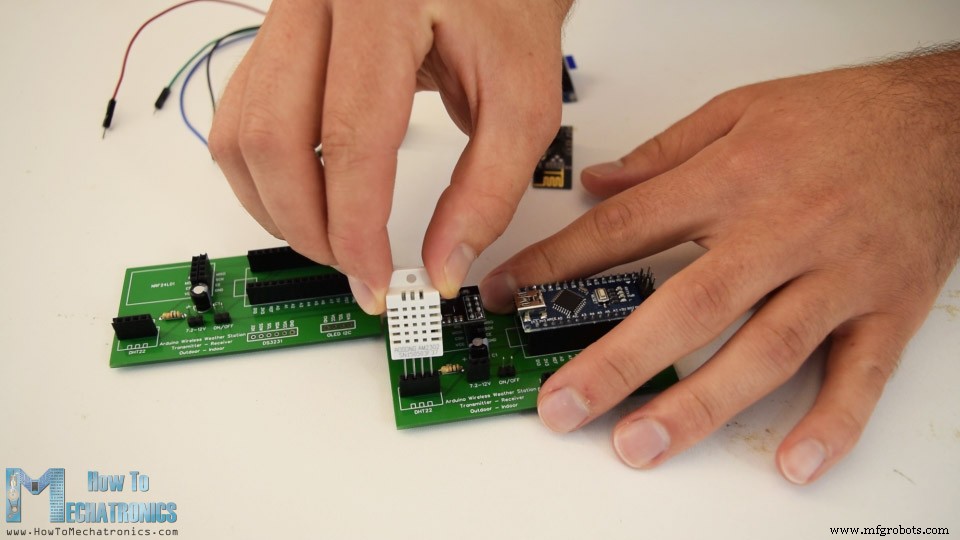
然后我还插入并焊接了电容器和上拉电阻。完成这一步后,现在我们可以简单地将组件连接到 PCB 的排针上。
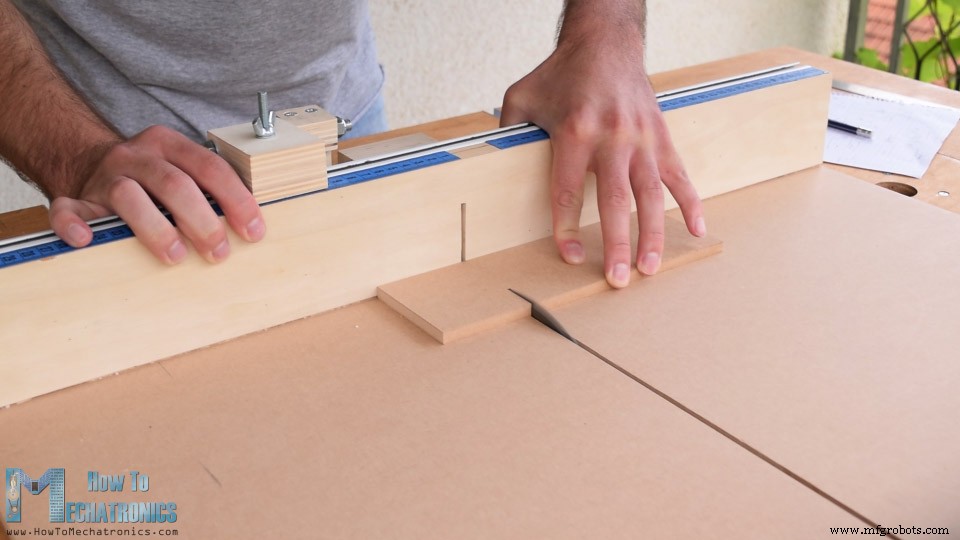
接下来,我继续为该项目制作案例。为此,我使用了 8 毫米刻度 MDF 板并使用圆锯将所有部件切割成合适的尺寸。
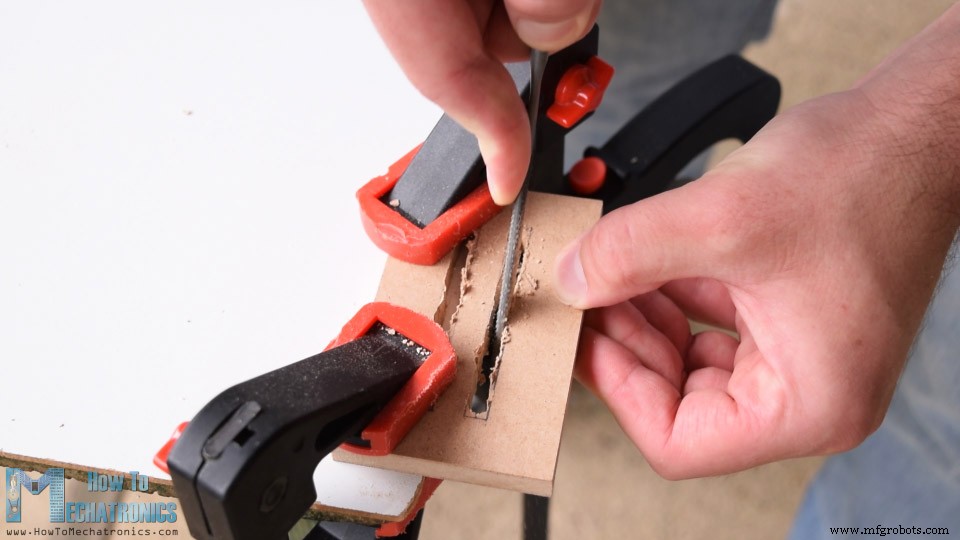
为了获得准确的温度和湿度测量值,外壳的侧面必须允许空气进入外壳。所以,我用钻头和锉刀在室内和室外机的侧板上开了几个槽。
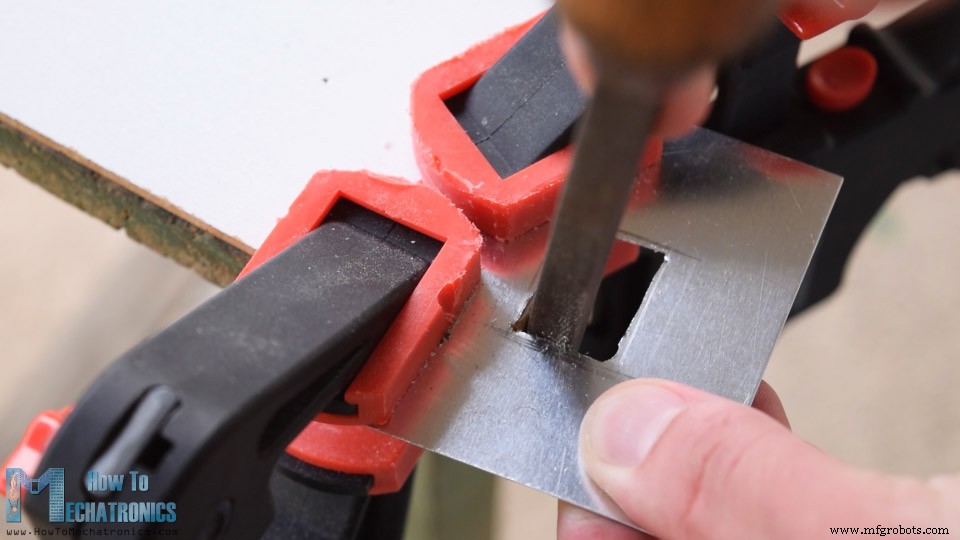
我还在前面板上为 OLED 显示屏制作了一个插槽,并将一小块铝切割成一定尺寸,稍后我将把它贴在前面板上作为装饰。
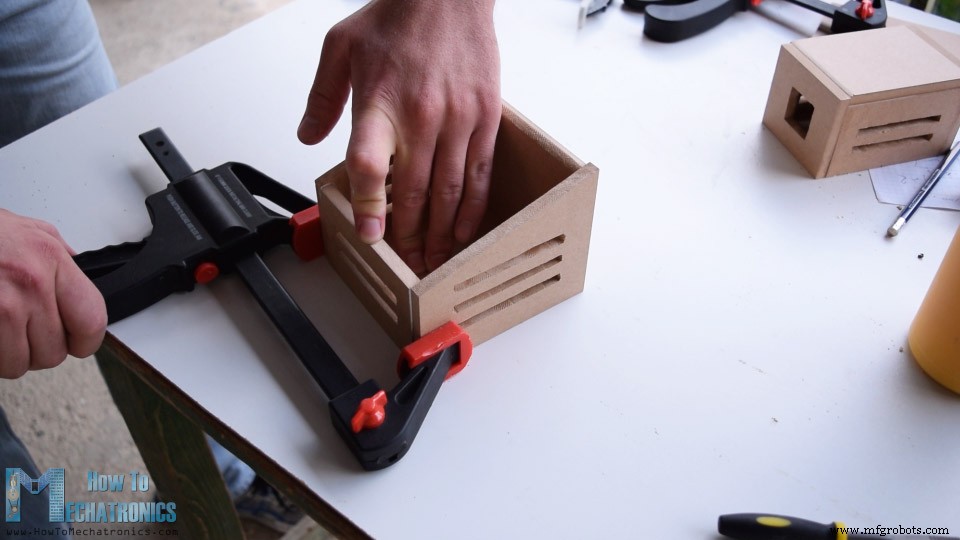
为了组装外壳,我使用了木胶和一些夹子,以及一些螺丝。
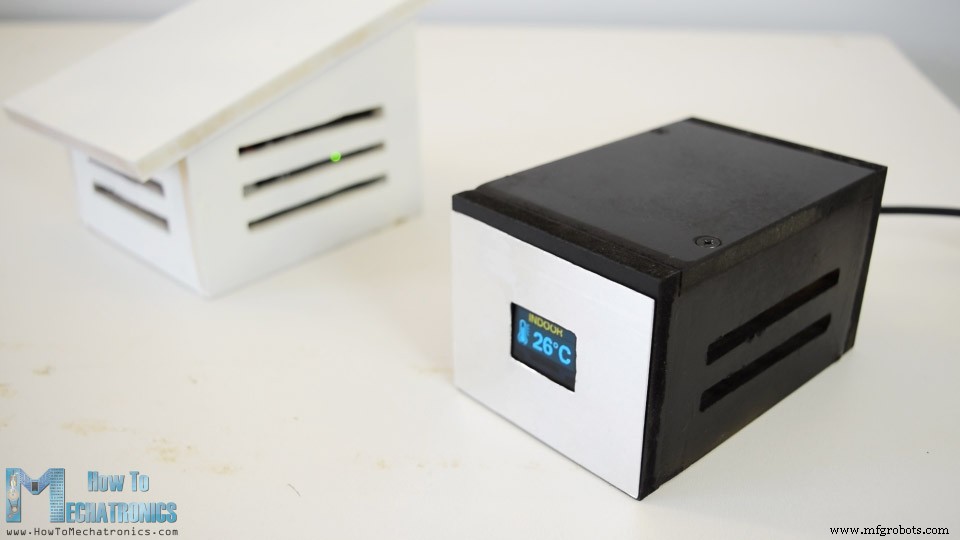
我用喷漆给箱子上漆。我为室外机使用白色油漆,为室内机使用黑色油漆。油漆干了之后,我就简单地将多氯联苯插入外壳中。
在室内机的背面,我插入了一个电源插孔和一个电源开关,在室外机,我使用了一根简单的跳线作为电源开关。
就是这样,我们的 Arduino 无线气象站现在正在运行,但本视频剩下的就是看看程序是如何工作的。
Arduino气象站室外机代码:
说明: 室外机是无线通信的发射器,所以这里首先需要包含RF24库,DHT库,以及用于让Arduino进入睡眠模式的LowPower库。
在定义了它们的实例、模块连接的引脚和一些变量之后,在设置部分我们需要初始化无线通信地址。然后在循环部分,首先我们从 DHT22 传感器读取数据,也就是温度和湿度。最初这些值是整数并且是分开的,所以我将它们转换为单个字符串变量,将它们放入字符数组中,并使用 radio.write() 函数将此数据发送到室内机。使用 for 循环我们发送数据 3 次,以确保接收方在发送时控制器正忙的情况下接收数据。
最后,我们将 Arduino 置于睡眠模式一段时间,以最大限度地降低功耗。
Arduino气象站室内机代码:
说明: 另一方面,在室内机或接收器处,我们需要多包含两个库,一个用于 DS3231 实时时钟模块,一个用于 OLED 显示器,即 U8G2 库。和之前一样,我们需要为下面的程序定义实例、引脚和一些变量。同样在这里我们需要将温度和湿度图标定义为位图。
温度图标位图:
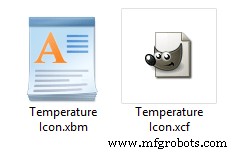
为此,我们可以使用开源图像编辑器 GIMP,通过它我们可以绘制任何内容,然后将其导出为位图(.xbm)。
然后我们可以使用记事本打开这个文件,然后我们可以将位图复制到 Arduino 代码中。
注意,这里我们可以使用PROGMEM变量修饰符将位图定义为常量,这样位图将存储在闪存中而不是Arduino板的SRAM中。
在设置部分我们需要初始化无线通信以及初始化OLED显示屏和实时时钟模块。
然后在循环部分,我们不断检查是否有可通过 NRF24L01 模块读取的传入数据。如果为真,则使用 radio.read() 函数读取它,并将前两个字符存储到温度字符串变量中,接下来的两个字符存储到湿度字符串变量中。
然后我们使用 millis() 函数,以便以间隔变量定义的间隔在显示器上显示各种数据,我将其设置为 3 秒。我们使用millis() 函数是因为这样可以重复执行其余代码,而如果我们使用delay() 函数,程序会等待该时间段,因此我们可能会错过传入的数据从室外机。
接下来,使用 U8G2 库的 firstPage() 和 nextPage() 函数,我们打印出使用自定义函数定义的五个不同屏幕。
drawDate() 自定义函数从实时时钟模块获取日期和时间信息,并将其适当地打印在显示器上。 drawInTemperature() 函数读取室内温度并将其适当地打印在显示器上。事实上,同样的方法用于打印显示器上的所有屏幕。
这就是全部,我希望你喜欢这个 Arduino 项目并学到新的东西。欢迎在下方评论区提出任何问题。概览
Arduino无线气象站电路图
定制设计PCB


Arduino 无线气象站代码
/*
  Arduino Wireless Communication Tutorial
      Outdoor unit - Transmitter

  by Dejan Nedelkovski, www.HowToMechatronics.com

Libraries:
NRF24L01 - TMRh20/RF24, https://github.com/tmrh20/RF24/
DHT22 - DHTlib, https://github.com/RobTillaart/Arduino/tree/master/libraries/DHTlib
LowPower - https://github.com/rocketscream/Low-Power
*/
#include <SPI.h>
#include <nRF24L01.h>
#include <RF24.h>
#include <dht.h>
#include <LowPower.h>

#define dataPin 8 // DHT22 data pin
dht DHT; // Creates a DHT object

RF24 radio(10, 9); // CE, CSN
const byte address[6] = "00001";

char thChar[32] = "";
String thString = "";

void setup() {
  radio.begin();
  radio.openWritingPipe(address);
  radio.setPALevel(RF24_PA_MIN);
  radio.stopListening();

}
void loop() {
  int readData = DHT.read22(dataPin); // Reads the data from the sensor
  int t = DHT.temperature; // Gets the values of the temperature
  int h = DHT.humidity; // Gets the values of the humidity
  thString = String(t) + String(h);
  thString.toCharArray(thChar, 12);
  // Sent the data wirelessly to the indoor unit
  for (int i = 0; i <= 3; i++) {           // Send the data 3 times
    radio.write(&thChar, sizeof(thChar));
    delay(50);
  }
  // Sleep for 2 minutes, 15*8 = 120s
  for (int sleepCounter = 15; sleepCounter > 0; sleepCounter--)
  {
    LowPower.powerDown(SLEEP_8S, ADC_OFF, BOD_OFF);
  }
}Code language: Arduino (arduino)/*
Arduino Wireless Communication Tutorial
Indoor unit - Receiver
by Dejan Nedelkovski, www.HowToMechatronics.com
Libraries:
DS3231 - http://www.rinkydinkelectronics.com/library.php?id=73
U8G2 - https://github.com/olikraus/u8g2
*/
#include <SPI.h>
#include <nRF24L01.h>
#include <RF24.h>
#include <dht.h>
#include <DS3231.h>
#include <U8g2lib.h>
#include <Wire.h>
#define dataPin 8 // DHT22 sensor
dht DHT; // Creats a DHT object
DS3231 rtc(SDA, SCL);
U8G2_SSD1306_128X64_NONAME_1_HW_I2C u8g2(U8G2_R0, /* reset=*/ U8X8_PIN_NONE);
RF24 radio(10, 9); // CE, CSN
const byte address[6] = "00001";
char text[6] = "";
int readDHT22, t, h;
String inTemp, inHum, outTemp, outHum;
String rtcTime, rtcDate;
int draw_state = 0;
unsigned long previousMillis = 0;
long interval = 3000;
#define Temperature_20Icon_width 27
#define Temperature_20Icon_height 47
static const unsigned char Temperature_20Icon_bits[] U8X8_PROGMEM = {
0x00, 0x00, 0x00, 0x00, 0x00, 0x3f, 0x00, 0x00, 0x80, 0x7f, 0x00, 0x00,
0xc0, 0xe1, 0x00, 0x00, 0xe0, 0xc0, 0x01, 0x00, 0x60, 0x80, 0xf9, 0x03,
0x60, 0x80, 0x01, 0x00, 0x60, 0x80, 0x01, 0x00, 0x60, 0x80, 0x79, 0x00,
0x60, 0x80, 0x01, 0x00, 0x60, 0x80, 0x01, 0x00, 0x60, 0x80, 0xf9, 0x03,
0x60, 0x80, 0x01, 0x00, 0x60, 0x80, 0x01, 0x00, 0x60, 0x8c, 0x79, 0x00,
0x60, 0x9e, 0x01, 0x00, 0x60, 0x9e, 0x01, 0x00, 0x60, 0x9e, 0xf9, 0x03,
0x60, 0x9e, 0x01, 0x00, 0x60, 0x9e, 0x01, 0x00, 0x60, 0x9e, 0x79, 0x00,
0x60, 0x9e, 0x01, 0x00, 0x60, 0x9e, 0x01, 0x00, 0x60, 0x9e, 0xf9, 0x03,
0x60, 0x9e, 0x01, 0x00, 0x60, 0x9e, 0x01, 0x00, 0x60, 0x9e, 0x01, 0x00,
0x70, 0x9e, 0x03, 0x00, 0x38, 0x1e, 0x07, 0x00, 0x18, 0x3e, 0x0e, 0x00,
0x1c, 0x3f, 0x0c, 0x00, 0x0c, 0x7f, 0x18, 0x00, 0x8c, 0xff, 0x18, 0x00,
0x8e, 0xff, 0x38, 0x00, 0xc6, 0xff, 0x31, 0x00, 0xc6, 0xff, 0x31, 0x00,
0xc6, 0xff, 0x31, 0x00, 0x8e, 0xff, 0x38, 0x00, 0x8c, 0xff, 0x18, 0x00,
0x0c, 0x7f, 0x1c, 0x00, 0x3c, 0x1c, 0x0e, 0x00, 0x78, 0x00, 0x06, 0x00,
0xe0, 0x80, 0x07, 0x00, 0xe0, 0xff, 0x03, 0x00, 0x80, 0xff, 0x00, 0x00,
0x00, 0x1c, 0x00, 0x00, 0x00, 0x00, 0x00, 0x00
};
#define Humidity_20Icon_width 27
#define Humidity_20Icon_height 47
static const unsigned char Humidity_20Icon_bits[] U8X8_PROGMEM = {
0x00, 0x00, 0x00, 0x00, 0x00, 0x70, 0x00, 0x00, 0x00, 0x70, 0x00, 0x00,
0x00, 0x70, 0x00, 0x00, 0x00, 0xf8, 0x00, 0x00, 0x00, 0xdc, 0x00, 0x00,
0x00, 0xdc, 0x01, 0x00, 0x00, 0x8e, 0x01, 0x00, 0x00, 0x86, 0x03, 0x00,
0x00, 0x06, 0x03, 0x00, 0x00, 0x03, 0x07, 0x00, 0x80, 0x03, 0x06, 0x00,
0x80, 0x01, 0x0c, 0x00, 0xc0, 0x01, 0x1c, 0x00, 0xc0, 0x00, 0x18, 0x00,
0xe0, 0x00, 0x38, 0x00, 0x60, 0x00, 0x30, 0x00, 0x70, 0x00, 0x70, 0x00,
0x30, 0x00, 0xe0, 0x00, 0x38, 0x00, 0xc0, 0x00, 0x18, 0x00, 0xc0, 0x01,
0x1c, 0x00, 0x80, 0x01, 0x0c, 0x00, 0x80, 0x03, 0x0e, 0x00, 0x80, 0x03,
0x06, 0x00, 0x00, 0x03, 0x06, 0x00, 0x00, 0x03, 0x07, 0x00, 0x00, 0x07,
0x03, 0x00, 0x00, 0x06, 0x03, 0x00, 0x00, 0x06, 0x03, 0x00, 0x00, 0x06,
0x63, 0x00, 0x00, 0x06, 0x63, 0x00, 0x00, 0x06, 0x63, 0x00, 0x00, 0x06,
0xe3, 0x00, 0x00, 0x06, 0xc7, 0x00, 0x00, 0x06, 0xc6, 0x01, 0x00, 0x07,
0x86, 0x03, 0x00, 0x03, 0x0e, 0x1f, 0x00, 0x03, 0x0e, 0x1e, 0x80, 0x01,
0x1c, 0x00, 0xc0, 0x01, 0x38, 0x00, 0xe0, 0x00, 0x78, 0x00, 0x70, 0x00,
0xf0, 0x00, 0x38, 0x00, 0xe0, 0x07, 0x1f, 0x00, 0x80, 0xff, 0x0f, 0x00,
0x00, 0xff, 0x03, 0x00, 0x00, 0x00, 0x00, 0x00
};
void setup() {
radio.begin();
radio.openReadingPipe(0, address);
radio.setPALevel(RF24_PA_MIN);
radio.startListening();
u8g2.begin();
rtc.begin();
}
void loop() {
if (radio.available()) {
radio.read(&text, sizeof(text)); // Read incoming data
outTemp = String(text[0]) + String(text[1]) + char(176) + "C"; // Outdoor Temperature
outHum = String(text[2]) + String(text[3]) + "%"; // Outdoor Humidity
}
unsigned long currentMillis = millis();
if (currentMillis - previousMillis > interval) {
previousMillis = currentMillis;
u8g2.firstPage();
do {
switch (draw_state ) {
case 0: drawDate(); break;
case 1: drawInTemperature(); break;
case 2: drawInHumidity(); break;
case 3: drawOutTemperature(); break;
case 4: drawOutHumidity(); break;
}
} while ( u8g2.nextPage() );
draw_state++;
if (draw_state > 4) {
draw_state = 0;
}
}
}
void drawDate() {
String dowa = rtc.getDOWStr();
dowa.remove(3);
rtcDate = dowa + " " + rtc.getDateStr();
u8g2.setFont(u8g2_font_timB14_tr);
u8g2.setCursor(0, 15);
rtcTime = rtc.getTimeStr(); // DS3231 RTC time
rtcTime.remove(5);
u8g2.print(rtcDate);
u8g2.setFont(u8g2_font_fub30_tf);
u8g2.setCursor(8, 58);
u8g2.print(rtcTime);
}
void drawInTemperature() {
readDHT22 = DHT.read22(dataPin); // Reads the data from the sensor
t = DHT.temperature; // Gets the values of the temperature
inTemp = String(t) + char(176) + "C";
u8g2.setFont(u8g2_font_helvR14_tr);
u8g2.setCursor(24, 15);
u8g2.print("INDOOR");
u8g2.setFont(u8g2_font_fub30_tf);
u8g2.setCursor(36, 58);
u8g2.print(inTemp);
u8g2.drawXBMP( 0, 17, Temperature_20Icon_width, Temperature_20Icon_height, Temperature_20Icon_bits);
}
void drawInHumidity() {
h = DHT.humidity; // Gets the values of the humidity
inHum = String(h) + "%";
u8g2.setFont(u8g2_font_helvR14_tr);
u8g2.setCursor(24, 15);
u8g2.print("INDOOR");
u8g2.setFont(u8g2_font_fub30_tf);
u8g2.setCursor(36, 58);
u8g2.print(inHum);
u8g2.drawXBMP( 0, 17, Humidity_20Icon_width, Humidity_20Icon_height, Humidity_20Icon_bits);
}
void drawOutTemperature() {
u8g2.setFont(u8g2_font_helvR14_tr);
u8g2.setCursor(12, 15);
u8g2.print("OUTDOOR");
u8g2.setFont(u8g2_font_fub30_tf);
u8g2.setCursor(36, 58);
u8g2.print(outTemp);
u8g2.drawXBMP( 0, 17, Temperature_20Icon_width, Temperature_20Icon_height, Temperature_20Icon_bits);
}
void drawOutHumidity() {
u8g2.setFont(u8g2_font_helvR14_tr);
u8g2.setCursor(12, 15);
u8g2.print("OUTDOOR");
u8g2.setFont(u8g2_font_fub30_tf);
u8g2.setCursor(36, 58);
u8g2.print(outHum);
u8g2.drawXBMP( 0, 17, Humidity_20Icon_width, Humidity_20Icon_height, Humidity_20Icon_bits);
}Code language: Arduino (arduino)#define Temperature_20Icon_width 27
#define Temperature_20Icon_height 47
static const unsigned char Temperature_20Icon_bits[] U8X8_PROGMEM = {
0x00, 0x00, 0x00, 0x00, 0x00, 0x3f, 0x00, 0x00, 0x80, 0x7f, 0x00, 0x00,
0xc0, 0xe1, 0x00, 0x00, 0xe0, 0xc0, 0x01, 0x00, 0x60, 0x80, 0xf9, 0x03,
0x60, 0x80, 0x01, 0x00, 0x60, 0x80, 0x01, 0x00, 0x60, 0x80, 0x79, 0x00,
0x60, 0x80, 0x01, 0x00, 0x60, 0x80, 0x01, 0x00, 0x60, 0x80, 0xf9, 0x03,
0x60, 0x80, 0x01, 0x00, 0x60, 0x80, 0x01, 0x00, 0x60, 0x8c, 0x79, 0x00,
0x60, 0x9e, 0x01, 0x00, 0x60, 0x9e, 0x01, 0x00, 0x60, 0x9e, 0xf9, 0x03,
0x60, 0x9e, 0x01, 0x00, 0x60, 0x9e, 0x01, 0x00, 0x60, 0x9e, 0x79, 0x00,
0x60, 0x9e, 0x01, 0x00, 0x60, 0x9e, 0x01, 0x00, 0x60, 0x9e, 0xf9, 0x03,
0x60, 0x9e, 0x01, 0x00, 0x60, 0x9e, 0x01, 0x00, 0x60, 0x9e, 0x01, 0x00,
0x70, 0x9e, 0x03, 0x00, 0x38, 0x1e, 0x07, 0x00, 0x18, 0x3e, 0x0e, 0x00,
0x1c, 0x3f, 0x0c, 0x00, 0x0c, 0x7f, 0x18, 0x00, 0x8c, 0xff, 0x18, 0x00,
0x8e, 0xff, 0x38, 0x00, 0xc6, 0xff, 0x31, 0x00, 0xc6, 0xff, 0x31, 0x00,
0xc6, 0xff, 0x31, 0x00, 0x8e, 0xff, 0x38, 0x00, 0x8c, 0xff, 0x18, 0x00,
0x0c, 0x7f, 0x1c, 0x00, 0x3c, 0x1c, 0x0e, 0x00, 0x78, 0x00, 0x06, 0x00,
0xe0, 0x80, 0x07, 0x00, 0xe0, 0xff, 0x03, 0x00, 0x80, 0xff, 0x00, 0x00,
0x00, 0x1c, 0x00, 0x00, 0x00, 0x00, 0x00, 0x00
};Code language: Arduino (arduino)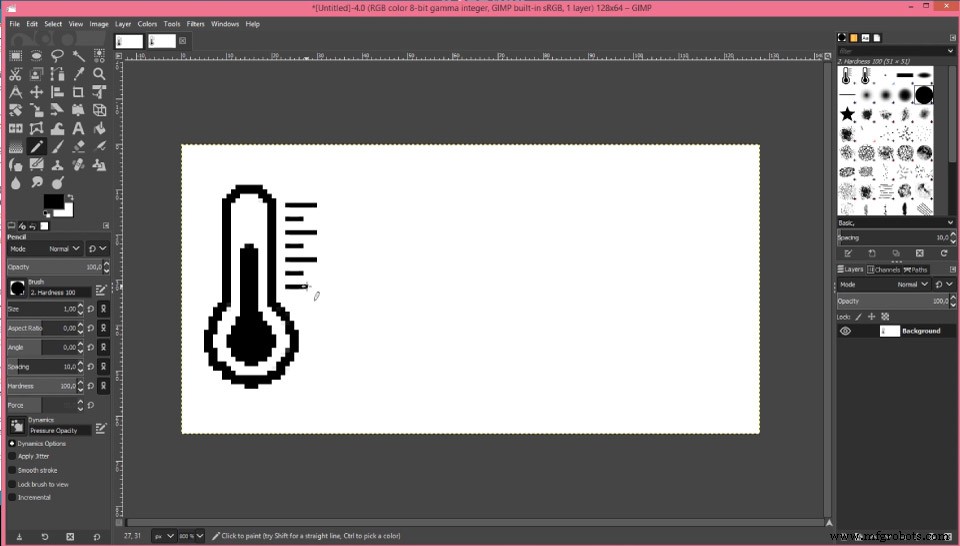
static const unsigned char Temperature_20Icon_bits[] U8X8_PROGMEM // Save in the Flash memory
static unsigned char Temperature_20Icon_bits[] // Save in the SRAM
制造工艺