

862D+的DIY烙铁控制
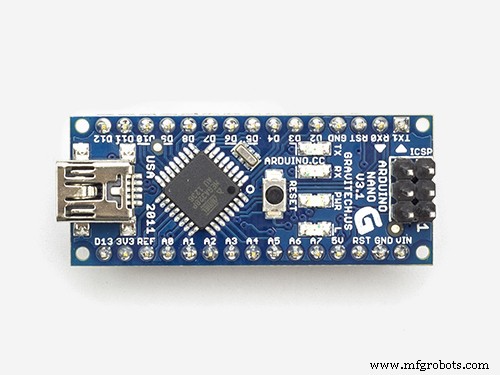
组件和用品
 |
| × | 1 | |||
| × | 1 | ||||
| × | 1 | ||||
| × | 1 | ||||
 |
| × | 1 | |||
| × | 2 | ||||
| × | 1 |
必要的工具和机器
 |
| |||
|
关于这个项目
更新 (10/21/2019):代码的重大更新。另请阅读以下内容。有一点改变了。
我的 862D+ 烙铁坏了,所以我没有买新的,而是拿了第二个烙铁把它修好了。最难的部分是在线其他地方没有解决方案。 PCB 坏了,因为更换熨斗后它仍然说 S-E 或传感器错误。
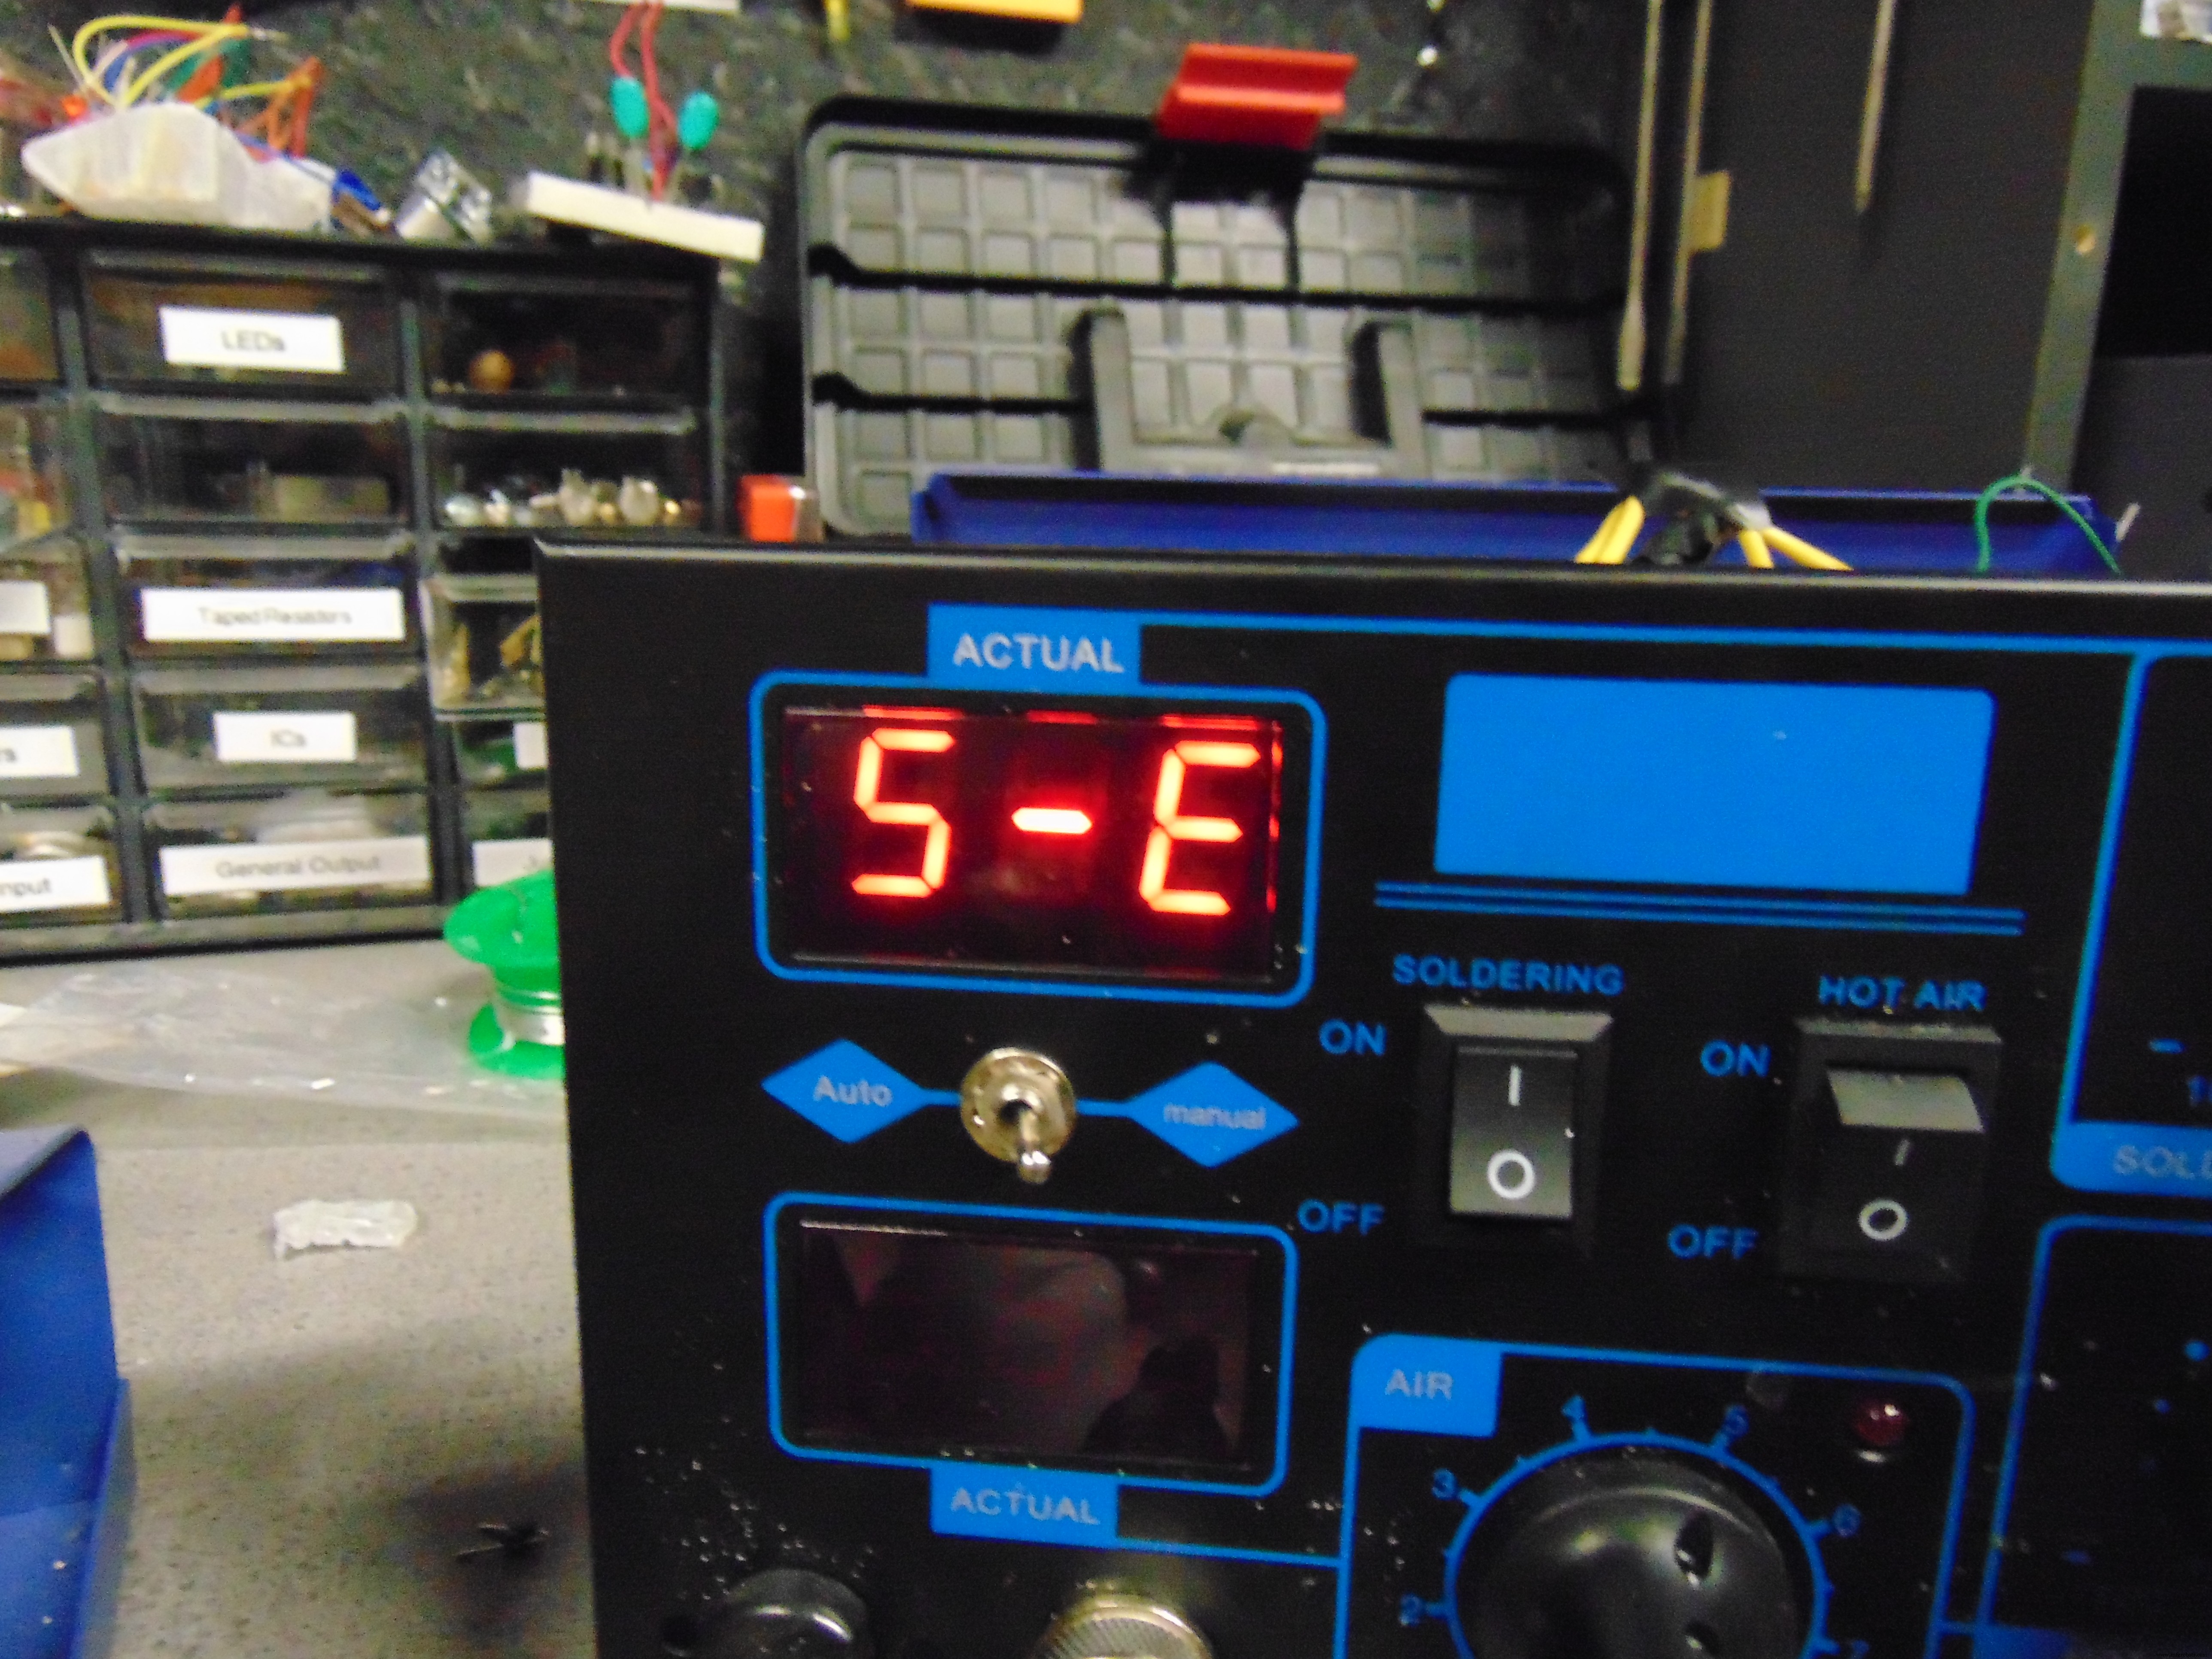
所以我决定创建我自己的控制器电路,然后把它塞进去。它需要第二个变压器,但价格便宜,里面有足够的空间。
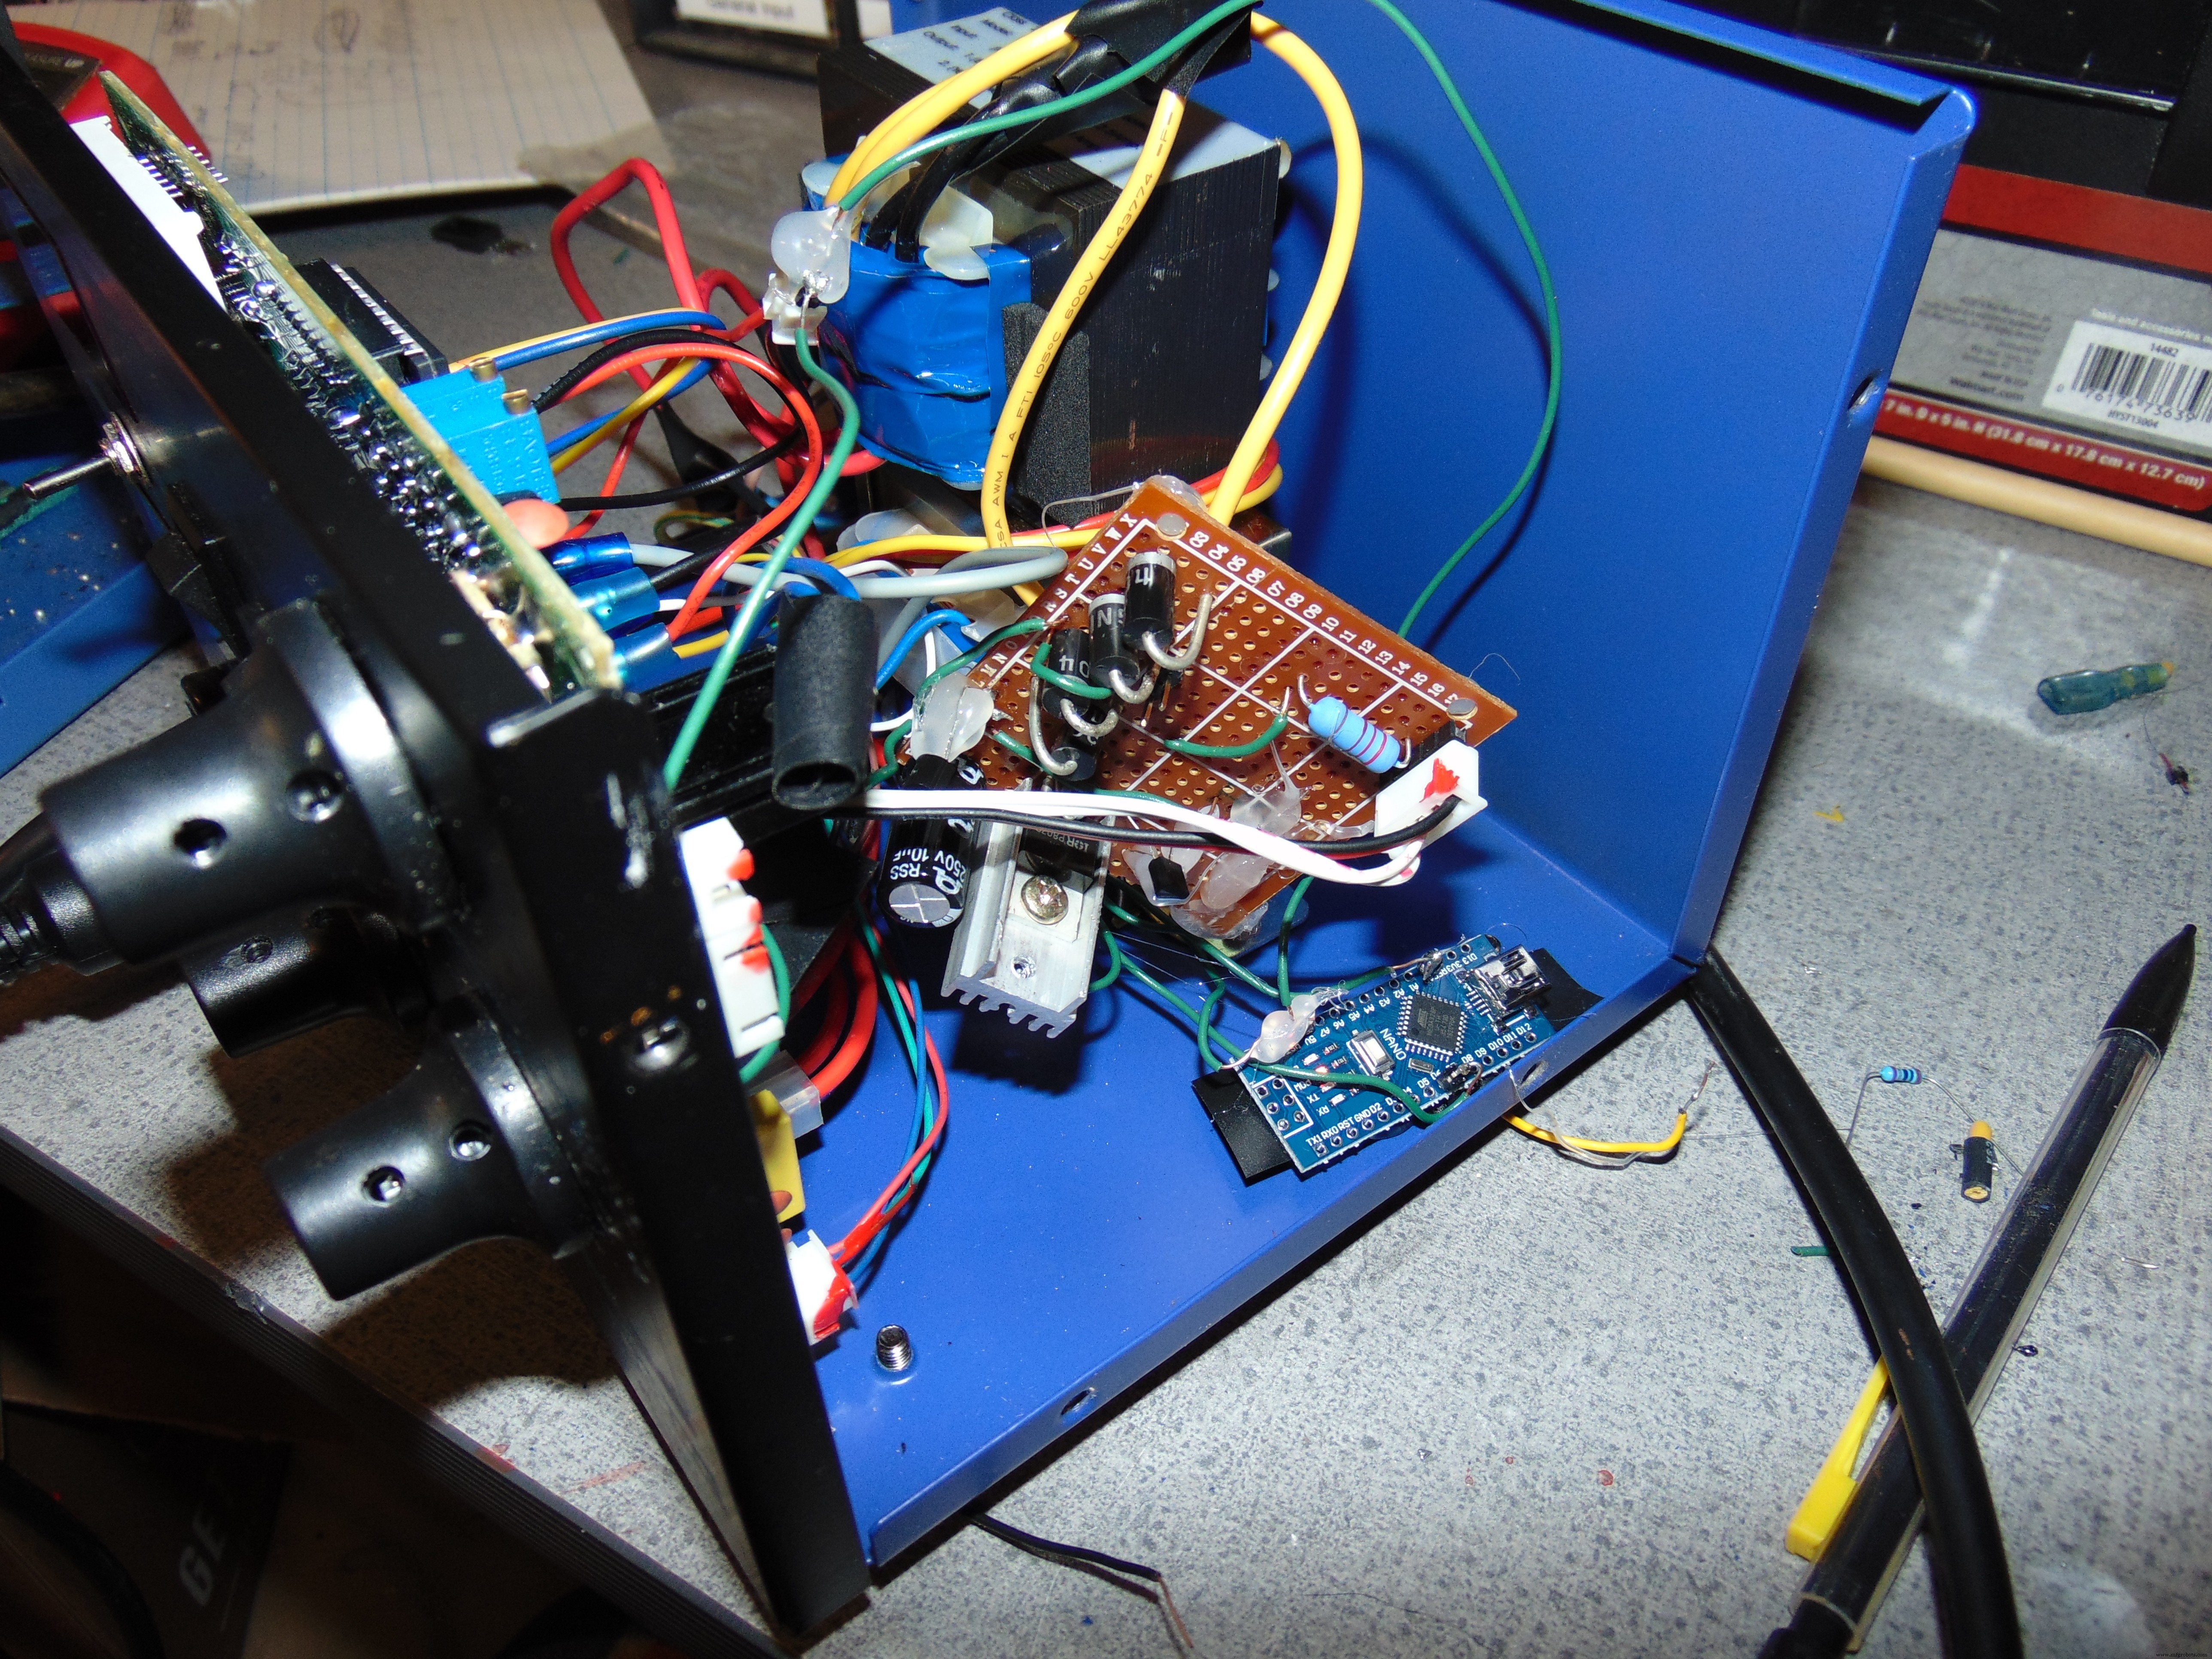
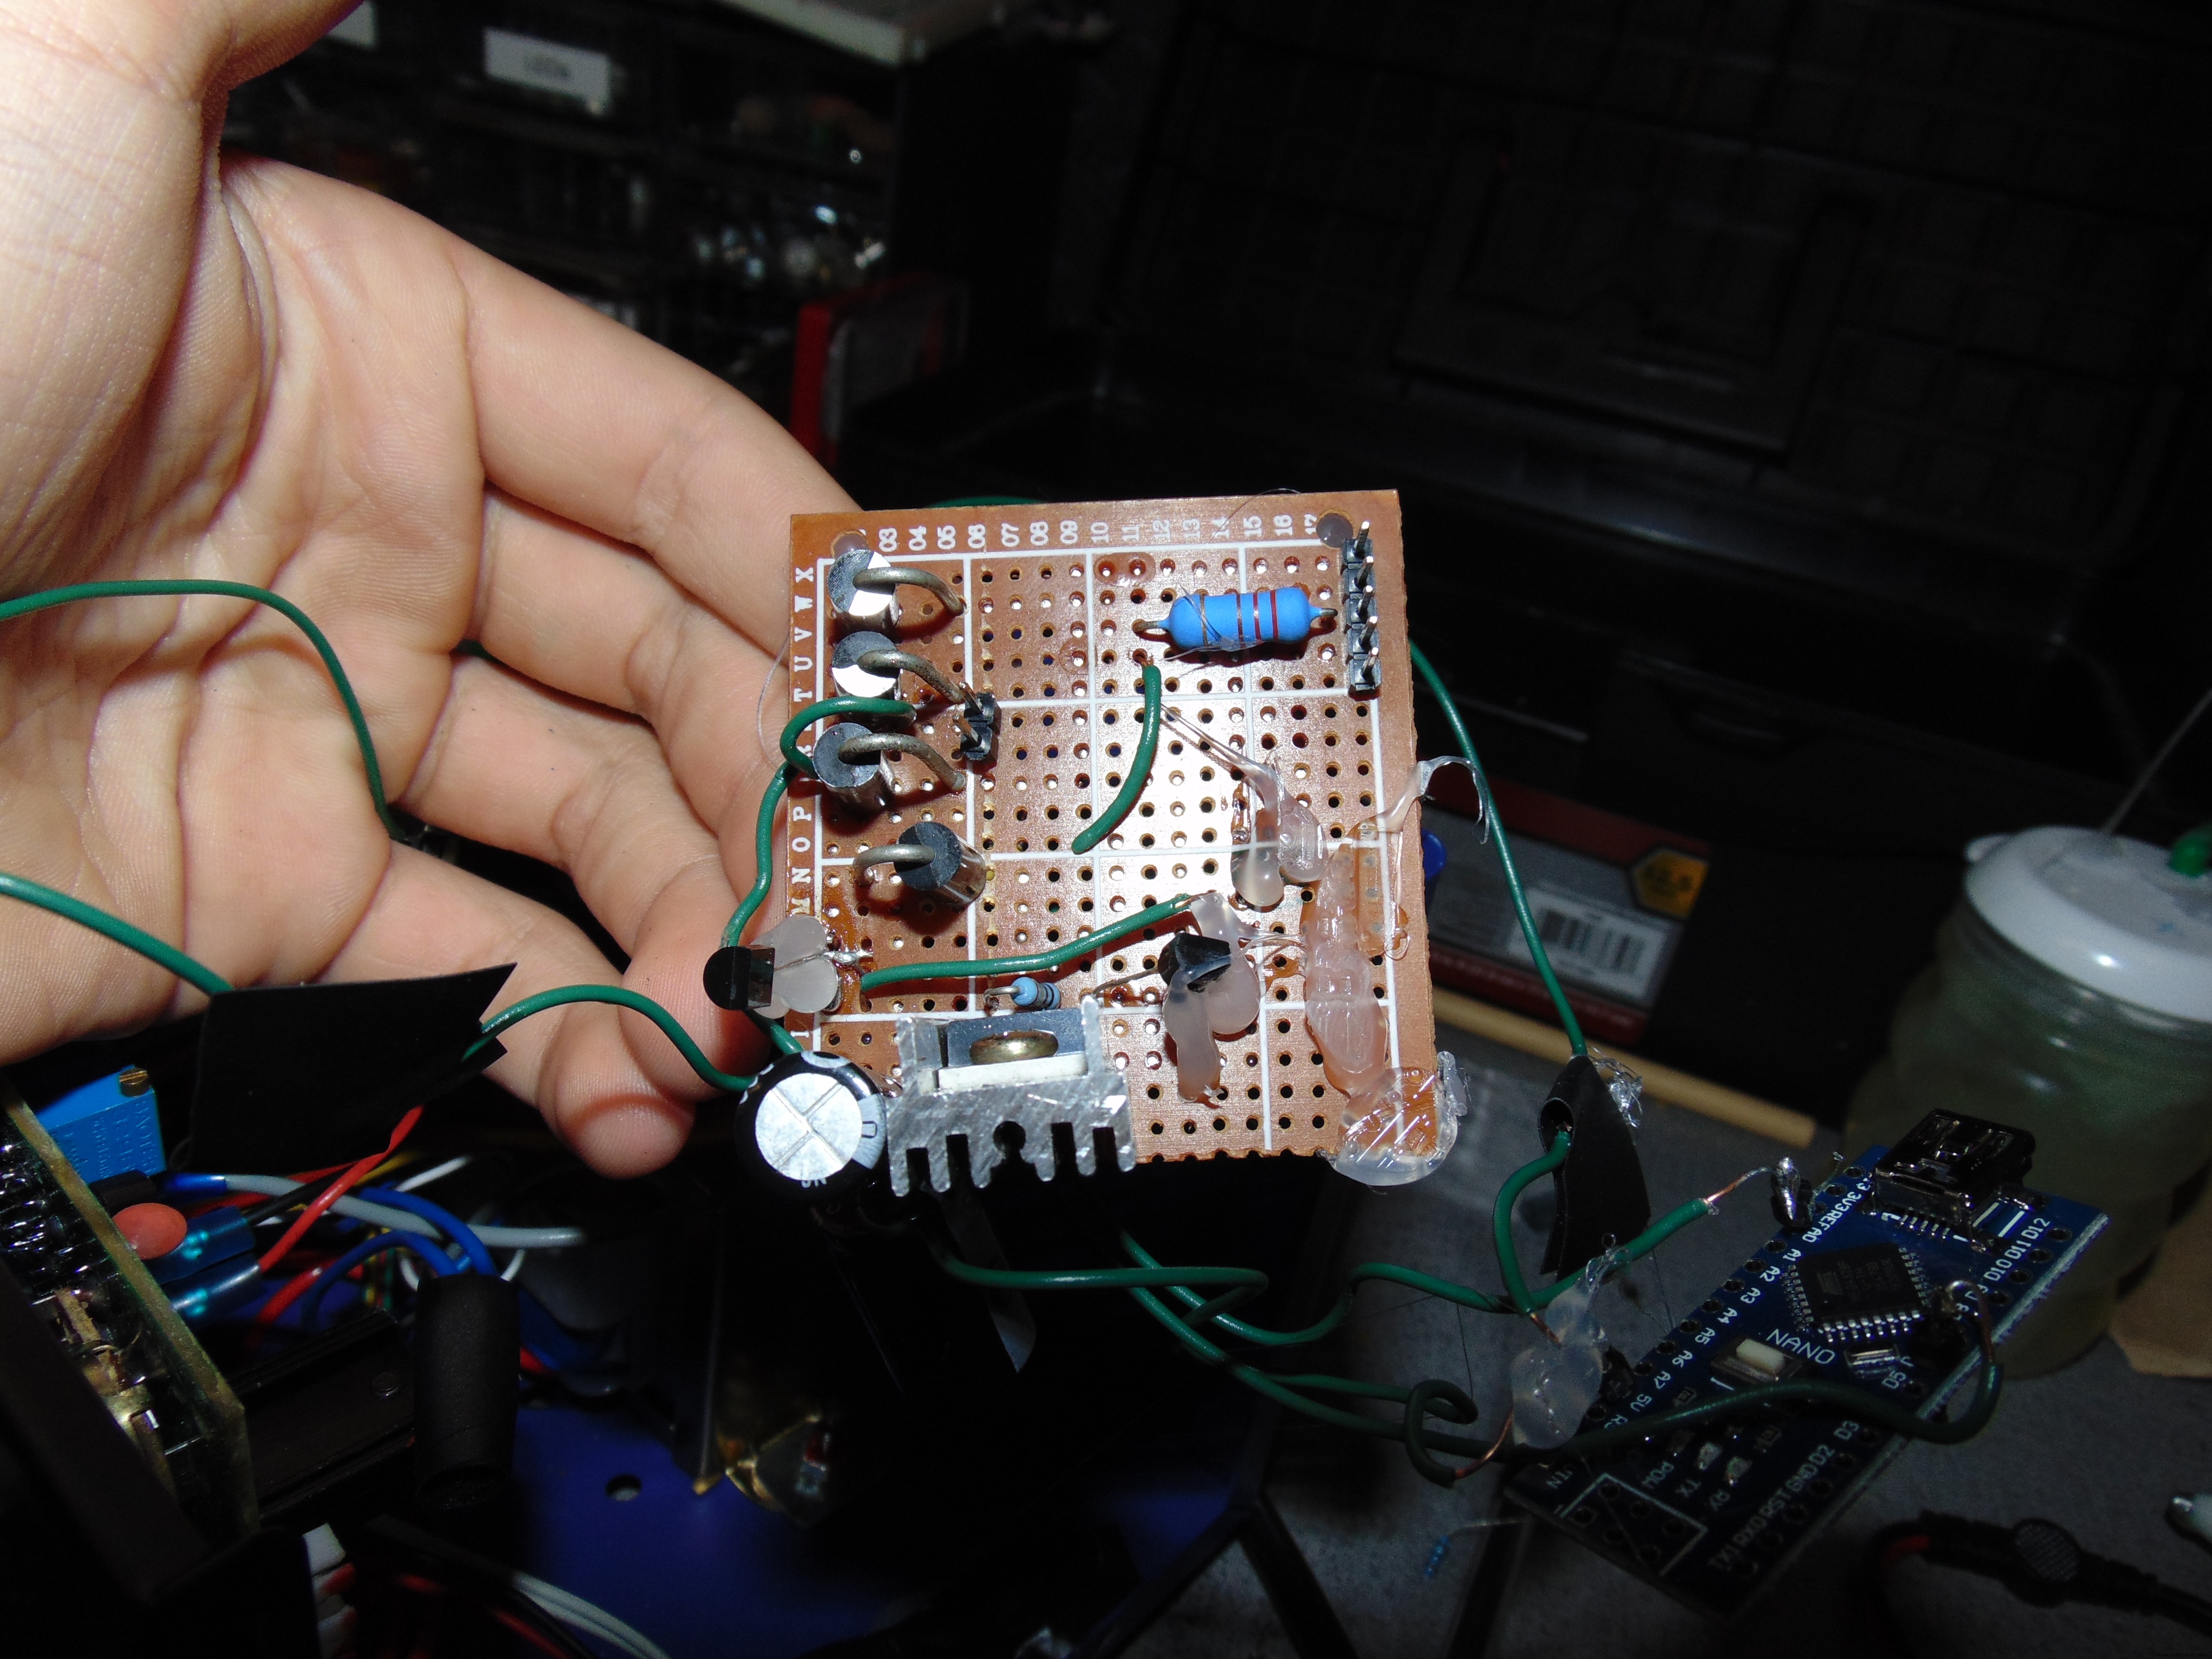
它可能看起来不太好,但它就像一个魅力。作为奖励,我移除了烙铁电源按钮,并在 5v 和 arduino 之间添加了它。
关于构建技巧:
现在可以购买所有零件。 LCSC 是一个大宗电子产品站点。运费到美国很贵,但组件便宜得离谱。
亚马逊上的 EX mosfet 6 美元,LCSC 上的 mosfet 32 美分。然而,电阻之类的东西必须批量购买。尽管如此,50 个电阻器实际上是 0.84 美分。
确保用接地铝箔或其他东西屏蔽长数据线。以12c丝网线为例。
代码中:
1023 最冷的 0 熔岩。根据需要更改设置温度。通常在 600 左右。
烙铁控制器可以检测您的烙铁是否连接或损坏。如果烙铁断开,arduino 会将模拟输入归零。如果烙铁过去能正常加热,但现在不能:断开烙铁,等到它说插入烙铁,然后你就可以开始了。 (这对我来说是个问题)
现在您了解熨斗的基本原理了。这可能是购买优质烙铁的廉价替代品。虽然有更高质量的铁杆,但这款非常便宜且可以自己动手制作。
代码
- 控制代码
- 代码
- 2019 年 10 月 21 日更新代码
控制代码C/C++
将其粘贴到 arduino 中并上传。这仅适用于提供的电路int output =0;int temp =0;int settemp =630;String inputString =""; // 保存传入数据的字符串 boolean rap =false;boolean stringComplete =false; // 字符串是否完整int t =0;void setup() { Serial.begin(9600); inputString.reserve(200); pinMode(6, 输出); digitalWrite(6, LOW);}void loop() { serialEvent(); if (stringComplete) { Serial.println(inputString); t =inputString.toInt(); //settemp =t //将设置温度设置为串行输入 inputString =""; stringComplete =假; } 迅速的(); pid();}void Rapid() { //在开始时通过快速加热来控制烙铁。 if (rap ==false) { digitalWrite(6, HIGH);做 { 温度 =模拟读取(0); Serial.print("快速"); Serial.println(temp); } while (temp - settemp>
10);数字写入(6,低);说唱 =真; }}void pid() { //通过缓慢的主动功率加热控制焊接。温度 =模拟读取(0);输出 =温度 - 设定温度;如果(输出 <0){ 输出 =0; } 如果(输出> 255){ 输出 =255; Serial.print("pid");串行打印(温度); Serial.print(", "); Serial.println(输出); AnalogWrite(6, output);}void serialEvent() { //可用于更新settemp的串行通信 while (Serial.available()) { char inChar =(char)Serial.read(); inputString +=inChar; if (inChar =='\n') { stringComplete =true; } }} 代码C/C++
粘贴到编辑器并上传。仅适用于设计的原理图。#include#include #include #define OLED_ADDR 0x3CAdafruit_SSD1306 display(-1);int settemp =590; //手动设置变量int output =0;int temp =0;String inputString ="";boolean rap =false;boolean stringComplete =false;int t =0;int mappingpower =0;byte powermultiply =0;long counter =0; int temp2 =0;byte outputoffset =0;byte scaleread =0;void setup() {Serial.begin(9600); pinMode(12,输出);数字写入(12,低); display.begin(SSD1306_SWITCHCAPVCC, OLED_ADDR); display.clearDisplay();显示。显示();快速();}无效循环(){pid(); display.clearDisplay();更新栏();更新文本(); display.display();}void Rapid() { //在开始时通过快速加热来控制烙铁。 if (rap ==false) { digitalWrite(12, HIGH);输出 =255;做 { 温度 =模拟读取(0); Serial.print("快速"); Serial.println(temp); display.clearDisplay();更新栏();更新文本();显示。显示(); } while (temp - settemp> 1);数字写入(12,低);说唱 =真; }}void pid() { //通过缓慢的主动功率加热控制焊接。温度 =模拟读取(0); //温度平均器 temp2 =temp;延迟(50);温度 =模拟读取(0);温度 =温度 + 温度 2;温度 =温度 / 2;零尺度; //激活无烙铁检查器 temp =temp + outputoffset;输出 =温度 - 设定温度;输出 =输出 + 幂乘;输出 =输出 * 4;如果(输出 <0){ 输出 =0; } 如果(输出> 255){ 输出 =255; } 计数器 =计数器 + 1;如果(计数器> 10){ 计数器 =0; if (temp> settemp + 3) { powermultiply =powermultiply + 1; } if (temp 0) { powermultiply =powermultiply - 1; Serial.print(powermultiply); Serial.print(", ");串行打印(温度); Serial.print(", "); Serial.println(输出); analogWrite(12, output);}void updatebar() { //更新 OLED 显示器上的 Powerbar mappingpower =map(output, 0, 255, 0, 127) - 10; display.fillRect(0, 0, mapspower, 8, WHITE); display.fillRoundRect(mappedpower - 5, 0, 20, 8, 3, WHITE);}void updatetext() {//在Oled显示器上更新文字 display.setCursor(0, 9); display.setTextColor(WHITE); display.setTextSize(1); display.print("设置温度:"); display.print(settemp); display.setCursor(0, 20); display.print("温度:"); display.print(temp);}void zeroscale() { //如果拔掉烙铁,调整输入引脚值使其归零 if (output <200) { display.clearDisplay(); display.setCursor(0, 9); display.setTextColor(WHITE); display.setTextSize(1); display.print("没有烙铁,或有缺陷"); display.setCursor(0, 15); display.print("铁。"); display.setCursor(0, 20); display.print("5 秒后测试。");显示。显示();延迟(5000); if (output <200) { outputoffset =temp; } display.clearDisplay(); display.setCursor(0, 9); display.setTextColor(WHITE); display.setTextSize(1); display.print("输出偏移设置。"); display.setCursor(0, 20); display.print("请插上熨斗。");显示。显示();做{ scaleread =analogRead(0); } while (scaleread <200); }}
代码更新 10/21/2019C/C++
粘贴到 IDE 中并上传。仅适用于 shematic。#include#include #include #define OLED_ADDR 0x3CAdafruit_SSD1306 display(-1);int settemp =590; //手动设置变量int output =0;int temp =0;String inputString ="";boolean rap =false;boolean stringComplete =false;int t =0;int mappingpower =0;byte powermultiply =0;long counter =0; int temp2 =0;byte outputoffset =0;byte scaleread =0;void setup() {Serial.begin(9600); pinMode(12,输出);数字写入(12,低); display.begin(SSD1306_SWITCHCAPVCC, OLED_ADDR); display.clearDisplay();显示。显示();快速();}无效循环(){pid(); display.clearDisplay();更新栏();更新文本(); display.display();}void Rapid() { //在开始时通过快速加热来控制烙铁。 if (rap ==false) { digitalWrite(12, HIGH);输出 =255;做 { 温度 =模拟读取(0); Serial.print("快速"); Serial.println(temp); display.clearDisplay();更新栏();更新文本();显示。显示(); } while (temp - settemp> 1);数字写入(12,低);说唱 =真; }}void pid() { //通过缓慢的主动功率加热控制焊接。温度 =模拟读取(0); //温度平均器 temp2 =temp;延迟(50);温度 =模拟读取(0);温度 =温度 + 温度 2;温度 =温度 / 2;零刻度(); //激活无烙铁检查器 temp =temp + outputoffset;输出 =温度 - 设定温度;输出 =输出 + 幂乘;输出 =输出 * 4;如果(输出 <0){ 输出 =0; } 如果(输出> 255){ 输出 =255; } 计数器 =计数器 + 1;如果(计数器> 10){ 计数器 =0; if (temp> settemp + 3) { powermultiply =powermultiply + 1; } if (temp 0) { powermultiply =powermultiply - 1; Serial.print(powermultiply); Serial.print(", ");串行打印(温度); Serial.print(", "); Serial.println(输出); analogWrite(12, output);}void updatebar() { //更新 OLED 显示器上的 Powerbar mappingpower =map(output, 0, 255, 0, 127) - 10; display.fillRect(0, 0, mapspower, 8, WHITE); display.fillRoundRect(mappedpower - 5, 0, 20, 8, 3, WHITE);}void updatetext() {//在Oled显示器上更新文字 display.setCursor(0, 9); display.setTextColor(WHITE); display.setTextSize(1); display.print("设置温度:"); display.print(settemp); display.setCursor(0, 20); display.print("温度:"); display.print(temp);}void zeroscale() { //如果拔掉烙铁,调整输入引脚值使其归零 if (temp <200) { display.clearDisplay(); display.setCursor(0, 20); display.setTextColor(WHITE); display.setTextSize(1); display.print("没有烙铁。");显示。显示();延迟(10000); display.setCursor(0, 0); display.print("5 秒后测试。");显示。显示();延迟(5000); if (temp <200) { outputoffset =temp; } display.clearDisplay(); display.setCursor(0, 20); display.setTextColor(WHITE); display.setTextSize(1); display.print("输出偏移设置。"); display.setCursor(0, 0); display.print("连接熨斗。");显示。显示();做{ scaleread =analogRead(0); } while (scaleread <200); }}
示意图
使用此原理图为熨斗创建电路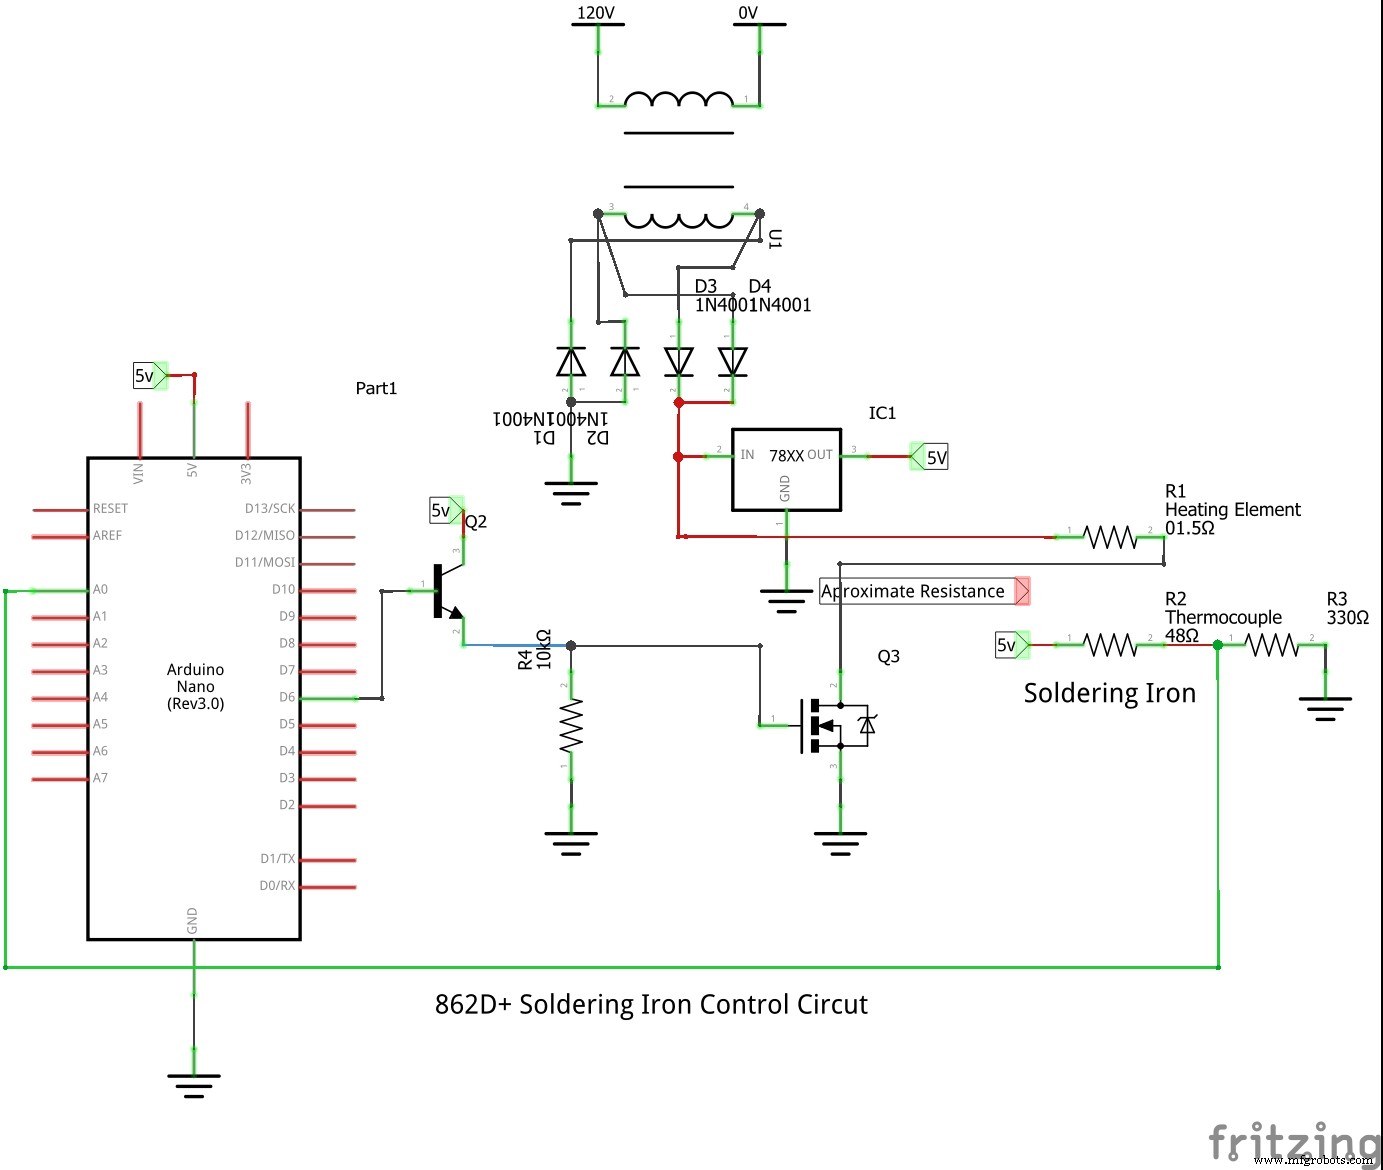
制造工艺