

Arduino 和 DS3231 实时时钟教程
在本 Arduino 教程中,我们将学习如何使用 DS3231 实时时钟模块。您可以观看以下视频或阅读下面的书面教程。
这里出现的第一个问题是,当 Arduino 本身具有内置计时器时,为什么我们实际上需要一个单独的 RTC 用于我们的 Arduino 项目。关键是 RTC 模块依靠电池运行,即使我们重新编程微控制器或断开主电源,也可以跟踪时间。
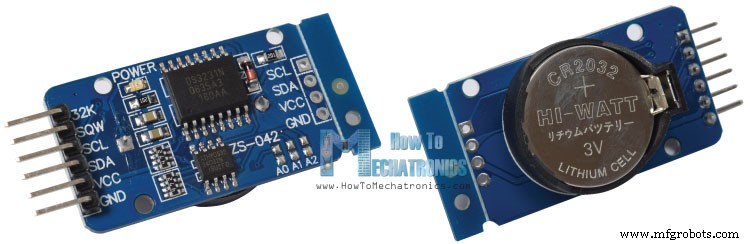
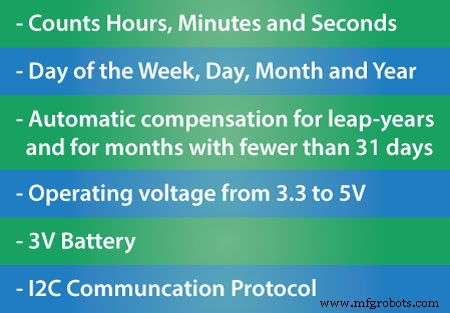
DS3231 是一款低成本、高精度的实时时钟,可以保持小时、分钟和秒以及日、月和年信息。此外,它还可以自动补偿闰年和少于 31 天的月份。
该模块可以在 3.3 或 5 V 上工作,这使其适用于许多开发平台或微控制器。电池输入为3V,典型的CR2032 3V电池可以为模块供电并保持信息一年以上。
模块采用I2C通信协议,与Arduino Board的连接非常简单。
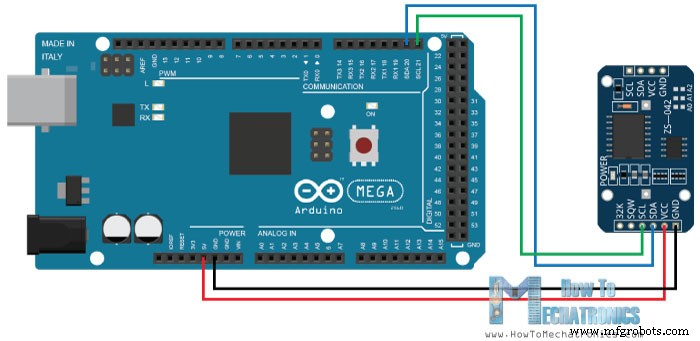
电路原理图如下:
所以我们只需要 4 根线,为模块供电的 VCC 和 GND 引脚,以及两个 I2C 通信引脚,SDA 和 SCL。
您可以从以下链接获取本 Arduino 教程所需的组件:
连接模块后,我们需要对 Arduino 板进行编程以使用实时时钟。然而,当涉及到 Arduino 和 I2C 模块之间的通信编程时,代码并不是那么简单。幸运的是,网上已经有几个 DS3231 RTC 库。
对于本教程,我选择使用 Henning Karlsen 制作的库,该库可以从他的网站 www.rinkydinkelectronics.com 找到和下载。
因此,一旦我们下载并安装了该库,我们就可以使用它的第一个演示示例来初始激活 RTC 模块的时钟。在演示示例代码的设置部分中,我们可以注意到我们需要取消注释三行,以便初始设置星期几、时间和数据。
第一行用于设置星期几,第二行用于设置时、分、秒的时间,第三行用于设置日、月、年的日期。
一旦我们上传了这段代码,我们需要注释掉这三行并重新上传代码。
如果我们看一下代码的循环部分,我们可以看到现在使用三个自定义函数,我们从 RTC 获取信息并在串行监视器中打印它们。以下是它们在串行监视器中的显示方式。
现在,即使我们断开 Arduino 电源,然后重新连接并再次运行串行监视器,我们也可以注意到时间继续运行而没有被重置。
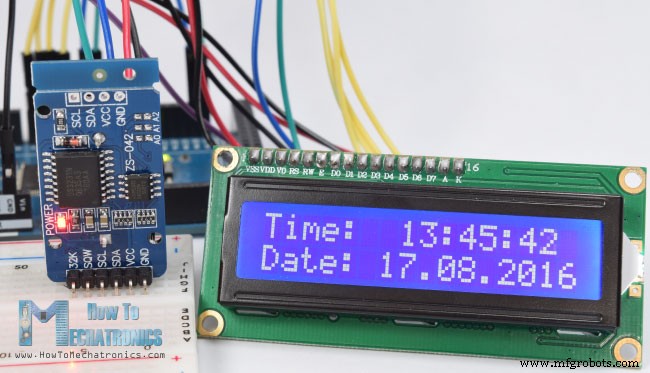
所以现在我们的实时时钟启动并运行,我们可以在任何 Arduino 项目中使用。作为第二个示例,我将 LCD 连接到 Arduino 并在其上打印时间和日期。
以下是此示例的源代码:
这就是本 Arduino 教程的全部内容,请随时在下面的评论部分提出任何问题。概览
DS3231 实时时钟
编程
// Code from the Demo Example of the DS3231 Library

void setup()
{
  // Setup Serial connection
  Serial.begin(115200);
  // Uncomment the next line if you are using an Arduino Leonardo
  //while (!Serial) {}

  // Initialize the rtc object
  rtc.begin();

  // The following lines can be uncommented to set the date and time
  //rtc.setDOW(WEDNESDAY);     // Set Day-of-Week to SUNDAY
  //rtc.setTime(12, 0, 0);     // Set the time to 12:00:00 (24hr format)
  //rtc.setDate(1, 1, 2014);   // Set the date to January 1st, 2014
}Code language: Arduino (arduino)// Code from the Demo Example of the DS3231 Library
void loop()
{
// Send Day-of-Week
Serial.print(rtc.getDOWStr());
Serial.print(" ");
// Send date
Serial.print(rtc.getDateStr());
Serial.print(" -- ");
// Send time
Serial.println(rtc.getTimeStr());
// Wait one second before repeating
delay (1000);
}Code language: Arduino (arduino)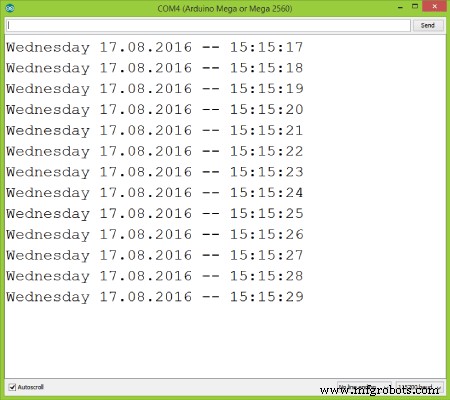
/*
* Arduino DS3231 Real Time Clock Module Tutorial
*
* Crated by Dejan Nedelkovski,
* www.HowToMechatronics.com
*
* DS3231 Library made by Henning Karlsen which can be found and downloaded from his website, www.rinkydinkelectronics.com.
*
*/
#include <DS3231.h>
#include <LiquidCrystal.h> // includes the LiquidCrystal Library

DS3231  rtc(SDA, SCL);
LiquidCrystal lcd(1, 2, 4, 5, 6, 7); // Creates an LC object. Parameters: (rs, enable, d4, d5, d6, d7)

void setup() {
 rtc.begin(); // Initialize the rtc object
 lcd.begin(16,2); // Initializes the interface to the LCD screen, and specifies the dimensions (width and height) of the display }
}

void loop() {
 lcd.setCursor(0,0);
 lcd.print("Time:  ");
 lcd.print(rtc.getTimeStr());

 lcd.setCursor(0,1);
 lcd.print("Date: ");
 lcd.print(rtc.getDateStr());

 delay(1000);
}Code language: Arduino (arduino)
制造工艺