Ender 3 (Pro &V2) 升级;可打印和购买!
以下是 Ender 3、Ender 3 Pro、V2 甚至 CR10、CR10 mini 以及其他打印机的一些最佳升级列表,您可以免费打印和购买。
确保检查每个升级与您的打印机的兼容性(信息可以在本文列出的每个升级下找到)。
如果您不想经历我们为找到在 Ender 3 上创建高质量打印的理想设置而进行的所有试验和错误,那么请务必查看我们自己专门定制的 Cura 配置文件适用于 Ender 3 打印机系列(只需 7 美元即可获得所有这些打印机)。
现在,事不宜迟,让我们开始吧!
修复设计缺陷的可打印升级
Ender 3 是一款非常实惠的机器,这意味着为了节省成本,一些角落被明显切割。幸运的是,您可以自己打印所有必要的升级并提高打印机的性能,而无需花费任何钱,当然,耗材除外。
Ender 3 Board 风扇罩
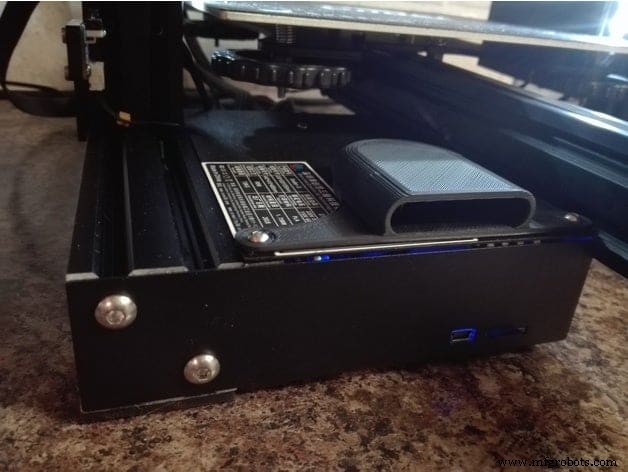
Ender 3(不是 Pro 和 V2 版本)存在一个严重的设计缺陷,即主板风扇朝上,这会导致灯丝和其他颗粒被吸入,这可能会导致风扇停止工作。
这个主板风扇罩完全覆盖了风扇并防止它被卡住。
就像我提到的,这只是 Ender 3 的问题。Pro 和 V2 不会受此影响。
兼容性 :末影3。
材料 :PLA、ABS、PETG。
在这里下载。
Ender 3 和 Pro 皮带张紧器
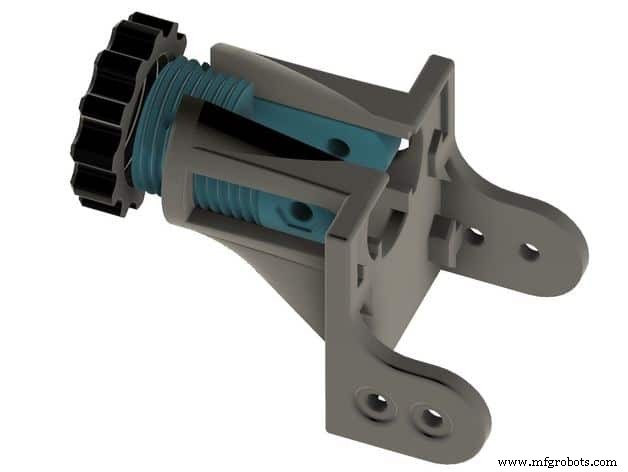
Ender 3 和 Ender 3 Pro 没有内置皮带张紧器(V2 有),这使得调整皮带的张力变得不必要地复杂。
通过这些简单的打印,您可以通过转动一个简单的螺丝轻松调整 X 轴和 Y 轴皮带的张力。
兼容性 :安德3,安德3 Pro。
材料 :PETG。
在此处下载:
- X 轴皮带张紧器
- Y 轴皮带张紧器
宠物扇风管
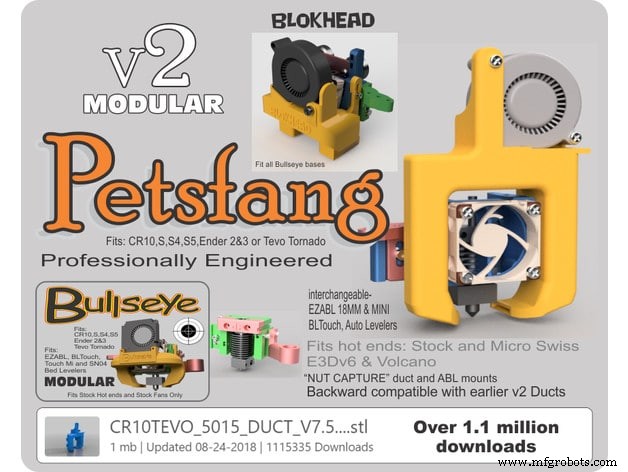
库存的 Ender 3、Pro 和 V2 风扇仅将空气从一侧吹到打印的热层上,导致冷却不均匀且不理想。
使用 Petsfang 风扇管道,这个问题得到了极大的改善,因为它允许在整个打印件周围有更好的气流。但是,它不是最容易打印的风扇管道,但如果您想增强挤出机和打印件之间的气流,则值得制作。它还设计用于配合 BLTouch 自动调平传感器。
兼容性: Ender 3、Ender 3 Pro、CR-10、Tevo Tornado。
材料 :PLA、ABS、PETG。
在这里下载。
柔性长丝挤出机升级
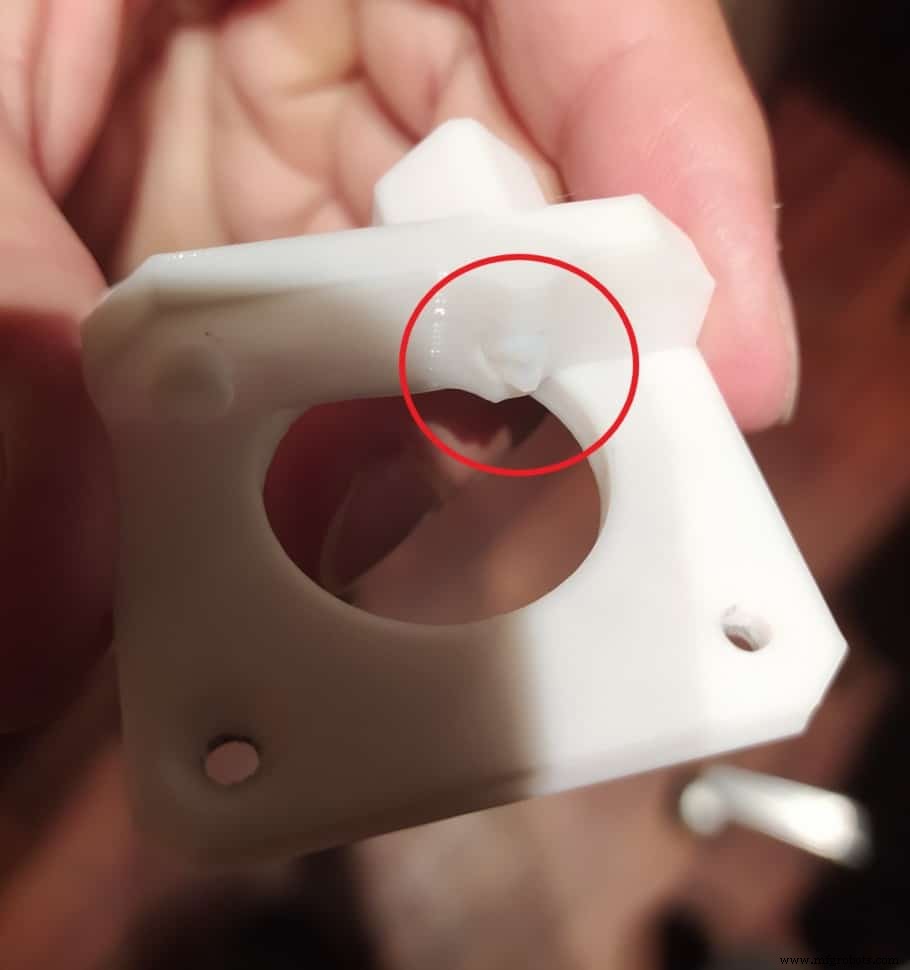
您可以下载并打印适用于 Ender 3、CR-7 和 CR-10 的柔性长丝挤出机升级,它应该可以让您使用非常灵活的长丝进行打印,因为它允许您使用小的 PTFE 插件来关闭挤出机中通常的间隙让柔性灯丝卡住。
确保获得我链接的名为“改进的柔性长丝挤出机升级”的版本,因为 Thingiverse 上可用的其他版本对我不起作用,并导致大量挤出不足,即使使用 PLA 打印也是如此,以及改进的版本适用于所有灯丝类型。
兼容性: 安德 3、安德 3 Pro、CR-10、CR-10 迷你、CR-7。
材料 :PLA、ABS、PETG。
在这里下载。
Ender 3 灯丝指南
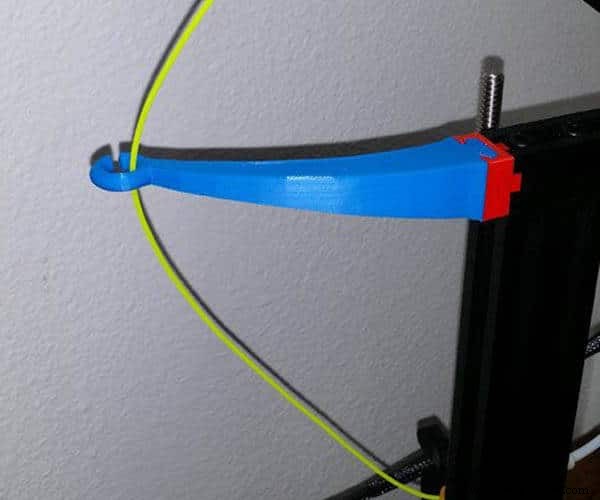
Ender 3 打印机有一个设计缺陷,即没有从线轴到挤出机的最佳耗材路径,耗材通常处于张力下并以锐角转动,并且与 Z 杆接触。
我在此处链接的两个灯丝导向器解决了这两个问题(我建议同时安装)。
兼容性 :安德 3、安德 3 Pro、安德 3 V2。
材料 :PLA、ABS、PETG。
在此处下载 :
- 顶级灯丝指南。
- 挤出机长丝指南。
Ender 3 压力接头修复
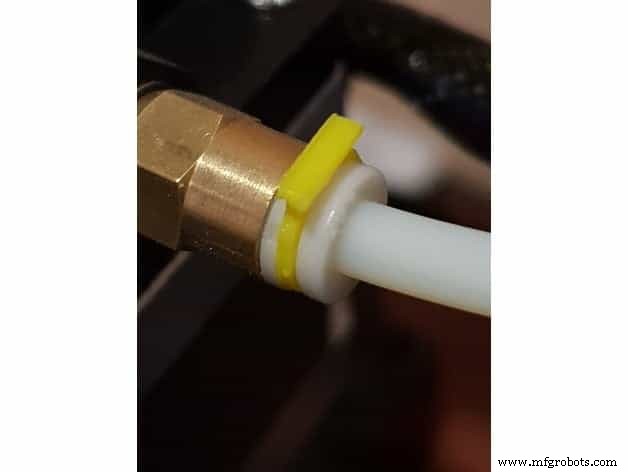
如果您的 PTFE 管弹出或未完全固定到位时遇到任何问题,您可以 3D 打印此压力接头固定装置,以确保一切都保持在其所属的位置。这种简单的印刷设计用于夹住管子的压力接头,它的安装方式比 Ender 3 随附的更紧密。
如果您的 PTFE 管无法完美固定到位,请尝试打印其中一个压力接头。
兼容性 :安德 3、安德 3 Pro、安德 3 V2。
材料 :PLA、ABS、PETG。
在这里下载。
Ender 3 减震脚垫
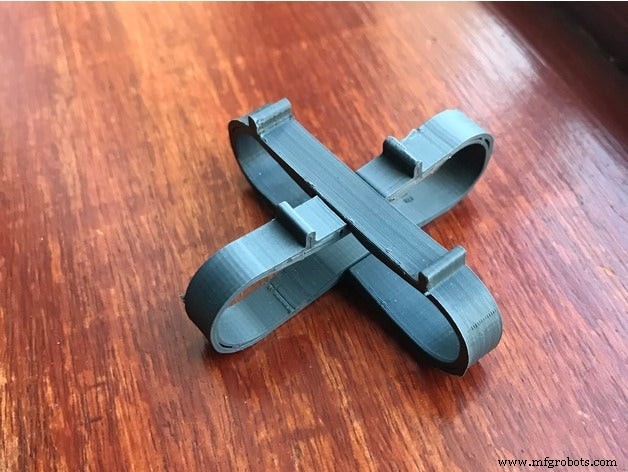
Ender 3 在打印时产生的振动可以转移到它所坐的表面,这会放大这些振动并产生大量噪音。
打印这些减振脚可确保将最少的振动传递到其他表面并降低整体打印噪音。
兼容性 :安德 3,专业版,V2。
材料 :Semi-Flex TPU(不太柔韧,肖氏硬度 98a),PETG。
在这里下载。
Ender-3 床把手
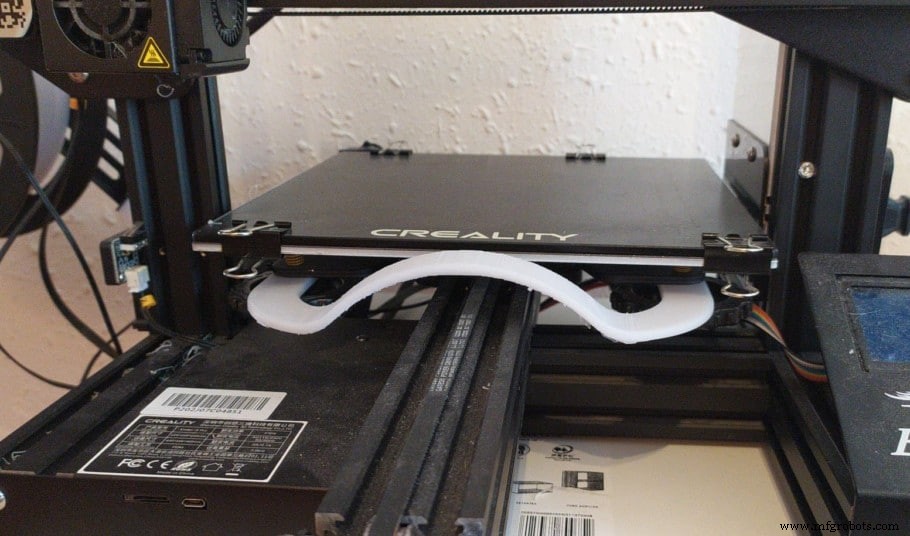
这款床把手可让您来回移动床而无需触摸它。如果您使用 PLA 打印并将床设置为 60°,则触摸床不是问题。但是,使用 ABS 打印并将床设置为接近 100° 或更高,几乎不可能触摸它,并且要正确调平它会变得更加困难。
这个手柄完全解决了这个问题,而且还有另一个可用的(链接如下)带有相机支架。
兼容性 :安德 3、安德 3 Pro、安德 3 V2。
材料 :PLA、ABS、PETG。
在此处下载:
- Ender 3 床把手。
- 带摄像头支架的 Ender 3 床把手。
Creality Ender-3 带状电缆夹
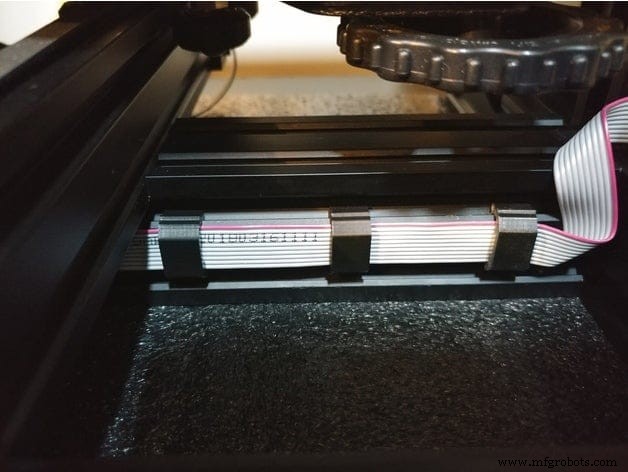
这是组织驱动的 Creality Ender 3 升级。这种可 3D 打印的显示屏带状电缆夹是一种快速的方法,可以让 LCD 的电缆或打印机下方的任何其他粗电缆尽可能不受干扰。
您需要为每条电缆打印两三个,仅此而已!
兼容性 :安德 3,专业版,V2。
材料 :PLA、ABS、PETG。
在这里下载。
不需要额外部件的非必要升级
虽然这些印刷品的设计可能无法修复我上面链接的一些关键设计缺陷,但它们仍然非常有用,可以改善整体印刷体验。
细丝滤尘器
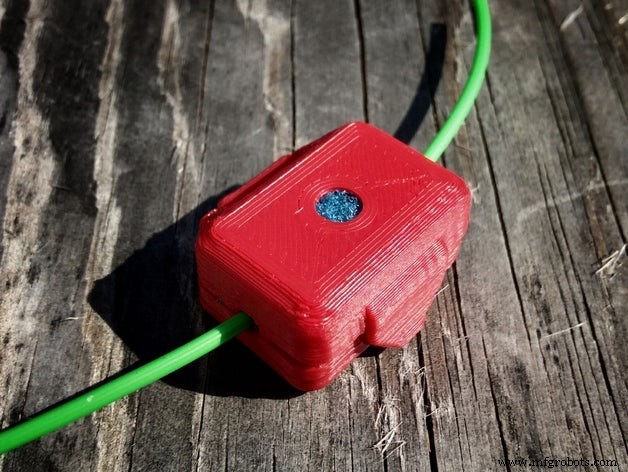
如果您需要防止灰尘、狗毛或猫毛或任何其他类型的颗粒进入挤出机,这可能会导致堵塞、挤出不足或完全破坏打印件等问题,请打印出此防尘过滤器并插入两片海绵或任何其他类似材料可以改善打印条件。
兼容性 :任何 3D 打印机。
材料 :PLA、ABS、PETG。
在这里下载。
Creality Ender 3 的 Vortex Z 旋钮
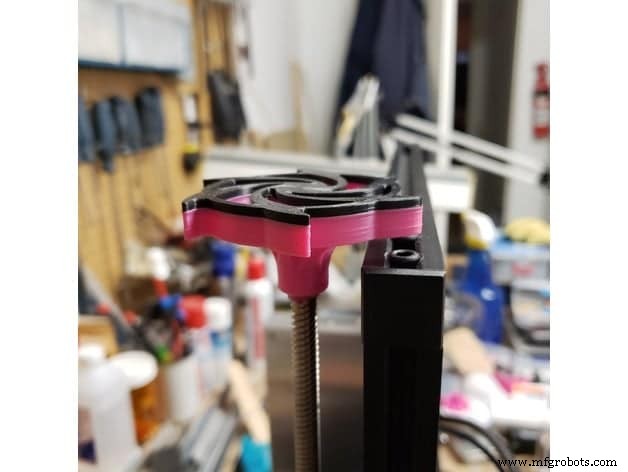
这个 Z 旋钮允许您旋转 z 轴螺纹杆以更轻松地上下移动 X 龙门架/轴,而无需手动或通过 Ender 3 固件推动它,每次需要升高或降低它时都可以节省一些时间。
兼容性 :Ender 3、Pro、V2(可以从顶部访问 Z 杆的任何 3D 打印机)。
材料 :PLA、ABS、PETG。
在这里下载。
挤出机旋钮/阀门/轮
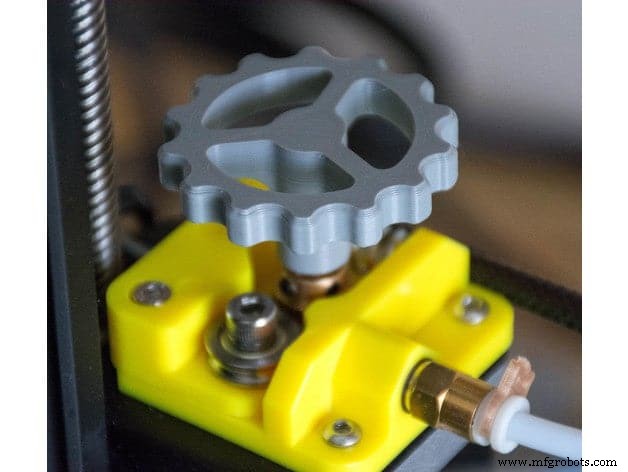
该挤出机轮可以帮助您识别挤出机是否正在转动,并在更换耗材后帮助您推入耗材。从本质上讲,它可以更轻松地更换 Ender 3 上的灯丝。
兼容性 :安德 3,专业版,V2。
材料 :PLA、ABS、PETG。
在这里下载。
Ender 3 LCD 盖板
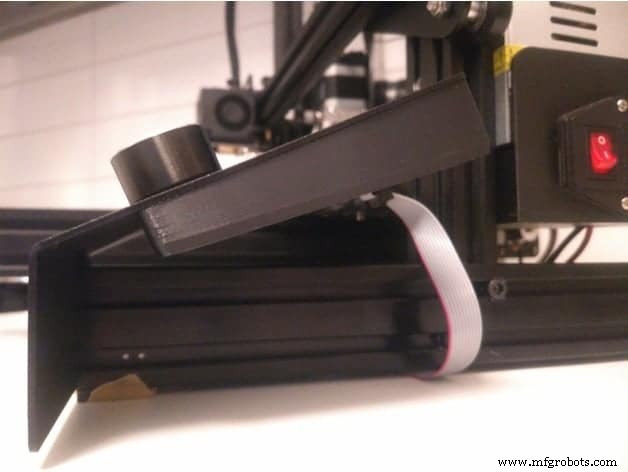
Ender 3 的另一个设计缺陷(包括 Pro 和 V2)是 LCD PCB 板周围缺乏保护,它位于 LCD 显示器的正后方,完全打开,没有外壳保护它。
该外壳覆盖了电路板的背面,可保护所有电子设备免受任何外部损坏。
另一个好处是它降低了允许从 LCD 屏幕通过背面发出的光量。
兼容性 :安德 3,专业版,V2。
材料 :PLA、ABS、PETG。
在这里下载。
Ender 3 工具架
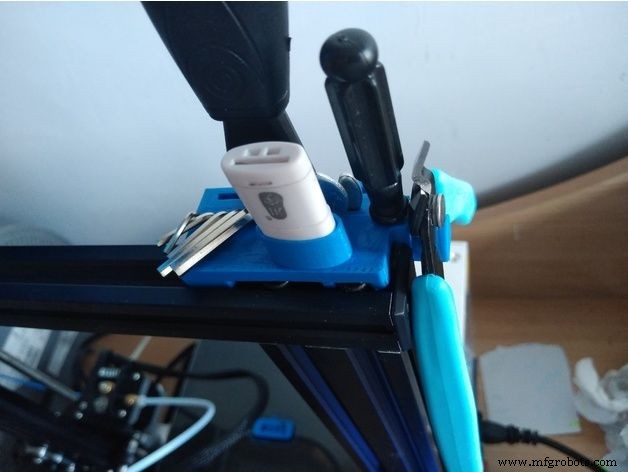
拥有一台 3D 打印机需要您使用几种不同的工具,这些工具可用于调整打印机的特定部分,更轻松地从床上移除打印件,或从完成的打印件中移除支撑。
此工具架允许您将所有这些工具挂在打印机本身上,让您可以快速使用它们。
兼容性 :安德 3,专业版,V2。
材料 :PLA、ABS、PETG。
在这里下载。
Ender-3 带把手的工具托盘
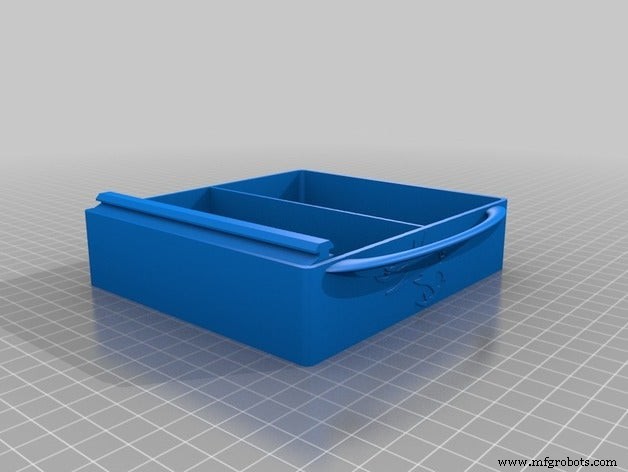
如果之前的工具架不够用,并且您需要更多空间来存放与 3D 打印机一起使用的工具,请打印这两个工具托盘中的一个。它们设计用于安装在打印机的底部,就在 LCD 屏幕旁边,并且可以轻松滑入和滑出。
兼容性 :安德 3,专业版,V2。
材料 :PLA、ABS、PETG。
在这里下载:
- 带把手的工具托盘。
- 以花瓶模式打印的工具托盘(更薄但打印速度更快)。
细丝线轴架
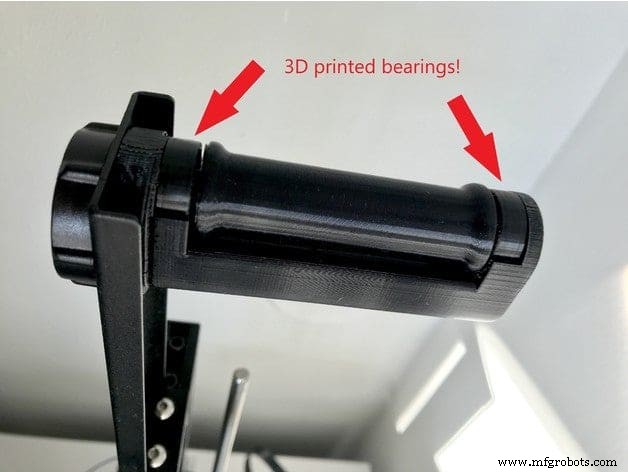
Ender 3 随附的线轴架远非理想:它设计为位于打印机顶部且不旋转,当挤出机拉动线材时,这会在线轴上引入不必要的摩擦,这可能会导致几个问题。
一种解决方案是打印我之前链接的耗材导板,但是,这是一个线轴架,当挤出机拉动耗材时,它会旋转,从而减少了很多摩擦,并且可以提高打印质量。
兼容性 :安德 3,专业版,V2。
材料 :PLA、ABS、PETG。
在这里下载。
Ender 3 电缆拖链
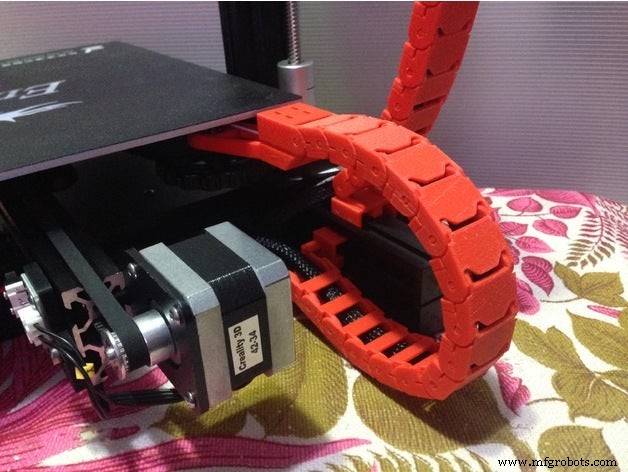
拖链经常与 3D 打印和 CNC 机器一起使用,因为它们可以防止电缆缠结和损坏。您可以根据需要打印尽可能多的链环,然后将它们放在一起以确保电缆安全。
注意 :印刷的链条并不完美(查看 thingiverse 的评论部分),有时可能会分开。如果您遇到这种情况,请考虑购买像这样的简单拖链,您可以在亚马逊上找到它。
兼容性 :安德 3,专业版,V2。
材料 :PLA、ABS、PETG。
在这里下载。
Ender 3 V 型槽盖
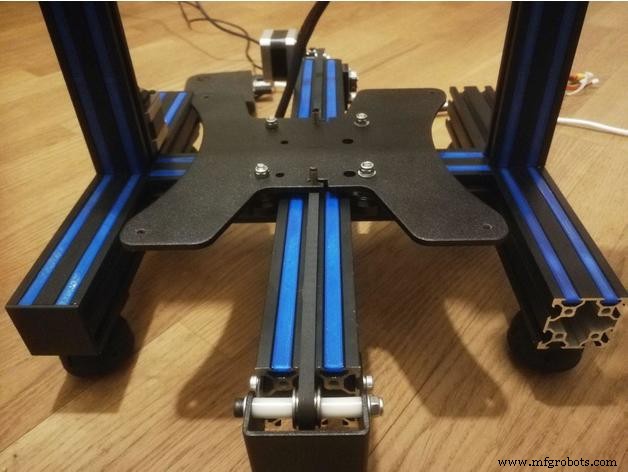
虽然不是此列表中功能最强大的打印件,但这些 V 形槽盖非常适合防止灯丝、灰尘和其他颗粒进入这些 V 形槽,而且它可以使打印机的战利品更具吸引力!
如果您不喜欢经常清洁打印机,那么一定要打印这些封面。
兼容性 :安德 3,专业版,V2。
材料 :PLA、ABS、PETG、TPU。
在这里下载。
需要额外部件的升级
我将在此处列出的可打印升级需要您购买某种额外的组件才能使其正常工作,无论是轴承、螺钉等。但是,它们通常比其他升级更好。
Creality Ender 3 可调 Z 挡块
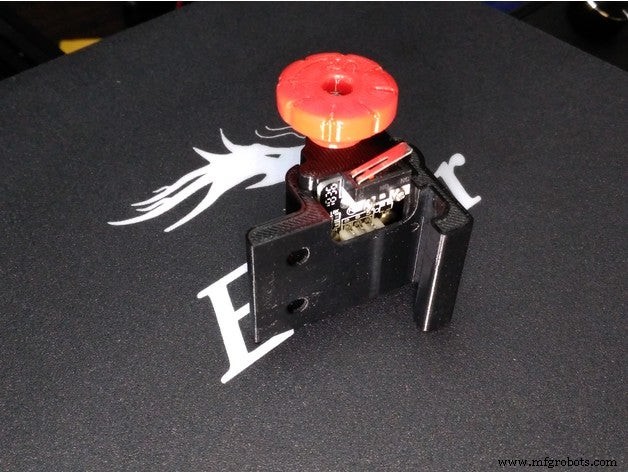
例如,在更改床型时,调整库存 Ender 3、Pro 或 V2 上的 Z 偏移非常重要,但是,这可能非常困难,主要是因为您需要拧松将限位开关固定到位的螺钉并向上或向下移动,然后重新检查以测试结果等。
通过这个可打印的升级,您可以轻松调整 Ender 3 的 Z 偏移。
兼容性 :安德 3,专业版,V2。
材料 :PLA、ABS、PETG。
所需部件 :2 个 M3 螺母、1 个 M3x25mm 或更长的螺栓和 1 个弹簧,就像我将在下一节中列出的床弹簧一样。
在这里下载。
Ender 3 带轴承的灯丝架
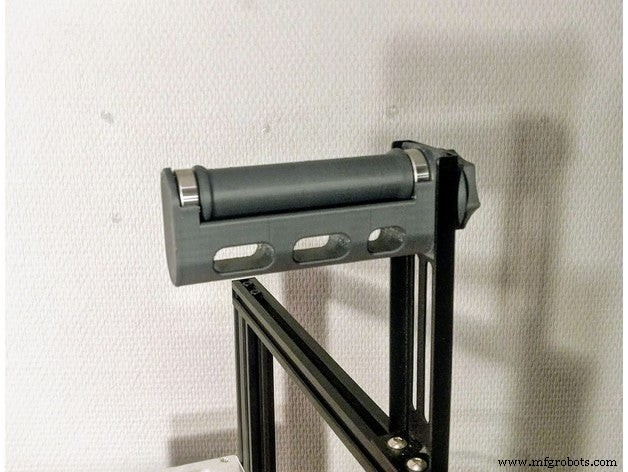
就像我之前提到的,普通的 Ender 3 灯丝支架会引入很多不必要的摩擦,降低摩擦可能会提高打印质量!
此灯丝座使用轴承来减少摩擦,从而提高打印质量,或至少防止打印问题。
兼容性 :安德 3,专业版,V2。
材料 :PLA、ABS、PETG。
所需部件 :两个 608ZZ 轴承。
在这里下载。
通用线轴架
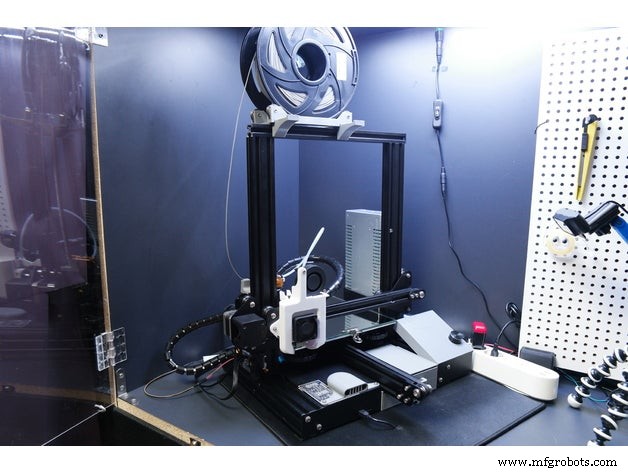
这是另一个线轴架,旨在降低挤出机拉动细丝时线轴本身的摩擦力。然而,这个线轴支架并不是严格为 Ender 3 设计的,而是任何常规 3D 打印机,其中线轴被放置在打印机外部,并且使用与 Ender 3 相同的挤压件。
此线轴架需要 4x 608ZZ 轴承、4x m3 尺寸约 15mm 的螺栓和 4x m3 尺寸的螺母。
兼容性 :任何将线轴放在打印机外的 3D 打印机。
材料 :PLA、ABS、PETG。
所需部件 :
- 4x 608ZZ 轴承
- 4x m3 尺寸螺栓 15mm-20mm
- 4x m3 大小的螺母
在这里下载。
Ender 3 不可打印升级
这些都是需要购买的升级,无论是官方 Creality 升级还是 3rd 方升级。
钢化玻璃床
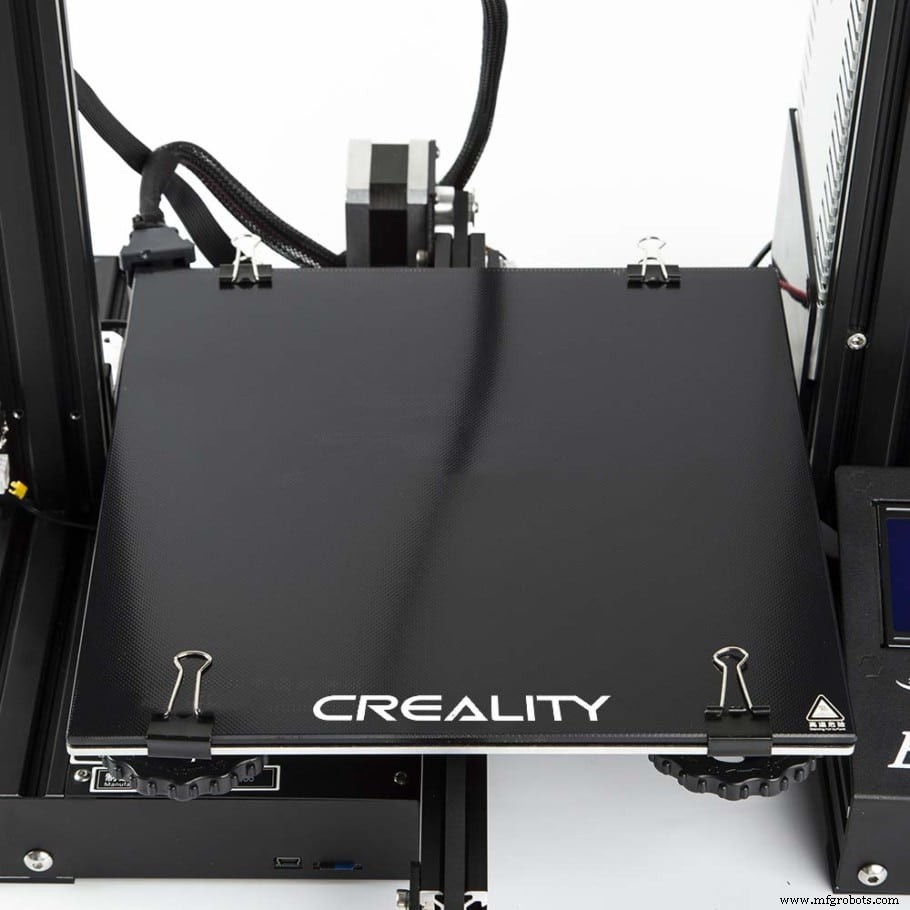
钢化玻璃床具有出色的附着力和热量分布,它们还有助于抵消翘曲板/床的影响,因为它们很厚且不适应床的形状,为您提供完全平坦的构建表面,制作第一层附着力好很多。
钢化玻璃床不仅可以很好地粘合床,而且一旦它们冷却下来,打印件也会立即弹出。
Ender 3、Pro 或 V2 都没有配备钢化玻璃床,您需要单独购买。 Ender 3 有一种型号称为 Ender 3X,本质上是 Ender 3 Pro,它配备了磁性和钢化玻璃床以及静音主板。
兼容性 :安德 3,专业版,V2。
到这里 :亚马逊。
磁床
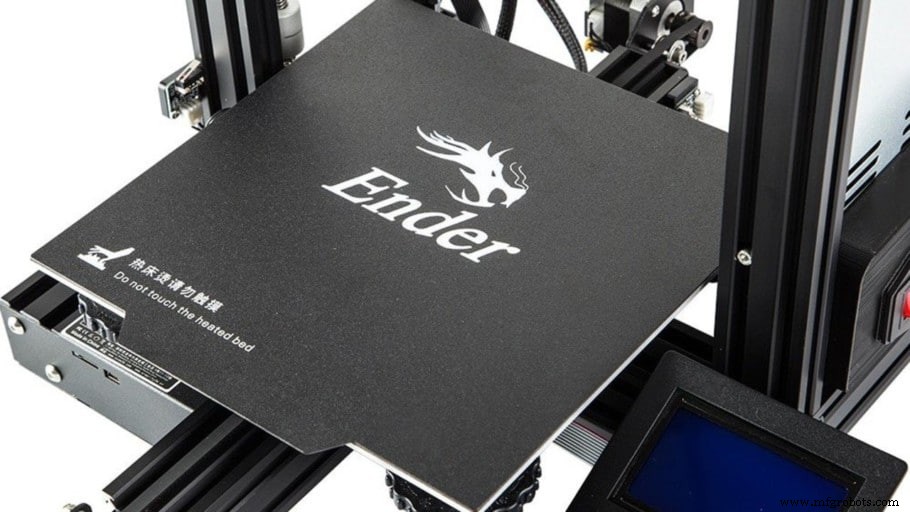
磁床提供出色的附着力。然而,使用它的主要原因是因为从它们上取下打印件非常容易,因为您只需将它们从打印机的床上剥离并弯曲直到打印件立即弹出。
It’s worth noting, however, that even though magnetic beds may seem far more appealing than tempered glass ones, they aren’t as great for bed adhesion, and if the bed on your Ender 3 is warped, then the magnetic bed will adapt to it and also be warped (usually with the center of the bed lower than the rest of it), making printing the first layer a lot harder.
Compatibility :Ender 3, Pro, V2.
Get here :Amazon.
BLTouch (Bed Leveling Sensor)
The BLTouch is a mechanical bed leveling sensor that can be installed on your Ender 3 and that makes the whole bed leveling process a lot simpler since you’ll never have to manually do it again. It uses a plastic probe to take measurements across the entire build surface before each print to determine the optimal first layer height.
注意 :The Installation of the BLTouch isn’t as simple as it may seem since you may need to install a pin 27 board, update the firmware, and more. Still, probably the best upgrade you can get for your Ender 3.
Compatibility :Ender 3, Pro, V2 (and most 3D printers).
Get here :Amazon, Banggood.
Bed Leveling Springs
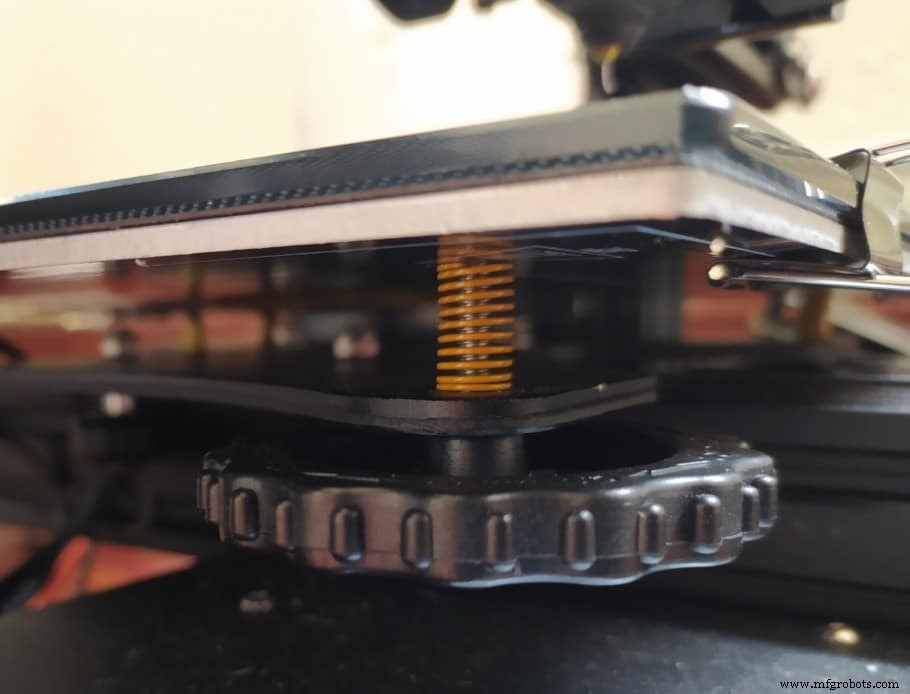
Levelling the Bed on your new Ender 3 can be hard to get right at first, but what’s even more frustrating is when you manage to properly level it and print one model successfully only to find that when you start the next print the bed isn’t leveled anymore.
This is generally caused by the sprints that are underneath the bed since they are too weak to keep the bed leveled for long periods of time. However, installing firmer springs like the yellow ones I installed on my Ender 3 will keep the bed leveled for much longer.
Compatibility :Ender 3, Pro, V2, CR10.
Get here :Amazon.
Laser Engraver Attachment
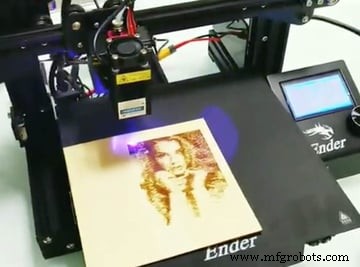
The Ender 3 can also be used as a laser engraver by simply installing this upgrade! It enables you to engrave wood, acrylic, paper, etc., and it can also cut wood and acrylic, depending on the wattage, and all of this without having to update the firmware of the printer.
Typically, they can just clip magnetically to the tool head (attached with magnets) and run from the fan port on the machine and are quick to assemble.
While this upgrade may not be strictly related to 3D printing, it’s definitely one of the better ones on this list.
Compatibility :Ender 3, Pro, V2.
Get here :Amazon.
Enclosure
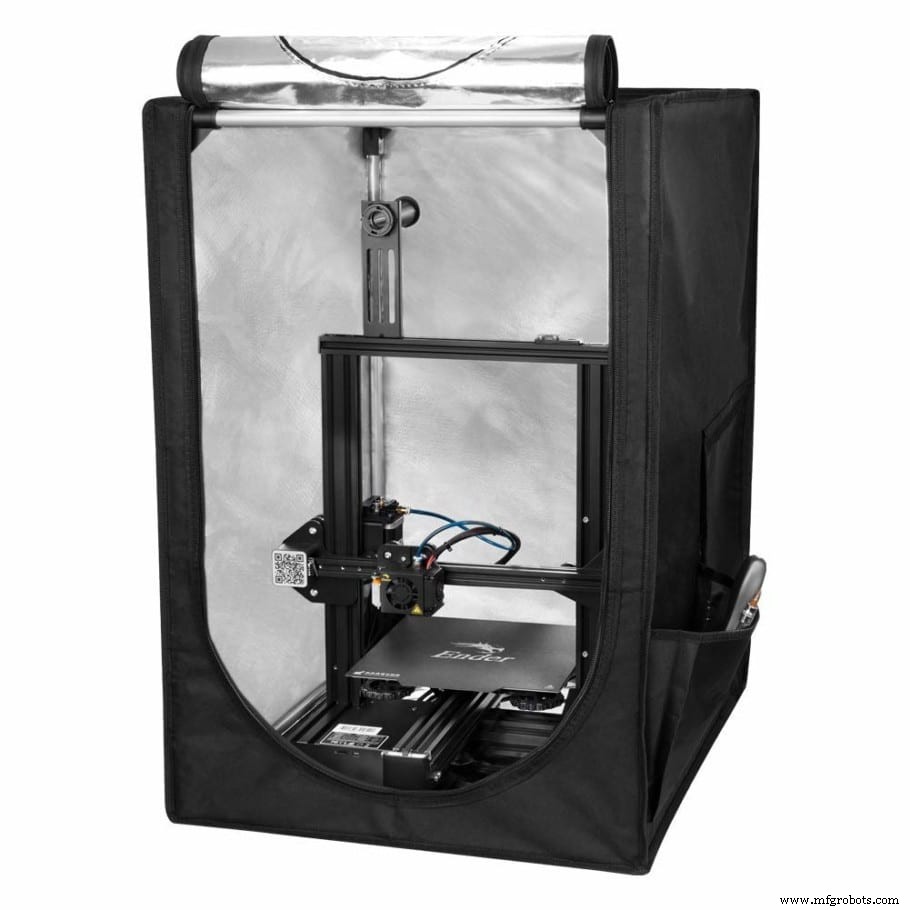
Enclosures are designed to keep the air temperature around the printer consistent and as warm as possible, since this prevents warping when parts cool unevenly, especially with filaments like ABS. If you only print with PLA, then an enclosure isn’t necessary.
Other benefits of using an enclosure are; Fire protection, since some of them are fireproof, and lower printing noise.
If you print with ABS, ASA, or even PETG, then printing with an enclosure will yield much better results and keep the print from warping or even detaching from the build plate.
Compatibility :Any printer that fits inside of the enclosure.
Get it here :Amazon, Creality website.
Direct Drive Extruder
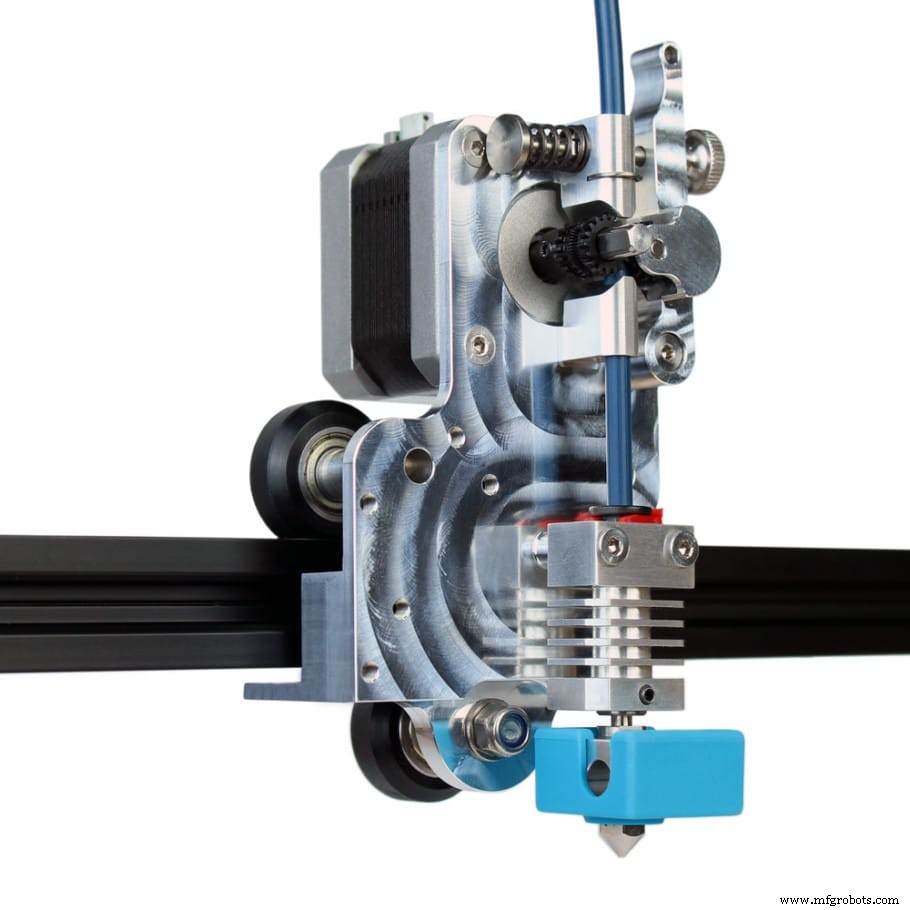
The stock Ender 3 comes with a Bowden extruder, which means that the motor that pushes the filament into the hot end isn’t part of the hot end itself but rather pushes the filament through the PTFE tube into the hot end, which means that the path the filament has to travel until it reaches the hot end is much longer.
The hot end used in a Bowden setup is much lighter than one that uses a direct drive, which reduces ringing, ghosting, and can print at higher speeds. Direct drive, on the other hand, has the advantage of being able to print with really flexible filaments since the path the filament has to travel is much shorter, and they can print at much higher temperatures since the PTFE tube in a Bowden setup can only handle up to 245° before getting damaged.
Generally speaking, direct rive extruders are better and more versatile, especially if you plan on using a vast variety of filaments.
Compatibility :Ender 3, Pro, V2, CR10.
High Quality Direct Drive Extruders :
- Titan Aero Extruder.
- Micro Swiss DD Extruder.
EZR Struder
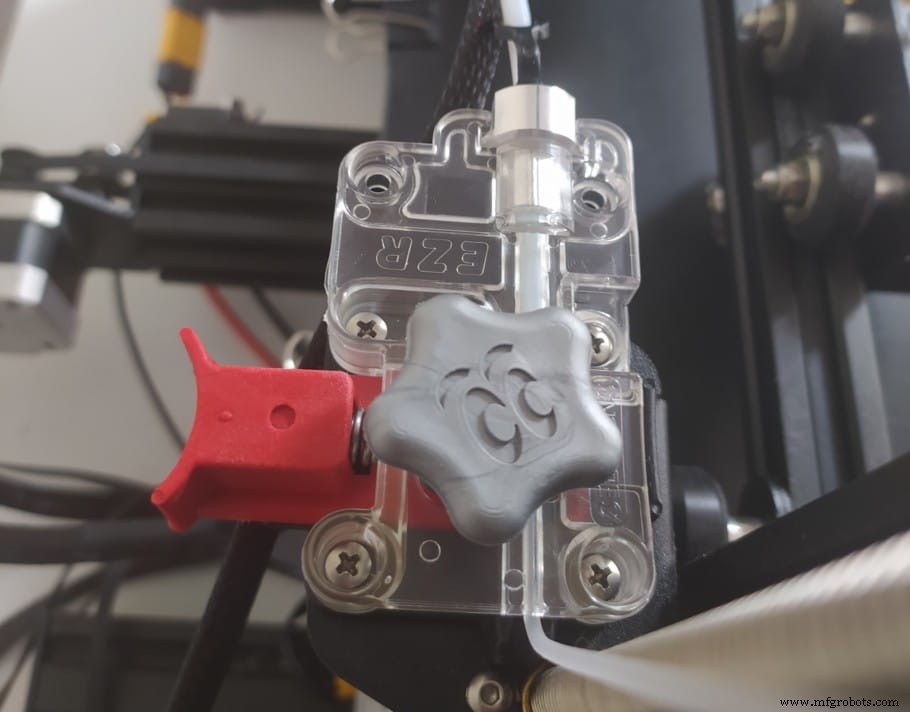
The EZR Struder is an upgraded extruder system for the Ender 3 that is designed to let you print extremely flexible filaments, even with a Bowden setup. The installation process is really quick and it can be used to print with any regular filament, such as PLA, ABS, etc., as well as NinjaFlex.
If you don’t want to upgrade to a direct drive extruder but need a way to print flexible filaments, give the EZR Struder a try, or print the upgrade I mentioned previously that lets you print really flexible filaments.
Compatibility :Ender 3, Pro, V2.
Get here :SeemeCNC.
Capricorn PTFE Tube
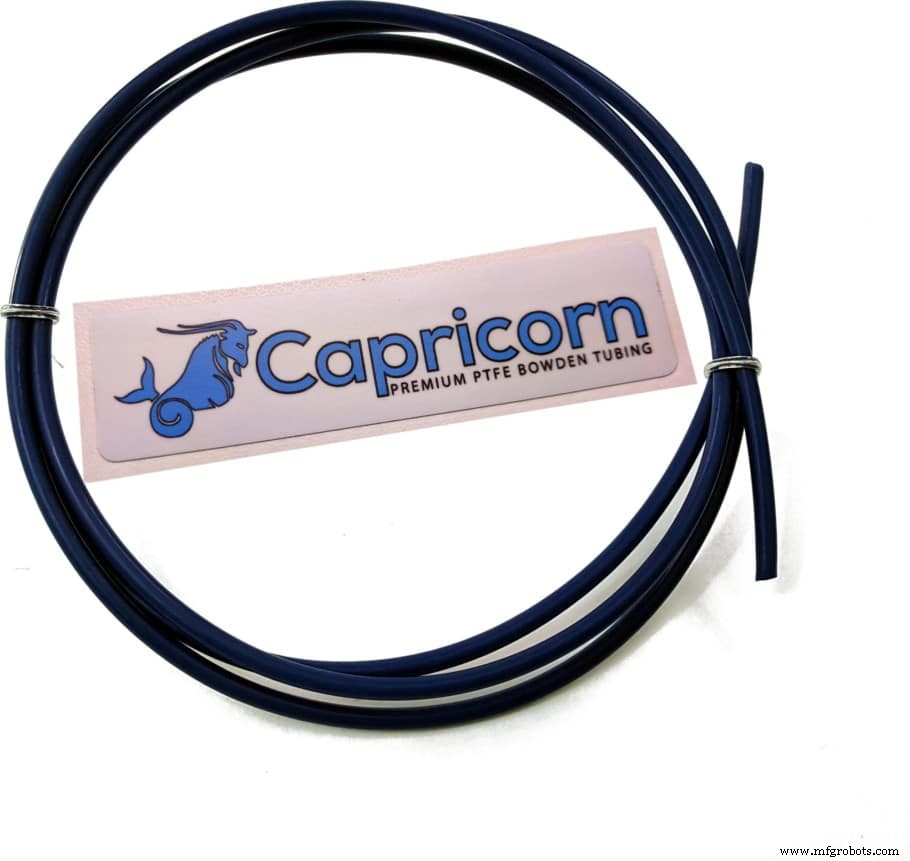
This might not seem like the most important upgrade you can make to your Ender 3, but the stock PTFE tube may have a slightly varying diameter on the inside and it’s also not able to withstand temperatures over 250°.
The Capricorn PTFE tube is designed to withstand much higher temperatures and has an extremely accurate internal diameter, which makes printing with flexible filaments easier.
Compatibility :Ender 3, Pro, V2 (and any Bowden printer).
Get here :Amazon.
Silent Mainboard
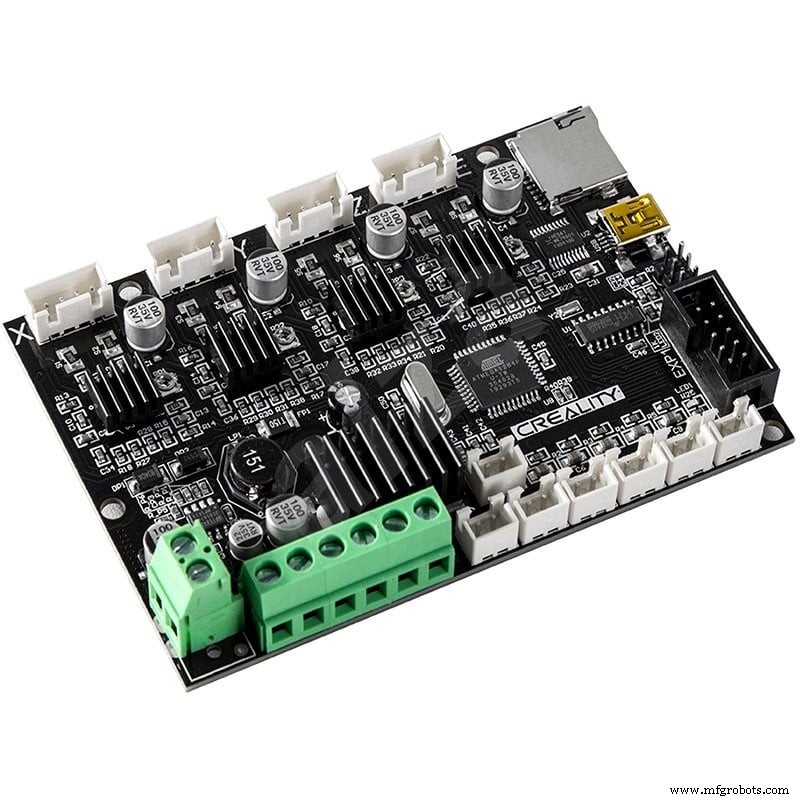
If you’re running your Ender 3 for a couple hours every day, and especially if it’s in the same room that you’re in, the noise it makes can be a bit irritating. However, there is a fix for this issue since you can change the mainboard to a Silent one that makes it so every stepper motor movement is completely silent.
This means that only the fans will be heard, and these can also be replaced with quieter ones.
The silent mainboard doesn’t come stock on the Ender 3 and Pro versions, but it does come built into the V2 and the Ender 3X.
Compatibility :Ender 3, Pro, Ender 5, Ender 5 Pro.
Creality 4.2.7 Mainboard: Amazon, Creality Website, Banggood.
BIGTREETECH 3D Printer Upgrade Motherboard :Amazon.
Silent Cooling Fans
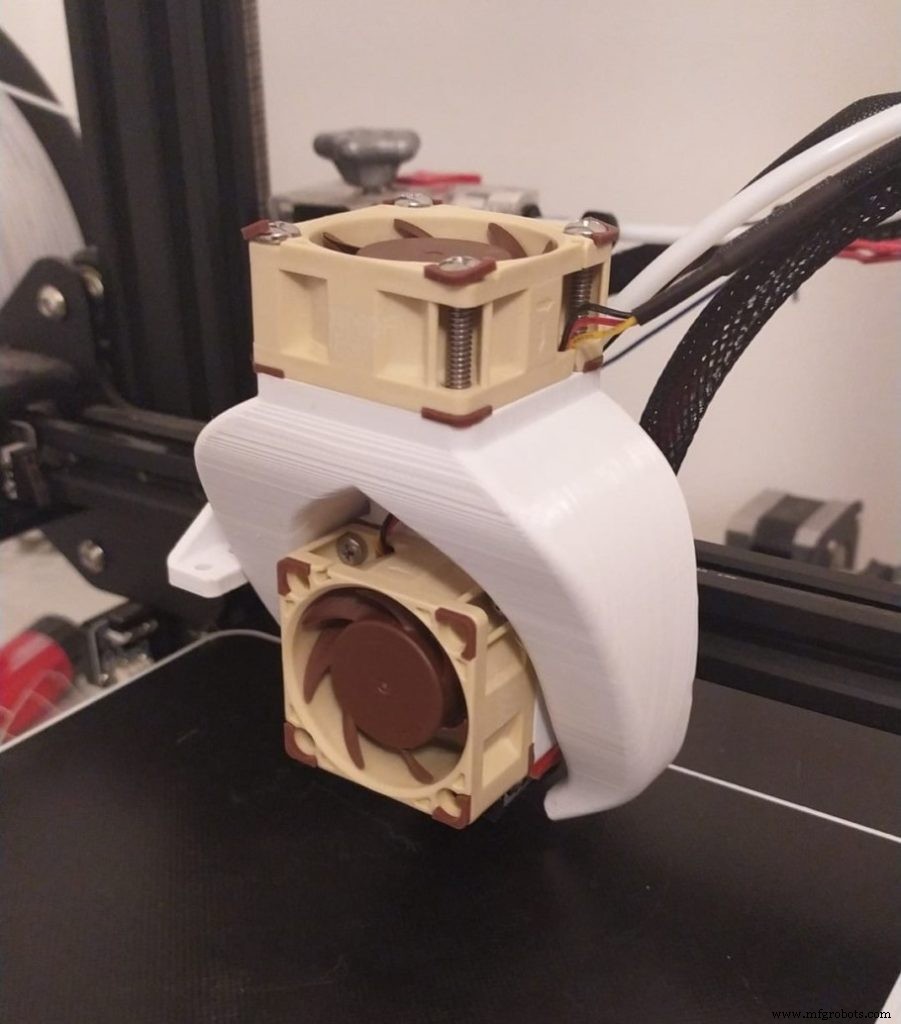
This one requires a bit more work but replacing the old fans on your 3D printer with Noctua fans will quiet it down dramatically, and it only costs about $40 to do so.
Here’s a guide on how to do it and these are the things you need to get:
- 2 x Noctua 40x20mm fan
- 1 x Noctua 40x10mm fan
- Buck Converters (at least 3, and 4 if PSU fan is 24V. I recommend getting the ones with the built-in display to see the voltage)
- Multimeter (if you want to get the cheaper buck converters without the display)
- 10 x 20mm m3 bolts (better to get an entire set of differently sized m3 bolts)
- Heat-shrink cable sleeves
- Heat Gun (optional since you can use a lighter)
- Allen wrenches (The ones that come with the Ender 3)
- Side Cutters/Pliers (included with the Printer as well)
Compatibility :Ender 3, Pro, V2.
如果您不想经历我们为找到在 Ender 3 上创建高质量打印的理想设置而进行的所有试验和错误,那么请务必查看我们自己专门定制的 Cura 配置文件适用于 Ender 3 打印机系列(只需 7 美元即可获得所有这些打印机)。
查看我们的推荐产品部分
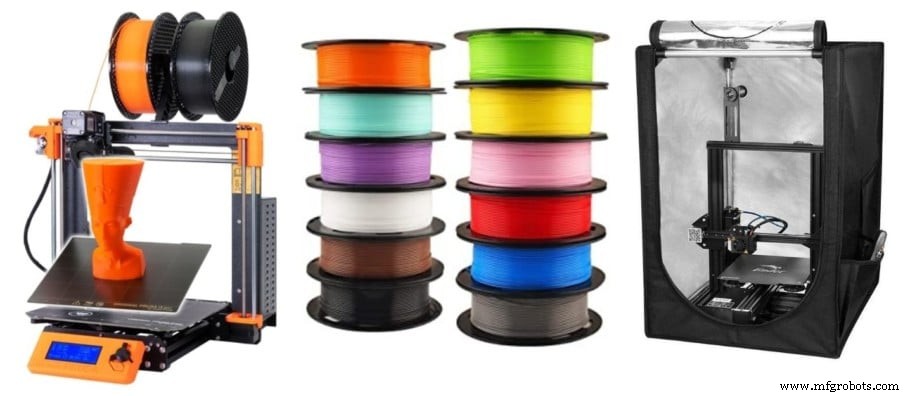
我们创建了一个推荐产品部分,可以让您消除猜测并减少研究打印机、灯丝或升级所花费的时间,因为我们知道这可能是一项非常艰巨的任务,而且通常会导致很多混乱.
我们只选择了少数我们认为对初学者、中级甚至专家都有好处的 3D 打印机,使决策更容易,并且列出的灯丝和升级都经过了我们的测试和精心挑选,因此您知道您选择的任何一个都会按预期工作。
3D打印


