带有 Arduino 和 Python 的人工智能助手机器人
组件和用品
 |
| × | 1 | |||
 |
| × | 1 | |||
 |
| × | 1 | |||
 |
| × | 1 |
应用和在线服务
 |
|
关于这个项目
简介:
我们都熟悉“钢铁侠”电影和漫威系列中的“贾维斯”AI助手机器人。自己做一些东西一直是程序员的梦想。我今天将展示一种使用 Python 编程制作这样一个助手的简单方法。而且,我还会给那个机器人做一个实体化身,这样我们每次跟这个机器人说话的时候,它就可以做一些动作。这将比仅仅一个软件机器人更令人惊奇。因为如果它有身体就很酷。所以今天我们将学习使用Arduino和Python编程来制作一个AIrobot,它可以控制您的计算机并与您闲聊。让我们加入伙计!
为什么我将机器人命名为“黄疸”?因为我把它涂成黄色,非常非常黄!
部分:
电子 -
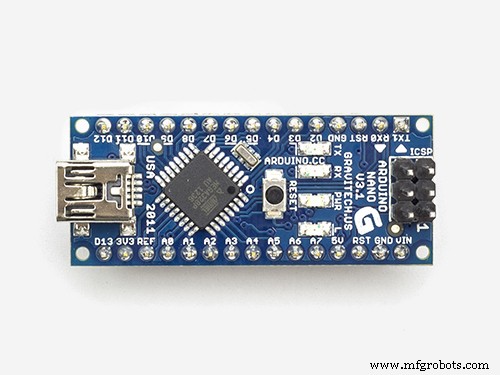
- Arduino Nano – 1x
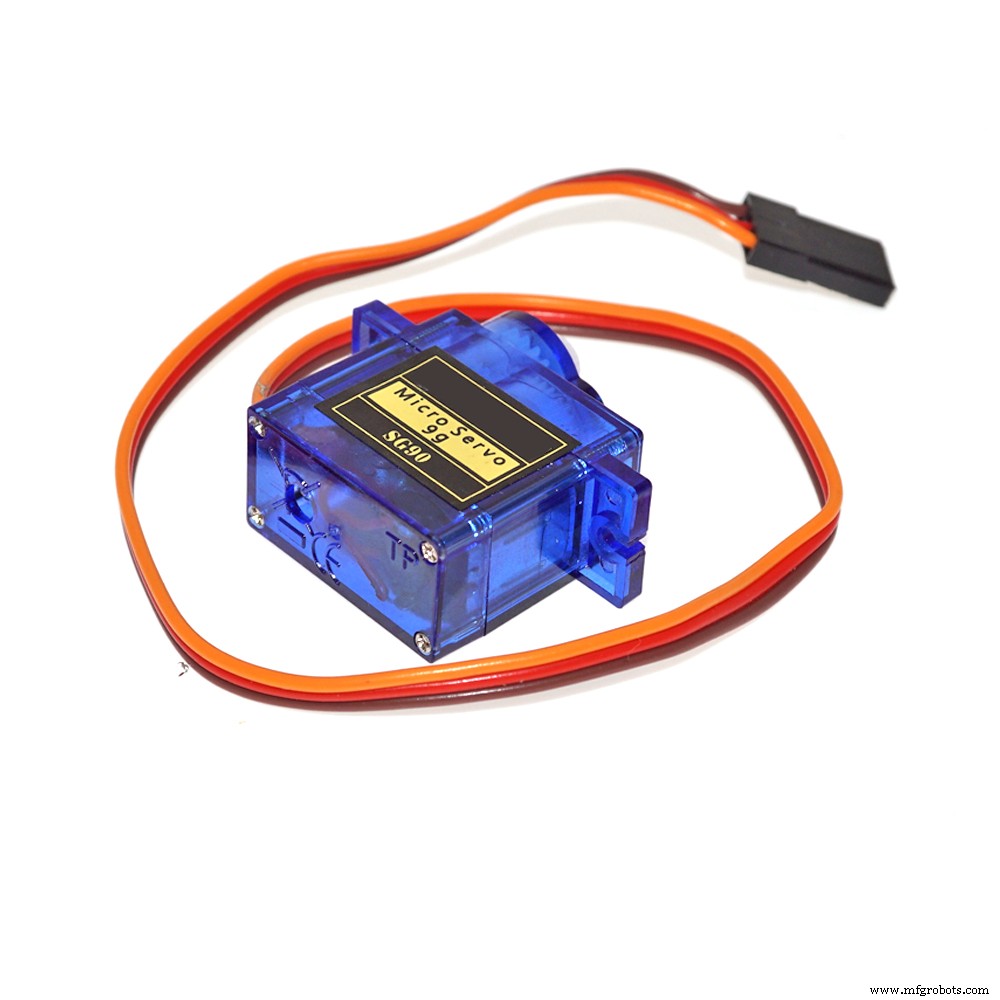
- 微型伺服 Sg90 – 3x
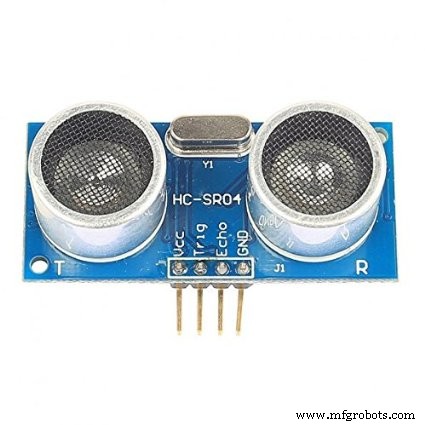
- 超音速传感器 HCsr04– 1x
身体——
- PVC 片材(最好是白色的,更适合上色,我用的是蓝色的)
- 伺服轮(用于支架)
工具:
- 切刀
- 剪刀
- 热胶
- 喷漆
软件 -
- Python3
- Arduino.ide
原则:
在进入实际建筑之前,很高兴知道我们将要做什么。
那么,主要代码或代码的AIpart会在电脑上运行,为什么呢?因为它支持 python 并且比小 Arduino 具有更多的处理能力,而且人工智能机器人将控制/自动化我的电脑的一些任务,它必须在我的电脑上运行。因此,Arduinoboard 使用 USB 电缆连接到我的计算机。
这个想法是运行一个 python 程序,该程序将执行 Speech totext 部分,处理文本,还将执行 Text to Speech。意味着机器人会倾听、理解和回应。对于身体运动,我在 Arduino 板中保存了一些运动(封装在函数中)。每个动作的函数都由python代码执行。
例如——如果机器人必须说“嗨/你好”,python 代码将发送一个字节“h”,然后 Arduino 执行 hi() 函数。就这么简单。
现在你有了想法,让我们继续下一个过程。
电路和电子
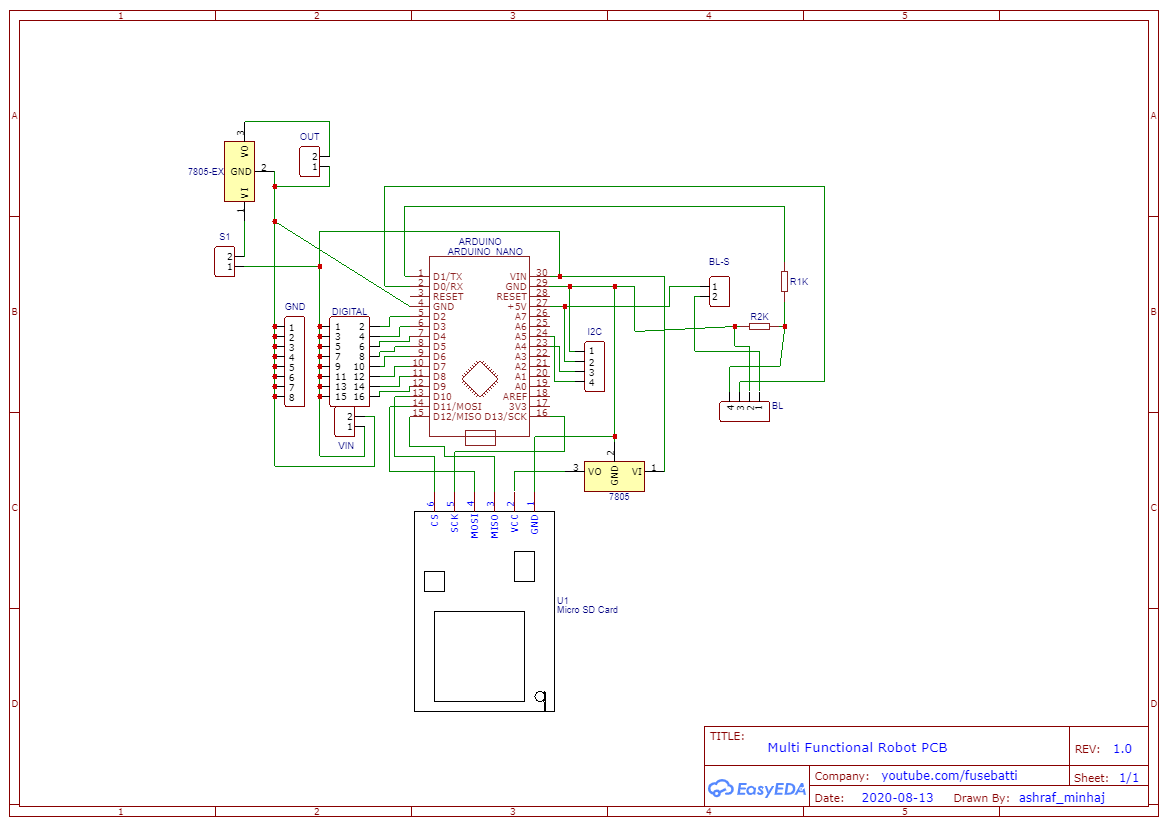

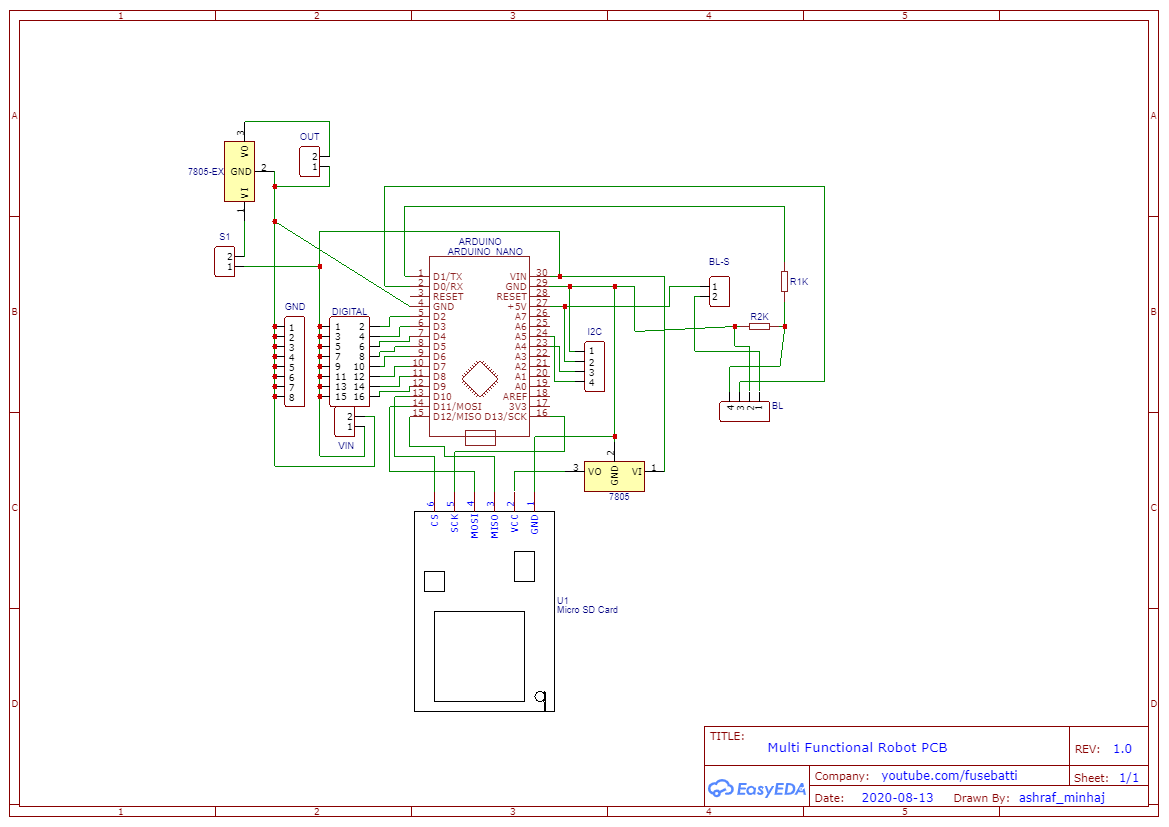
电路是让大多数制造商烦恼的事情。如果出现问题,您可能会烧毁一些昂贵的零件。为此,我设计了一块可用于制作众多项目的 PCB 板。它有micro SD卡插槽,蓝牙模块插槽,5v外部电源,全部由Arduino Nano供电。
我使用 EasyEDA 设计了一块 PCB,并使用 PCBWay 在线服务打印。他们的服务很棒。我下令使用 PCB 即时报价,他们的系统会自动为我完成所有工作。三天之内,我从中国到孟加拉都拿到了板子。质量太棒了,阻焊很完美,线条/走线,光洁度尽可能好。
无论如何,我使用了 300 mmtrace,因为它可以承受 1Amp 电流。
你可以从这里下载PCB文件。
焊接东西和测试电路:
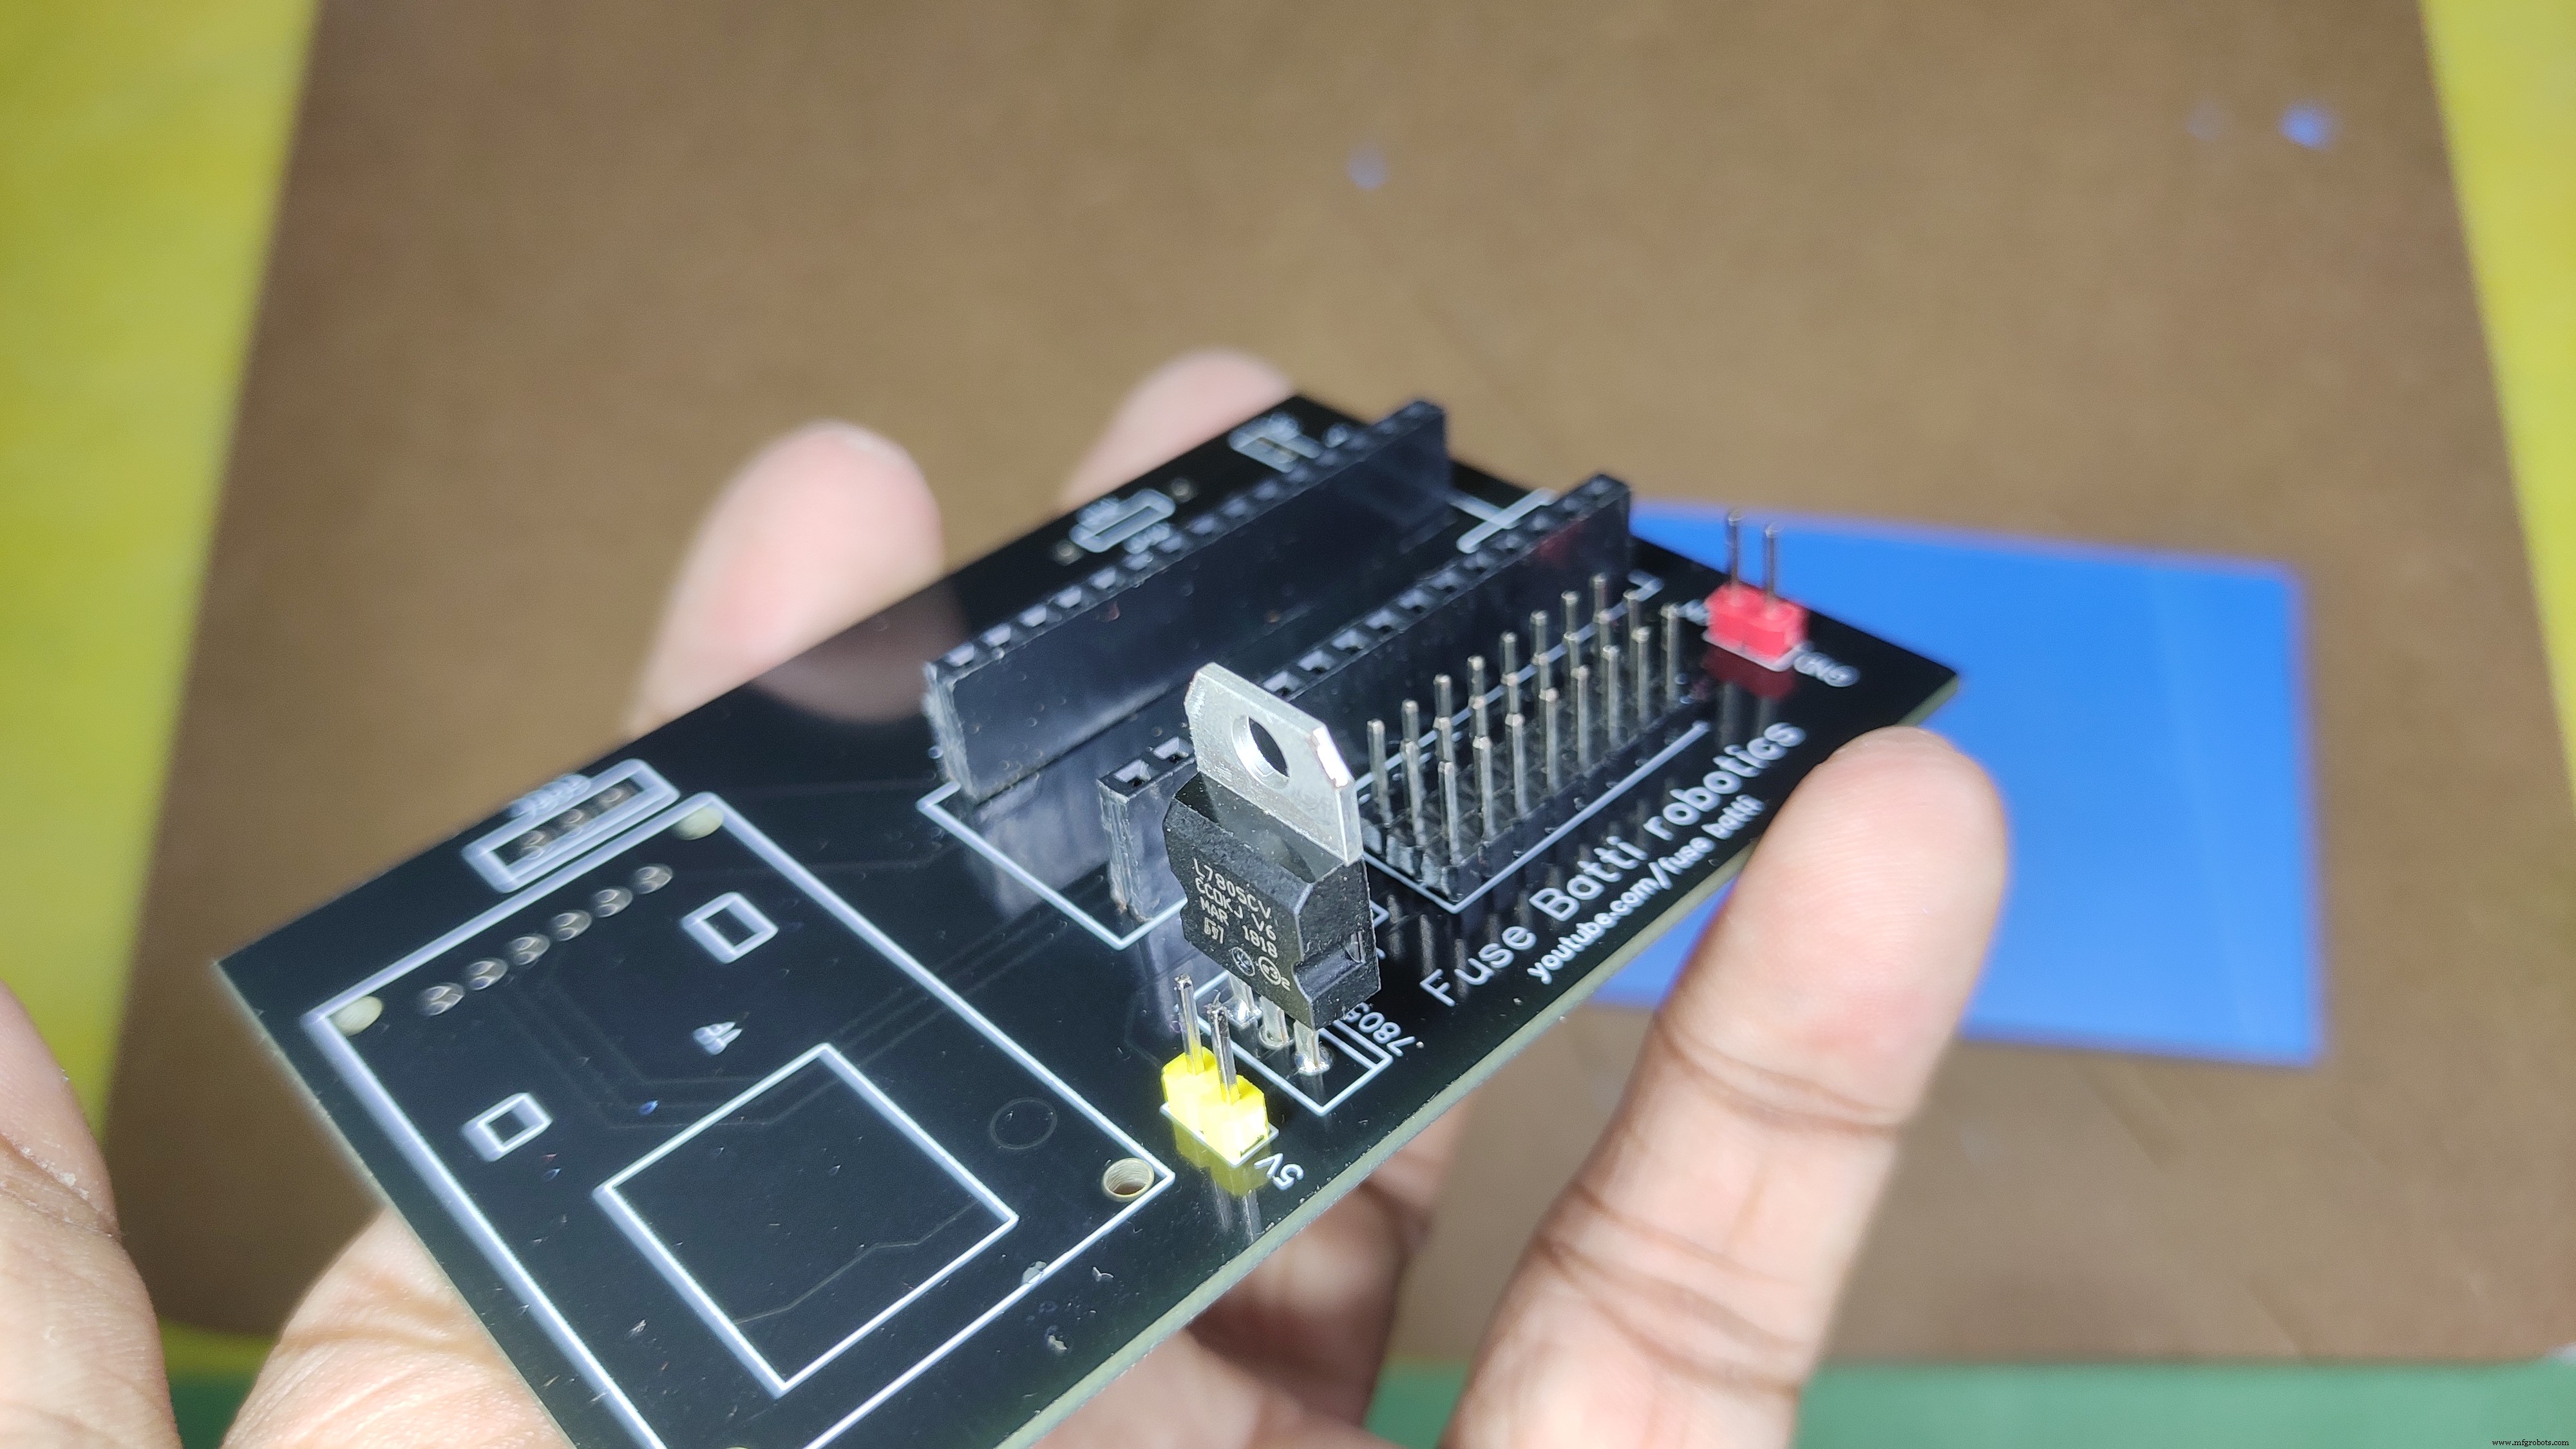
在这一步中,我焊接了所有东西。小心不要吸入烟雾,它可能会导致癌症。
我没有使用蓝牙模块或 TF 模块,所以我没有焊接它们。好消息是,我使用了 3 伺服电机和一个声纳传感器,所有东西都可以通过我们连接的 USB 电缆轻松供电,以对 Arduino 进行编程。这很棒,因为我们不必考虑其他电源。
但是,如果您仍然想使用外部电池,那么请选择 lipo 2s (7.4V) 电池,超过这个数量会导致伺服器烧毁。
制作身体:
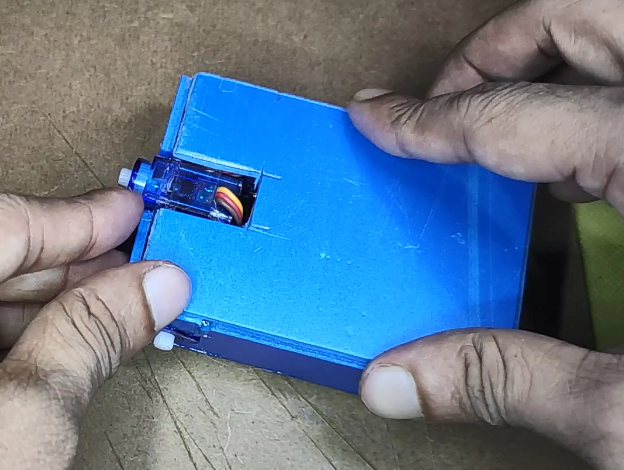
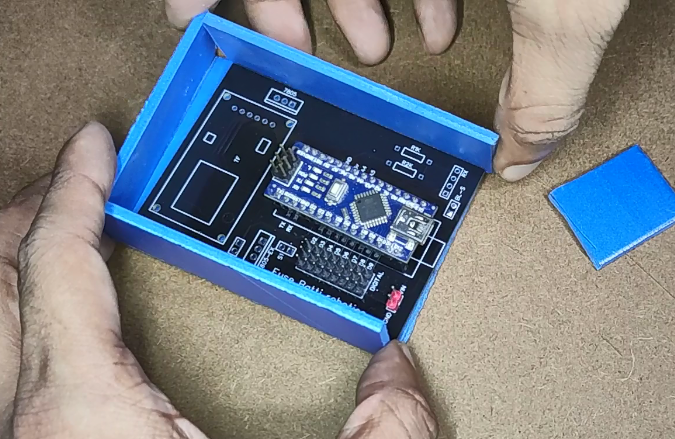
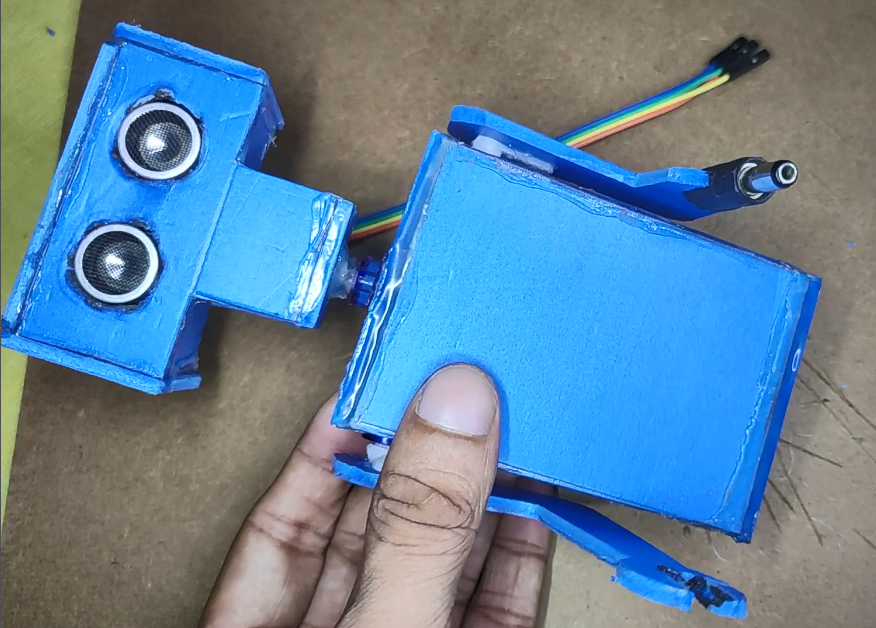

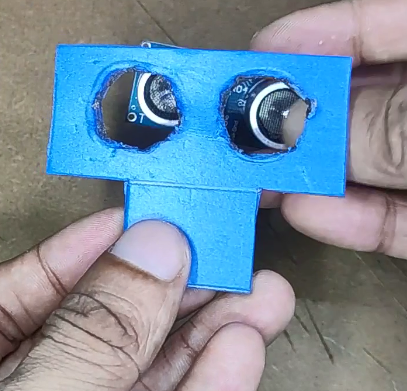
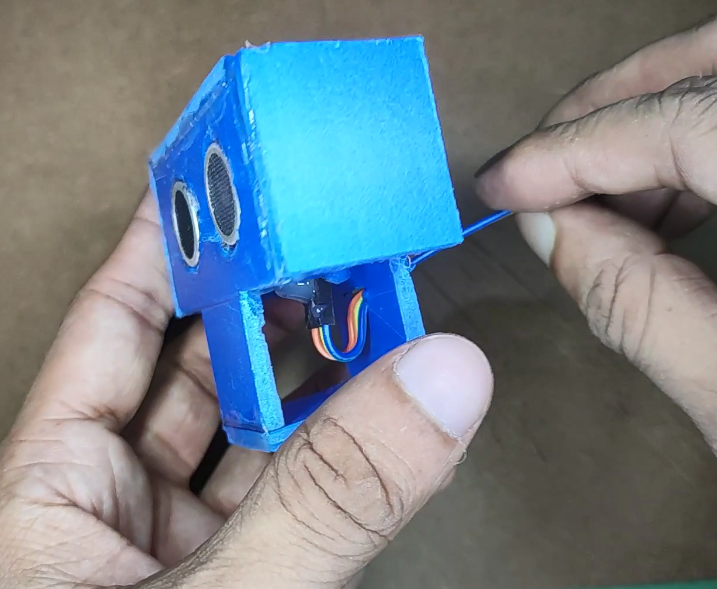
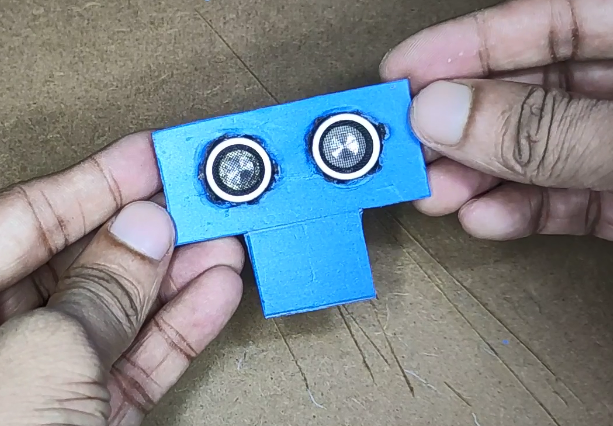
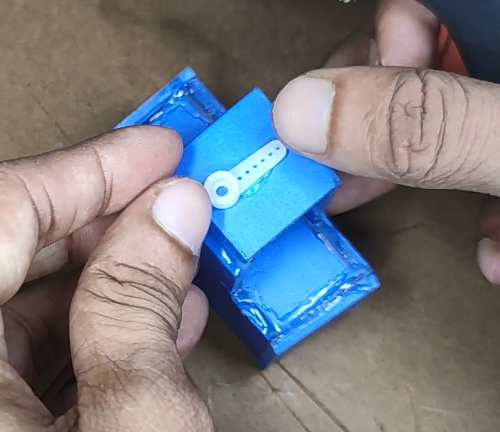
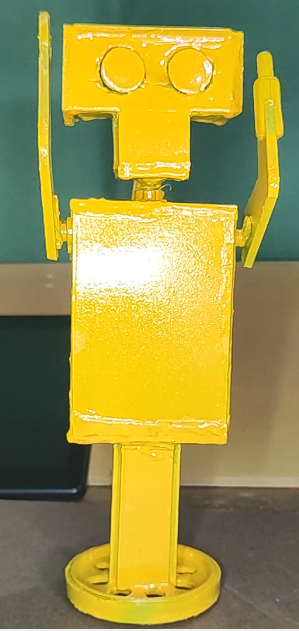
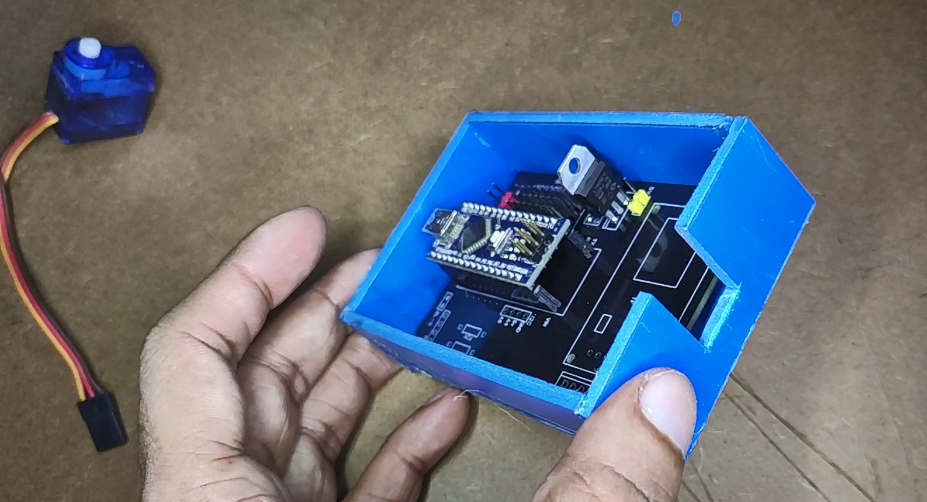
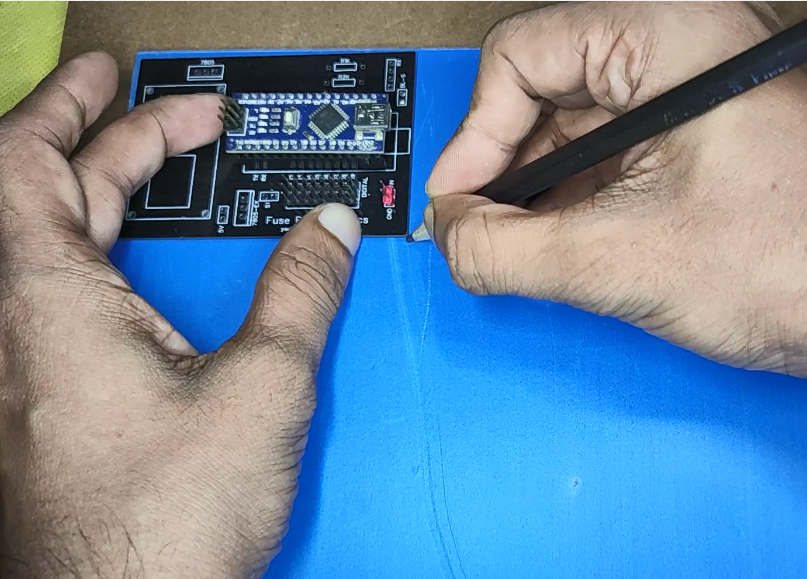
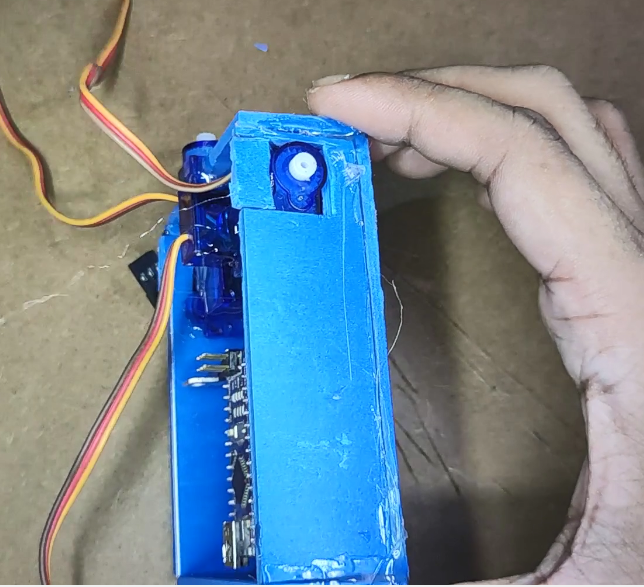
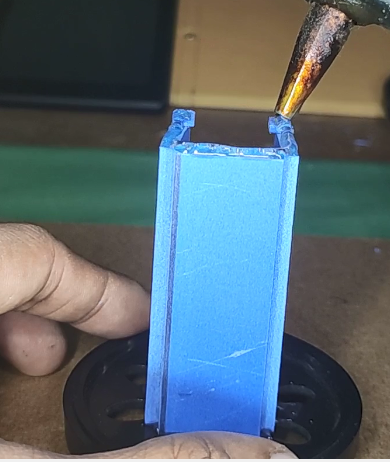
我用PVC片做身体,你也可以用纸板。首先,我为主要部分做了一个盒子,里面有主板和伺服电机。这就像制作盒子一样。我以同样的方式制作了头部,为传感器(作为眼睛)制作了两个孔。我已经添加了你需要的所有图片。我让一只手像扳手,另一只手像塞子。我实际上使用了一个插头并使用热胶将其添加到一个手臂上。
方面?其实没有,因为它是你的机器人,你可以用一些简单的工具制作它,随心所欲,制作成任何形状和大小。
在关闭机身之前要非常小心地添加所有电子设备。在我放置传感器和所有电子设备后,我对车身进行了涂漆。不要那样做,我已经将我的 Arduino 染成黄色。
所以,在完成车身后进行油漆,然后放置所有电子设备。
编码 1(Python):
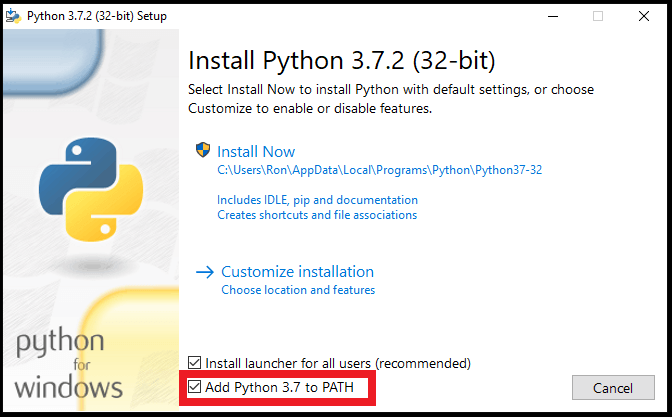
从本站下载 Python,安装时确保将 python 添加到您的路径中。
安装 Python 后,您需要从命令提示符/终端运行一些命令来安装用于语音识别、音频支持、文本到语音、浏览器自动化、串行通信目的的库。运行这些命令 -
pip installspeechrecognitionpip install pyaudiopip install pyttsx3pip install pywhatkitpip install pyserial 然后从这里下载pythoncode或从下面复制。开始编码2步骤。
""" JAUNDICE:AI Assistant robot with Arduino and Pythonauthor:ashraf minhajmail:ashraf_minhaj@yahoo.comLast Edit:Nov 2020License:Copyright (C) Ashraf Minhaj.General Public License (GPL3+)"""import speech_recognition as sr # 语音识别库import random # 从列表中选择随机单词import pyttsx3 # offline Text to Speechimport datetime # 获取日期和时间import webbrowser # 打开和执行网络任务import serial # 用于串行通信import pywhatkit # 用于更多网络自动化# 声明机器人名称(唤醒词)robot_name ='jaundice'# 随机词 listhi_words =['hi', 'hello', 'yo baby', 'salam']bye_words =['bye', 'tata', 'hasta la vista' ]r_u_there =['are you there', 'you there']# initilize thingsengine =pyttsx3.init() # 初始化文本到语音引擎#voices =engine.getProperty('voices') #check for voices#engine.setProperty( 'voice', voices[1].id) # women voicelistener =sr.Recognizer() # 初始化语音识别API#连接NiNi mot或驱动板通过串行通信try:port =serial.Serial("COM15", 9600) print("Phycial body, connected.")except:print("Unable to connect to my physical body")def listen():"" "听用户说""" try:with sr.Microphone() as source:# get input from mic print("Talk>>") voice =listener.listen(source) # 从麦克风监听 command =listener.recognize_google (voice).lower() # 使用谷歌 API # 所有单词小写-以便我们可以轻松处理 #command =command.lower() print(command) # 在开头查找唤醒词 if (command.split(' ')[0] ==robots_name):# 如果找到唤醒词.... print("[wake-up word found]") process(command) # 调用进程函数来采取行动除了:passdef process(words) :""" 处理用户所说的并采取行动 """ print(words) # 检查它是否收到任何命令 # 在 word_list 中打断单词 =words.split(' ')[1:] # 按空格分割并忽略唤醒-up word if (len(word_list)==1):if (word_list[0] ==robots_name):talk("How Can我帮你?") #.write(b'l') return if word_list[0] =='play':"""if命令播放东西,从youtube播放""" talk("好的老板,播放" ) extension =' '.join(word_list[1:]) # 不带命令词搜索 port.write(b'u') pywhatkit.playonyt(extension) port.write(b'l') return elif word_list[0] =='search':"""if 命令用于谷歌搜索""" port.write(b'u') talk("好的老大,正在搜索") port.write(b'l') extension =' '.join (word_list[1:]) pywhatkit.search(extension) 返回 if (word_list[0] =='get') and (word_list[1] =='info'):"""if 命令获取信息""" port.write(b'u') talk("好吧,我说得对") port.write(b'u') extension =' '.join(word_list[2:]) # 不带命令词搜索 inf =pywhatkit.info(extension) talk(inf) # 从结果中读取 return elif word_list[0] =='open':"""if 命令打开 URL""" port.write(b'l') talk(" Opening, sir") url =f"http://{''.join(word_list[1:])}" # 使 URL webbrowser.open(url) return elif word_list[0] =='uppercut':port.write(b'U') elif word_list[0] =='smash':port.write(b's') elif word_list[0] =='punch':port.write(b'p') # 现在检查匹配 word_list 中的单词:if word in hi_words:""" 如果用户说 hi/hello 相应地向他打招呼""" port.write(b'h') # 发送命令到挥手谈话(random.choice(hi_words) ) elif word in bye_words:""" if user say bye etc""" talk(random.choice(bye_words))def talk(sentence):""" talk / response to the user """ engine.say(sentence) engine.runAndWait()# 运行应用程序同时 True:listen() # 运行一次监听
编码2(Arduino):
这部分很容易,无需安装。使用 Arduino.ide 对开发板进行编程。如果您以前从未使用过 Arduino,请从这里下载。
正如我之前提到的,Arduino 程序等待串行数据,如果它收到任何数据,它会检查字节数据。如果数据与预定义命令匹配,则它执行语句。如果发送'u',它会使两只手都举起来,就像那样。
从这里下载代码从下面复制。
/** 黄疸:带有 Arduino 和 Python 的 AI 助手机器人 *** * 作者:ashraf minhaj* 邮件:ashraf_minhaj@yahoo.com* 最后编辑:2020 年 11 月* * 许可证:版权所有 (C) Ashraf Minhaj .* General Public License (GPL3+)*/#includeServo head;Servo l_hand;Servo r_hand;//定义声纳传感器的pinsint trig =4;int echo =5;//收到的数据字节val =""; void setup() { // 把你的设置代码放在这里,运行一次: head.attach(2); l_hand.attach(3); r_hand.attach(4); Serial.begin(9600); // 用于通过串口与 Python 通信}void Standby(){ // 所有电机到这些位置 head.write(90); int r_pos =30; int l_pos =map(r_pos, 0, 180, 180, 0); l_hand.write(l_pos); r_hand.write(r_pos);}void hi(){ // 所有马达到这些位置 head.write(90); int i =0; for(i=30; i<=170; i++){ r_hand.write(i);延迟(5); } for(i=170; i>=100; i--){ r_hand.write(i);延迟(5); } for(i=100; i<=170; i++){ r_hand.write(i);延迟(5); } for(i=170; i>=30; i--){ r_hand.write(i);延迟(5); }standby();}void hands_up(){ // 对每个命令都这样做(没什么,只是稍微移动一下手) //head.write(150); //延迟(300); //head.write(90); int i =0; for(i=30; i<=170; i++){ int r_pos =i; int l_pos =map(r_pos, 0, 180, 180, 0); l_hand.write(l_pos); r_hand.write(r_pos);延迟(5); } 延迟(600); for(i=170; i>=30; i--){ int r_pos =i; int l_pos =map(r_pos, 0, 180, 180, 0); l_hand.write(l_pos); r_hand.write(r_pos);延迟(5); }}void weight_lift(){ // 双手举重 int i =0; for(i=30; i<=170; i++){ int r_pos =i; int l_pos =map(r_pos, 0, 180, 180, 0); l_hand.write(l_pos); r_hand.write(r_pos);延迟(5); } for(int count=0; count<=4; count++){ for(i=170; i>=60; i--){ int r_pos =i; int l_pos =map(r_pos, 0, 180, 180, 0); l_hand.write(l_pos); r_hand.write(r_pos);延迟(5); } for(i=60; i<=170; i++){ int r_pos =i; int l_pos =map(r_pos, 0, 180, 180, 0); l_hand.write(l_pos); r_hand.write(r_pos);延迟(5); } } for(i=170; i>=30; i--){ int r_pos =i; int l_pos =map(r_pos, 0, 180, 180, 0); l_hand.write(l_pos); r_hand.write(r_pos);延迟(5); }}void 兴奋(){ return;}void look_left(){ // 向左旋转 hed head.write(180);}void Confused(){ for(int count=0; count<=1; count++){ head .写(30); r_hand.write(170);延迟(700); r_hand.write(30);头写(120); l_hand.write(30);延迟(700); l_hand.write(160); }standby();}void double_punch(){ // 打一拳 int i =0; for(i=30; i>=0; i--){ int r_pos =i; int l_pos =map(r_pos, 0, 180, 180, 0); l_hand.write(l_pos); r_hand.write(r_pos);延迟(5); } 延迟(2000); int r_pos =80; int l_pos =map(r_pos, 0, 180, 180, 0); l_hand.write(l_pos); r_hand.write(r_pos);延迟(500); Standby();}void r_upper_cut(){ // 使右上切 int i =0; for(i=30; i<=170; i++){ int r_pos =i; int l_pos =map(r_pos, 0, 180, 180, 0); l_hand.write(l_pos); r_hand.write(r_pos);延迟(5); } for(int count=0; count<=4; count++){ int i =0; for(i=170; i>=60; i--){ r_hand.write(i);延迟(1); } for(i=60; i<=170; i++){ r_hand.write(i);延迟(1); } } 支持(); delay(100);}void smash(){ // 粉碎东西 int i =0; for(i=30; i<=170; i++){ int r_pos =i; int l_pos =map(r_pos, 0, 180, 180, 0); l_hand.write(l_pos); r_hand.write(r_pos);延迟(5); } 延迟(2000); for(i=170; i>=0; i--){ int r_pos =i; int l_pos =map(r_pos, 0, 180, 180, 0); l_hand.write(l_pos); r_hand.write(r_pos);延迟(1); } 延迟(300); int r_pos =180; int l_pos =map(r_pos, 0, 180, 180, 0); l_hand.write(l_pos); r_hand.write(r_pos);延迟(1000); Standby();}void eye_detect(){ // 如果眼传感器检测到运动,则做一些事情 return;}void loop() { // 把你的主要代码放在这里,重复运行:standby(); while(Serial.available()> 0) //查找串行数据是否可用 { val =Serial.read(); //读取串行值 if(val =='h'){ // do hi hi(); } if(val =='p'){ // 嗨 double_punch(); } if(val =='u'){ hand_up();延迟(3000); } if(val =='l'){ 备用();看左边();延迟(2000); } if(val =='U'){ // 上勾 r_upper_cut();延迟(2000); } if(val =='s'){ 粉碎();延迟(2000); } }} 上传代码。
全部放在一起完成:
完成所有这些步骤后,我使用 USB 电缆将我的 Arduino 连接到电脑,然后运行 python 程序。当您使用它时,请确保在 python 代码中添加正确的 Arduino 端口。如果你按照我提到的方式做了所有事情,那么机器人应该会像魅力一样工作。
谢谢!
代码
源代码
https://github.com/ashraf-minhaj/JAUNDICE-AI-Assistant-Robot示意图
制造工艺
- 使用 Raspberry Pi 和 Python 构建机器人
- 使用 Arduino 和 Raspberry Pi 构建您的 Internet 控制的视频流机器人
- Python 中的 type() 和 isinstance() 示例
- 使用 Arduino 和 RFID 和 Python 的考勤系统
- 带伺服电机的机器人避障
- 使用 Arduino 和 Android 设备控制 Roomba 机器人
- 使用 Arduino 和 MPU6050 控制伺服电机
- u-blox LEA-6H 02 GPS 模块,带有 Arduino 和 Python
- 使用 Arduino 进行语音识别和合成
- 自主家庭助理机器人
- 使用 Android 应用程序控制 Arduino 机械臂
- 智能会说话的人形机器人,仅使用 Arduino!


