

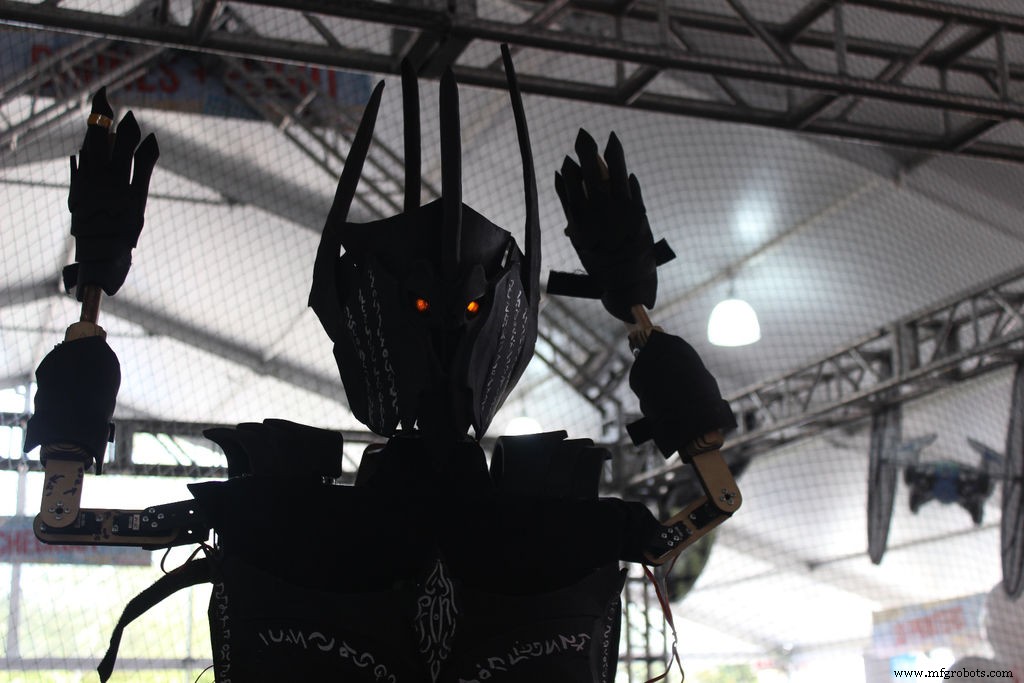
如何打造机器人之王索伦
组件和用品
 |
| × | 1 | |||
 |
| × | 1 | |||
 |
| × | 1 |
必要的工具和机器
 |
|
应用和在线服务
 |
|
关于这个项目
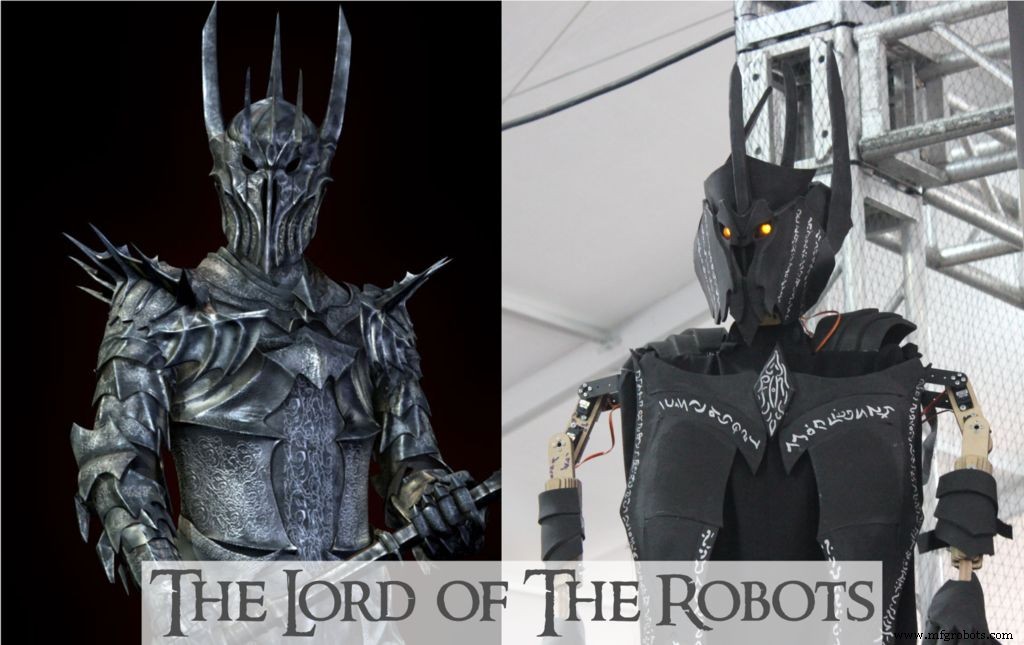

你是指环王系列电影的粉丝吗?如果是这样你肯定知道“索伦”!
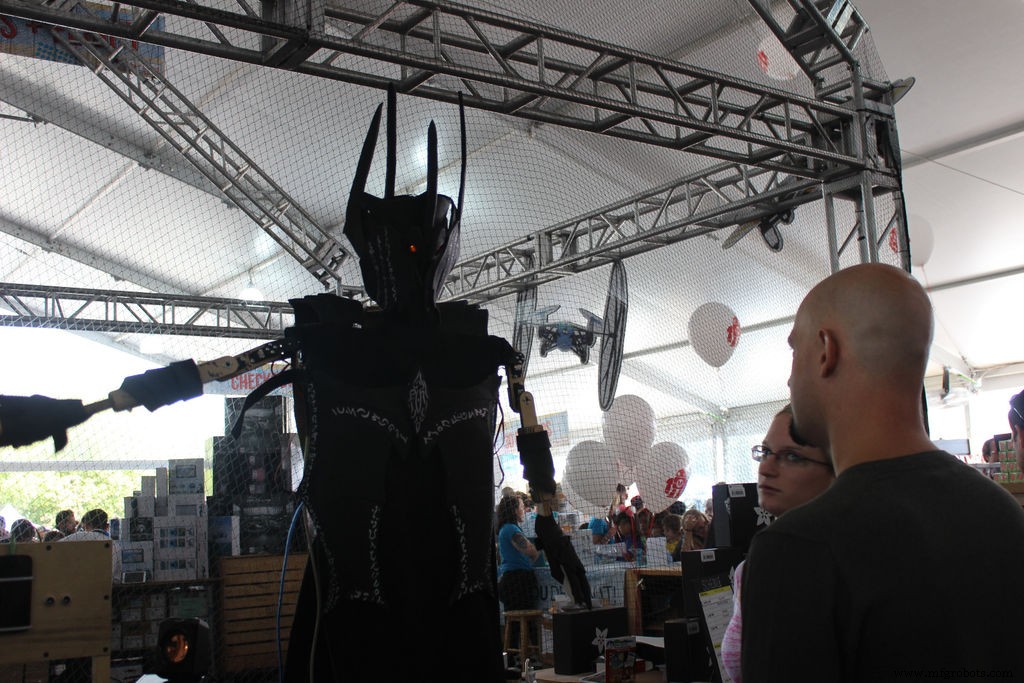
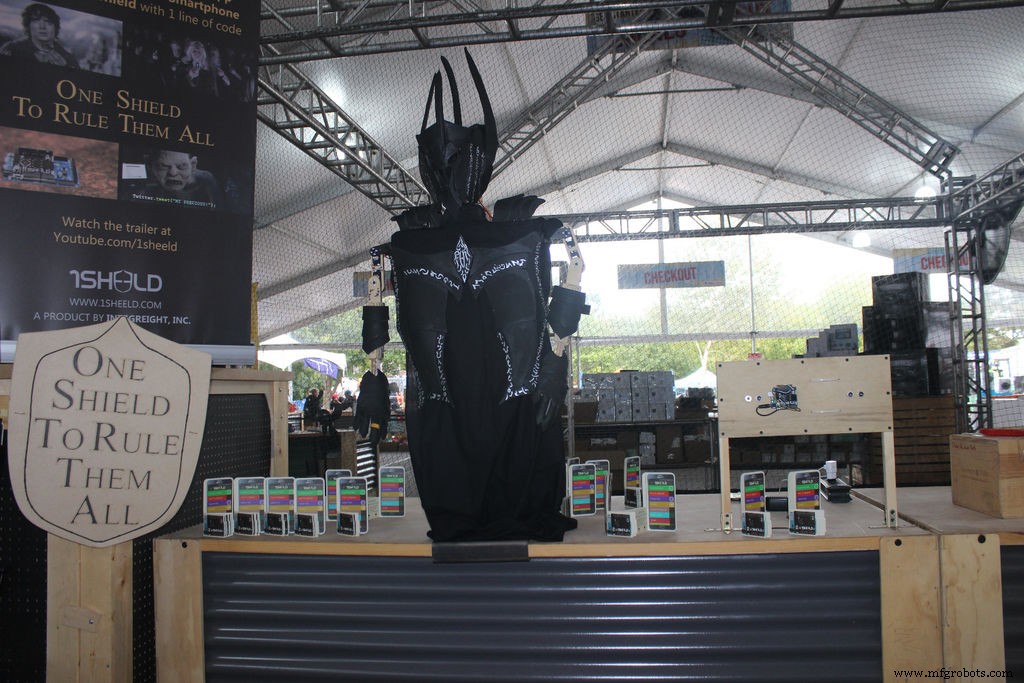
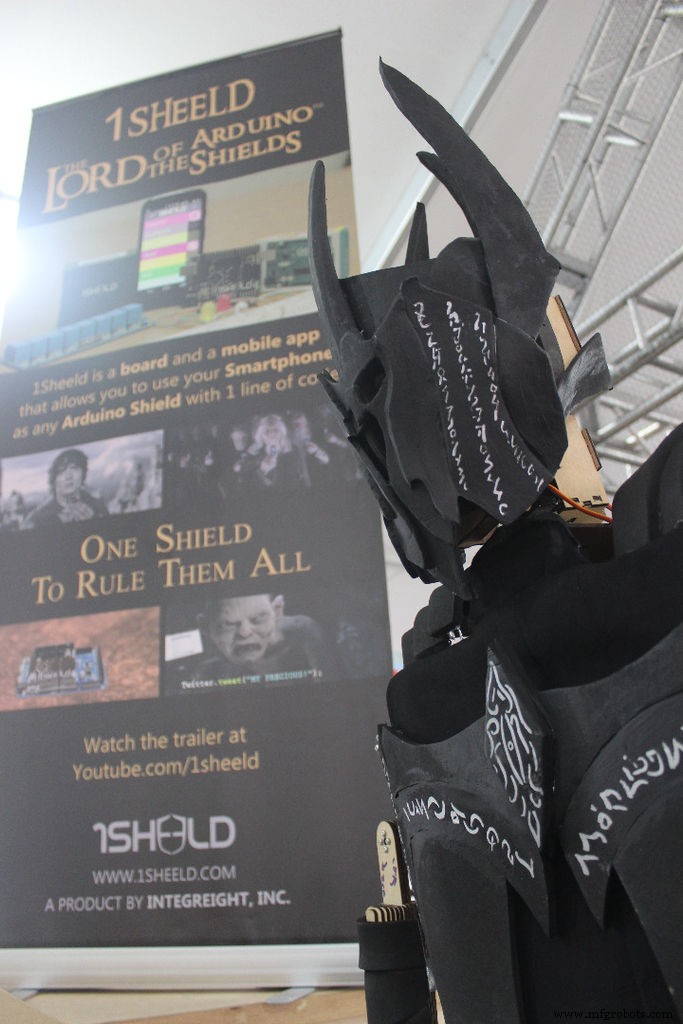
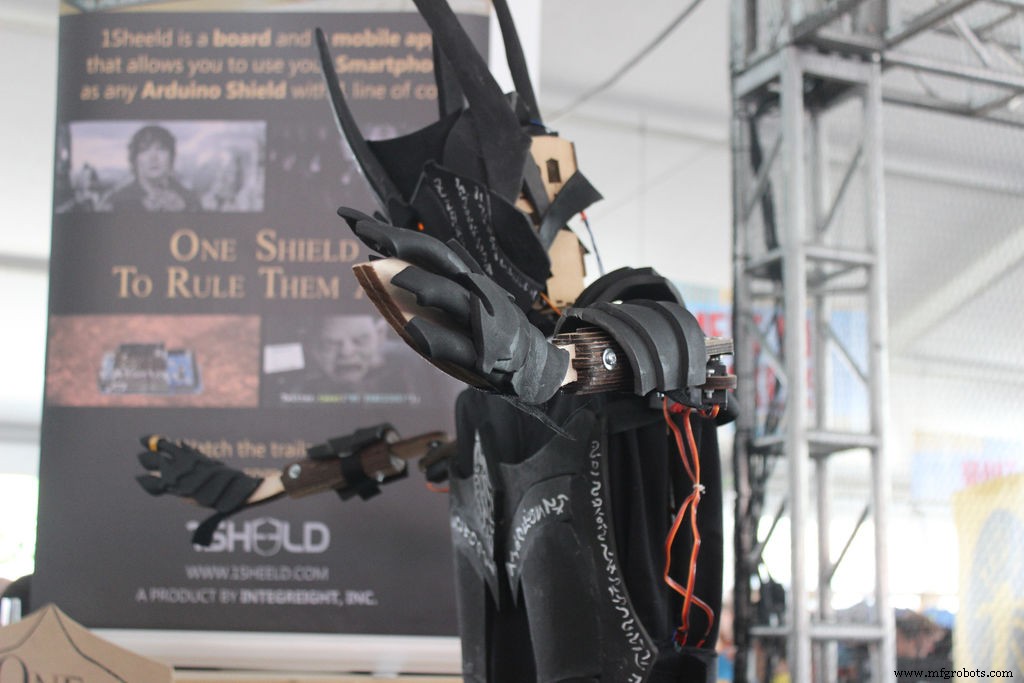
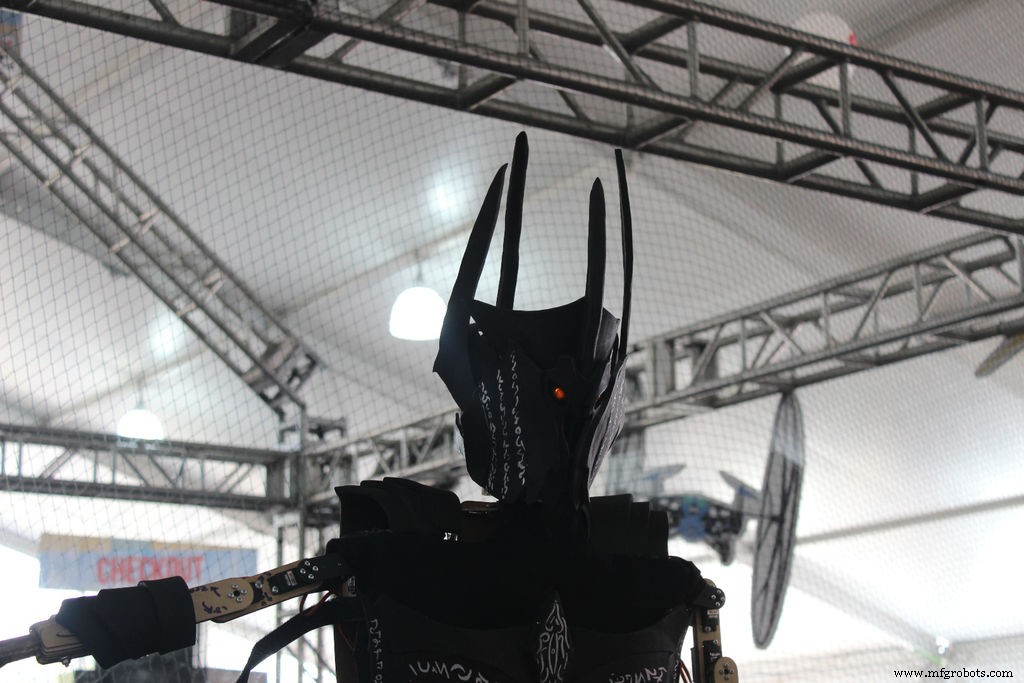
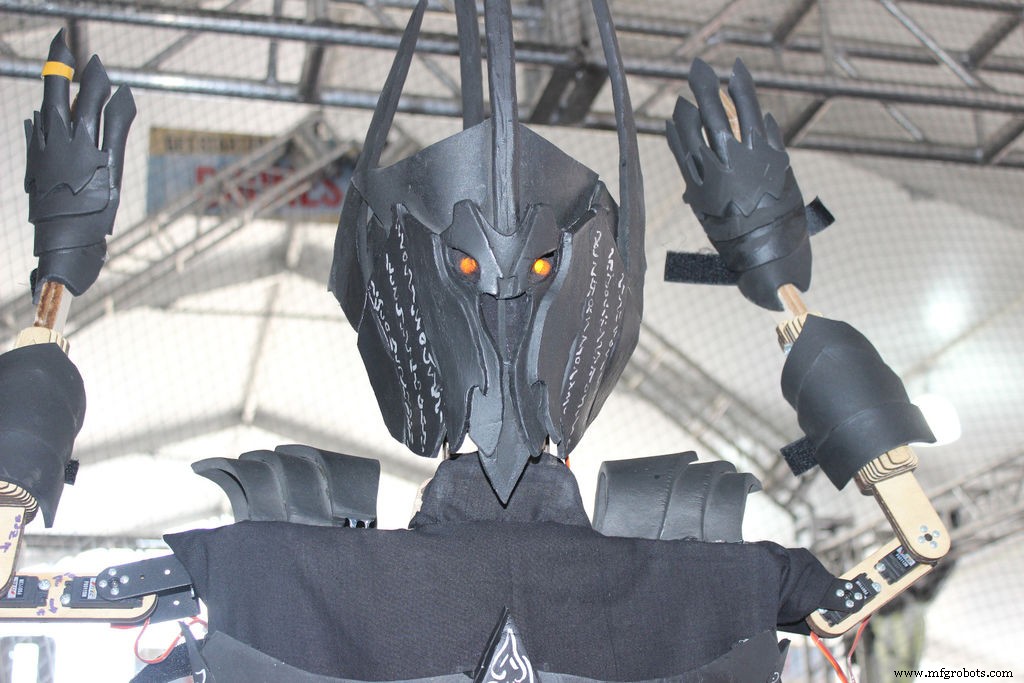
在这个项目中,我们将建造一个人类大小的半人形机器人,看起来像 Sauron :)
机器人有两个 3 DOF 手臂和一个 3 DOF 头部和一个固定底座。 机器人 Sauron 可以在三种模式下运行,您可以使用连接到两个数字输入引脚的两个按钮在这些模式之间切换:
1.待机模式 此模式用于在任何情况下展示机器人外壳,机器人执行一系列动作以吸引参与者。
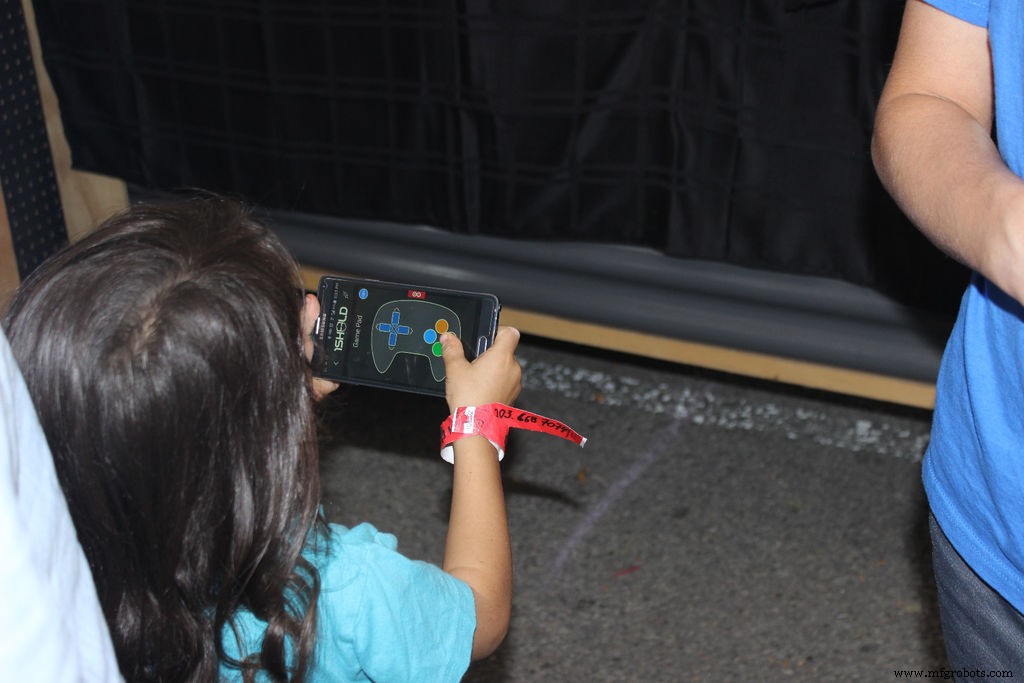
2.游戏手柄模式 在这种模式下,活动参与者可以使用 1Sheeld 应用程序中的 Gamepad shield 控制机器人。
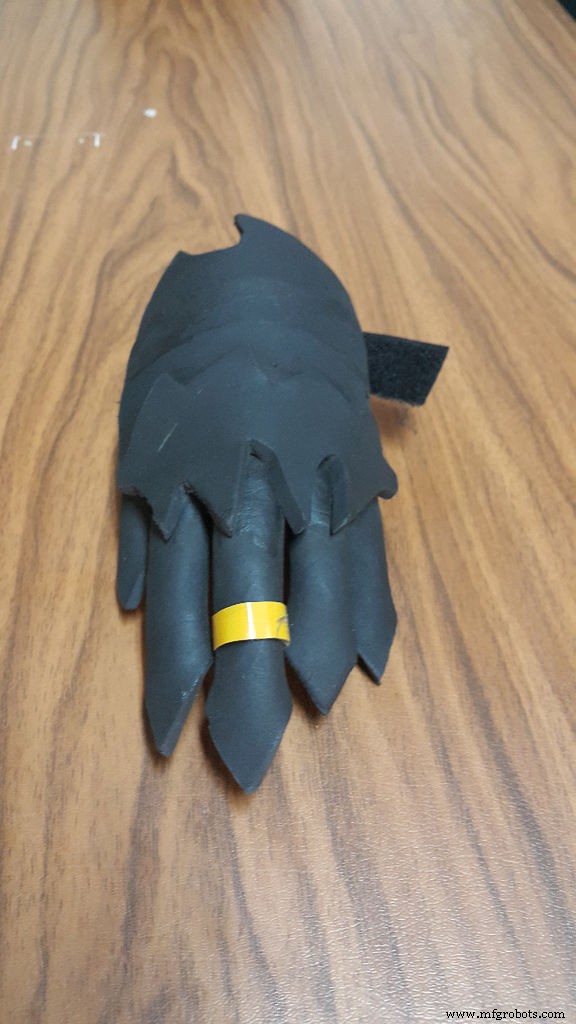
3.模仿模式 在这种模式下,机器人可以像 Real Steal Movie 中的孩子一样模仿活动参与者的动作。因此,您将戴上手套,将智能手机固定在其上,Arduino 将读取您的智能手机传感器值,例如方向和陀螺仪,然后使用这些值来控制机器人的手臂。
我做这个项目是为了参加纽约创客嘉年华,让孩子们开心并激励他们使用现代技术,特别是开发平台,如 Arduino 和 1Sheeld 来构建他们的电影角色,如 Real Steal 电影中的 ATOM 或指环王中的 Sauron电影系列。我已经包含了所有需要的文件(CAD 图纸、电路原理图和布局、Arduino 代码和激光切割机的 dxf 文件)来帮助任何人构建他自己的 Sauron :)
让我们开始构建机器人之王。
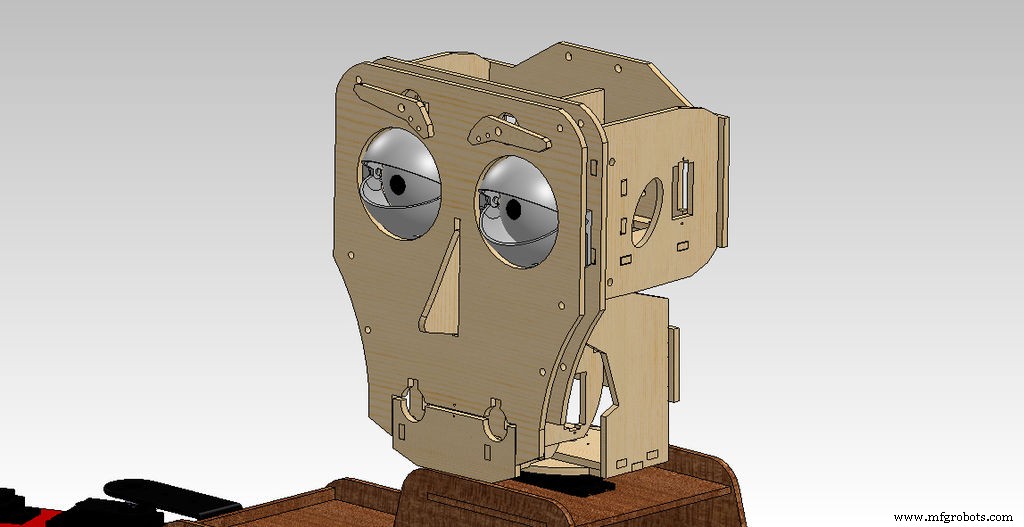
第 1 步:构建机器人的头部
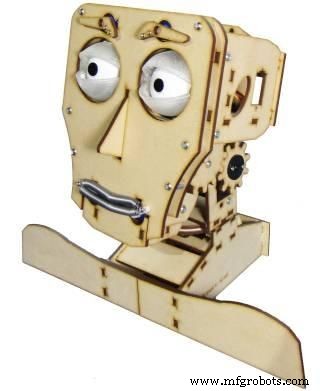
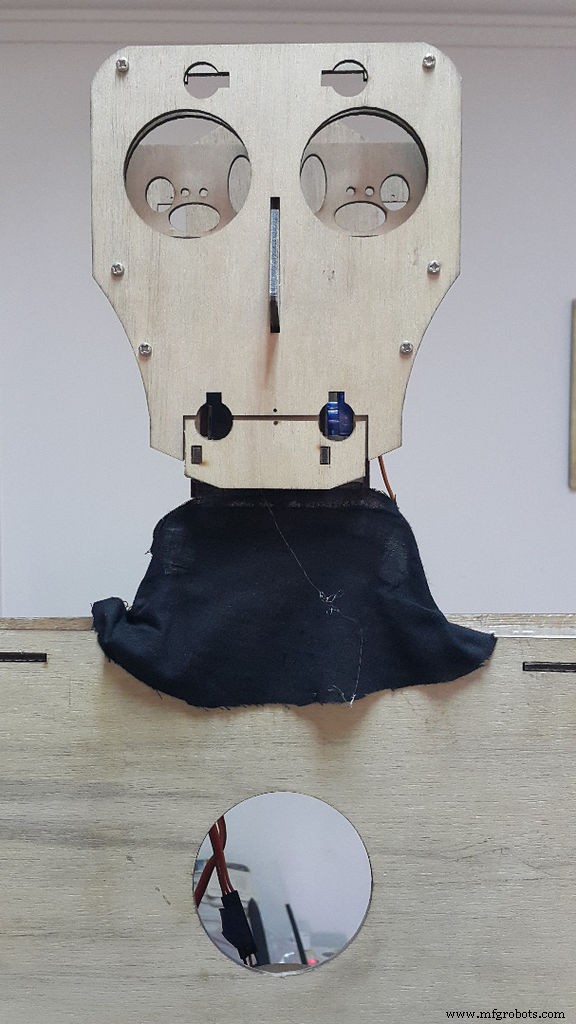
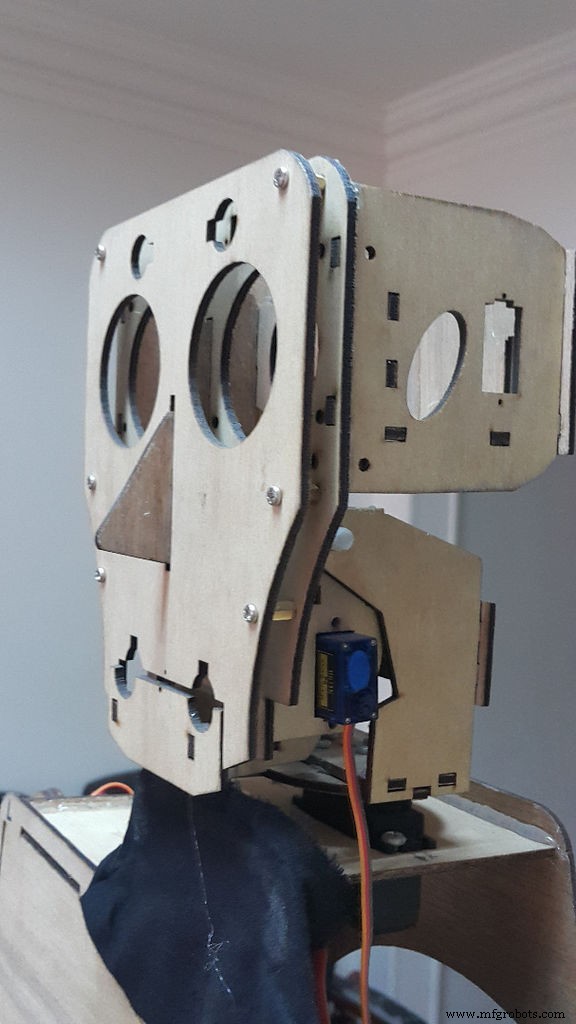
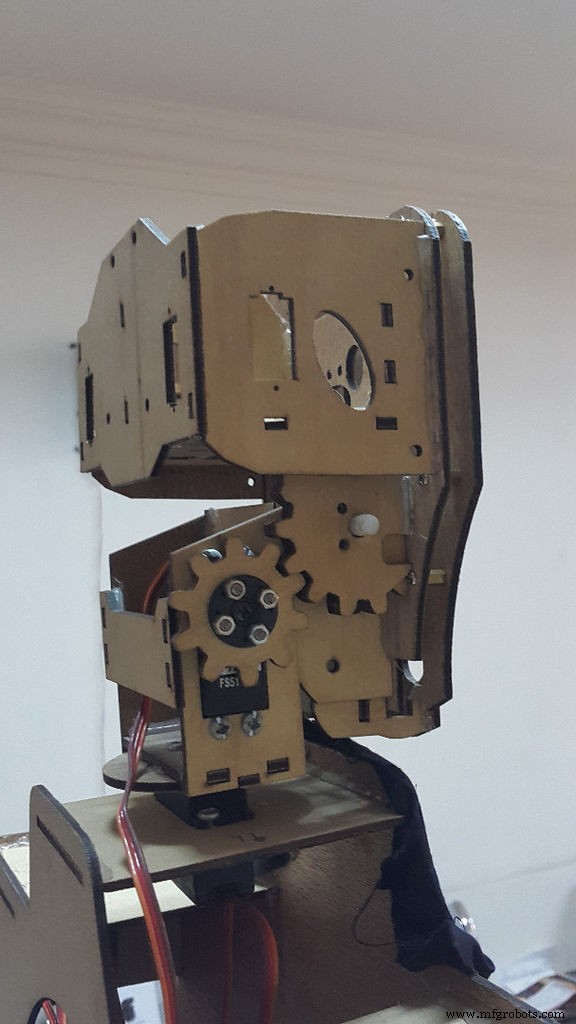
为了节省时间和精力,我决定不重新发明轮子,因此我没有设计新的机器人头部,而是使用了来自 xyzbot 的这个出色的开源机器人头部“Fritz”。我下载了他们的激光切割机文件,然后我在附近的创客空间使用激光切割机切割头部部件。在我的情况下,我试图减少时间和成本,所以我跳过了 3D 打印眼睛部分然后我跳过了嘴唇和眉毛.
我使用 3mm 胶合板来实现头部部件,使用激光切割机切割这些部件后,请按照随附的视频组装套件,但要注意以下几点:
1. 您将跳过组装底座。
2. 您将跳过与眼睛 3D 打印部分相关的所有步骤。
3.您将跳过与眉毛和嘴唇相关的所有步骤。
Open_Source_Files.zip FFRDB2LIKJ8MS1G.dxf
第 2 步:构建机器人的身体
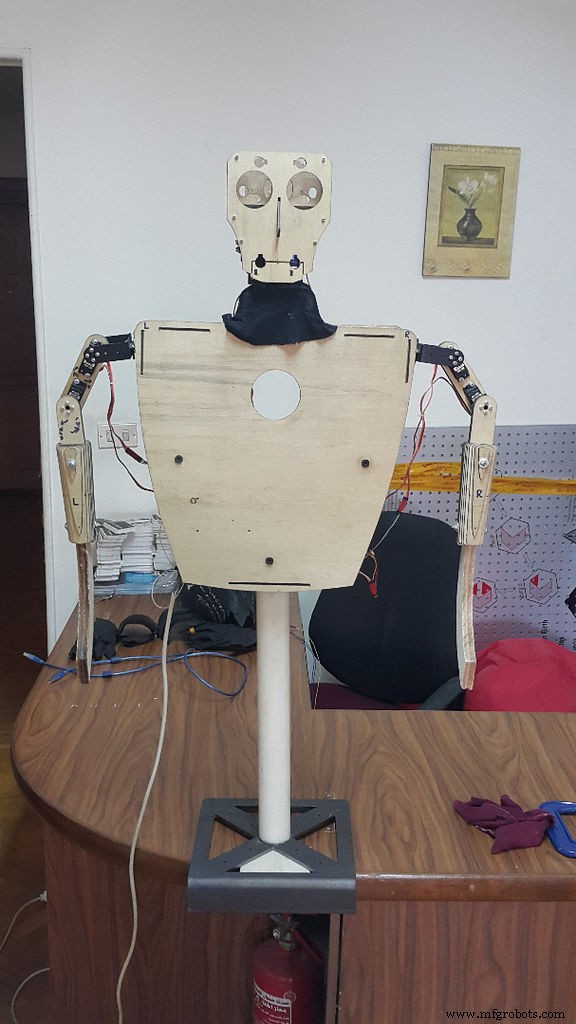
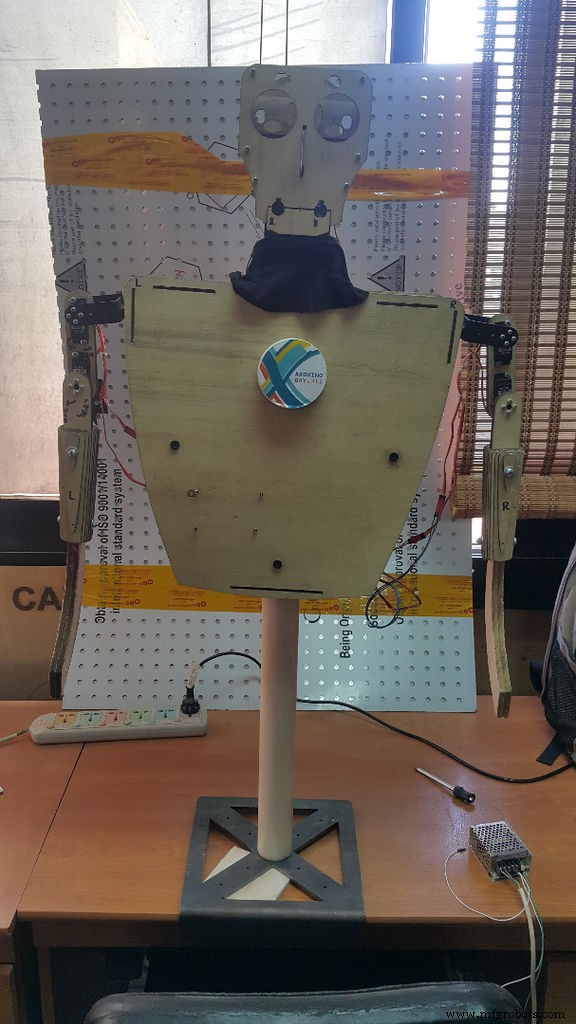

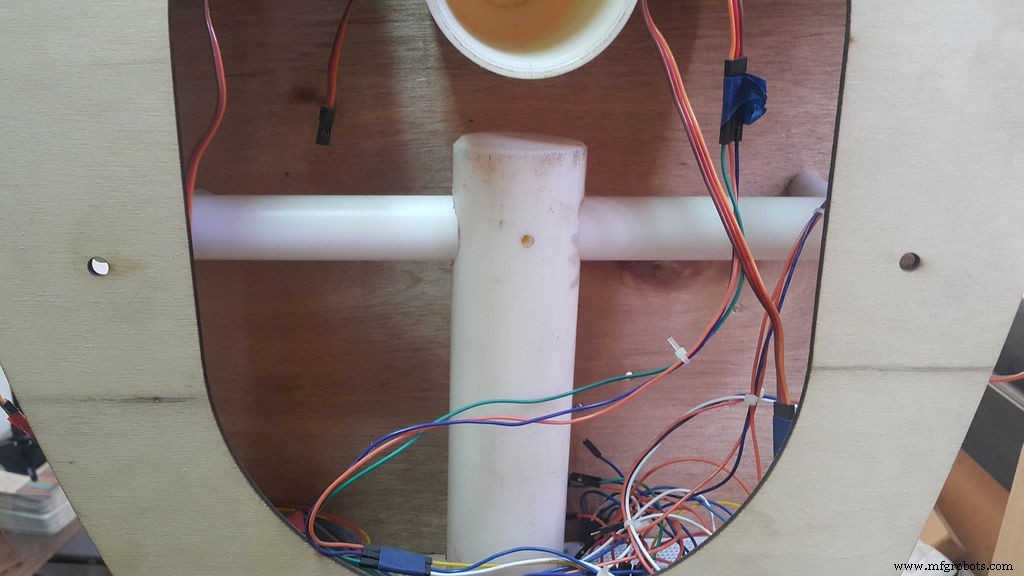
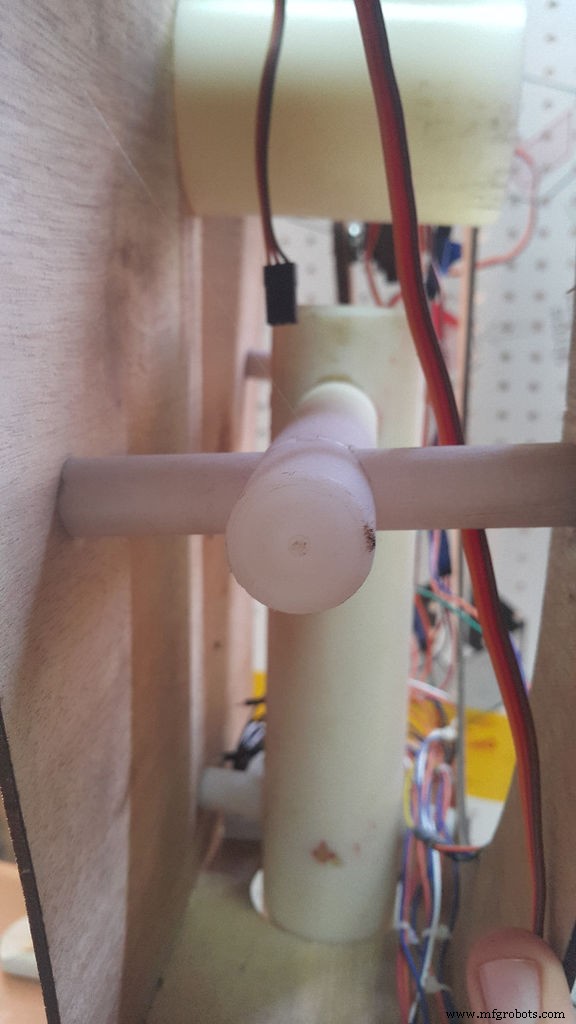


像往常一样,如果我带着它去参加像 Maker Faire 这样的活动,我会将我的项目构建为便携式,以便在短时间内轻松组装,所以我使用 Artelon 杆和 3 毫米胶合板制作了机器人的身体。
我使用舌头和凹槽关节来固定胸部与肩部、颈部和背部。然后我用 4mm x 20mm 螺丝用 Artelon 骨架固定木框架,用 12mm x 30mm 螺丝用机器人底座固定 Artelon 骨架。我用 4mm x 10mm 螺丝用木框架固定伺服电机。 Artelon 骨架由5部分:
1. 基本杆 由50mm Artelon杆制成。
2. 骷髅 由25mm Artelon杆制成。
3.宽杆 -> 机器人有3个部分在Artelon骨架的帮助下固定胸部和背部,这些部分由15mm的Artelon杆制成。
您可以查看附图以获取有关制造所有这些零件的更多信息。
F7DSZV7IKMXH73S.pdf FI5J5H6IKMXH73X.pdf FYPCBU7IKMXH748.pdf FXN90VDIKMXH75Z.pdf F3LCJDQIKMXH763.pdf FZ2QN61IKMXH769.pdf FA2UEZBIKMXH90J.zip
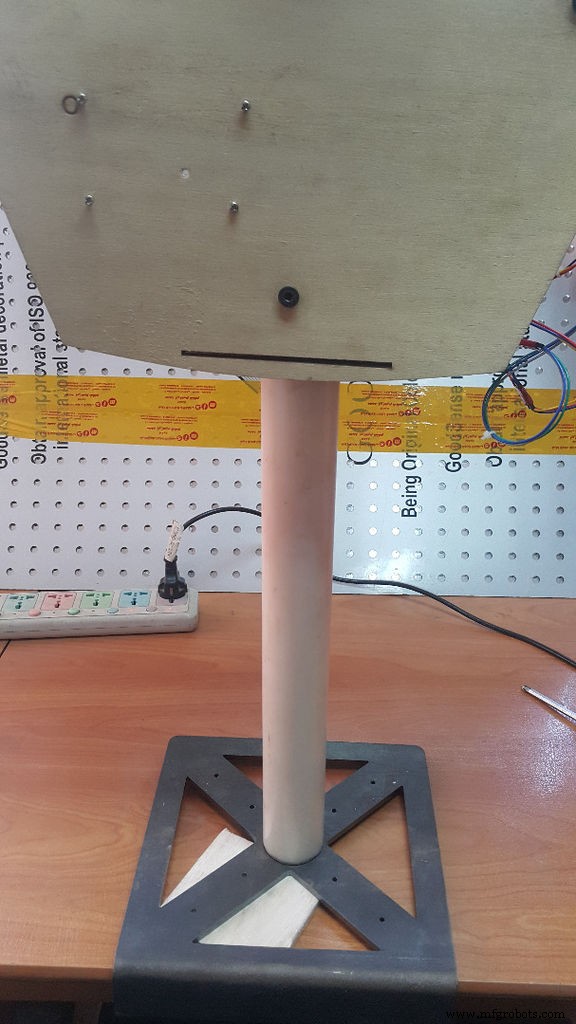
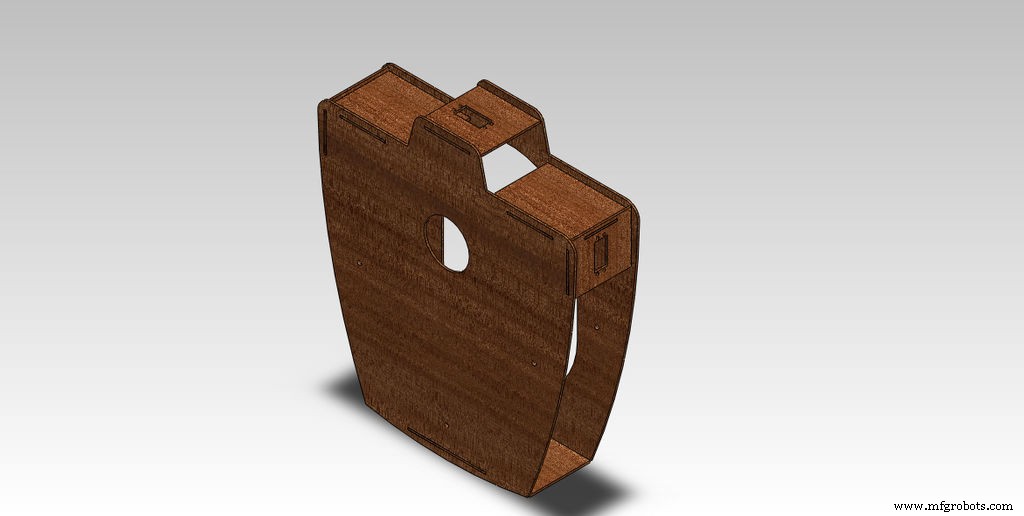
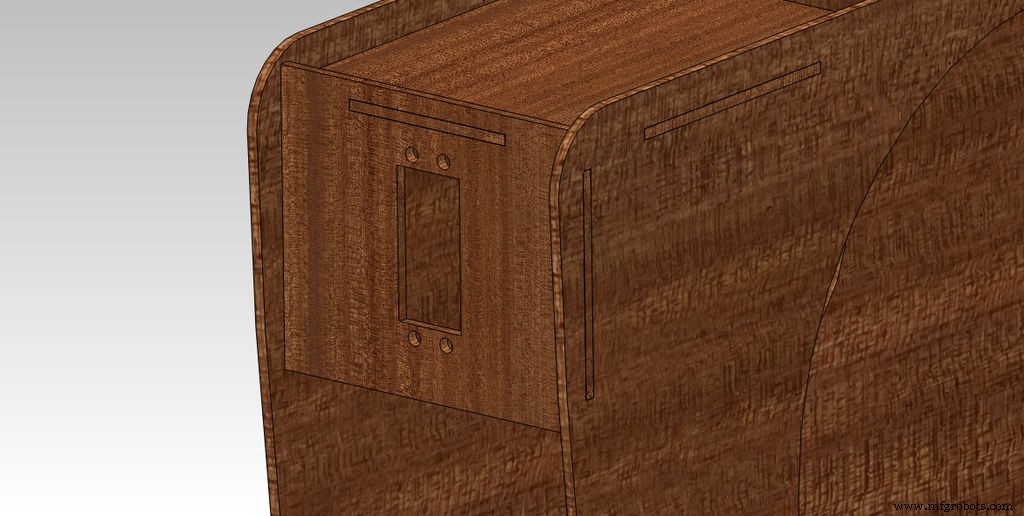
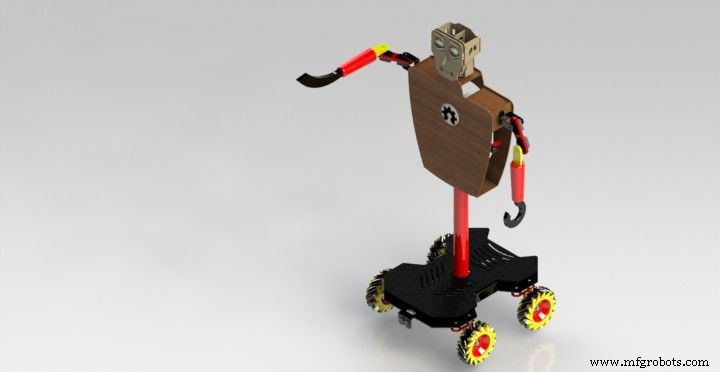
第 3 步:创建机器人的底座
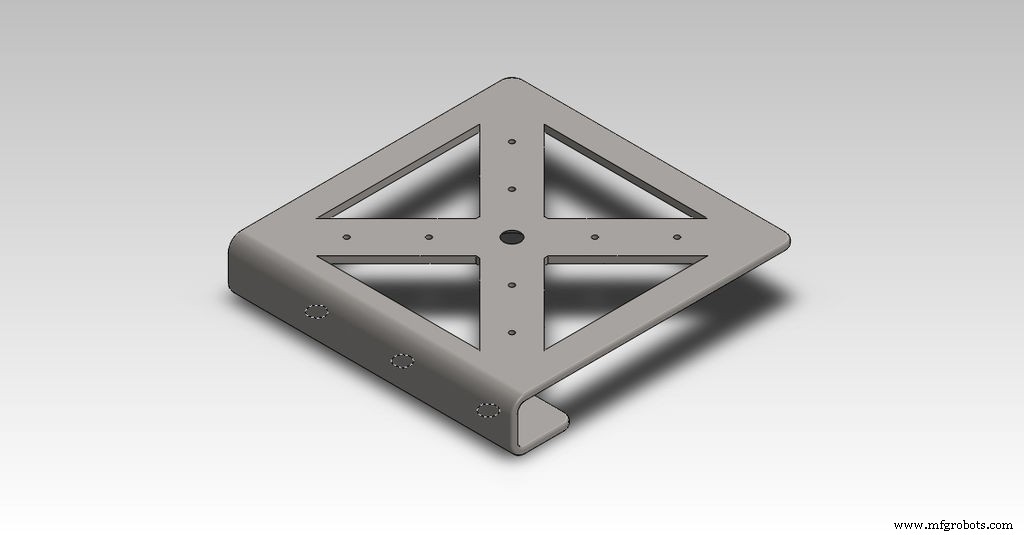
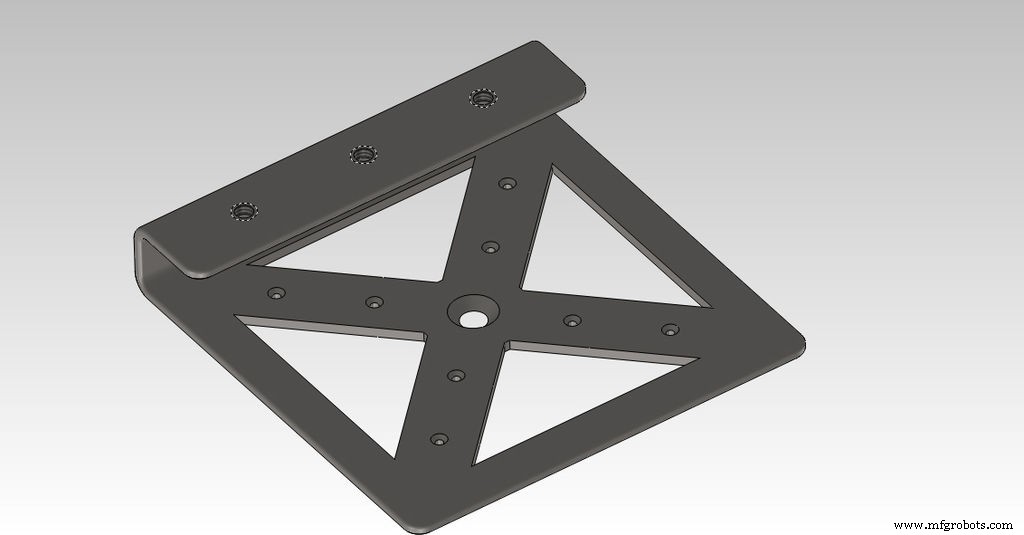


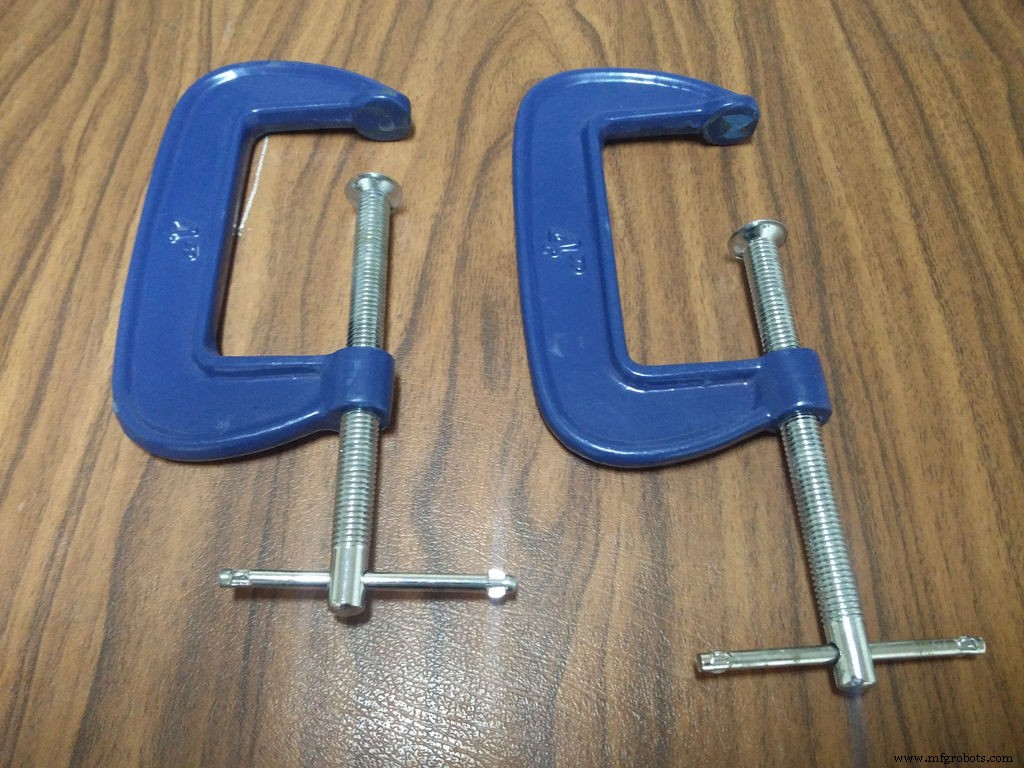

- 我使用 Solidworks 设计了这个底座,将机器人固定到我的桌子上,您可以使用三个螺丝将其固定到桌子上,也可以使用两个 4 英寸 C 形夹。
- 我使用了 6 毫米的金属板来制造这个底座,并制作了这些开口以减轻其重量。
- 我使用 12mm x 30mm 螺丝将底座与 Artelon 骨架固定在一起。
- 您可以使用随附的 .dxf 文件来实现您的。
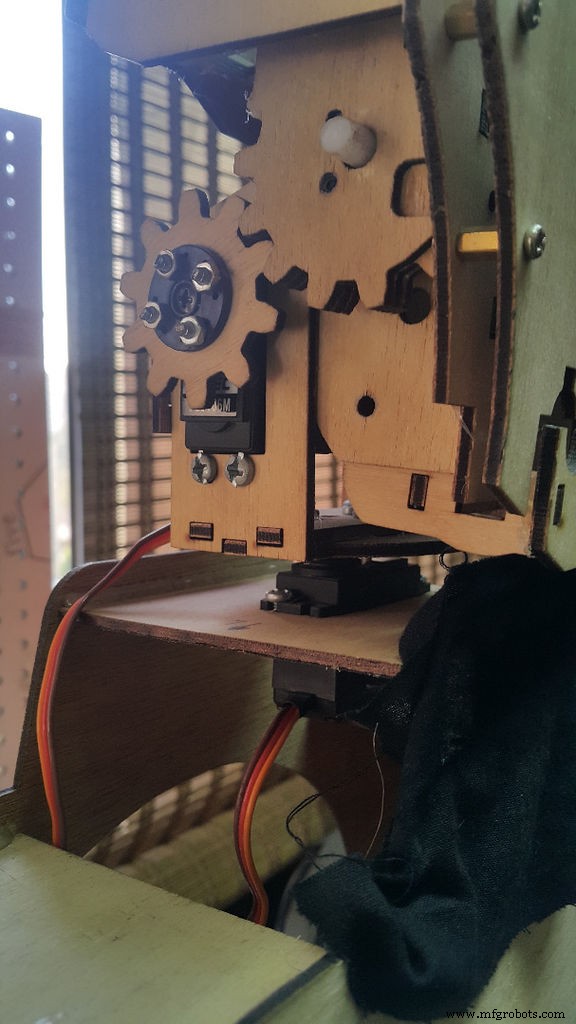
第 4 步:构建机器人的手臂
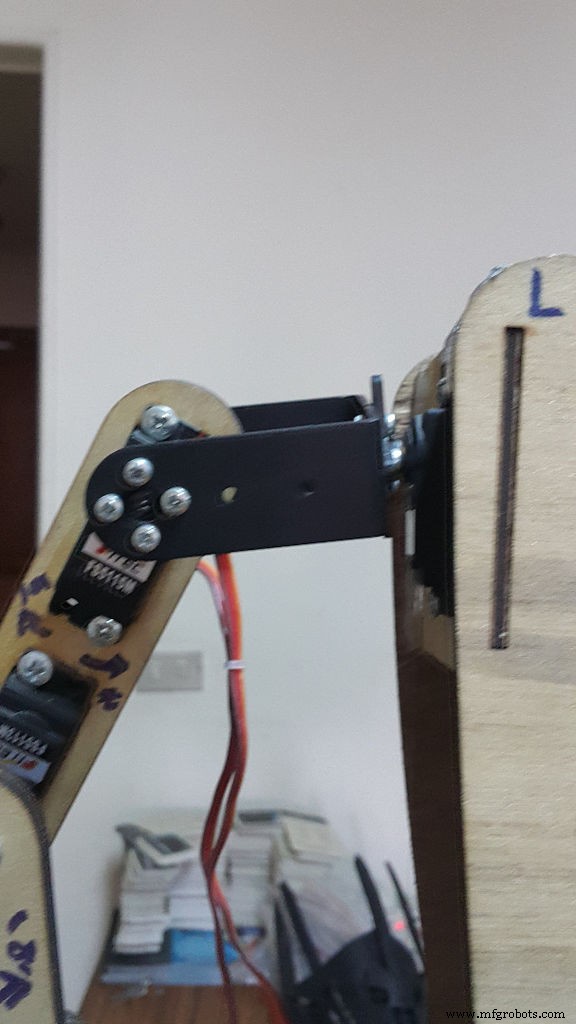
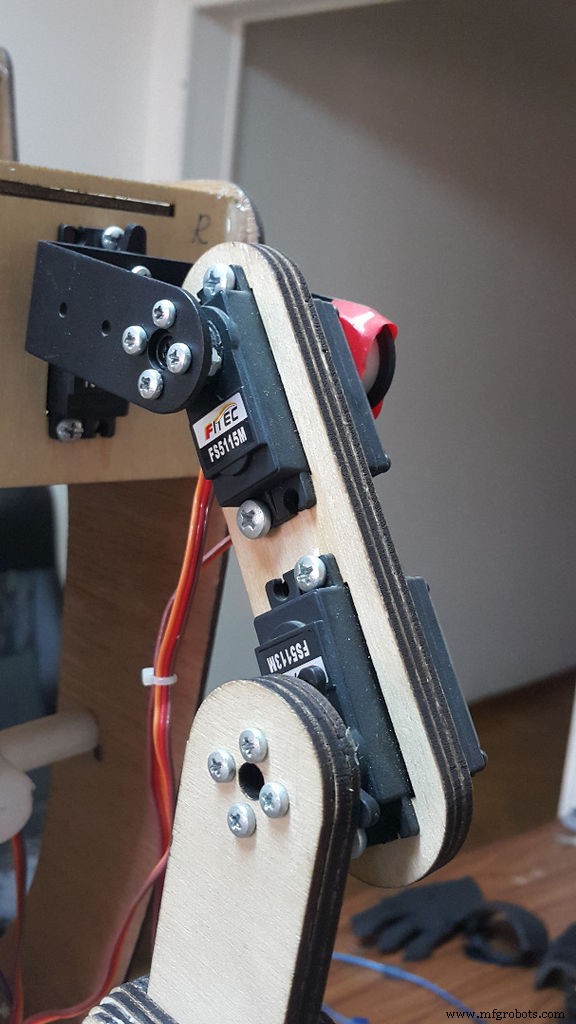
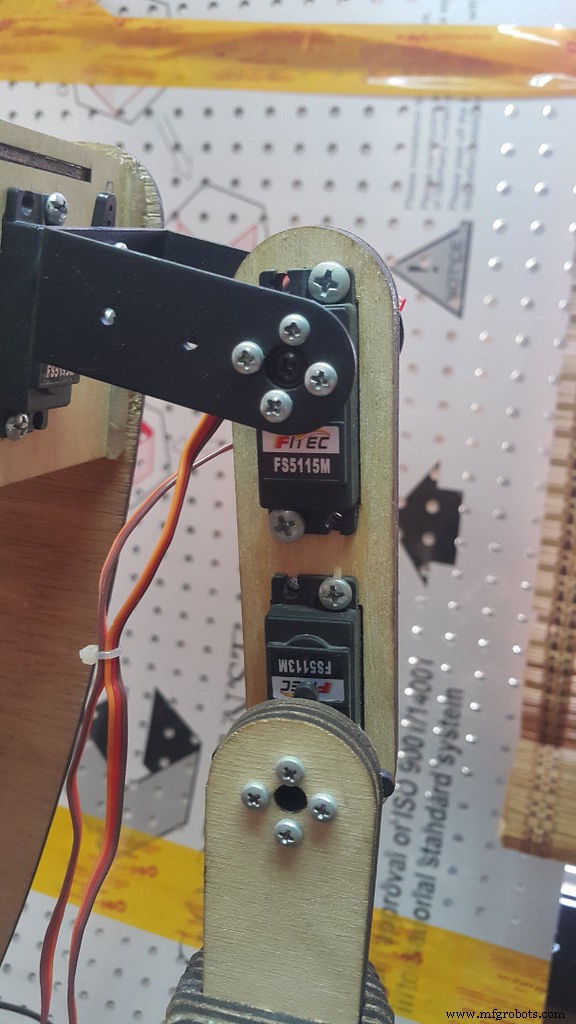
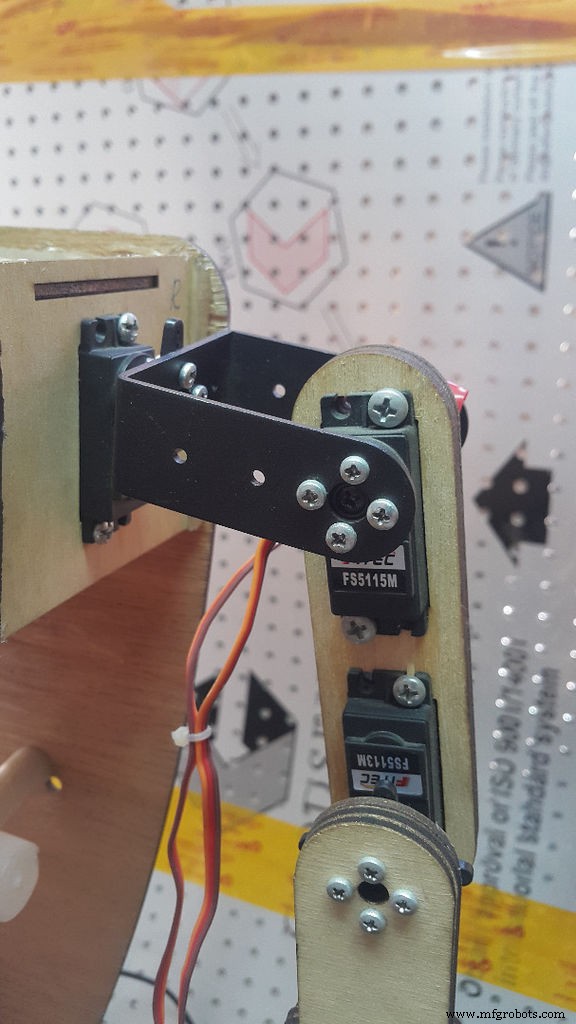
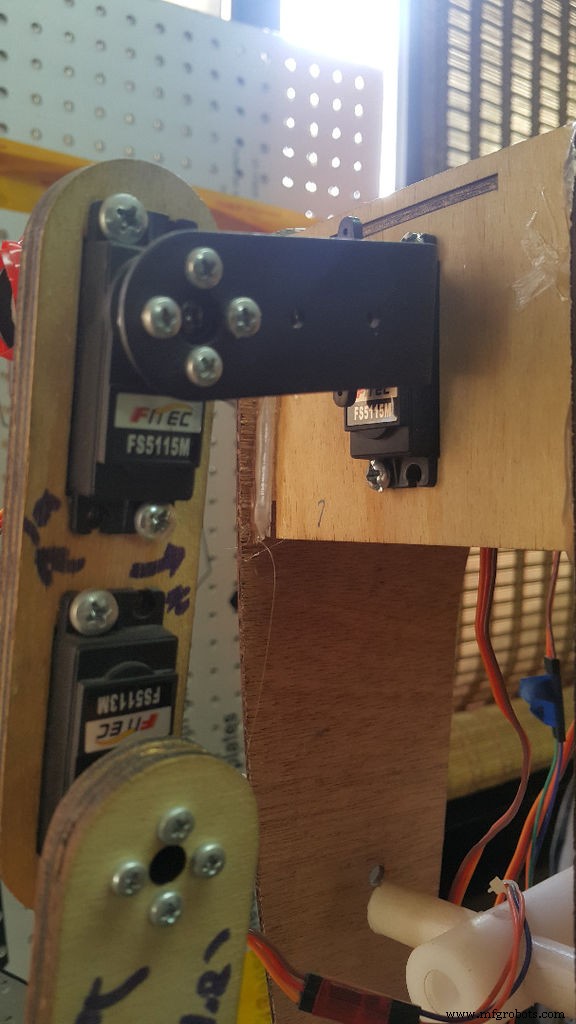
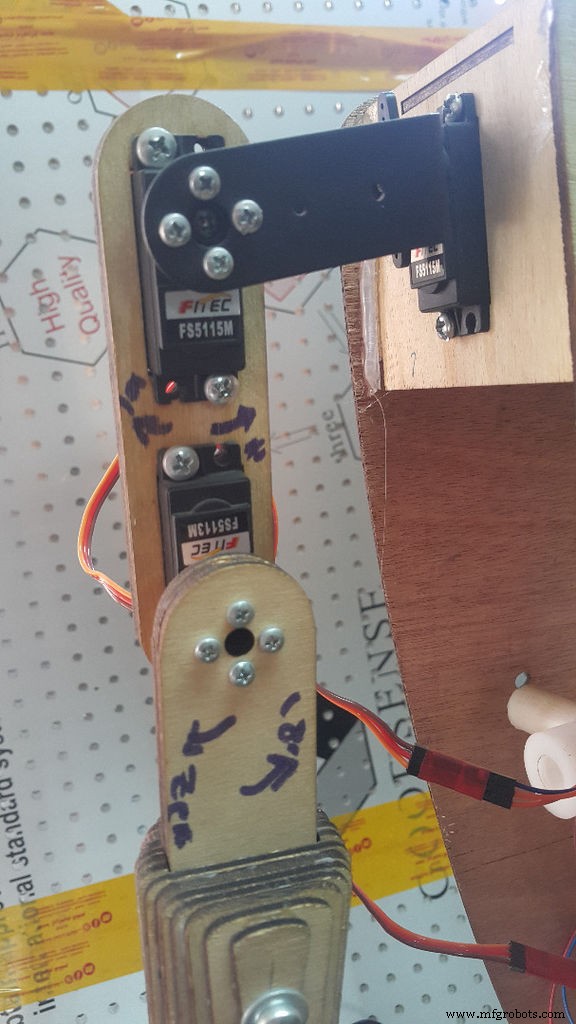
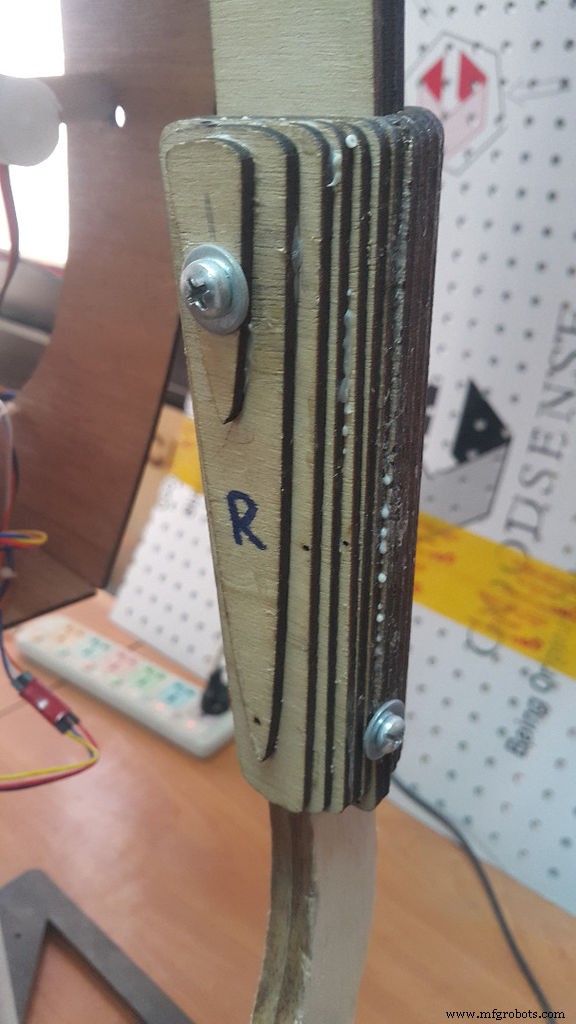
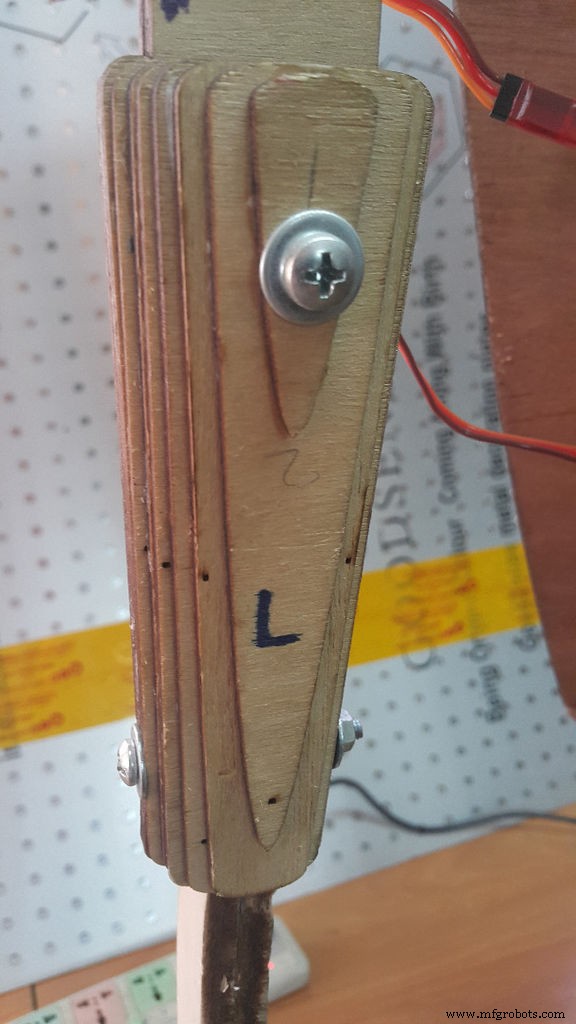
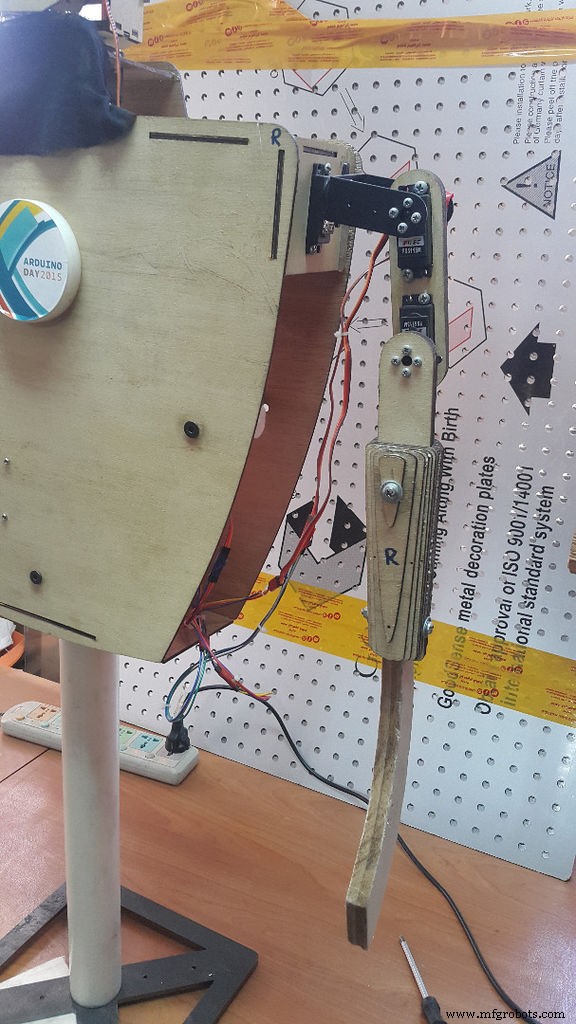
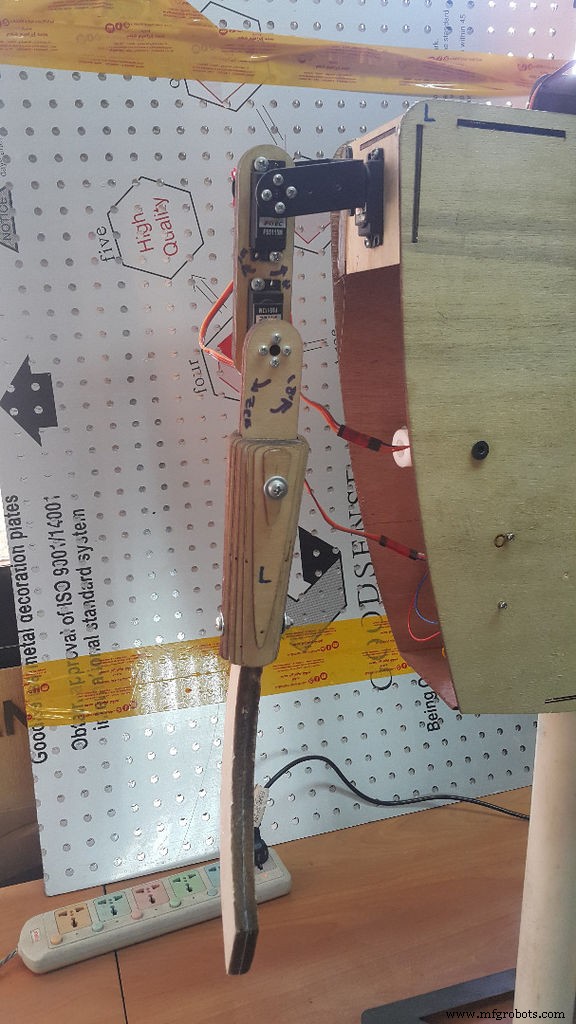
机器人的手臂是这个项目中最大的挑战点。我希望它们是模块化的,并且尽可能易于组装和拆卸,以便我能够带着机器人前往美国。
我希望这些手臂是通用的,我可以很容易地修改它们。如果我想让这个机器人成为海盗,我可以使用剑和钩子,如果我想让机器人成为像 Real Steal 电影中的 Atom 那样的拳击手,我可以添加两个拳头,我可以添加两个抓手,使他成为通用型机器人机器人,所以我为此设计了前臂关节。
我使用 3mm 胶合板来实现臂架和铝制平移倾斜用于肩关节,然后我使用轻木板来切割武器、剑和钩子。
我用Solidworks来计算所需的扭矩,结果是我需要使用3kg/cm的伺服电机,但我使用了更大的电机来让机器人举起一些东西。而不是在车床上做很多加工来实现前臂关节我用Autodesk 123D Make把它们分成一排切片,然后我用激光切割机切割它们。
我在 Solidworks 上附加了机械臂设计,以便您可以进行修改并计算扭矩。
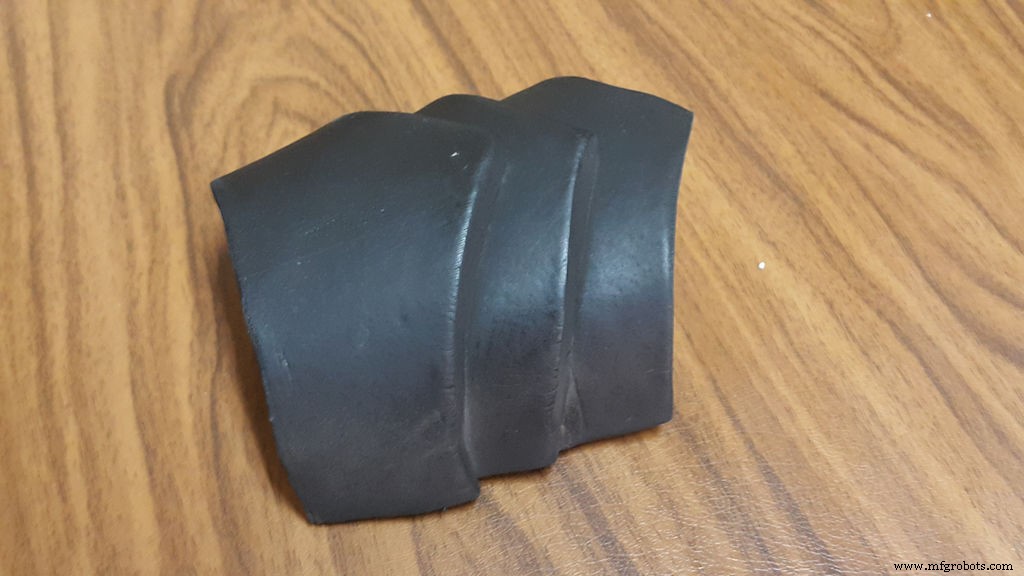
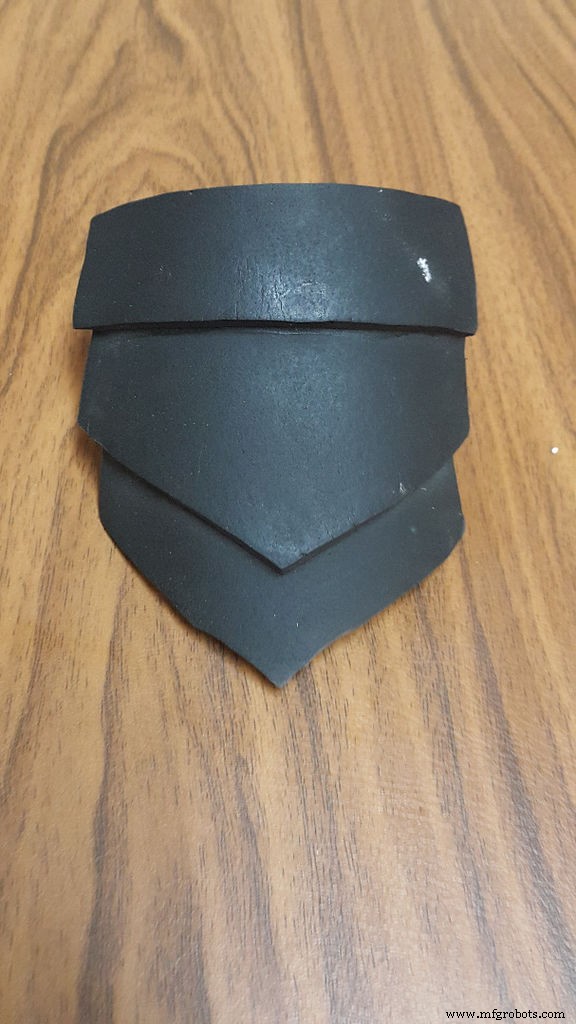
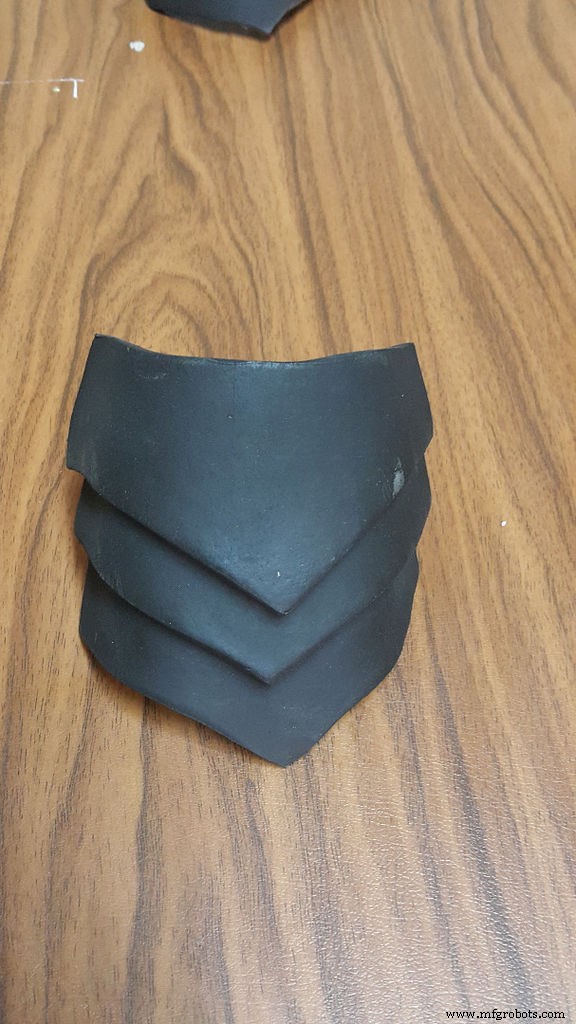
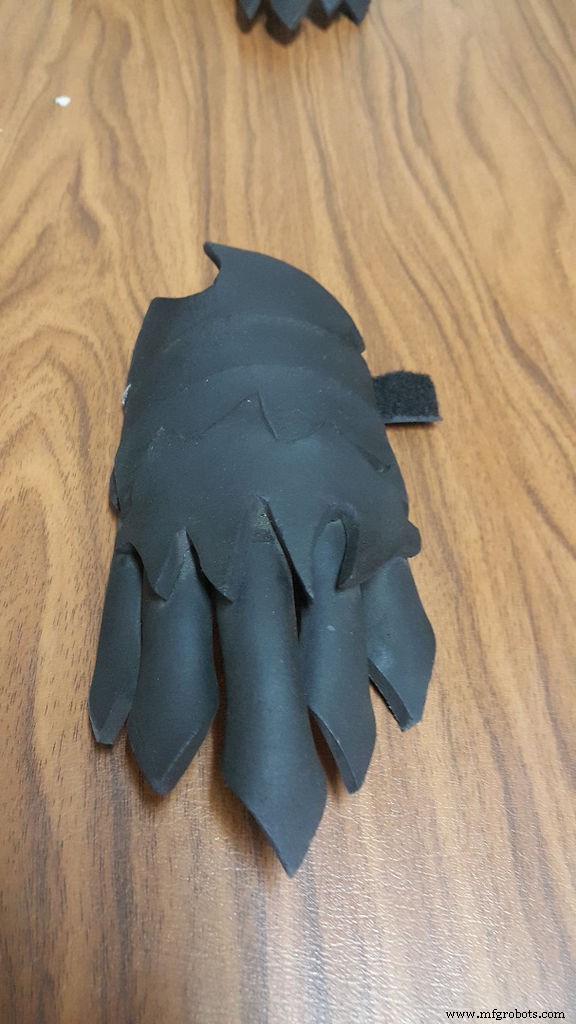
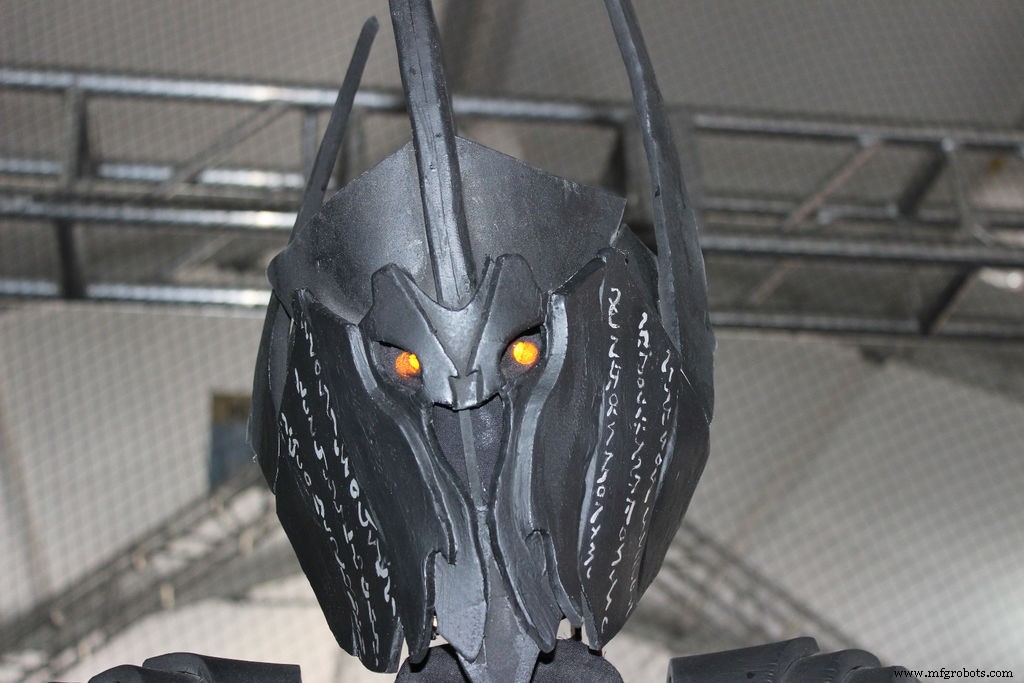
第 5 步:索伦头盔和盔甲角色扮演
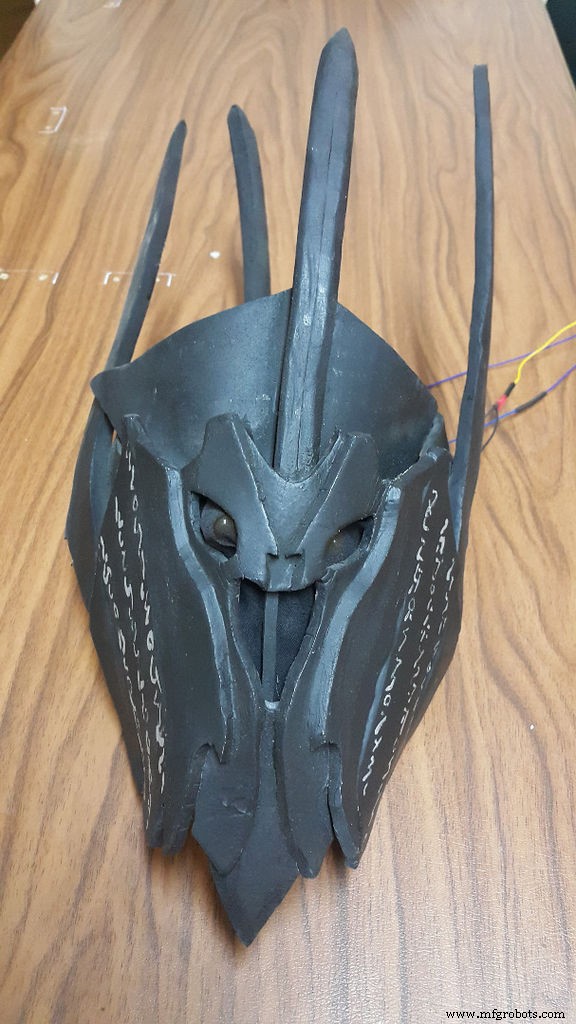
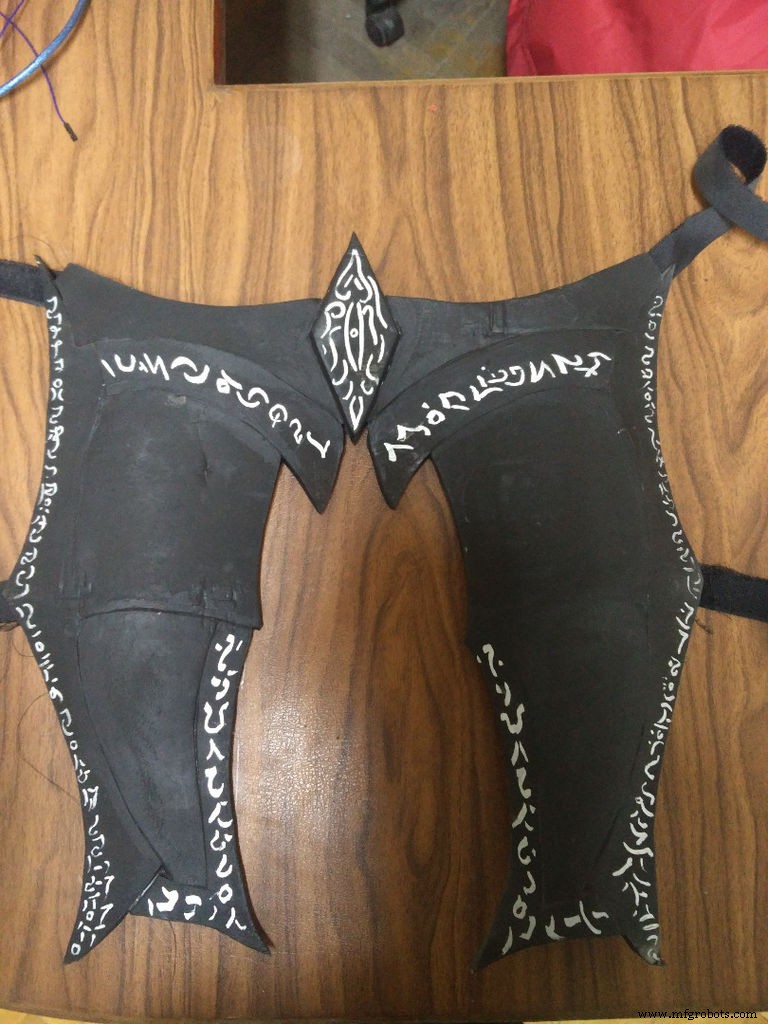
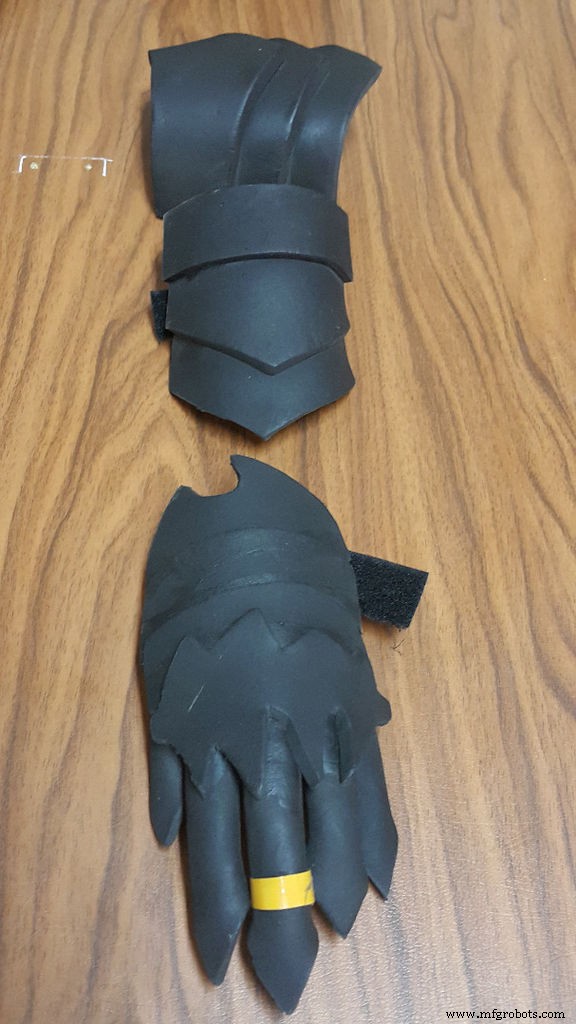


直到现在机器人看起来像真正的偷电影中的原子,让我们帮助原子成为索伦:D
我的朋友 Kareem 帮助我实现了角色扮演,我们按照这些出色的说明制作了机器人的头盔和盔甲,但我对它们稍作修改以适应机器人的尺寸。
http://www.instructables.com/id/Sauron-Cosplay/
http://www.instructables.com/id/Sauron-Cosplay-Hel...
如果你对cosplay部分有任何疑问可以通过他的FB页面问他
感谢 Nate Space。
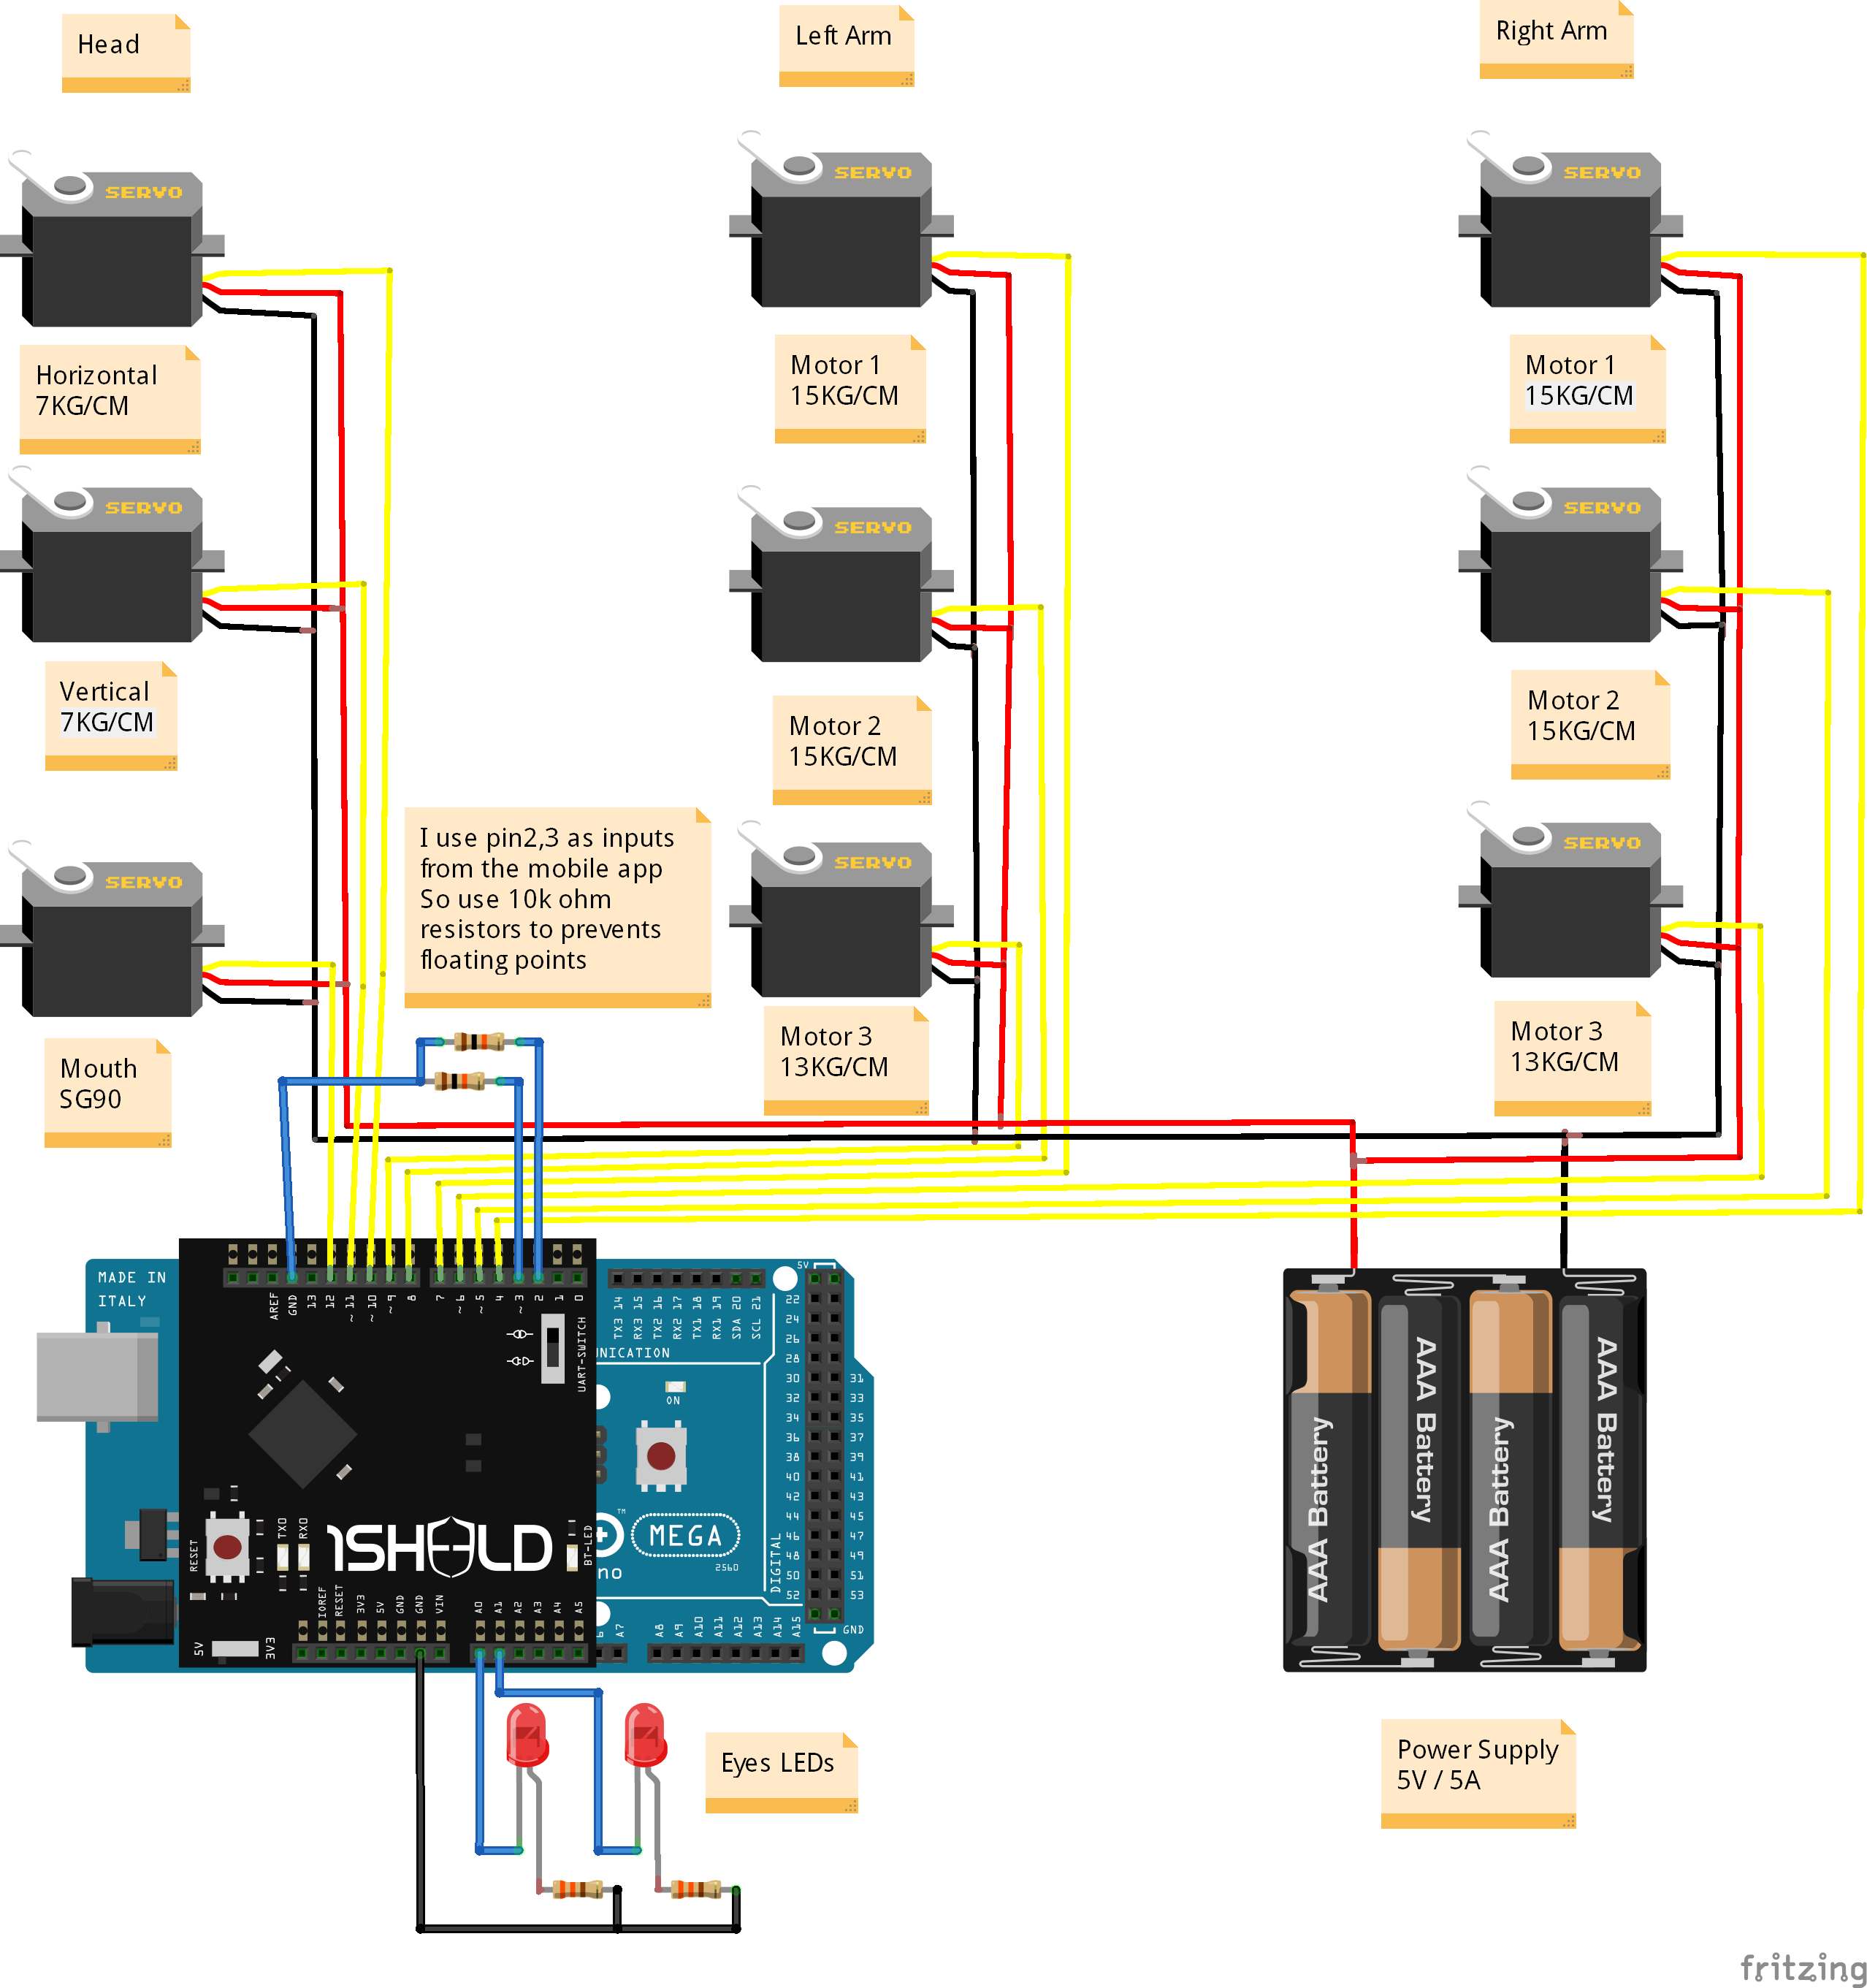
第 6 步:机器人的电子设备
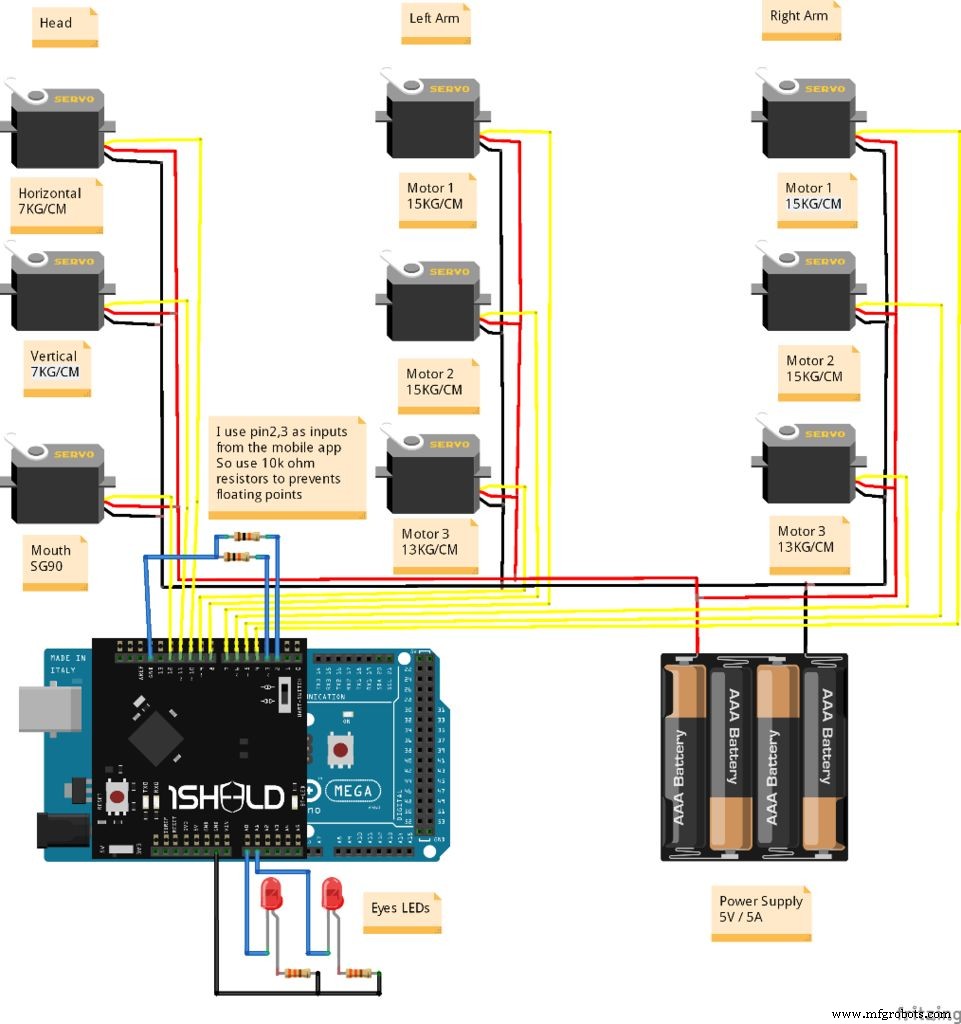
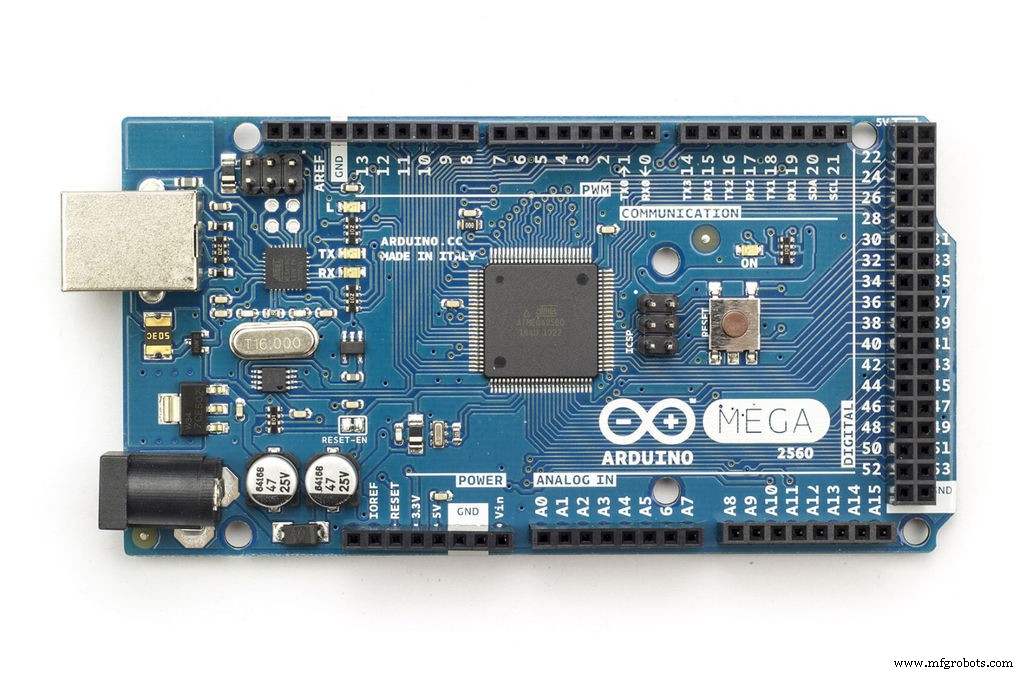
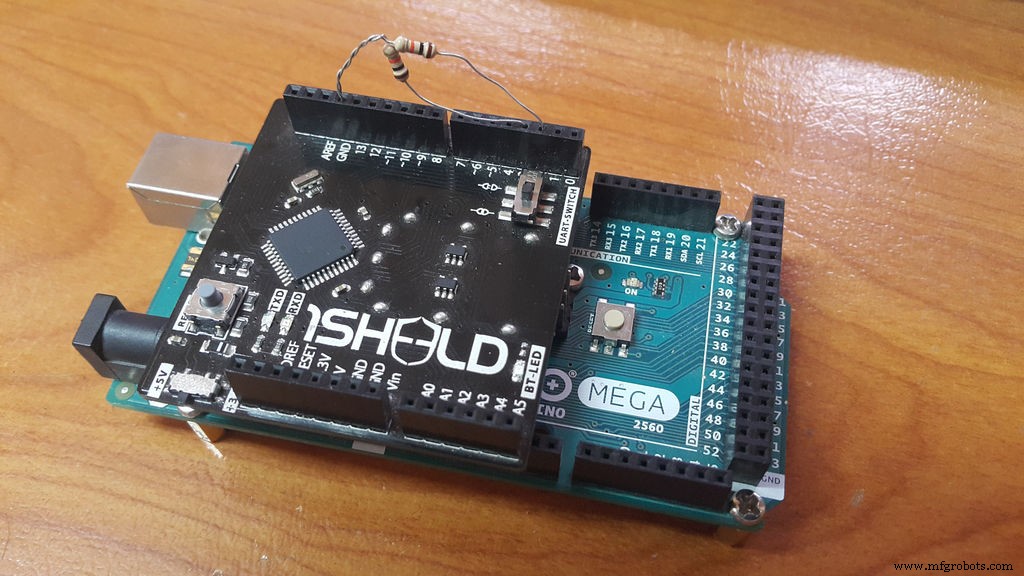
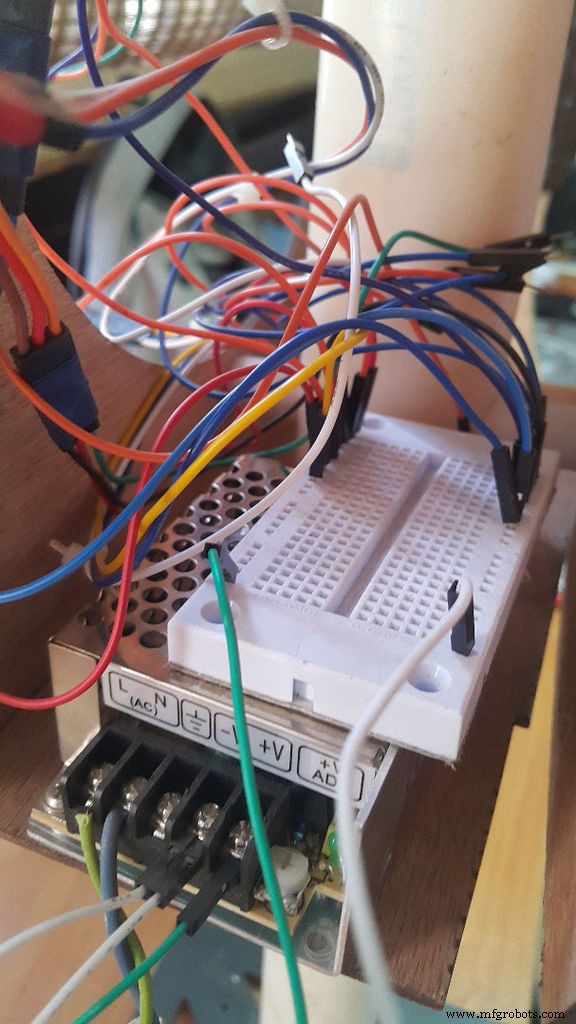
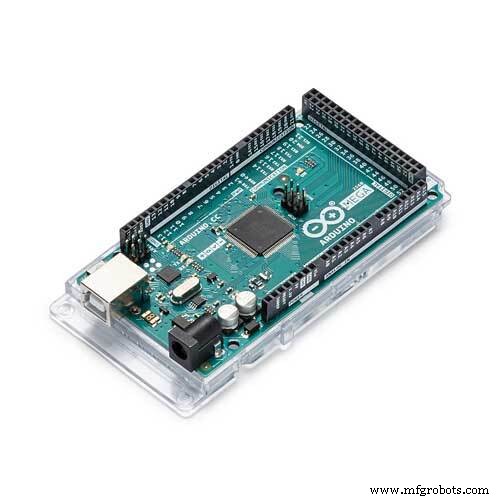
1.我使用Arduino Mega和1Sheeld来控制机器人的手臂和头部伺服电机。
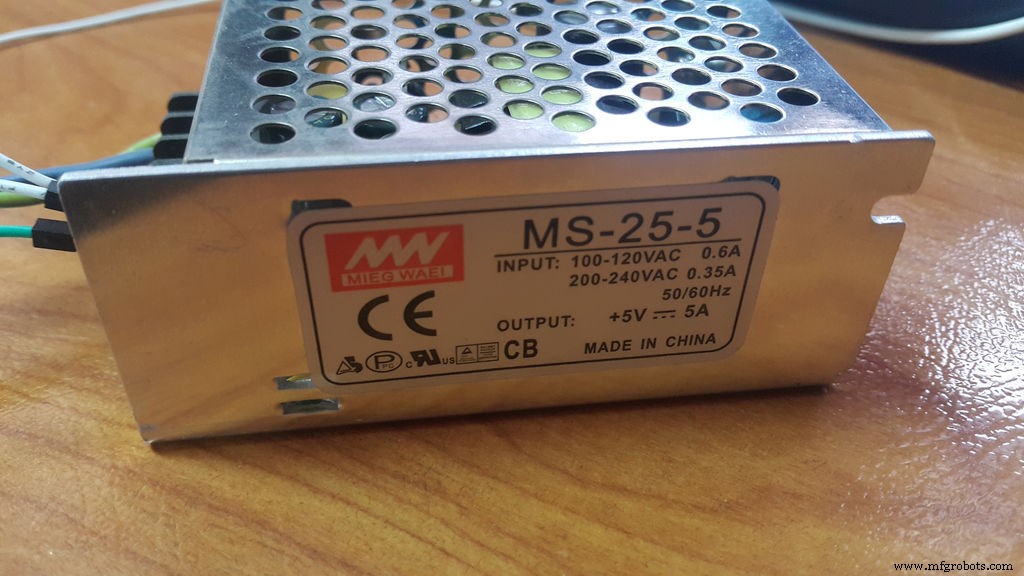
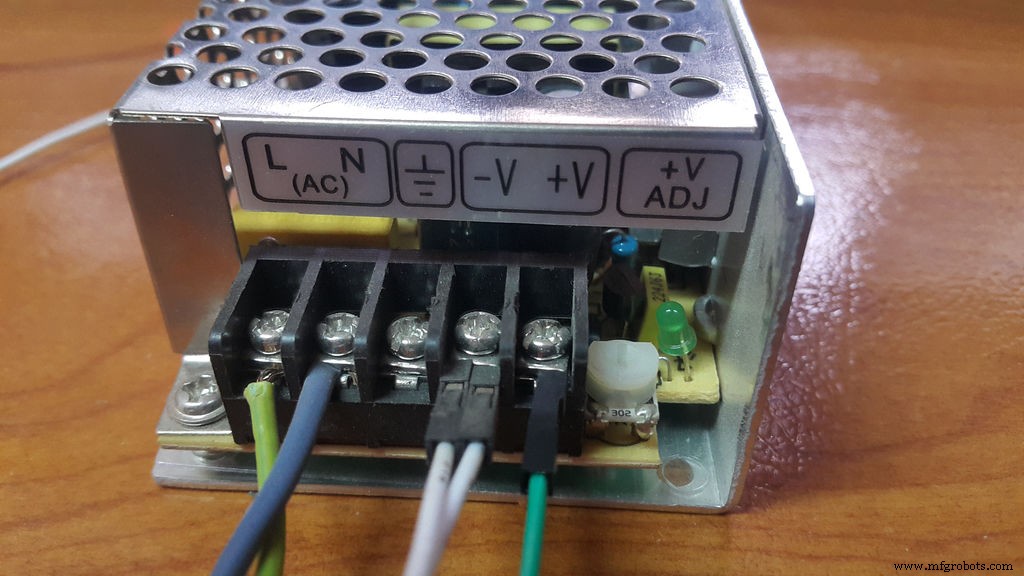
2.我使用5V/5A电源为电机和Arduino供电。
3.我用小面包板将所有电机Vcc和GND与电源连接在一起
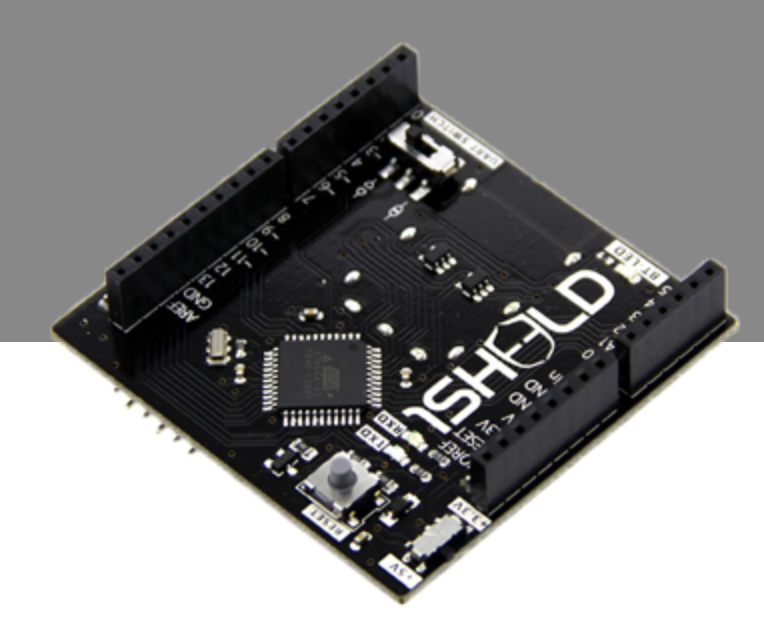
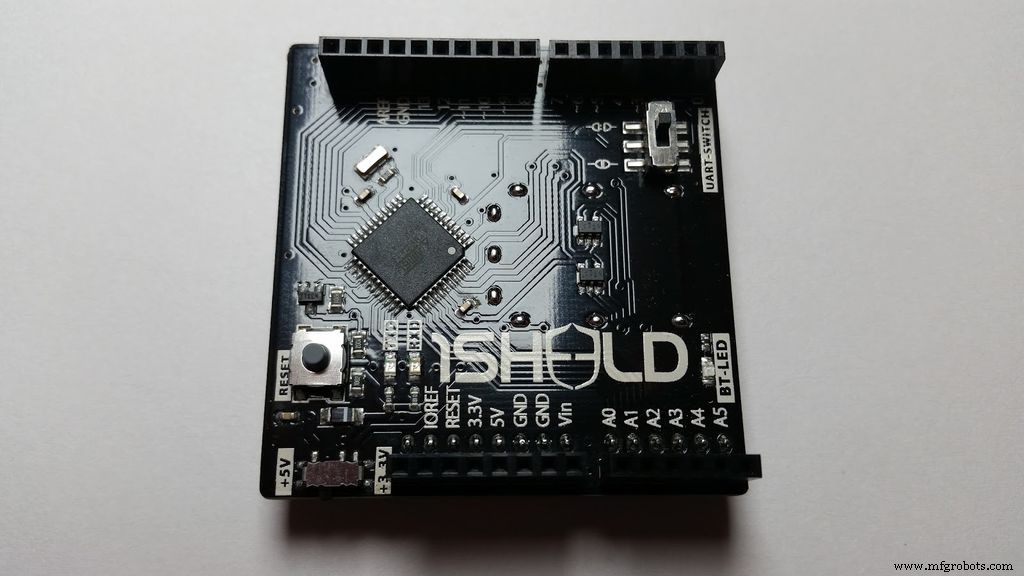
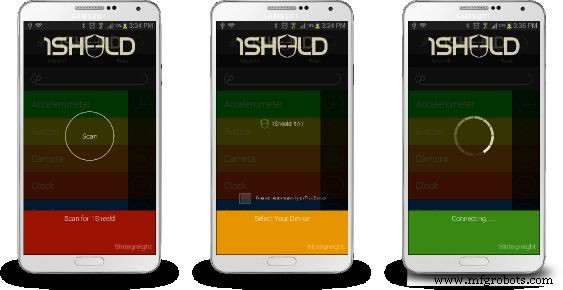
4. 我使用 1Sheeld 通过我的智能手机控制机器人。1Sheeld 是 Arduino 的快速原型设计平台,它允许您利用智能手机的传感器和功能,并让您在 Arduino 项目中使用它们。基本上,它是一个硬件防护罩,位于 Arduino 板的顶部,并通过蓝牙与此 Android 应用程序进行通信,以在它和您的智能手机之间传输数据。
1Sheeld Mobile Application 有一长串盾牌,您应该从该列表中选择游戏手柄盾牌、方向盾牌、音乐播放器盾牌、终端盾牌和切换按钮。
1. 手柄护盾 这是我智能手机上的 GUI,有一些按钮,如 PlayStation 操纵杆,并通过蓝牙连接到 Arduino,我用它手动控制伺服电机。当您按下 Gamepad shield 上的任何按钮时,应用程序会将数据发送到 1Sheeld,然后 Arduino 将控制机器人手臂和头部的伺服电机。
2. 方向盾 :我戴着手套,将智能手机固定在上面,然后我将智能手机传感器的值映射到伺服电机的角度。
3. 音乐播放器护盾: 我用音乐播放器盾播放了一个声音轨道,当他上下移动嘴巴时有索伦的声音。
4. 切换按钮屏蔽: 我使用这个盾牌来选择所需的模式,而不是添加物理按钮
5. 终端屏蔽: 我使用此扩展板而不是使用 Arduino IDE 串行监视器,因为 1Sheeld 无法同时与 PC 和蓝牙模块通信。
第 7 步:Arduino 代码
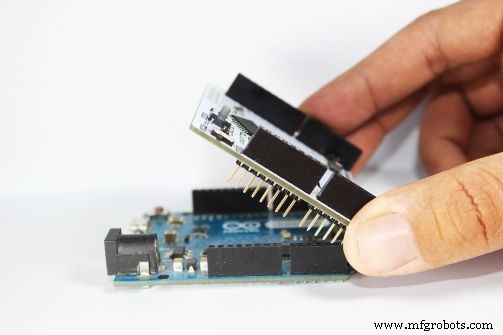
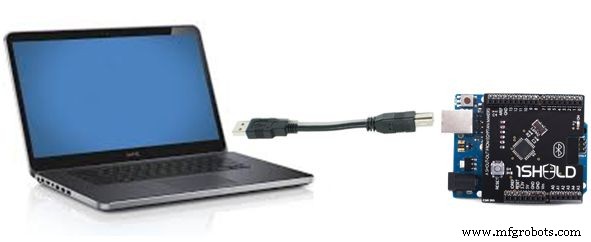

第 1 步: 将 1Sheeld 放在 Arduino 板上,然后将 Arduino 插入笔记本电脑或 PC。
第 2 步: 将 1Sheeld 应用程序下载到您的智能手机上。该应用程序可在 http://1sheeld.com/app
的 Google Play 商店中获得第 3 步: 下载 1Sheeld 库 通过此链接将 OneSheeld 库下载到您的计算机。
第 4 步: 提取文件夹,复制它,然后将其粘贴到您的 Arduino 库目录中。
第 5 步: 打开我的 Arduino Sketch(你会在附件中找到它)
第 6 步: 上传你的草图
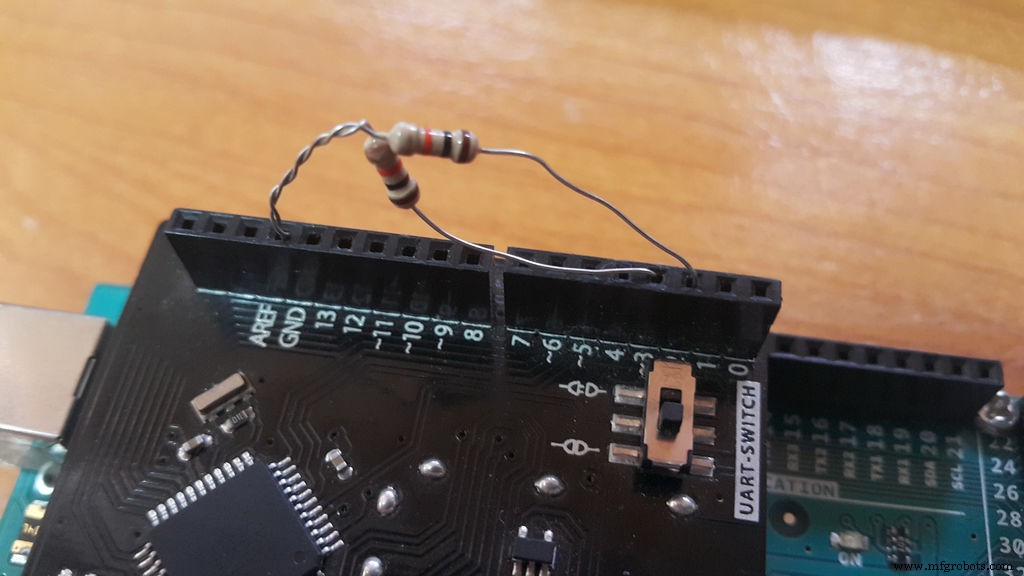
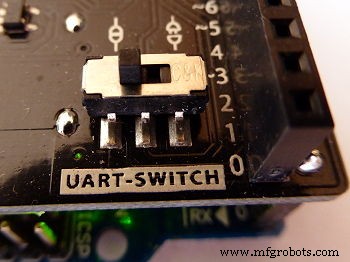
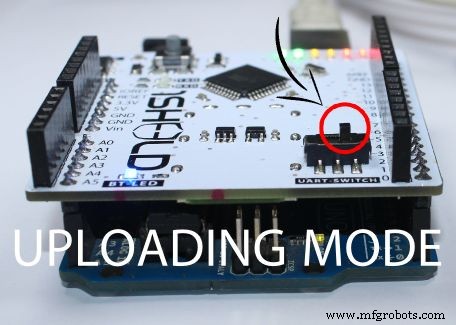
这是整个教程中最重要的部分,在将草图上传到 Arduino 板以避免 1Sheeld 和 Arduino 之间的串行冲突之前,将 1Sheeld 切换到上传模式(这是板上标有 UART 开关的开关),然后按IDE 中的上传按钮。
当 UART 开关推离 1Sheeld 标志时,上传模式开启。完成上传后,您需要将 1Sheeld 切换回操作模式。
不要忘记! 如果您不将 UART 开关切换回操作模式,您的项目将无法正常工作,因为 1Sheeld 和 Arduino 板之间将无法进行通信。当 UART 开关被推到最靠近 1Sheeld 标志时,工作模式开启。
第 7 步: 使用 1Sheeld 应用程序 在您的 Android 智能手机上打开 1Sheeld 应用程序。该应用程序将首先通过蓝牙扫描您的 1Sheeld,几秒钟后手机就会找到它。一旦它在您的屏幕上显示为 1Sheeld #xxxx,您将需要输入配对代码(默认配对代码为 1234)并通过蓝牙连接到 1Sheeld。
注意: 如果您遇到问题,请确保您的 Android 手机的蓝牙已打开,并且 Android 手机靠近您的 1Sheeld。
第 8 步: 从盾牌列表中选择游戏手柄盾牌、方向盾牌、音乐播放器盾牌和切换按钮盾牌和终端盾牌,然后按应用程序右上角的多盾牌图标。
第 9 步: 为机器人供电后,如果您想使用游戏手柄手动控制它,则默认情况下它将在待机模式下运行,访问切换按钮护罩并选择引脚 2,然后按开。如果您想返回待机模式,请按 OFF。
第 10 步: 如果您想使用方向传感器手动控制它,请访问切换按钮屏蔽并选择引脚 3,然后按开。并确保引脚 2 状态为低电平。
F5KJZGXIKMXG3DG.ino
第 8 步:纽约创客嘉年华中的索伦


现在让我们在纽约 Maker Faire 的粉丝之间观看 Sauron :)
第 9 步:未来工作
关于这个指导: 我会为我录制一段视频来组装机器人然后尝试三种模式。
关于机器人的头部: 在这次迭代中,我决定降低成本,所以我只在头部使用了 3 个电机,在下一次迭代中,我将添加其余的电机,我将 3D 打印眼睛部件,如(眼睑、眼罩、眼环、U 形夹、眼球壳)
关于机器人基地: 我会把固定的底座换成4麦克纳姆轮的机器人底座,让机器人可以自由移动。我在Solidworks上完成了底座的设计,但我没有时间和机器人合并。
代码
- Sauron Arduino 代码
Sauron Arduino 代码Arduino
#define CUSTOM_SETTINGS#define INCLUDE_GAMEPAD_SHIELD#define INCLUDE_MUSIC_PLAYER_SHIELD#define INCLUDE_TERMINAL_SHIELD#define INCLUDE_ORIENTATION_SENSOR_SHIELD/* 包括1Sheeld 库。 */#include#include Servo rightArm_Motor1;Servo rightArm_Motor2;Servo rightArm_Motor3;Servo leftArm_Motor1;Servo leftArm_Motor2;Servo leftArm_Motor3;Servo NeckHorizontal;Servo NeckVertical;伺服口int modePin2 =3;volatile int modeState1 =LOW;volatile int modeState2 =LOW;volatile boolean gamepadMode_Enabled =false;volatile boolean imitationMode_Enabled =false;const int ledPin1 =A0;const int ledPin2 =A1;//------- --------------------- 无效设置 ------------- --------------------------------------void setup(){ // 开始通信 OneSheeld.begin (); // 将一些引脚设置为输出 pinMode(modePin1, INPUT); pinMode(modePin2, INPUT); // 将 LED 设置为输出和高电平“Saurons Eye” pinMode(ledPin1,OUTPUT); pinMode(ledPin2,OUTPUT);数字写入(ledPin1,高);数字写入(ledPin2,高); // 使用 Mega、Mega2560、MegaADK (2, 3, 18, 19, 20, 21) 时可用于中断的数字引脚 attachInterrupt(digitalPinToInterrupt(modePin1), gampadMode_ChangeISR, CHANGE); attachInterrupt(digitalPinToInterrupt(modePin2),imitationMode_ChangeISR,CHANGE); /* 将信号引脚(橙色)从电机直接连接到 Arduino 大型 PWM 引脚,然后从电源而非 Arduino 为电机供电,然后将 Arduino 的接地和电源相互连接 */ rightArm_Motor1.attach(4); rightArm_Motor2.attach(5); rightArm_Motor3.attach(6); leftArm_Motor1.attach(7); leftArm_Motor2.attach(8); leftArm_Motor3.attach(9);颈部水平.attach(10);颈部垂直.attach(11);嘴。附上(12); // 起始位置 rightArm_Motor1.write(95); rightArm_Motor2.write(150); rightArm_Motor3.write(20); leftArm_Motor1.write(90); leftArm_Motor2.write(45); leftArm_Motor3.write(180);颈部水平。写(105);脖子垂直。写(30);口。写(100);}//-------------------------------- 无效循环---- ----------------------------------------------- 无效循环( ){ modeState1 =digitalRead(modePin1); modeState2 =digitalRead(modePin2); // 始终检查所需的模式 if (modeState1 ==HIGH) { Terminal.println("GamePad Mode was selected"); gamePadMode(); } //Pin 12 =High --> 游戏手柄模式 else if (modeState2 ==HIGH) { Terminal.println("Imitation Mode was selected");模仿模式(); } //Pin 13 =High --> 模仿模式 else { Terminal.println("待机模式被选中");待机模式(); }}//无效循环//----------------------------------------- void待机模式 ---------------------------------------------void StandbyMode( ) { // 待机模式 Terminal.println("待机模式已激活"); // 起始位置 Terminal.println("第一个位置"); rightArm_Motor1.write(95); rightArm_Motor2.write(150); rightArm_Motor3.write(20); leftArm_Motor1.write(90); leftArm_Motor2.write(45); leftArm_Motor3.write(180);颈部水平。写(105);脖子垂直。写(30); // 设置音量// MusicPlayer.setVolume(10);音乐播放器.play(); for (int i =0; i <=19; i++) {mouth.write(100); OneSheeld.delay(150);口。写(75); OneSheeld.delay(150); }//对于MusicPlayer.pause();口。写(100); OneSheeld.delay(3000); //------------------------------------------------ ---- // 始终检查所需的模式 if (gamepadMode_Enabled ==true) { Terminal.println("System Was Interrupted And It Will Activate GamePad Mode Now"); gamePadMode(); } //Pin 12 =High --> Gamepad mode else if (imitationMode_Enabled ==true) { Terminal.println("系统被中断,现在将激活模仿模式");模仿模式(); } //Pin 13 =High --> 模仿模式 else { // 完成序列的其余部分 // 移动头 90 --> 0 --> 180 --> 90 Terminal.println("2nd position"); rightArm_Motor1.write(95); rightArm_Motor2.write(150); rightArm_Motor3.write(20); leftArm_Motor1.write(90); leftArm_Motor2.write(45); leftArm_Motor3.write(180);颈部水平。写(105); OneSheeld.delay(1500);颈部水平。写(65); OneSheeld.delay(1500);颈部水平。写(140); OneSheeld.delay(1500);颈部水平。写(105);脖子垂直。写(30); // 设置音量// MusicPlayer.setVolume(10);音乐播放器.play(); for (int i =0; i <=19; i++) {mouth.write(100); OneSheeld.delay(150);口。写(75); OneSheeld.delay(150); }//对于MusicPlayer.pause();口。写(100); OneSheeld.delay(3000); }//else --> 完成序列的其余部分 //----------------------------------- ----------------- // 始终检查所需的模式 if (gamepadMode_Enabled ==true) { Terminal.println("System Was Interrupted And It Will Activate GamePad Mode Now"); gamePadMode(); } //Pin 12 =High --> Gamepad mode else if (imitationMode_Enabled ==true) { Terminal.println("系统被中断,现在将激活模仿模式");模仿模式(); } //Pin 13 =High --> 模仿模式 else { // 完成序列的其余部分 // 将手和头移动到 45 度 Terminal.println("3rd position"); rightArm_Motor1.write(15); rightArm_Motor2.write(180); rightArm_Motor3.write(0); leftArm_Motor1.write(180); leftArm_Motor2.write(30); leftArm_Motor3.write(145);颈部水平。写(65);脖子垂直。写(30); // 设置音量// MusicPlayer.setVolume(10);音乐播放器.play(); for (int i =0; i <=19; i++) {mouth.write(100); OneSheeld.delay(150);口。写(75); OneSheeld.delay(150); }//对于MusicPlayer.pause();口。写(100); OneSheeld.delay(3000); }//else --> 完成序列的其余部分 //----------------------------------- -------------- // 始终检查所需的模式 if (gamepadMode_Enabled ==true) { Terminal.println("System Was Interrupted And It Will Activate GamePad Mode Now"); gamePadMode(); } //Pin 12 =High --> Gamepad mode else if (imitationMode_Enabled ==true) { Terminal.println("系统被中断,现在将激活模仿模式");模仿模式(); } //Pin 13 =High --> 模仿模式 else { // 完成序列的其余部分 // 向右移动并朝向 135 度 Terminal.println("4th position"); rightArm_Motor1.write(15); rightArm_Motor2.write(150); rightArm_Motor3.write(30); leftArm_Motor1.write(180); leftArm_Motor2.write(30); leftArm_Motor3.write(145);颈部水平。写(140);脖子垂直。写(30); // 设置音量// MusicPlayer.setVolume(10);音乐播放器.play(); for (int i =0; i <=19; i++) {mouth.write(100); OneSheeld.delay(150);口。写(75); OneSheeld.delay(150); }//对于MusicPlayer.pause();口。写(100); OneSheeld.delay(3000); }//else --> 完成序列的其余部分 //----------------------------------- ---------------- // 始终检查所需的模式 if (gamepadMode_Enabled ==true) { Terminal.println("系统被中断,现在将激活游戏手柄模式"); gamePadMode(); } //Pin 12 =High --> Gamepad mode else if (imitationMode_Enabled ==true) { Terminal.println("System Was Interrupted And It Will Activate Imitation Mode Now"); imitationMode(); } //Pin 13 =High --> Imitation Mode else { // Complete the rest of the sequence // Move head to the center Terminal.println("5th position"); rightArm_Motor1.write(15); rightArm_Motor2.write(150); rightArm_Motor3.write(30); leftArm_Motor1.write(180); leftArm_Motor2.write(30); leftArm_Motor3.write(145); neckHorizontal.write(105); neckVertical.write(30); // Set the volume// MusicPlayer.setVolume(10); MusicPlayer.play(); for (int i =0; i <=19; i++) { mouth.write(100); OneSheeld.delay(150); mouth.write(75); OneSheeld.delay(150); }//for MusicPlayer.pause(); mouth.write(100); OneSheeld.delay(3000); }//else --> complete the rest of the sequence //---------------------------------------------------- // Always check the desired mode if (gamepadMode_Enabled ==true) { Terminal.println("System Was Interrupted And It Will Activate GamePad Mode Now"); gamePadMode(); } //Pin 12 =High --> Gamepad mode else if (imitationMode_Enabled ==true) { Terminal.println("System Was Interrupted And It Will Activate Imitation Mode Now"); imitationMode(); } //Pin 13 =High --> Imitation Mode else { // Complete the rest of the sequence // Move hands up Terminal.println("6th position"); rightArm_Motor1.write(110); rightArm_Motor2.write(0); rightArm_Motor3.write(45); leftArm_Motor1.write(90); leftArm_Motor2.write(180); leftArm_Motor3.write(145); neckHorizontal.write(105); neckVertical.write(30); // Set the volume// MusicPlayer.setVolume(10); MusicPlayer.play(); for (int i =0; i <=19; i++) { mouth.write(100); OneSheeld.delay(150); mouth.write(75); OneSheeld.delay(150); }//for MusicPlayer.pause(); mouth.write(100); OneSheeld.delay(3000); }//else --> complete the rest of the sequence //------------------------------------------------- // Always check the desired mode if (gamepadMode_Enabled ==true) { Terminal.println("System Was Interrupted And It Will Activate GamePad Mode Now"); gamePadMode(); } //Pin 12 =High --> Gamepad mode else if (imitationMode_Enabled ==true) { Terminal.println("System Was Interrupted And It Will Activate Imitation Mode Now"); imitationMode(); } //Pin 13 =High --> Imitation Mode else { // Complete the rest of the sequence /* Move hands to sides o -- | -- ^ */ Terminal.println("7th position"); rightArm_Motor1.write(110); rightArm_Motor2.write(80); rightArm_Motor3.write(60); leftArm_Motor1.write(90); leftArm_Motor2.write(115); leftArm_Motor3.write(140); neckHorizontal.write(105); neckVertical.write(30); // Set the volume// MusicPlayer.setVolume(10); MusicPlayer.play(); for (int i =0; i <=19; i++) { mouth.write(100); OneSheeld.delay(150); mouth.write(75); OneSheeld.delay(150); }//for MusicPlayer.pause(); mouth.write(100); OneSheeld.delay(3000); }//else --> complete the rest of the sequence //--------------------------------------------------- // Always check the desired mode if (gamepadMode_Enabled ==true) { Terminal.println("System Was Interrupted And It Will Activate GamePad Mode Now"); gamePadMode(); } //Pin 12 =High --> Gamepad mode else if (imitationMode_Enabled ==true) { Terminal.println("System Was Interrupted And It Will Activate Imitation Mode Now"); imitationMode(); } //Pin 13 =High --> Imitation Mode else { // Complete the rest of the sequence // Strike right hand Terminal.println("8th position"); rightArm_Motor1.write(0); rightArm_Motor2.write(0); rightArm_Motor3.write(45); leftArm_Motor1.write(90); leftArm_Motor2.write(45); leftArm_Motor3.write(180); OneSheeld.delay(500); rightArm_Motor1.write(180); rightArm_Motor2.write(0); rightArm_Motor3.write(45); OneSheeld.delay(1000); rightArm_Motor1.write(95); rightArm_Motor2.write(150); rightArm_Motor3.write(20); neckHorizontal.write(105); neckVertical.write(30); // Set the volume// MusicPlayer.setVolume(10); MusicPlayer.play(); for (int i =0; i <=19; i++) { mouth.write(100); OneSheeld.delay(150); mouth.write(75); OneSheeld.delay(150); }//for MusicPlayer.pause(); mouth.write(100); OneSheeld.delay(3000); }//else --> complete the rest of the sequence //-------------------------------------------------- // Always check the desired mode if (gamepadMode_Enabled ==true) { Terminal.println("System Was Interrupted And It Will Activate GamePad Mode Now"); gamePadMode(); } //Pin 12 =High --> Gamepad mode else if (imitationMode_Enabled ==true) { Terminal.println("System Was Interrupted And It Will Activate Imitation Mode Now"); imitationMode(); } //Pin 13 =High --> Imitation Mode else { // Complete the rest of the sequence // Strike left hand Terminal.println("9th position"); rightArm_Motor1.write(95); rightArm_Motor2.write(150); rightArm_Motor3.write(20); leftArm_Motor1.write(90); leftArm_Motor2.write(180); leftArm_Motor3.write(110); OneSheeld.delay(500); leftArm_Motor1.write(0); leftArm_Motor2.write(180); leftArm_Motor3.write(110); OneSheeld.delay(1000); leftArm_Motor1.write(90); leftArm_Motor2.write(45); leftArm_Motor3.write(180); neckHorizontal.write(105); neckVertical.write(30); // Set the volume// MusicPlayer.setVolume(10); MusicPlayer.play(); for (int i =0; i <=19; i++) { mouth.write(100); OneSheeld.delay(150); mouth.write(75); OneSheeld.delay(150); }//for MusicPlayer.pause(); mouth.write(100); OneSheeld.delay(3000); }//else --> complete the rest of the sequence //----------------------------------------------------- // Always check the desired mode if (gamepadMode_Enabled ==true) { Terminal.println("System Was Interrupted And It Will Activate GamePad Mode Now"); gamePadMode(); } //Pin 12 =High --> Gamepad mode else if (imitationMode_Enabled ==true) { Terminal.println("System Was Interrupted And It Will Activate Imitation Mode Now"); imitationMode(); } //Pin 13 =High --> Imitation Mode else { // Complete the rest of the sequence // Play Music Player and move the robot's mouth Terminal.println("Return to the home position"); rightArm_Motor1.write(95); rightArm_Motor2.write(150); rightArm_Motor3.write(20); leftArm_Motor1.write(90); leftArm_Motor2.write(45); leftArm_Motor3.write(180); neckHorizontal.write(105); neckVertical.write(30); // Set the volume// MusicPlayer.setVolume(10); MusicPlayer.play(); for (int i =0; i <=49; i++) { mouth.write(100); OneSheeld.delay(150); mouth.write(75); OneSheeld.delay(150); }//for MusicPlayer.pause(); mouth.write(100); Terminal.println("Done"); }//else --> complete the rest of the sequence}// void standby mode//----------------------------------------- void Gamepad Mode ---------------------------------------------void gamePadMode() { Terminal.println("Gamepad mode activated"); // Always check the status of gamepad buttons if (GamePad.isUpPressed()) { // Move both hands up Terminal.println("Up is pressed"); rightArm_Motor1.write(110); rightArm_Motor2.write(0); rightArm_Motor3.write(45); leftArm_Motor1.write(90); leftArm_Motor2.write(180); leftArm_Motor3.write(145); neckHorizontal.write(105); neckVertical.write(30); mouth.write(100); }//Up is pressed if (GamePad.isDownPressed()) { // Move both hands up Terminal.println("Down is pressed"); rightArm_Motor1.write(110); rightArm_Motor2.write(170); rightArm_Motor3.write(45); leftArm_Motor1.write(90); leftArm_Motor2.write(20); leftArm_Motor3.write(145); neckHorizontal.write(105); neckVertical.write(30); mouth.write(100); }//Down is pressed if (GamePad.isRightPressed()) { // Move right hand side Terminal.println("Right is pressed"); rightArm_Motor1.write(110); rightArm_Motor2.write(80); rightArm_Motor3.write(60); leftArm_Motor1.write(90); leftArm_Motor2.write(20); leftArm_Motor3.write(145); neckHorizontal.write(105); neckVertical.write(30); mouth.write(100); }//Right is pressed if (GamePad.isLeftPressed()) { // Move left hand side Terminal.println("Left is pressed"); rightArm_Motor1.write(110); rightArm_Motor2.write(170); rightArm_Motor3.write(45); leftArm_Motor1.write(90); leftArm_Motor2.write(115); leftArm_Motor3.write(140); neckHorizontal.write(105); neckVertical.write(30); mouth.write(100); }//Left is pressed if (GamePad.isRedPressed()) { // Combo 1 Terminal.println("Red is pressed"); rightArm_Motor1.write(180); rightArm_Motor2.write(45); rightArm_Motor3.write(100); leftArm_Motor1.write(90); leftArm_Motor2.write(180); leftArm_Motor3.write(110); neckHorizontal.write(105); neckVertical.write(30); mouth.write(100); }//Red is pressed if (GamePad.isOrangePressed()) { // Combo 2 Terminal.println("Orange is pressed"); rightArm_Motor1.write(15); rightArm_Motor2.write(100); rightArm_Motor3.write(0); leftArm_Motor1.write(180); leftArm_Motor2.write(100); leftArm_Motor3.write(180); neckHorizontal.write(105); neckVertical.write(30); mouth.write(100); }//Orange is pressed if (GamePad.isGreenPressed()) { // Combo 3 Terminal.println("Green is pressed"); rightArm_Motor1.write(95); rightArm_Motor2.write(45); rightArm_Motor3.write(120); leftArm_Motor1.write(90); leftArm_Motor2.write(135); leftArm_Motor3.write(60); neckHorizontal.write(105); neckVertical.write(10); mouth.write(100); }//Green is pressed if (GamePad.isBluePressed()) { // Combo 4 Terminal.println("Blue is pressed"); rightArm_Motor1.write(90); rightArm_Motor2.write(0); rightArm_Motor3.write(90); leftArm_Motor1.write(180); leftArm_Motor2.write(45); leftArm_Motor3.write(180); neckHorizontal.write(105); neckVertical.write(30); mouth.write(100); }//Blue is pressed}// Gamepad mode//----------------------------------------- void Imitation Mode -------------------------------------------void imitationMode() { // Imitation mode Terminal.println("Imitation mode activated"); if (OrientationSensor.getY()> -90 &&OrientationSensor.getY() <=90) { leftArm_Motor1.write(map(OrientationSensor.getY(), -90, 90, 0, 180)); } if (OrientationSensor.getZ()> -70 &&abs(OrientationSensor.getZ()) <=70) { leftArm_Motor2.write(map(OrientationSensor.getZ(), 0, 60, 100, 160)); leftArm_Motor3.write(map(OrientationSensor.getZ(), 0, 60, 160, 100)); }}// void imitation mode//-----------------------------------------------------------------------------------------------------------//-------------------------------------------- Modes ISR ----------------------------------------------------//-----------------------------------------------------------------------------------------------------------void gampadMode_ChangeISR() { if (gamepadMode_Enabled &&!imitationMode_Enabled) { gamepadMode_Enabled =false; imitationMode_Enabled =false; } else { gamepadMode_Enabled =true; imitationMode_Enabled =false; }}//gampadMode_ChangeISR//------------------------------------------------------------------------------------------------------------void imitationMode_ChangeISR() { if (imitationMode_Enabled &&!gamepadMode_Enabled) { gamepadMode_Enabled =false; imitationMode_Enabled =false; } else { gamepadMode_Enabled =false; imitationMode_Enabled =true; }}//imitationMode_ChangeISR
示意图
制造工艺